
Related Manuals for Bambu Lab A1 with AMS lite


Summary of Contents for Bambu Lab A1 with AMS lite
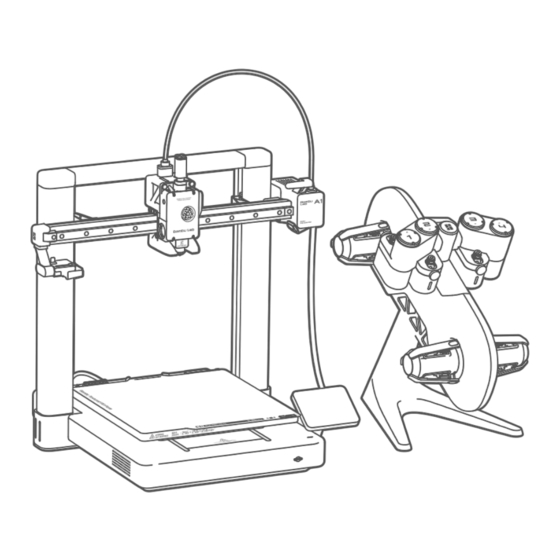
- Page 1 Bambu Lab AMS lite with Quick Start Please review the entire guide before operating the printer. * Safety Notice: Do not connect to power until assembly is complete. PF002-A SA005...
-
Page 3: What's In The Box
What’s In The Box A1 Base Housing A1 Printer Frame AMS lite Body AMS lite Stand Power Cable Spool Holder AMS lite Rotary Purge Wiper Spool Holder (×4) PTFE Tubes 600mm Sample Build Plate Accessory Box For AMS lite PTFE Tube Filament... -
Page 4: Accessory Box
Accessory Box Unclogging Pin Tool Allen Key H2 Allen Key H1.5 Heatbed Nozzle Wiper Cable Organizer Bambu Spare Filament Grease & Oil Cutter (×2) Scraper Blade BT2.6-8 Screw (×2) BT3-6 Screw (×5) M3-12 Screw (×1) ST3-23 Screw (×13) (For Scraper) (For AMS Stand) (For Purge Wiper) (For Base Housing) - Page 5 Install Build Plate Base Housing Build Plate ① Install the build plate with correct orientation, aligning the edge with the heatbed.
- Page 6 Unlock Heatbed ① ② ① Flip the base housing 90 degree to the side opposite to the screen. ② Use Allen Key H2 to remove the 4 highlighted screws at the bottom of the Base Housing to unlock the heatbed (Be careful when fully releasing the heatbed;...
- Page 7 Mate Base Housing & Printer Frame ① Printer Frame ② Base Housing ③ ① Put the Printer Frame on the table as shown above. ② Tilt the Base Housing about 45 degree to pass through the Printer Frame. (Use the screen as indicator for orientation) ③...
- Page 8 Unlock Toolhead ① Cut the ziptie and cardboard wrapped around the toolhead and X-axis. ② Remove the zipties and foam paddings on the printer frame.
- Page 9 Remove Y-Axis Cover ① ② ③ ① Push the heatbed fully to the front end, where the screen located. ② Open the Y-axis cover. ③ Pull out the Y-axis cover gently.
- Page 10 Lock Base Housing...
- Page 12 Put Cover Back ② ① ①Push the heatbed fully to the front end, where the screen located. ② Gently slide the Y-axis cover back into place. ③ Make sure to align the clip.
- Page 13 Place On Table ① Turn the A1 90 degree onto its rear, laying it on the edge of a table. (It is recommended to cover the table with cardboard for protection.) Please make sure the printer is secure on the table while following the steps.
- Page 14 Plug In Cable Box ② Keep flush with the base ① ③ ① Align the 2 clips on the cable box with the holes on the Base Housing. ② Slide up the cable box until the Type-C cable clicks in place. (DO NOT force the insert.) ③...
- Page 15 Plug In Connectors ① ② ① Plug in the 3 harnesses according to color. ② Tuck the harness into the cable slot and then close the cover.
- Page 16 Fold Out Touch Screen ① Fold out the touch screen, make sure the touch screen is in place as shown in the graph.
- Page 17 Install Purge Wiper ① ② ① Slide in Purge Wiper unit into the slot at the end of the X-axis. ② Install the 1*M3-12 screw from the accessory box to fix the Purge Wiper in place...
- Page 18 AMS lite Assembly ① ② ① Put the AMS lite body on the stand. (cable on the upward end) ② Secure the AMS lite with the 4*BT3-6 screws (For AMS Stand) from the accessory box.
- Page 19 AMS lite Assembly Green Yellow Yellow Green ① Slide the rotary spool holders on (all the way in), being careful to match colors to avoid damaging any parts.
- Page 20 AMS lite Assembly Short Long ⑤ ② Organizer ③ ④ 50mm ① Put AMS lite to the right side of the A1 ② Insert all four PTFE tubes into the toolhead filament hub. ③ Insert short PTFE tubes into ports 1 and 2. ④...
- Page 21 Powering On 24V DC,0.5A ① Plug the AMS lite 4pin connector into the ② Plug in the power cable and turn on the port on the back of the A1. (either one) A1 using the power switch on the back. Please leave a safe amount of space for heatbed movement.
-
Page 22: Network Setting
Network Setting ② Select your preferred network. ① Follow the instructions untill you see this screen. Press “Select Wi-Fi” to search for available network. ③ Input the passcode, and then press “OK”. - Page 23 ① Download the Bambu Handy App. Register and log in to your Bambu Lab account. ② Use Bambu Handy to scan the QR code on the screen, and bind your printer to your Bambu Lab account. ③ Follow the instructions on the screen to complete the Code initial calibration.
- Page 24 Spool Loading ① Orient spool installation according to the filament winding direction. (as shown in the diagram)
- Page 25 *Warning ① The AMS lite supports spools with a width of 40-68 mm and an inner diameter of 53-58 mm. ② Avoid using AMS lite to print flexible materials, including TPU, TPE, or absorbent PVA. Avoid using materials that are too hard (too high modulus) or too brittle (not enough toughness), including third-party fiber reinforcement materials (PA-CF/GF, PET-CF/GF, PLA-CF/GF, etc.).
- Page 26 Spool Loading Note: Press the release button to disengage drive motor if filament stuck. ① Push the spool all the way onto the ② Feed the filament into the filament inlet. spool retractor, make sure it fully click into place.
-
Page 28: First Print
First Print ② Select the model you want to print. ① Press “Print Files” to access the preloaded models on the SD card. ③ Turn on “Use AMS” if you are using filaments on AMS. Turning on “Bed leveling” is recommended. Turn on “Timelapse”... - Page 29 AMS Mapping Map the actual filaments you have to the print file preset filaments. Actual Filaments Print File Preset In Use Note: We recommend using similar colors to match the preset. Otherwise the flush setting might be inaccurate.
-
Page 30: Specification
Specification Item Specification Printing Technology Fused Deposition Modeling Build Volume (W×D×H) 256*256*256 mm³ Body Chassis Steel + Extruded Aluminum Hot End All-Metal Extruder Gears Steel Nozzle Stainless Steel Max Hot End Temperature 300 ℃ Toolhead Nozzle Diameter (Included) 0.4 mm Nozzle Diameter (Optional) 0.2 mm, 0.6 mm, 0.8 mm Filament Cutter... - Page 31 Specification Input Voltage 100-240 VAC, 50/60 Hz Electrical Parameters Max Power 1300W@220V, 350W@110V Display 3.5 inches 320*240 IPS Touch Screen Connectivity Wi-Fi, Bambu-Bus Electronics Storage Micro SD Card Control Interface Touch Screen, APP, PC Application Motion Controller Dual-Core Cortex M4 Bambu Studio Support third party slicers which export standard Slicer...
- Page 32 Enjoy! www.bambulab.com...
Need help?
Do you have a question about the A1 with AMS lite and is the answer not in the manual?
Questions and answers
Filament will not load. will not allow me to select spool from filament menu. cannot dismount the PLA spool from the ams lite unit. Any assistance would be appreciated
The filament won't load on the Bambu Lab A1 with AMS Lite because the Load, Unload, and Edit buttons remain unselectable after choosing a filament location (1–4) on the LCD, app, or computer. The issue persists despite power cycling, factory resets, and changing AMS Lite connection ports. This suggests a communication or hardware detection problem between the printer and AMS Lite.
To select the spool from the filament menu, you normally choose the filament location (slot 1–4) on the LCD or app. However, if the options remain disabled, the AMS Lite may not be recognized correctly or fully engaged. Ensure the AMS Lite is properly connected, fully assembled, and all parts are pressed and aligned before use. If issues persist, the AMS hub or filament sensor may be faulty.
This answer is automatically generated
How to get models
You can obtain models for the Bambu Lab A1 with AMS Lite by accessing preloaded models on the SD card. Press “Print Files” on the printer, then select the model you want to print. Additionally, you can use third-party slicers that export standard G-code, such as Superslicer, Prusaslicer, and Cura, though some advanced features may not be supported.
This answer is automatically generated
the y axis plate will not slide off, the end of the plate will not disengage from the magnet
To fix the issue where the Y-axis plate won’t slide off the Bambu Lab A1 with AMS Lite due to the magnet holding it in place, follow these detailed steps based on the manual:
1. Push the heatbed fully to the front end – This is the side where the screen is located. Doing this clears the space needed to access the Y-axis cover.
2. Open the Y-axis cover – Carefully lift or open the cover. If it feels stuck due to the magnet, apply gentle but steady pressure. The magnet is designed to hold the plate firmly, so you may need to slightly wiggle the cover while pulling.
3. Gently pull out the Y-axis cover – Don’t use excessive force. The magnet may create some resistance, but once the alignment is off-center, it should release more easily.
4. Tip: If the magnet is especially strong or stuck, try tilting the cover slightly upward as you pull. This can help break the magnetic hold without damaging the components.
5. Once removed, you can continue with the rest of the maintenance steps, like locking the base housing or reinstalling the cover by reversing the steps.
Would you like a visual reference from the manual to help guide the process?
This answer is automatically generated