
Related Manuals for GEA ECOVENT N ECO Series


Summary of Contents for GEA ECOVENT N ECO Series
- Page 1 Operating Instructions Hygienic valves GEA ECOVENT Valve Type N_/ECO ® 2023-03 430BAL008482 Original instructions...
- Page 2 Copyright © GEA Tuchenhagen GmbH 2023. All rights reserved. No liability will be accep- ted for damage resulting from non-observance of this document. If you have any ques- Customer tions or require clarification concerning the use of this document, contact the...
-
Page 3: Table Of Contents
Table of Contents - 3 / 106 Table of Contents 1 General Information about the document 1.1.1 Purpose and structure of the document 1.1.2 Design elements 1.1.3 Reading obligation and storage Manufacturer address Customer service Declarations of conformity 2 Safety Intended use 2.1.1 Requirements for the operation... - Page 4 4 / 106 - Table of Contents 3 Description Set-up and function 3.1.1 Design 3.1.2 Functional description Spring-to-close actuator function (NC) Spring-To-Open actuator function (NO) Modifying the actuator closing direction 3.1.3 Signs 3.1.4 Protective devices Technical data 3.2.1 Type plate 3.2.2 Technical data 3.2.3...
- Page 5 Table of Contents - 5 / 106 9 Maintenance Carrying out inspections 9.1.1 Checking seals that come into contact with the product 9.1.2 Checking the pneumatic connection 9.1.3 Checking the electrical connection 9.1.4 Checking the signs on the valve Servicing intervals List of tools Prior to removal Removing the valve...
-
Page 6: Table Of Contents
6 / 106 - Table of Contents 0000000576 - 001 - EN-GB... -
Page 7: General
This chapter contains basic instructions for using the valve and explanations of illustra- tion conventions. It also contains information about the design and structure. ® The term valve in these Operating Instructions refers to GEA ECOVENT Valve Type N_/ ECO. -
Page 8: Reading Obligation And Storage
1.1.3 Reading obligation and storage Every person who works on or with the valve must have read these Operating Instruc- tions. They must be available to these persons at all times. 1.2 Manufacturer address GEA Tuchenhagen GmbH Am Industriepark 2-10 Germany 21514 Büchen 1.3 Customer service... -
Page 9: Declarations Of Conformity
1.4 Declarations of conformity - 9 / 106 1.4 Declarations of conformity... - Page 10 10 / 106 - 1.4 Declarations of conformity Translated copy of the EU - Declaration of conformity in accordance with the Pressure Equipment Directive 2006/42/EU Manufacturer: GEA Tuchenhagen GmbH Am Industriepark 2-10 21514 Büchen We hereby declare that the machine named below...
- Page 11 Annex VII, Part A, and undertake to forward this documentation by means of data medium upon justified request by the national authorities. GEA Importer into UK: GEA Mechanical Equipment UK Ltd Westfalia House Old Wolverton Road, Old Wolverton, Milton Keynes...
- Page 12 12 / 106 - 1.4 Declarations of conformity 0000000576 - 001 - EN-GB...
-
Page 13: Safety
Pressure Equipment Directive which specifies sound engineering practice. Nominal diameters ≥ IPS 4“; DN 125 valid for the fluid group II. In the event of any deviations, GEA Tuchenhagen GmbH will supply a special Declara- tion of Conformity. 2.1.3 ATEX directive In areas with an explosive atmosphere, only valves suitable for use in such areas may be used. -
Page 14: Improper Operating Conditions
EC Machinery Directive on your own. In general, only genuine spare parts supplied by GEA Tuchenhagen GmbH should be fitted. This ensures the reliable and economical operation of the valve. 2.3 Structure of warning notices Warning notices warn of hazards which can occur when certain actions are carried out. -
Page 15: Personnel Qualification
Additionally, the following groups of people must possess the personnel qualifications or skills listed below and be authorised by the operator to perform actions on the valve. Operating staff ● Trained by the operating company, a qualified customer specialist or a GEA service expert Customer specialist ●... -
Page 16: General Hazard
16 / 106 - 2.5 General safety instructions 2.5.1 General hazard Source Consequences Measures Faulty valve Injury and damage Check that the valve is fully functional. Non-compliance with these Op- Injury and damage Read and familiarise yourself erating Instructions with these Operating Instruc- tions. -
Page 17: Personal Protective Equipment
2.6 Personal protective equipment - 17 / 106 2.6 Personal protective equipment To prevent possible personal injuries, the personal protection equipment must be worn. In addition, GEA recommends keeping the requirements listed below. ● Locally applicable accident prevention regulations ●... - Page 18 Danger to life caused by the pressur- ised spring in the actuator. Do not open the actuator, rather return it to GEA Tuchenhagen for proper disposal. Risk of injury Danger presented by moving or sharp- The operator must exercise caution edged parts and prudence.
-
Page 19: Safety Signs
2.9 Safety signs - 19 / 106 2.9 Safety signs The safety symbols listed below are attached to the valve. The position of the applicable safety symbols on the valve are shown in an overview, 3.1.3 Signs . Warning signs General warning sign Hazard for persons, conveyed by the additional sign. - Page 20 20 / 106 - 2.10 Emergency measures 0000000576 - 001 - EN-GB...
-
Page 21: Description
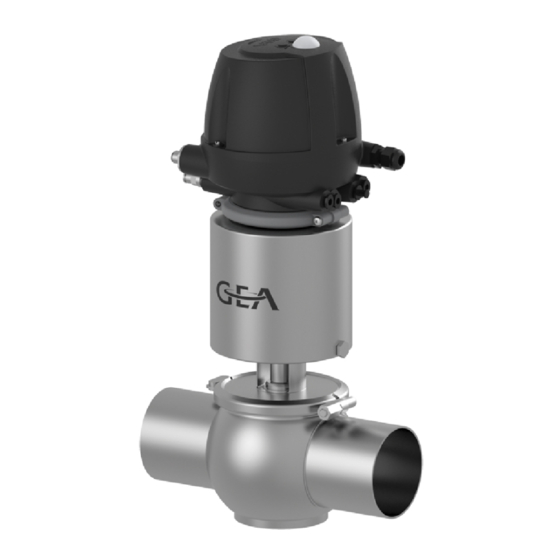
3.1 Set-up and function - 21 / 106 3 Description This chapter contains instructions on how to install the valve and its functions. 3.1 Set-up and function 3.1.1 Design Figure 3-1 - Design of the valve Designation Designation Actuator Air connection T.VIS T.VIS control top Electrical connection Proximity switch holder... -
Page 22: Functional Description
22 / 106 - 3.1 Set-up and function 3.1.2 Functional description 3.1.2.1 Spring-to-close actuator function (NC) The actuator is of the spring-closing type (NC). The valve is closed in the non-actu- ated position. Identification: Shoulder of the valve disk is at the ●... - Page 23 3.1 Set-up and function - 23 / 106 Figure 3-4 - 3.3 Reverse idle position Designation Feedback side Installation position spring-to-close actuator (NC), idle position closed Installation position spring-to-open actuator (NO), idle position Valve side Reversing the idle position Prerequisites 9.4 Prior to removal .
-
Page 24: Signs
24 / 106 - 3.1 Set-up and function 3.1.3 Signs Overview and layout All safety symbols and other signs must meet the following criteria throughout the life- cycle of the valve. ● Complete ● Attached as shown ● Clean and legible Signs Type plate T.VIS;... -
Page 25: Technical Data
3.2 Technical data - 25 / 106 3.2 Technical data 3.2.1 Type plate The type plate clearly identifies the valve. The type plate provides the following key data: Characteristics Values Type N_/ECO Serial Serial number Material 1.4404(AISI316L) / 1.4571 Control air pressure bar/psi 6 (87) Product pressure bar/psi 5 (72.5) - Page 26 26 / 106 - 3.2 Technical data Designation Description Valve 0 to 45 °C (32 to 113 °F), standard < 0 °C (32 °F): Use control air with low dew point. Protect valve rods against freezing. < −15 °C: no solenoid valves in the control top <...
- Page 27 3.2 Technical data - 27 / 106 Designation Description Product pressure 5 bar (72.5 psi) configuration with standard drive max. 10 bar (116 psi) configuration with corre- spondingly designed actuator > 10 bar (145.0 psi) for static applications and on request CIP pressure 2-5 bar, a test may be necessary for higher CIP...
-
Page 28: Resistance Of The Sealing Materials
The maximum operating temperature is defined by the sealing type and its mechanical load. Due to the versatile conditions of use (e.g. usage duration, switching frequency, type and temperature of product and cleaning agents as well as usage environment), GEA Tuchenhagen recommends that the user carries out resistance tests. Resistance: ●... -
Page 29: Pipe Ends - General Table Of Measurements
3.2 Technical data - 29 / 106 Sealing materials General temperature resistance* EPDM -40 to +135 °C (-40 °F to 275 °F) -10 to +200 °C (+14 °F to +392 °F) HNBR -25 to +140 °C (-13 °F to +284 °F) * The general resistance of the material does not correspond to the maximum operating temperature. -
Page 30: Lubricants
30 / 106 - 3.2 Technical data Inch OD Outside diame- Wall thickness Inside diameter Outside diame- ter acc. to BS 4825 1.5" 38.1 1.65 34.8 2" 50.8 1.65 47.5 2.5" 63.5 1.65 60.2 3" 76.2 1.65 72.9 4" 101.6 2.11 97.38 6"... -
Page 31: Storage And Transport
4.1 Scope of supply - 31 / 106 4 Storage and transport This chapter contains information about how to transport the valve with and without packaging material. It also describes the minimum requirements for storage after deliv- ery and for any necessary intermediate storage. It is addressed to all persons who carry out actions related to the transport or storage of the valve. -
Page 32: Transport
32 / 106 - 4.3 Transport 4.3 Transport For transport, the following principles apply: ● When transporting the valve be sure to unscrew the control top and the switch bar from the actuator (2) and use the screwed-in eye bolt (1), material no. 221-104.98, to lift the valve. -
Page 33: Assembly And Installation
5.1 Notes on installation - 33 / 106 5 Assembly and installation This chapter contains information and instructions about the assembly and installation of the valve. It is addressed to all persons who carry out actions related to the valve. INFO During assembly and installation, observe chapter 2 Safety of this Operat-... - Page 34 34 / 106 - 5.4 Install valve with welding ends ATTENTION Welding distortions An open housing can warp during welding. To avoid welding distortions, always seal the housing before welding. ● INFO Welding method: We recommend using the automatic orbital welding method.
-
Page 35: Checking The Pneumatic Connection
5.5 Checking the pneumatic connection - 35 / 106 5.5 Checking the pneumatic connection 5.5.1 Air requirement Actuator type Actuator Ø Air requirement (dm /stroke) [mm] at 1.01325 bar at 0 °C as per DIN 1343 E_AA 0.13 E_BA 0.23 E_BB 0.23 E_CA... - Page 36 36 / 106 - 5.5 Checking the pneumatic connection Hose connection diagram with T.VIS control top Figure 5-1 - Hose Connection Diagram Position Designation Actuator Central air supply Sound absorber Locking screw Plug 0000000576 - 001 - EN-GB...
-
Page 37: Electrical Connection With T.vis Control Top
5.6 Electrical connection with T.VIS control top - 37 / 106 5.6 Electrical connection with T.VIS control top DANGER Live parts Electrical shocks can cause serious personal injuries or death. Only allow properly qualified staff to work on the electrical equipment. ●... - Page 38 38 / 106 - 5.6 Electrical connection with T.VIS control top 0000000576 - 001 - EN-GB...
-
Page 39: Commissioning
6.1 Preparing commissioning - 39 / 106 6 Commissioning This chapter contains information for the initial and any subsequent commissioning of the valve. It also describes the necessary checks and tests. It is addressed to all persons who carry out actions related to the valve. INFO During all commissioning, observe the chapter 2 Safety of this Operating... -
Page 40: Restarting
40 / 106 - 6.2 Restarting 6.2 Restarting The following principles apply for restarting: ● Only allow properly qualified staff to set the valve into operation. ● Make sure all connections are connected properly. ● The safety devices for the valve must be complete, fully functional and in perfect condition. -
Page 41: Operation And Control
7.1 Monitoring operation - 41 / 106 7 Operation and control This chapter contains information on starting up and shutting down the valve. It is addressed to the personnel that operate the valve. 2 Safety of this Operating In- INFO During every start-up, observe the chapter structions. - Page 42 42 / 106 - 7.2 Shutdown 0000000576 - 001 - EN-GB...
-
Page 43: Cleaning
8.1 General points - 43 / 106 8 Cleaning This chapter contains information about cleaning the valve. It also contains information about cleaning intervals and the use of cleaning agents. It is addressed to all persons who carry out actions related to the cleaning the valve. INFO During all cleaning work, observe chapter 2 Safety of this Operating In-... -
Page 44: Cleaning Results
44 / 106 - 8.2 Passivation 8.1.2 Cleaning results The cleaning result depends on the following factors: ● Temperature ● Time ● Mechanics ● Chemicals ● Degree of soiling These factors can be combined in such a way as to make an optimal cleaning result probable. -
Page 45: Maintenance
9.1 Carrying out inspections - 45 / 106 9 Maintenance This chapter contains information about valve maintenance, inspection and repairs. It also describes the personnel qualifications required for the individual actions. It is addressed to all persons who carry out actions related to the valve. INFO During all repair work, observe the chapter 2 Safety of this Operating In-... -
Page 46: Checking The Electrical Connection
46 / 106 - 9.2 Servicing intervals 9.1.3 Checking the electrical connection Prerequisites Access to the electrical connection ● Check that the union nut on the cable gland is tight Check that the cable connections are firmly secured. Check the solenoid valves for proper function. Check that the proximity switch connections are clean. - Page 47 9.3 List of tools - 47 / 106 Tool Intended Purpose Material no. Torque wrench ¼“ (2.5-25 Nm) Fitting the clamp connection 408-424 Torque wrench 2-10 Nm Installing the valve 408-486 Torque wrench size 2 (20-120 Assembling the valve insert from 408-426 individual parts Assembling the valve insert from...
-
Page 48: Prior To Removal
48 / 106 - 9.4 Prior to removal Tool Intended purpose Material no. Open end plug tool size 1 a/f 13 Mounting the switch bar 408-452 Removing/mounting the pilot valve Screwdriver, slot head 2.5 mm 406-102 T.VIS Screwdriver crosstip size 2 Removing/mounting the hood 406-125 9.4 Prior to removal... - Page 49 9.5 Removing the valve - 49 / 106 Spring-to-close valve (NC) with control head T.VIS INFO Removal step: remove the clamp connection between the housing and lan- tern Prerequisites No solenoid valve must be actuated electrically or manually. ●...
- Page 50 50 / 106 - 9.5 Removing the valve The pneumatic and electrical connections on the plant side can remain on the ● control top. Tools Philips screwdriver ● WARNING Spring tension in the valve (NC) Danger of injury when opening the clamp connections on the actuator or on the housing as the released spring pretension will suddenly lift the actuator.
- Page 51 9.5 Removing the valve - 51 / 106 Spring-to-close valve (NC) without control head T.VIS INFO Removal step: remove the clamp connection between the housing and lan- tern Tools Open end spanner, a/f 10/11 ● Open end spanner, a/f 12/13 ●...
- Page 52 52 / 106 - 9.5 Removing the valve Spring-to-open valve (NO) with control head T.VIS INFO Removal step: remove the clamp connection between the housing and lan- tern Tools Philips screwdriver ● Depressurize actuator (0 bar). Remove the clamp connection (43) between the housing and lantern (9).
- Page 53 9.5 Removing the valve - 53 / 106 Spring-to-open valve (NO) without control head T.VIS INFO Removal step: remove the clamp connection between the housing and lan- tern Tools Open end spanner, a/f 10/11 ● Open end spanner, a/f 12/13 ●...
-
Page 54: Removing The Control Top
54 / 106 - 9.5 Removing the valve 9.5.2 Removing the control top Tools Hex socket key ● Unscrew the screws (B11) of the half- rings (B12) using a hex key, size 3, and remove the half-rings (B12). Lift off the control top (B), also refer to the operating instructions for the "T.VIS control top". -
Page 55: Dismantling The Valve Insert Into Individual Parts
9.5 Removing the valve - 55 / 106 Pull the valve insert out of the hous- ing. Þ The valve insert has been disconnected from the housing. 9.5.4 Dismantling the valve insert into individual parts The valve is dismantled into individual parts depending on how it is configured: ●... - Page 56 56 / 106 - 9.5 Removing the valve Valve with T.VIS control top INFO Removal step: disassemble the valve insert into individual parts Tools Open-ended wrench ● Articulated face spanner with journal 4 mm ● Belt wrench ● Assembling device ECO-lantern ●...
- Page 57 9.5 Removing the valve - 57 / 106 Release the valve disk (15) using the jaw wrench at the wrench flat surface (15.1) and unscrew of the actuator (A). To do this, affix with a belt wrench. Remove the seal disk (3) and seal ring (1) from the valve disk (15).
- Page 58 58 / 106 - 9.5 Removing the valve Valve without T.VIS control top INFO Removal step: disassemble the valve insert into individual parts Tools Open-ended wrench ● Articulated face spanner with journal 4 mm ● Belt wrench ● 0000000576 - 001 - EN-GB...
- Page 59 9.5 Removing the valve - 59 / 106 Assembling device ECO-lantern ● ATTENTION Take care no dirt enters the actuator. The sealing surfaces on the cylinder can be ● damaged by dirt. Release the blanking plate (35.1) us- ing the jaw wrench on the wrench flat 35.1 surface and unscrew.
- Page 60 60 / 106 - 9.5 Removing the valve Release the valve disk (15) using the jaw wrench at the wrench flat surface (15.1) and unscrew of the actuator (A). To do this, affix with a belt wrench. Remove the seal disk (3) and seal ring (1) from the valve disk (15).
-
Page 61: Dismantling Of The Housing Combination
9.6 Installing the valve - 61 / 106 9.5.5 Dismantling of the housing combination Disassembly of the housing combination Prerequisites This housing combination does not exist for welded housings ● Remove the blanking plate (35): Remove the clamp connection (43) on the housing in the pipe. Remove the blanking plate (35). -
Page 62: Assembling The Valve Insert From Individual Parts
62 / 106 - 9.6 Installing the valve Tightening torques [Nm] [lbft] Clamp connection 16.2 9.6.2 Assembling the valve insert from individual parts Mounting the clamp connection depends on how the valve is configured: Valve configuration with T.VIS control top ●... - Page 63 9.6 Installing the valve - 63 / 106 Valve configuration with T.VIS control top INFO Mounting step: assemble the valve insert from individual parts ATTENTION Sensitive sealing surfaces in the actuator The sealing surfaces on the cylinder can become damaged. Take care no dirt enters the actuator.
- Page 64 64 / 106 - 9.6 Installing the valve Open-end plug tool ECO_LAT_DN100 ● Push the O-ring (98) onto the lantern (9). Place the locking ring (4) onto the lan- tern (9) Screw the lantern (9) into the actuator (A) and tighten with the open-end plug tool ECO-Lat (Z).
- Page 65 9.6 Installing the valve - 65 / 106 Equip the installation base (198.2) with O-rings (98, 99) and slide bear- ings (202) and position in the installa- tion base (198.1). ® 9.6.1 Tight- Observe torques, see ening torques . Screw the installation base unit into the actuator (A) using the articulated face spanner, and tighten.
- Page 66 66 / 106 - 9.6 Installing the valve Valve configuration without T.VIS control top INFO Mounting step: assemble the valve insert from individual parts Tools Open end spanner, a/f 10/11 ● Open end spanner, a/f 12/13 ● Jaw wrench a/f 24 ●...
- Page 67 9.6 Installing the valve - 67 / 106 Open-end plug tool ECO_LAT_DN100 ● ATTENTION Sensitive sealing surfaces in the actuator The sealing surfaces on the cylinder can become damaged. Take care no dirt enters the actuator. ● Push the O-ring (98) onto the lantern (9).
- Page 68 68 / 106 - 9.6 Installing the valve Screw the blanking plate (35) with the O-ring (98) into the actuator (A) on the wrench flat surface (35.1) using a 35.1 jaw wrench. Alternative version with proximity switch holder (C): Screw the mounting for the proximity switch (C) into the ac- tuator (A) using the jaw wrench on the wrench flat surface (C3).
-
Page 69: Assembly Of The Housing Combination
9.6 Installing the valve - 69 / 106 9.6.3 Assembly of the housing combination Assembly of the housing combination Prerequisites This housing combination does not exist for welded housings ● Equip with a seat ring (33) with an O- ring (5) and mount to the housing with a hinged clamp (43). -
Page 70: Mounting The Control Top
70 / 106 - 9.6 Installing the valve 9.6.5 Mounting the control top Tools Hex socket key ● Place the control top (B) onto the switch bar (1) and installation base from above. Mount the half-rings (B12) on the control top (B). ®... - Page 71 9.6 Installing the valve - 71 / 106 Spring-to-close valve (NC) with control head T.VIS INFO Mounting step: remove the clamp connection between the housing and lantern Tools Philips screwdriver ● Pressurize the actuator – with com- pressed air (max. 8 bar) - by activating the solenoid valve Y1 at the manual operation element S.
- Page 72 72 / 106 - 9.6 Installing the valve Spring-to-close valve (NC) without control head T.VIS INFO Mounting step: remove the clamp connection between the housing and lantern Tools Open-ended wrench ● Pressurize the actuator - with com- pressed air, max. 8 bar (air connection 61).
- Page 73 9.6 Installing the valve - 73 / 106 Spring-to-open valve (NO) with control head T.VIS INFO Mounting step: remove the clamp connection between the housing and lantern Tools Philips screwdriver ● Depressurize actuator (0 bar). Mount the clamp connection (43) be- tween the housings and lantern (9).
- Page 74 74 / 106 - 9.6 Installing the valve Spring-to-open valve (NO) without control head T.VIS INFO Mounting step: remove the clamp connection between the housing and lantern Tools Philips screwdriver ● Depressurize the actuator (air connec- tion on the actuator). Mount the clamp connection (43) be- tween the housings and lantern (9).
-
Page 75: Checking The Function
9.6 Installing the valve - 75 / 106 9.6.7 Checking the function Check valve stroke and adjust feedback Actuate the valve with compressed air. Check the valve stroke (c), also refer Valve strokes depending on to table size . 3. INFO Please take the operating instructions for the respective control top into account for adjustment of the feedbacks. -
Page 76: Maintenance
76 / 106 - 9.7 Maintenance 9.7 Maintenance 9.7.1 Cleaning the valve ATTENTION Sensitive valve parts Damage to the valve parts can lead to a malfunction. Protect the valve parts against impact stress. ● 0000000576 - 001 - EN-GB... - Page 77 9.7 Maintenance - 77 / 106 Prerequisites 9.5 Removing the valve . The valve has been removed, see ● ATTENTION Damage to the valve Damage to the valve parts can result in a malfunction. Observe the safety information sheets issued by the detergent manufacturers! ●...
-
Page 78: Replacing Seals
78 / 106 - 9.7 Maintenance 9.7.2 Replacing seals 9.7.2.1 Replacing the V-ring INFO Replace defective seals, but always fit new housing O-rings to ensure the tightness of the valve. Always use genuine spare parts. V-ring insertion tool 0000000576 - 001 - EN-GB... - Page 79 9.7 Maintenance - 79 / 106 Prerequisites 9.5 Removing the valve . The valve has been removed, see ● Insert V-ring without grease. To facilitate fitting, use water with a drop of wash- ● ing-up liquid to remove the surface tension. To ensure that no rust is transfer- red, the washing-up liquid solution must be mixed in a ceramic, plastic, or stain- less steel container.
-
Page 80: Replacing More Seals
80 / 106 - 9.7 Maintenance Use the insertion tool to press in the V-ring – press in evenly at several op- posite points along the circumference. Insert the V-ring evenly. Þ V-ring has been exchanged. INFO Used seals must not be used again, since the proper function of the seal can then no longer be ensured. -
Page 81: Lubricating Seals And Threads
The warranty will also be- come null and void. A Manufacturer's Declaration for these products can be obtained from GEA Tuchenhagen if required. A thin film of grease is required on the seals to ensure the proper function of the fit- tings. - Page 82 82 / 106 - 9.7 Maintenance 0000000576 - 001 - EN-GB...
-
Page 83: Faults
9.7 Maintenance - 83 / 106 10 Faults This chapter contains information about how to rectify problems with the valve. It also describes the personnel qualifications required for the individual actions. It is addressed to all persons who carry out actions related to the valve. INFO During all troubleshooting, observe the chapter 2 Safety of this Operating... - Page 84 84 / 106 - 9.7 Maintenance 0000000576 - 001 - EN-GB...
-
Page 85: Decommissioning, Dismantling And Disposal
11.1 Decommissioning - 85 / 106 11 Decommissioning, dismantling and disposal This chapter contains information about decommissioning the valve. It also describes the removal and disposal processes. It is addressed to all persons who carry out actions related to the valve. INFO 2 Safety of this Operating During all decommissioning, observe the chapter... - Page 86 GEA Tuchenhagen accepts unopened actuators and arranges the proper disposal ● free of charge. Prerequisites The valve should be disposed of ● Remove the actuator. Pack the actuator securely and send it to GEA Tuchenhagen GmbH. Þ The valve actuator has been disposed of. 0000000576 - 001 - EN-GB...
-
Page 87: Spare Parts
It is addressed to the personnel that operate the valve. 12.1 Order information Only original spare parts from GEA may be used. All spare parts are packed in GEA original packaging and marked accordingly. The spare parts are not included in the scope of supply of the machine. -
Page 88: Spare Parts Lists
88 / 106 - 12.2 Spare parts lists 12.2 Spare parts lists Parts list - shut-off valve N_ECO Spare parts list - shut-off valve N_/ECO Fig.1: Spare parts drawing valve N_/ECO Fig.: Housing combination 221ELI011012DE_7 06.07.2021 0000000576 - 001 - EN-GB... - Page 89 12.2 Spare parts lists - 89 / 106 Parts list - shut-off valve N_ECO Fig.3: with control top T.VIS 221ELI011012DE_7 06.07.2021...
- Page 90 90 / 106 - 12.2 Spare parts lists Parts list - shut-off valve N_ECO Item Designation DN 25 DN 40 DN 50 DN 65 DN 80 DN 100 Mater Sealing set complete 1) EPDM 221-001314 221-001315 221-001315 221-001316 221-001316 221-001317 221-001318 221-001319 221-001319...
- Page 91 12.2 Spare parts lists - 91 / 106 Parts list - shut-off valve N_ECO Item Designation Mater DN 25 DN 40 DN 50 DN 65 DN 80 DN 100 Actuator ECO-E/US 221)642.16 221)642.17 221)642.17 221)642.20 221)642.20 221)642.23 140.1 Actuator ECO- 221)642.01 221)642.02 221)642.02...
- Page 92 92 / 106 - 12.2 Spare parts lists Parts list - shut-off valve N_ECO Item Designation 1" OD 1.5" OD 2" OD 2.5" OD 3" OD 4" OD Mater Sealing set complete 1) EPDM 221-001314 221-001315 221-001315 221-001316 221-001316 221-001317 221-001318 221-001319 221-001319 221-001320 221-001320 221-001321 HNBR 221-001322 221-001323 221-001323 221-001324 221-001324 221-001325...
- Page 93 12.2 Spare parts lists - 93 / 106 Parts list - shut-off valve N_ECO Item Designation Mater 1" OD 1.5" OD 2" OD 2.5" OD 3" OD 4" OD Actuator ECO-E/US 221)642.16 221)642.17 221)642.17 221)642.20 221)642.20 221)642.23 140.1 Actuator ECO- 221)642.01 221)642.02 221)642.02...
- Page 94 94 / 106 - 12.2 Spare parts lists Parts list - shut-off valve N_ECO Sets of seals for ECOVENT® shut-off valve N DN 25 DN 40/50 DN 65/80 DN 100 Item Qty. Designation Material 1" 1,5"/2" 2,5"/3" 4" Sealing set complete EPDM 221-001314 221-001315...
- Page 95 12.2 Spare parts lists - 95 / 106 Spare parts lists - Installation base for control top T.VIS and connection 0 Spare parts lists - Installation base for control top T.VIS and connection 0 221ELI000977DE_6 20.10.2022...
- Page 96 96 / 106 - 12.2 Spare parts lists Spare parts lists - Installation base for control top T.VIS and connection 0 221ELI000977DE_6 20.10.2022 0000000576 - 001 - EN-GB...
- Page 97 12.2 Spare parts lists - 97 / 106 Spare parts lists - Installation base for control top T.VIS and connection 0 Installation in ECOVENT -disk ® valves Item Designation Material with pneumatic with connection 0 with connection 0 actuator M/TME Z/TME TME (pos.
- Page 98 98 / 106 - 12.2 Spare parts lists 0000000576 - 001 - EN-GB...
-
Page 99: Annex
13.1 Dimensions sheet - Valve N_/ECO - 99 / 106 13 Annex 13.1 Dimensions sheet - Valve N_/ECO Dimension sheet - shut-off valve Dimension sheet - shut-off valve N_/ECO Fig. 1: Valve with T.VIS control top 221MBL002590DE_4 10.09.2021... - Page 100 100 / 106 - 13.1 Dimensions sheet - Valve N_/ECO Dimension sheet - shut-off valve With control head T.VIS Dimension DN 25 DN 40 DN 50 DN 65 DN 80 DN 100 Ø Stroke value I - II m 28.220 57.490 101.460 170.090...
-
Page 101: Dimensions Sheet - Actuator Eco-E
13.2 Dimensions sheet - Actuator ECO-E - 101 / 106 13.2 Dimensions sheet - Actuator ECO-E Dimensions sheet - Actuator ECO-E Dimensions sheet - Actuator ECO-E Fig.1: X= actuator marking 221MBL003579DE_4 20.10.2022... - Page 102 102 / 106 - 13.2 Dimensions sheet - Actuator ECO-E Dimensions sheet - Actuator ECO-E Actuator Material no. Dimensio Piston Weight surface Ø D (approx.) kg *E AA 221)642.01 E BA 221)642.07 E BB 221)642.02 E CA 221)642.08 E CB 221)642.06 E CD 221)642.03...
- Page 103 13.2 Dimensions sheet - Actuator ECO-E - 103 / 106 221MBL003579DE_4 20.10.2022...
-
Page 104: List Of Abbreviations
104 / 106 - 13.3 List of abbreviations 13.3 List of abbreviations Abbreviations and terms Abbreviation Explanation British Standard Unit of measurement of pressure [bar] All pressure data expressed in [bar/psi] is assumed to be gauge pressure [barg/ psig] unless explicitly specified otherwise. approx. - Page 105 13.3 List of abbreviations - 105 / 106 Abbreviation Explanation normal closed normal opened Unit of measurement of work [newton metre] SPECIFICATION FOR THE TORQUE: 1 Nm = 0.737 lb-ft Pound-Force (lb)× Feet (ft) Polyamide PE-LD Low-density polyethylene Polytetrafluoroethylene Anglo-American unit of measurement for pressure [pound-force per square inch] All pressure data expressed in [bar/psi] is assumed to be gauge pressure [barg/ psig] unless explicitly specified otherwise.
- Page 106 GEA Tuchenhagen GmbH Am Industriepark 2-10 21514 Büchen , Germany Telefon +49 4155 49-0 www.gea.com © GEA Tuchenhagen All rights reserved. Subject to modifications. 430BAL008482...
Need help?
Do you have a question about the ECOVENT N ECO Series and is the answer not in the manual?
Questions and answers