
Subscribe to Our Youtube Channel
Related Manuals for Optex Fiber SenSys Laser Defender LD308SH


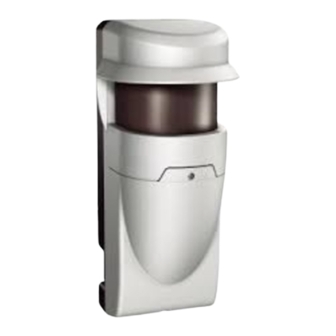
Summary of Contents for Optex Fiber SenSys Laser Defender LD308SH
- Page 1 Laser Defender™ Application Note Hangar and Bay Door Protection AN-ENS-009 Laser Defender Hangar and Bay Door Protection Rev A...
- Page 2 © Copyright 2020, Fiber SenSys®, Inc. all rights reserved. No part of this publication may be reproduced or transmitted in any form or by any means, electronic or mechanical, including photocopy, recording, or any info rmation storage and retrieval system, without permission in writing from Fiber SenSys®, Inc., 2925 NE Aloclek Drive, Suite 120, Hillsboro, Oregon 97124, USA.
-
Page 3: Table Of Contents
Contents Summary ........................... 4 Introduction ..........................4 Planning ............................. 5 Design ............................5 Installation ..........................7 Configuration ..........................9 Terminal Settings ........................13 Network Settings ........................14 Probability of Detection ......................14 Maintenance ..........................15... -
Page 4: Summary
Summary The versatility of the Fiber SenSys intrusion detection technology allows for a wide array of implementation options. Laser Defender™ is a quality solution for interiors using Lidar technology. With a two-dimensional plane of coverage, the Laser Defender provides security by creating a virtual wall or ceiling of protection. -
Page 5: Planning
Planning The first step to a successful installation is performing a detailed site survey. The site survey includes identifying the level of security, threat assessments, area drawings, site walk-through, wire connections, and available mounting options. Analysis of the data obtained through this process aids in the proper planning of zone layout and equipment selection. - Page 6 o Please refer to PM-ENG-083 LD308SH Rev B installation manual for mounting types • LD204S - 20m x 20m at 95° detection coverage. o 12 to 24 VDC / PoE(+) compatible. o 3 programmable analog zones / 4 virtual zones for IP connection. o Multiple mounting options for ceiling and wall protection.
-
Page 7: Installation
Installation Between the planning stage and the installation date, there could be some downtime. During this time, boxes and other peripheral devices could be installed or placed within the sensors field-of- view. These changes to the site can create problems for the sensor’s placement and how the sensor detects. - Page 8 Running Intrusion Time is an important factor when detecting a fast runner. High sensitivity and angling of the laser in a manner allows the detector more time to process fast intrusions. Installing the laser facing straight down 270°, the LD308SH can detect a 5.5ft intruder running at a speed of 6.71mph.
-
Page 9: Configuration
Configuration To calibrate the sensor, first install the Laser Defender Manager Software (LDMS) on a laptop or workstation. This software is provided as a free download with each hardware purchase and can also be found at www.fibersensys.com/product/product-software. Connect the PC to the Laser Defender via Ethernet port. - Page 10 If connection times out and aborts the connecting process, follow the troubleshooting steps below. • Confirm power. • Confirm IP addresses are on the same subnet. (LD204S maintenance port uses a different subnet). • Check the physical connection • IP conflict from other sensors. (Isolate sensor and try again) •...
- Page 11 Figure 7: LD204S Detection Mode settings Figure 8: Removing unwanted areas using the scissor tool Proceed to Settings (F3) and make the necessary detection changes to fit the application. Indoor Mode should be all that is necessary for most hangar door applications. For more information about the other modes, please refer to PM-ENG-084 LD-204S Rev B installation manual section 6-2 Detection Configuration.
- Page 12 Figure 10: Masking unwanted areas The third and final settings page covers area Masking and Allocating. Masking a section of the detection area becomes a non-detectable segment while the rest of the detection area remains detectable. Enabling area allocating creates independent detection segments in the scanned area. Up to eight patterns can be allocated in the LD308SH;...
-
Page 13: Terminal Settings
Terminal Settings Select relay I/O Settings for relay output configuration. Shown below in Figure 12 is the terminal settings page for the LD204S. Here the user can change alarm outputs from N/C to N/O. Users can also customize specific detection areas to a selected output. Additionally, trouble outputs can be selected for the desired output. -
Page 14: Network Settings
Network Settings Select the Advanced Settings tab and choose Network (F6) to change the detectors network settings. Enter the preferred IP settings. Be sure the main and maintenance port remain on separate subnets. After saving the network settings, the detector resets and the user is disconnected from the detector. -
Page 15: Maintenance
These intrusion attempts may include: • Crawling • Jumping • Walking • Running • Rolling Simulate each attempt multiple times to confirm the laser is detecting reliably. Adjust settings as is necessary and continue to simulate the intrusions. Maintenance Periodic testing is a good way of extending the life of your system and ensuring correct functionality.
Need help?
Do you have a question about the Fiber SenSys Laser Defender LD308SH and is the answer not in the manual?
Questions and answers