Table of Contents
Advertisement
Quick Links
Advertisement
Table of Contents

Related Manuals for Asko CW4935SCN


Summary of Contents for Asko CW4935SCN
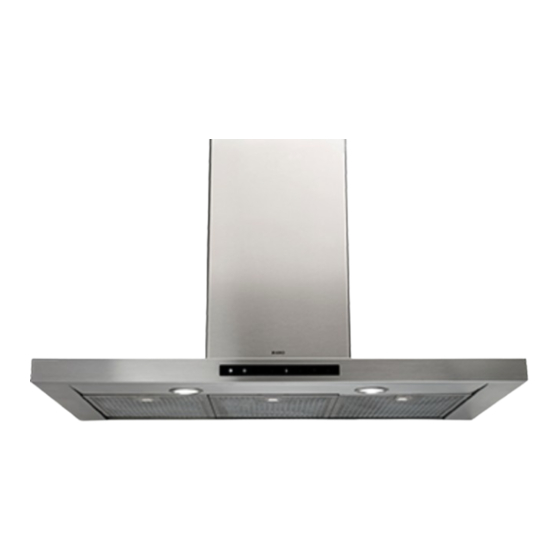
- Page 1 CW4935SCN INSTRUCTIONS FOR USE Cooker hood CW41235SCN...
-
Page 2: Table Of Contents
Contents Introduction ..........Wi-Fi-connectivity ........Pictograms used .......... Wi-Fi/ConnectLife-app ......... Introduction ..........Maintenance ..........Cleaning ............Safety ..........................Lighting ............Use .............. Technical data ..........Description user interface ......Hazardous substances in products ..... Cooker hood functions ......... Compliance information ....... Operation ............ -
Page 3: Introduction
Introduction Pictograms used The following symbols are used throughout the manual and they have the following meanings: INFORMATION! Information, advice, tip, or recommendation WARNING! Warning – general danger ELECTRIC SHOCK! Warning – danger of electric shock HOT SURFACE! Warning – danger of hot surface DANGER OF FIRE! Warning –... -
Page 4: Safety
Safety WARNING! READ CAREFULLY AND KEEP FOR FUTURE REFERENCE! Safe use • This appliance is only designed for household use. • CAUTION: Accessible parts may become hot when used with cooking appliances. • This appliance can be used by children aged from 8 years and above and persons with reduced physical, sensory or mental capabilities or lack of experience and knowledge if they have been given supervision or instruction concerning use of the... - Page 5 Safety • Do not use the cooker hood if the grease filter has not been fitted properly! • Do not lean against the cooker hood. • Never use the cooker hood as a working surface unless this is indicated explicitly. •...
- Page 6 Safety • The light emitted by LED lights is very dazzling and can damage the eyes. Do not look directly into the switched on LED lights for longer than 100 seconds. • When washing grease filters in the dishwasher it is recommended to use a short, non-intensive programme.
-
Page 7: Use
Description user interface 1. Switching on/off and dimming the lighting 2. Reducing air extraction capacity and switching off 3. Grease filter cleaning indicator 4. Proximity sensor 5. Display status 6. Proximity sensor 7. Wi-Fi key 8. Switching on and increasing air extraction capacity 9. -
Page 8: Operation
Operation Switching extraction on and off 1. Press the ‘+’ button. The cooker hood will switch on at the lowest setting. 2. Press the ‘+’ key for a higher fan setting. Press and hold the ‘+’ key for 2 seconds to select the highest setting (boost) (see 'Switch on the boost setting'). -
Page 9: Switching The Light On And Off
Operation Switching the light on and off 1. Shortly press and release the light button. 2. Press and hold the lighting button to set the lighting strength. The lighting changes from maximum to minimum strength and vice versa. 3. To turn off the light, shortly press the light button while the light is Changing the colour temperature You can adjust the lighting temperature. -
Page 10: Making The Connection Between Cooker Hood And Hob
Operation Making the connection between cooker hood and hob To be able to operate the cooker hood with the hob, a connection must be made between the hob and the hood. To make the connection, the Connection setup mode of the cooker hood and the hob must be activated. -
Page 11: Wi-Fi-Connectivity
Wi-Fi-connectivity Wi-Fi/ConnectLife -app The appliance is tted with a Wi-Fi module that allows the appliance to connect to a mobile device such as a smartphone or tablet. It o ers to monitor the appliance status via the mobile device. NOTE! The monitoring function via mobile device shall not be used to replace the personal supervision of the cooking process directly on the appliance. - Page 12 Wi-Fi-connectivity Switching on Wi-Fi: • The hood must be switched off. • Touch and hold simultaneously the – (minus) and timer key for 3 seconds to enter the Wi-Fi menu. ‘Light' icon will be turned off. • Touch and hold simultaneously the – (minus) and timer key for 3 seconds to turn on Wi-Fi. ‘o’ will blink 3 times.
- Page 13 Wi-Fi-connectivity Displaying the Wi-Fi status: • Wi-Fi module disabled: Wi-Fi symbol not displayed. • Configuration in progress: Wi-Fi symbol flashes. • Connected to home network router: Wi-Fi symbol flashes. • Connected to home network router and cloud: Wi-Fi symbol continuously lit. ConnectLife-app The ConnectLife-app is available on the Apple App Store and Google Play Store.
-
Page 14: Maintenance
Maintenance Cleaning WARNING! Important! For all maintenance, first switch off the mains power to the cooker hood by pulling the plug out of the socket or by turning off the home's master switch. The hood needs to be cleaned regularly, both inside as well as outside (at least as often as the grease filter). Do not use abrasive cleaning products. - Page 15 Maintenance Removing grease filter 1. Switch off the motor and lighting. 2. Open the filter’s access hatch. 3. Removing the filter out of the hood. Reposition the grease filter The filter should be placed with the locking mechanism on the front. Open the filter access latch. The notches at the front of the filter will then slot in.
-
Page 16: Lighting
Maintenance Remove grease trays 1. Grab the grease trays with both hands and slide them forward out of the hood ledge. 2. Empty the grease trays and clean them using a neutral cleaning agent, either by hand or in the dishwasher on a short, low-temperature program. -
Page 17: Technical Data
Technical data Hazardous substances in products Name and content of hazardous substances in products Component Hazardous substance name Lead (Pb) Mercury Cadmium Hexavalent Polybrominated Polybrominated (Hg) (Cd) Chromium biphenyls diphenyl (Cr (VI)) (PBB) ethers (PBDE) Enclosure material Housing of electronics Printed circuit board assembly... -
Page 18: Compliance Information
Radio equipment type Cooker hood Operating frequency range xx MHz (16 channels) Maximum output power xx dBm EIRP average (calculated) Maximum antenna gain xx dBi Hereby, ASKO declares that the radio equipment type Cooker hood is in compliance with Directive 2014/53/EU. -
Page 19: Installation
Installation Safety regulations WARNING! This appliance should only be connected by a registered installer. • Always follow the installation instructions in the installation manual provided. • Check the appliance for transport damage. Do not connect a damaged appliance. • Faulty parts may only be replaced by original parts. The manufacturer can only guarantee that original parts meet safety requirements. - Page 20 Installation WARNING! Never open the casing of the appliance. • Disconnect the appliance from the mains supply before starting any repair work. • We advise you to wear protective gloves when assembling the cooker hood because of the possible sharp edges. •...
-
Page 21: Preparations For Installation
Installation Preparations for installation x = min. 65 cm x = min. 55 cm Electrical connection This appliance is manufactured in class I, it must therefore be connected to the earth system. Make sure the supply voltage ratings correspond with those stated on the appliance data plate. The connection to the mains is carried out as follows: •... -
Page 22: Appliance Dimensions
Installation Appliance dimensions... -
Page 23: Built-In
Installation Built-in Wall hoods... - Page 24 Installation...
- Page 25 Installation...
- Page 26 Installation...
- Page 27 Installation...
-
Page 28: Environment
Environment Tips for energy-efficient cooking with hoods • Use a low extractor setting and use the highest setting (boost) if necessary. • A well-ventilated kitchen makes the range hood more efficient. • Clean filters regularly and replace filters when needed to keep the filter efficiency high, as a saturated filter cannot perform and leads to longer usage times. -
Page 29: Your Notes
Your notes Your notes... - Page 30 Your notes Your notes...
- Page 31 Your notes Your notes...
- Page 32 860560 -a7DRAFT We reserve the right to make changes.
Need help?
Do you have a question about the CW4935SCN and is the answer not in the manual?
Questions and answers