Table of Contents
Advertisement
Quick Links
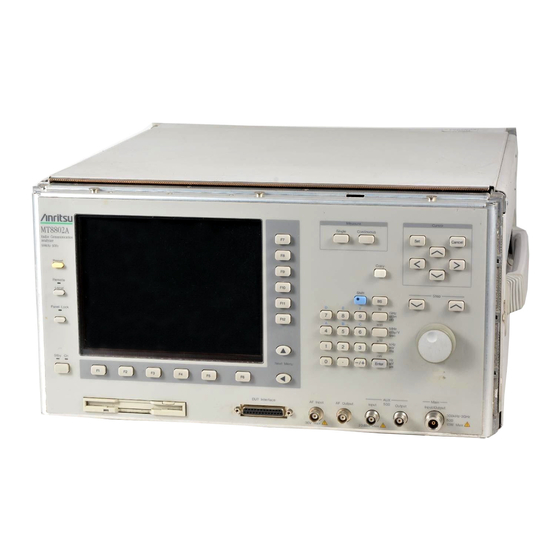
MT8802A
Radio Communication Analyzer
Service Manual
Second Edition
To ensure that this equipment is used safely, im-
portant safety items are explained in the MT8802A
Radio Communication Analyzer Operation Manual.
This manual explains important service items re-
lated service.
Read both the operation manual and this manual,
and keep both with the equipment.
ANRITSU CORPORATION
i
Document No.: M-W1382BE-2.0
Advertisement
Chapters
Table of Contents

Related Manuals for Anritsu MT8802A


Summary of Contents for Anritsu MT8802A
- Page 1 Radio Communication Analyzer Service Manual Second Edition To ensure that this equipment is used safely, im- portant safety items are explained in the MT8802A Radio Communication Analyzer Operation Manual. This manual explains important service items re- lated service. Read both the operation manual and this manual, and keep both with the equipment.
- Page 2 MT8802A Radio Communication Analyzer Service Manual November 1999 (First Edition) 13 November 2002 (Second Edition) Copyright © 1999-2002, ANRITSU CORPORATION. All rights reserved. No part of this manual may be reproduced without the prior written permission of the publisher. The contents of this manual may be changed without prior notice.
- Page 3 Always request repair by a trained engineer who understands the hazards. Anritsu Corporation will not accept liability for any injuries sustained as a result of opening the equip- ment covers.
- Page 4 Power Line Fuse Protection For safety, Anritsu products have either one or two fuses in the AC power lines as requested by the customer when ordering. Single fuse: A fuse is inserted in one of the AC power lines. Double fuse: A fuse is inserted in each of the AC power lines.
- Page 5 About This Manual This is the service manual of the MT8802A Radio Communication Analyzer for smooth maintenance and service work of the service personnel, and does not supplied to customers. Only used for service personnel. Refer to the separate operation manual (an accessory supplied to the equipment) for handling the instruments.
-
Page 6: Table Of Contents
5.1 Adjustment of Spectrum analyzer ........5.2 Adjustment of Power meter ..........5.3 IF Gain Adjustment ............5.4 Confirmation of detection level ........5.5 A05 MOD DSP1 .............. 5.6 A16 AF ................5.7 A31 CDMA IQ ..............5-12 5.8 MT8802A Software Operation Instructions ..... 5-13... - Page 7 Section 6 Correction Software....6.1 Outline ................6.2 System configuration ............6.3 Development Environment ..........6.4 Program setup ..............6.5 Software Summary ............6.6 Operation ................ 6.7 Program Operations ............6-33 6.8 Error Codes List .............. 6-45 Section 7 Inspection Software ....7.1 Outline ................
- Page 8 ..
-
Page 9: Section 1 Specifications
Section 1 Specifications This manual does not cover performance and function specifications of the MT8802A and options. For details, refer to the separate operation manuals. - Page 10 Section 1 Specifications ..
-
Page 11: Section 2 Block Diagram And Basic Explanation
Section 2 Block Diagram and Basic Explanation Signal Flow ............... Explanation of Each Block ........ -
Page 12: Signal Flow
Section 2 Block Diagram and Basic Explanation Fig. 2-1 shows the general block diagram. Signal Flow • MAIN Input route An RF signal input to the MAIN connector is branched by the Power Divider. It is then attenuated by 15 dB and supplied to the A09 RF INTERFACE (RF I/F). The RF signal input to the A09 RF/IF, is split to the following 3 routes. -
Page 13: Explanation Of Each Block
2.2 Explanation of Each Block Explanation of Each Block • A01 MAIN CPU Controls each unit and also transfers data to/from the A02 BASEBAND1, A03 BASEBAND2, A04 DEMOD DSP, and A05 MOD DSP. • A02 BASEBAND1, A03 BASEBAND2 Generates modulation data and timing signals (e.g., symbol clock, burst gate, and frame trigger). - Page 14 Section 2 Block Diagram and Basic Explanation • A12 IF Beats down the 2nd IF signal to the 3rd IF (6.8 MHz), and then A/D converts it. The A/D conversion sample rate is 32 MHz. The clock signal is also supplied to the A04 DEMOD DSP.
- Page 15 Section 2 Block Diagram and Basic Explanation Fig. 2-1...
- Page 16 Section 2 Block Diagram and Basic Explanation Fig. 2-2...
- Page 17 Section 2 Block Diagram and Basic Explanation Fig. 2-3...
- Page 18 Section 2 Block Diagram and Basic Explanation Fig. 2-4 ..
-
Page 19: Section 3 Level Diagram
Section 3 Level Diagram Fig. 3-1 to 3-4 show the RX/TX-route level diagrams in addition to the variable attenu- ator set values. - Page 20 Section 3 Level Diagram...
- Page 21 Section 3 Level Diagram...
- Page 22 Section 3 Level Diagram S-ATT input level [dBm] CDMA CDMA TDMA, (AWGN on) (AWGN off) Analog –4 –5 –6 S-ATT [dB] TDMA, Analog CDMA (AWGN off) CDMA (AWGN on) –130 –125 –120 –5 Output setting level [dBm] Fig. 3-3 Output setting level vs S-ATT, S-ATT input level...
- Page 23 Section 3 Level Diagram RF ATT [dB] IF ATT [dB] TX Ref level in CDMA Tester (MAIN) –11 –5 +42dBm TX Ref level in CDMA Tester (AUX) –31 –25 –15 –5 +22dBm TX Ref level in TDMA, Analog Tester (MAIN) –8 –2 +42dBm...
- Page 24 Section 3 Level Diagram ..
-
Page 25: Section 4 Troubleshooting
Section 4 Troubleshooting Detecting Faulty Block ..........Adjustment after Unit Replacement ...... -
Page 26: Detecting Faulty Block
Section 4 Troubleshooting Detecting Faulty Block General Phenomenon Cause to be supposed Fault block The Stby LED lamp does not light on. Z4 Power supply2 Standby switch Fuse A07 PANEL CONTROL The Power on LED lamp does not light on. Z3 Power supply1 A07 PANEL CONTROL The system stopped on the logo screen. - Page 27 4.1 Detecting Faulty Block RX Tester Phenomenon Cause to be supposed Fault block The RF output signal level is not normal. Signal route operation error A13 SG A05 MOD DSP Level setting error A01 MAIN CPU The RF output signal frequency is not normal. LO route operation error A13 SG A131 SG LOCAL...
- Page 28 Section 4 Troubleshooting Opectrum Analyzer Phenomenon Cause to be supposed Fault block The frequency sweeping does not operate LO operation error A10 CONVERTER normally. A11 LOCAL Sweep circuit operation error A12 IF A04 DEMOD DSP Control circuit operation error A01 MAIN CPU The CAL does not operate normally.
-
Page 29: Adjustment After Unit Replacement
4.2 Adjustment after Unit Replacement Adjustment after Unit Replacement After replacing each unit, perform adjustment and calibration according to the table below. However, the adjustment and calibration about units omitted in the table are not required. Phenomenon Cause to be supposed Fault block A01 MAIN CPU 5.8 Serial No. - Page 30 Section 4 Troubleshooting ..
-
Page 31: Section 5 Total Adjustment
A31 CDMA IQ ............5-12 5.7.1 Setting of measurement system ....5-12 5.7.2 Adjustment............. 5-12 MT8802A Software Operation Instructions ....5-13 5.8.1 Preface ............5-13 5.8.2 Setting DIP Switches on Front Panel .... 5-13 5.8.3 Registered Master File ........5-14 5.8.4 Software installation ........ -
Page 32: Adjustment Of Spectrum Analyzer
• Adjust with the R54 of All. • Confirm that the measurement screen of MT8802A becomes as Figure-C. [3] Confirmation • Set X=0, ±500 kHz. • Confirm that the measurement screen of MT8802A become as Figures-D · E · F. Figure-C Figure-D... - Page 33 • Adjust with the R53 of A1002. • Confirm that the measurement screen of MT8802A becomes as figure-C. [3] Confirmation • Set X=0, ±5 MHz. • Confirm that the measurement screen of MT8802A become as figures-D · E · F. Figure-C Figure-D...
- Page 34 MT8802A measurement screen according to the marker frequency. (See Figure C.) [3] Confirmation Set X = 0 or –400 MHz and confirm that the frequency is formed on the MT8802A measurement screen as shown below. (See Figures D to E.) Figure-C Figure-D Figure-E...
-
Page 35: Adjustment Of Power Meter
MT8802A A12 IF MAIN terminal [1] Setting of measurement system MT8802A POWER METER screen (TDMA system) 100 MHz [2] SG level: +20.0 dBm Power meter range: +20 dBm • At display of the POWER METER screen, adjust R162 to Set 100 mW. -
Page 36: If Gain Adjustment
IF Gain Adjustment MT8802A A12 IF MAIN terminal [1] Setting of measurement system MT8802A TX Measure (TDMA system) Freq=1 GHz, TX Ref Level=+10 dBm Measuring Object=Continuous POWER screen Freq=1 GHz, Level=+10 dBm [2] Adjust “R33” to Set “TX POWER” display value=+10 dBm. -
Page 37: A05 Mod Dsp1
5.5 A05 MOD DSP1 A05 MOD DSP1 5.5.1 Preparation • Make all the variable resistors at the center of the variable range. (R112, R115, R124, R128, R132) • Push “RX measure” key in PHS mode. • Set RX parameter Burst=“off” Pattern=“0000”... -
Page 38: A16 Af
De-emphasis=“off” • Input the HP8903 AF output to the MT8802A Ext FM Input terminal. • Connect the MT8802A RF output (AUX Output) to the HP8901 RF input ter- minal. Adjust the R19 (FM1 variable resistor) so that the HP8901 measurement result (FM deviation (p-p)/2) is within 35 kHz ±1%. -
Page 39: Af Output Level Adjustment
AF Output Impedance=“600 Ω” HP8903 Audio Analyzer LPF=“30 kHz” • Connect the MT8802A AF Output to the HP8903 AF input (100 k ohms) termi- nal. Adjust the R100 (OSC variable resistor) so that the HP8903 measurement result (AF level) is within 1.988 Vrms ±0.5%. -
Page 40: Af Level Meter Adjustment
AF Freq.=“1 kHz” AF level=“4 Vrms” Output Impedance=“600 Ω” • Connect the HP8903 AF output to the MT8802A AF Input terminal. Adjust the R126 (Level variable resistor) so that the MT8802A measurement result (AF level) is within 3.976 Vrms ±0.5%. -
Page 41: Fm Demod. Gain And Squelch Level Adjustment
LPF=“30 kHz” • Connect the RF output of SG to the MT8802A AUX Input terminal. • Connect the MT8802A Demod. Output to the HP8903 AF input (100 k ohms) terminal. Set the R223 (RSSI variable resistor) to the minimum position (full-counter- clockwise) and adjust the R175 (Det variable resistor) so that the HP8903 mea- surement result (AF level) is within 2.812 Vrms ±1%. -
Page 42: A31 Cdma Iq
[No Sync] 5.7.2 Adjustment Set the VR 52/53/54/55/67/75 at each the center position. Press the Start key for setting the Call Processing function of the MT8802A to Idle state. Using a personal computer, send the GPIB command of “TESTMODE ∆... -
Page 43: Mt8802A Software Operation Instructions
5.8.1.1 Outline This procedure instructs the operation (confidential) required for delivery inspection in the MT8802A Software Inspection Department, and for maintenance in the Service Department. When a sales personnel or user upgrades the version, transfer the MT8802A Software Version Upgrade Handbook of the separate volume. -
Page 44: Registered Master File
The date and time of the registered master file have a special meaning. If the date and time changed at copying, it is not a problem; but, they should remain unchanged unless necessary. 5.8.3.1 MT8802A main unit file configuration (document No. M-E9WMT8802A) File name Software function MT8802A.I... -
Page 45: Software Installation
7. Power-OFF 5.8.4.2 Measurement option In the MT8802A, the same measurement option can only be updated. The operation procedure below is important to add an option. Take care to perform this procedure for adding an option at user side. -
Page 46: Writing Basic Calibration Data
Section 5 Total Adjustment 5.8.5 Writing Basic Calibration Data 1. Prepare a floppy disk (IBM 1.44M format) on which the files below are in subdirectory MT8801. File name Data type MT8801.CAL Basic calibration-data transfer permission file TX_PC.TXT Power meter data file (MAIN terminal input) TX_APC.TXT Power meter data file (AUX terminal input) TX_MHP.TXT... -
Page 47: Serial Number Management
8. Power-OFF 9. Turn the power on. After the set serial number appears in the center of the ANRITSU logo display screen, the setting is completed. • Specify each serial number with 20 or fewer alphanumeric characters. Be sure to suffix CR + LF to the data. -
Page 48: Clearing All Sram
5.8.9 Setting Parameters to State of Shipment from Factory Initialize the setup parameters saved in the SRAM backed up by a battery to the default values. 1. Power-OFF 2. Press [Preset] + Power-ON. After the ANRITSU logo appears, release the keys. 5-18 .. -
Page 49: Section 6 Correction Software
Section 6 Correction Software Outline ..............System configuration ..........Development Environment ........6.3.1 OS ..............6.3.2 Program language ......... Program setup ............Software Summary ........... 6.5.1 Correction Items List ........6.5.2 Summary of Measurement Module ....Operation ..............6.6.1 Starting Program ........... 6.6.2 Initial Menu Screen Summary ....... -
Page 50: Outline
• Measurement of frequency response. (Level , Modulation ON/OFF) System configuration The equipment which is necessary for this software to work. • Equipment which take a test : MT8802A Radio Communication Analyzer (RCA) • Equipment which does a test : ML4803A Power Meter MA4601A Amorphous Power Sensor... -
Page 51: Software Summary
The table below shows the list of measurement items for each DUT model as well as the file names for correction value output. Table 6-1 List of Output File Names Terminal File Name MT8801B MT8802A MS8606A MS8607A (Output) RX_MOC (Power Meter) -
Page 52: Summary Of Measurement Module
The following section shows the connection diagram of the measurement system and the list of set values for each DUT model. Table 6-2 List of Set Values for Measurement of Transmitter MT8801B MT8801B with OPT05 MT8802A Main Main Main Measurement screen... - Page 53 6.5 Software Summary 6.5.2.2 Correction of Receiver HP8665B MT8802A 3 dB Pad MN74A 3 dB Pad Fig. 6-2 Connection Diagram of Measurement System of Receiver Calibrate the output level of the signal generator registered via the channel selector by the power meter, calculate the difference with the measured value of the DUT and set it as the correction value.
-
Page 54: Operation
Section 6 Correction Software Operation This program enables continuous measurement of items selected at will by the user and storage of measured results into the floppy disk in the format designed to write correc- tion values into the DUT. On the other hand, when “Printer” is selected as the output destination, the measured results are graphed together with the worst value. -
Page 55: Initial Menu Screen Summary
6.6 Operation 6.6.2 Initial Menu Screen Summary When this program is successfully activated, the “Initial Menu Screen,” shown in Fig. 6-4, is displayed together with the default values. The following section shows the names of control functions on this screen as well as an outline of these functions. [1] Measurement item selection section This section is used to confirm the modifications to the serial number, output destina- tion of the measured results and standardized value of the graph on the measurement... - Page 56 Section 6 Correction Software [8] Measurement device selection section This section enables selection of the equipment name of the DUT to be measured. Note that this program sets different measurement items, depending on the equipment name selected in this section. [9] Output Device (Output destination of measured result display section) This section displays the output destination of the measured results currently set.
- Page 57 6.6 Operation [4] [5] [6] [7] [8] [10] [11] [12] [13] [14] [15] [16] Fig. 6-4 Initial Menu Screen When section [1], “Settings,” is clicked on this screen, the menu of setup items used for this program is displayed as shown in Fig. 6-5 “List of Setup Items.” The following section shows the names of control functions on the menu bar as well as an outline of these functions.
- Page 58 Section 6 Correction Software [20] Spec Set (S) (Specification data input command) This command is used to change the vertical scale (specification data) of the graph shown on the screen during measurement and of the data output from the printer. See 6.6.6 “Setting Specification data”...
-
Page 59: Inputting Serial Number
6.6 Operation 6.6.3 Inputting Serial Number When “Serial Number” of section [17] is selected from “List of Setup Items” shown in Fig. 6-5; “Serial Number Input Screen,” shown in Fig. 6-6, is displayed together with the address of the units that have been set up. The following section shows the names of control functions on this screen as well as an outline of these functions. - Page 60 Section 6 Correction Software Input the serial number by following the instructions below. Select a measurement item in section [2] on the “Initial Menu Screen” shown in Fig. 6-4. When “Receiver” is selected in this section and “Channel Selector” is selected in section [19], the “Connect”...
-
Page 61: Results
6.6 Operation 6.6.4 Setting Output Destination of Measured Results When “Out Device Set” in section [18] is selected from “List of Setup Items” shown in Fig. 6-5, the “Measured Result Output Device Selection Screen,” shown in Fig. 6-9, is displayed together with the current set values. The following section shows the names of control functions on this screen as well as an outline of these functions. - Page 62 Section 6 Correction Software Set the output destination of the measured results by following the instructions below. Select “Settings” in section [1] - “Out Device Set” in section [18] on the “Initial Menu Screen” shown in Fig. 6-4. This causes the “Measured Result Output De- vice Selection Screen,”...
-
Page 63: Selecting Data File Storage Directory
6.6 Operation 6.6.5 Selecting Data File Storage Directory When the “Refer” button of section [6] is selected in 6.6.4 “Setting Output Destination of Measured Results,” the “Data File Storage Directory Selection Screen,” shown in Fig. 6-11, is displayed together with the current set values. The following section shows the names of control functions on this screen as well as an outline of these func- tions. - Page 64 Section 6 Correction Software Select the directory to store the data file by following the instructions below. Select the “Refer” button of section [6] on the “Measured Result Output Device Selection Screen” shown in Fig. 6-9. This causes the “Data File Storage Direc- tory Selection Screen.”, shown in Fig.
- Page 65 6.6 Operation Check the path displayed in section [2] and click the “OK” button of section [4]. When a new directory name is input in section (4), a message requesting confir- mation of directory creation as shown in Fig. 6-13 is displayed. To create a new directory, click the “OK”...
-
Page 66: Setting Specification Data
Section 6 Correction Software 6.6.6 Setting Specification Data When “Spec Set” in section [20] is selected from “List of Setup Items,” shown in Fig. 6-5, the “Specification Data Input Screen,” shown in Fig. 6-15, is displayed together with the default setting. The following section shows the names of control functions on this screen as well as an outline of these functions. - Page 67 6.6 Operation [5] Data Input (Data input section) This section is used to modify the specification data displayed in section [4]. Input a numeric data directly into the box. [6] OK (O) (“OK” button) This button is used to confirm the modified data. The input data is confirmed, and the screen returns to the “Initial Menu Screen”...
- Page 68 Section 6 Correction Software Modify the specification data by following the instructions below. Select “Settings” in section [1] and “Spec Set” in section [20] on the “Initial Menu Screen” shown in Fig. 6-4. This causes the “Specification Data Input Screen,” shown in Fig. 6-15, to be displayed together with the current set values. To change the specification data for the item combining each setting displayed in section [1] to [3], click the relevant item in section [4].
-
Page 69: Confirmation Of Measured Results
6.6 Operation 6.6.7 Confirmation of Measured results When “Graph Check” in section [3] is selected on the “Initial Menu Screen,” shown in Fig. 6-4, the “Measured result Confirmation Screen,” shown in Fig. 6-18, is displayed together with the default specification data. This program enables confirmation of the data by graph based on the measurement data (the output data file) of the DUT for which correction or frequency response measurement has been completed. - Page 70 Section 6 Correction Software Confirmation of measured results by following the instructions below. Select “Graph Check” in section [3] on the “Initial Menu Screen” shown in Fig. 6-4. This causes the “Measured result Confirmation Screen,” shown in Fig. 6-18, to appear together with the currently set specification data. Check the specification data displayed in section [3] and select “File”...
-
Page 71: Selecting Data File
6.6 Operation 6.6.8 Selecting Data File Selecting “File” –– “Select” in section [1] on the “Measured result Confirmation Screen,” shown in Fig. 6-18, causes the “Data File Selection Screen,” shown in Fig. 6- 20, to appear. The following section shows the names of control functions on this screen as well as an outline of these functions. - Page 72 Section 6 Correction Software Select a file to check its data by following the instructions below. Select “File” –– “Select” in section [1] on the “Measured result Confirmation Screen” shown in Fig. 6-18. This causes the “Data File Selection Screen,” shown in Fig.
-
Page 73: Message
6.6 Operation 6.6.9 Displaying Connection Confirmation Message This program displays the cable connection diagram on the screen as shown in Fig. 6- 21 by using a bit map file. The following section shows the names of control function on this screen as well as an outline of these functions. [1] Connection diagram display section The program reads the connection diagram stored in the bit map file when this screen is displayed and displays the diagram on the screen. -
Page 74: Inputting Power Sensor Cal Factor
Section 6 Correction Software 6.6.10 Inputting Power Sensor Cal Factor The Cal factor input screen of the power sensor to be used, as shown in Fig. 6-22, is displayed together with the currently set serial number and set values at the time of transmitter measurement and calibration of the output level of the signal generator. - Page 75 6.6 Operation [9] Reference Cal Factor (Reference Cal factor input section) This section displays the reference Cal factor of each power sensor. To modify the setting, directly input a numeric value. Fig. 6-22 Power Sensor Cal Factor Input Screen Input a Cal factor by following the instructions below. Click either the left or right grid, or the reference Cal factor input section to select the power sensor type to constitute the target of data editing.
- Page 76 Section 6 Correction Software Check the data displayed on the screen, and select the “OK” button in section [7], or select the “Quit” button in section [8] to return to the “Initial Menu Screen,” shown in Fig. 6-4, without performing measurement. When the “OK” button of section [7] is selected after the serial number of the power sensor to be used or any other data is modified, a message requesting confirmation of storage of the modified information, as shown in Fig.
- Page 77 6.6 Operation When connection is completed, a message requesting confirmation of the power sensor calibration, as shown in Fig. 6-25, is displayed. Select the “Yes” button to perform calibration. Selecting the “No” button causes the screen to return to the “Initial Menu Screen”...
-
Page 78: Registering The Power Sensor Serial Number
Section 6 Correction Software 6.6.11 Registering the Power Sensor Serial Number When “Data_Select” in section [1] is selected on the “Power Sensor Cal Factor Input Screen,” shown in Fig. 6-22, this causes the “Power Sensor Serial Number Registration Screen,” shown in Fig. 6-26, to appear. Selecting a data file of a power sensor already registered or entering a new registration is enabled on this screen. - Page 79 6.6 Operation Fig. 6-26 Power Sensor Serial Number Registration Screen Register a new serial number or select a data file already registered by following the instructions below. Select the power sensor type that is to be the target of editing in the same manner as described in (1) of 6.6.10 “Inputting Power Sensor Cal Factor.”...
-
Page 80: Exiting Program
Section 6 Correction Software Check the serial number displayed in section [8], and select the “OK” button in section [5]. This causes relevant data to be displayed together with the power sensor serial number set in the “Power Sensor Cal Factor Input Screen” shown in Fig. -
Page 81: Program Operations
Select the equipment name of the DUT from the “Test Device” box of section [8]. The equipment that is to be the target of measurement of the transmitter can be either of the two models, the “MT8801B” or “MT8802A.” Select “Transmitter” from the “Measured Type” box of section [2]. This enables the address numbers of only the DUT and the power meter in the “Address Num-... - Page 82 Section 6 Correction Software To measure the correction values of the DUT, set the command button of section [14] at “Calibration.” On the other hand, to measure the frequency response, set the command button at “Freq. –– Resp.” Check all the setup items and click the “Measure” button of section [15]. This causes the measurement to start after confirmation of the contents set prior to measurement start.
-
Page 83: Measurement Of Receiver
6.7 Program Operations 6.7.2 Measurement of Receiver The measurement of the receiver performed by this program involves connection of the output of the calibrated signal generator to the DUT via the channel selector and a cable with 3 dB-3 dB attenuator and calculation of the correction values based on the difference between the measured value of each frequency and the reading of the power meter at the time of calibration. - Page 84 Section 6 Correction Software (10) When the measurement starts, an output calibration selection screen for the signal generator is displayed. This enables selection of calibration of the data file to be used for measurement. See 6.7.3 “Procedures for Signal Generator Calibration” for more information on the calibration of the signal generator.
-
Page 85: Procedures For Signal Generator Calibration
6.7 Program Operations 6.7.3 Procedures for Signal Generator Calibration This program displays Fig. 6-31 “Signal Generator Calibration Selection Screen” to- gether with each data file information when the measurement is started following the selection of the measurement of the reception system on the “Initial Menu Screen” shown in Fig. - Page 86 Section 6 Correction Software [4] [5] Fig. 6-31 Signal Generator Calibration Selection Screen Calibrate the level of the signal generator by following the instructions below. Set the reception system measurement on the “Initial Menu Screen” shown in Fig. 6-4 and click the “Measure” button of section [15]. This causes the serial number of the DUT and other data input prior to measurement start to be con- firmed and the “Signal Generator Calibration Selection Screen”...
- Page 87 6.7 Program Operations Check the items selected and click the “Start” button of section [7]. When no items are selected for calibration, a confirmation message as shown in Fig. 6-32 appears. Select “OK” to start measurement without performing the signal gen- erator calibration.
- Page 88 Section 6 Correction Software When the measurement is resumed, different connection confirmation diagrams are displayed depending on whether the channel selector is used or not. Perform operations in the manner described in 6.6.9 “Connection Confirmation Message Display.” Fig. 6-35 “Example of Signal Generator Calibration Screen Display” shows an example of a screen displayed in the process of calibration of the signal generator.
-
Page 89: Measurement
6.7 Program Operations 6.7.4 Items Confirmed Before Start of Measurement This program confirms the matters set when the “Measure” button of section [15] is selected on the “Initial Menu Screen” shown in Fig. 6-4. The following section shows the display of an error message for an item to be confirmed and actions to be taken. The figure in the circle [ ] in the text refers to the control item number on the “Initial Menu Screen”... - Page 90 Section 6 Correction Software (4) Confirmation of the address number set When the GPIB address number set is found to be outside the range for the DUT and the equipment to be used for measurement, a message as shown in Fig. 6-39 appears.
- Page 91 6.7 Program Operations (6) Confirmation of the data file output selection When the data file is not selected as the output destination of the measured re- sults, the message shown in Fig. 6-42 appears. Click the “OK” button to start measurement without outputting the measured results to the data file.
- Page 92 Section 6 Correction Software (9) Confirmation of the GPIB cable connection Confirm the GPIB cable connection between the controller and the measurement system. This program displays different messages depending on the error gener- ated. When the address number set and the target equipment are found to be different, an error message as shown in Fig.
-
Page 93: Error Codes List
6.8 Error Codes List Error Codes List When an error occurs in the process of initial file etc. input or output, an error message as shown in Fig. 6-47 is displayed. The error codes displayed in this message box comply with Appendix B “Error Message” of “Visual Basic Reference Manual” of Microsoft Corporation. - Page 94 Section 6 Correction Software 6-46 ..
-
Page 95: Section 7 Inspection Software
Section 7 Inspection Software Outline ..............System Configuration ..........Development Environment ........7.3.1 OS ..............7.3.2 Languages ............. Program Setup ............7.4.1 Setting Up Program ........7.4.2 Starting Program ........... Outline of Displayed Screen ........7.5.1 Initial Menu Screen ........7.5.2 Output Device Select (Measured Results Output Destination Selection) Screen ... -
Page 96: Outline
Section 7 Inspection Software Outline This Section is written about the automatic inspection software of “MT8802A”. System Configuration The following equipment is required to run this program. • Equipment under test: MT8802A Radio Communication Analyzer MG3633A Synthesized Signal Generator × 2 units •... -
Page 97: Development Environment
7.4.2 Starting Program Start this program by following the procedure described below. Select “MT8802A Test System” and “Inspection Ver 3.0” by clicking “Start” and “Program.” At the program start, the currently set information is read from the initial setting file and the “Initial Menu”... -
Page 98: Outline Of Displayed Screen
Section 7 Inspection Software Outline of Displayed Screen 7.5.1 Initial Menu Screen When this program starts normally, the “Initial Menu Screen” shown in Fig. 7-1 to- gether with initial data is displayed. The names of various controls and a brief sum- mary of their functions are described in the following section. - Page 99 7.5 Outline of Displayed Screen [4] Address Number (Address number display and selection field) Highlights only the equipment to be used for the selected measurement items and en- ables the change of settings. Make the entries by directly typing in the data or by using the scroll bar located at the right margin of the display field.
-
Page 100: Output Device Select
Section 7 Inspection Software 7.5.2 Output Device Select (Measured Results Output Destination Se- lection) Screen Selection of item [3] “Output_Select” on the “Initial Menu” screen shown in Fig. 7-1 displays the “Measured Results Output Destination Selection Screen” shown in Fig. 7- 2 together with the current settings. -
Page 101: Path Check (Data File Output Directory Selection)
7.5 Outline of Displayed Screen 7.5.3 Path Check (Data File Output Directory Selection) Screen This screen is displayed when item [6] “Refer” button is selected on the “Measured Results Output Destination Selection Screen” shown in Fig. 7-2, and enables the selec- tion of the destination of data file output and the creation of a new directory. - Page 102 Section 7 Inspection Software 7.5.4 Device Connection Check (Measurement System Setup Diagram Display) Screen This program displays the setup diagram of the entire measurement system on a single common screen. The following section describes the name and gives a brief summary of the function of each control effective on this screen.
-
Page 103: Screen
7.5 Outline of Displayed Screen 7.5.5 Sensor Data Input (Power Sensor and Calibration Factor Input) Screen When a measurement is to be performed using a power meter (including prior calibra- tion), the “Power Sensor and Calibration Factor Input Screen” shown in Fig. 7-5 is displayed in this program to enable the selection of a sensor and to set the calibration factor. - Page 104 Section 7 Inspection Software [5] Diode Power Sensor (Diode sensor data display field) Displays the data on the currently set sensor when a measurement is performed using the diode (low power) sensor. Editing is performed in item [11] “Data Input”. [6] Frequency data display field Displays the frequency information on the power sensor.
-
Page 105: Power Sensor Data Input
7.5 Outline of Displayed Screen 7.5.6 Power Sensor Data Input (Power Sensor Registration and Selec- tion) Screen Selection of item [1] “Data_Select” on the “Sensor Data Input Screen” shown in Fig. 7- 5 displays the “Power Sensor Registration and Selection Screen” shown in Fig. 7-6. The following section describes the name and gives a brief summary of the function of each control effective on this screen. - Page 106 Section 7 Inspection Software [6] File Type (Data file list display and selection field) If previously registered data files are present in the directory selected in item [1] and item [2] “Drive”, they are listed for selection. [7] “OK” button Restores the screen back to the “Sensor Data Input Screen”...
-
Page 107: Serial Number And Cal Factor Input
7.5 Outline of Displayed Screen 7.5.7 Serial Number and Cal Factor Input (100 MHz Calibration Factor Data Input) Screen The “100 MHz Calibration Factor Data Input” Screen shown in Fig. 7-7 appears when the prior calibration of the signal generator is selected for reference level accuracy of the spectrum analyzer function. -
Page 108: Attenuator Calibration Data Input Screen
Section 7 Inspection Software 7.5.8 Attenuator Calibration Data Input Screen The “Attenuator Calibration Data Input” Screen shown in Fig. 7-8 is displayed when the measurement of reference level accuracy or log linearity of the spectrum analyzer function is selected. The following section describes the name and gives a brief summary of the function of each control effective on this screen. - Page 109 7.5 Outline of Displayed Screen [5] Making Time (Data creation time display field) Displays the time of data registration if data for the serial number inputted in item [3] are available, or displays the current time if no relevant data are available. [6] Input Data (Data input field) Used to make changes to data in “Cal.
-
Page 110: Attenuator Data Input Of Linearity Measure
Section 7 Inspection Software 7.5.9 Attenuator Data Input of Linearity Measure (Attenuator Calibra- tion Data Input) Screen for CDMA Measurement The “Attenuator Calibration Data Input Screen for CDMA Measurement” shown in Fig. 7-9 appears when the measurement of the IF level meter of a CDMA function is selected. - Page 111 7.5 Outline of Displayed Screen [6] Date (Data creation date display field) Displays the date of data registration if data for the serial number inputted in item [5] are available, or displays the current date if no relevant data are available. [7] Time (Data creation time display field) Displays the time of data registration if data for the serial number inputted in item [5] are available, or displays the current time if no relevant data are available.
-
Page 112: Measurement Item Selection Screen
Section 7 Inspection Software 7.5.10 Measurement Item Selection Screen In this program, the measurement item selection screen varies depending on the item selected in item [2] “Measure Mode” on the “Initial Menu Screen” shown in Fig. 7-1. See the following paragraphs for more information on the item selection screen for each measurement section of Main, Analog, Measurement Software, Spectrum Ana- lyzer, and MX880231A/32A Measurement Software. - Page 113 7.5 Outline of Displayed Screen 7.5.10.2 Analog Operation Test Items Screen (Measurement Item Selection Screen for Analog Section) The “Measurement Item Selection Screen for Analog Section” shown in Fig. 7-11 is displayed when “Analog Measure” is selected in item [2] “Measure Mode” on the “Ini- tial Menu Screen”...
- Page 114 Section 7 Inspection Software [4] [Frame All] checkbox Selection of this check box results in the selection of all the TX measurement items in the frame. [5] Rx Measurement Mode (Measurement item selection field for RX side) Lists measurement items on the RX side for analog measurement, as the similar man- ner for TX side.
- Page 115 7.5 Outline of Displayed Screen [1] “Exit” bar Restores the screen to the “Initial Menu Screen” shown in Fig. 7-1. The bit of the measurement item selected for each frame is displayed in hexadecimal in item [6] “Measure Items (Hex)” on the Initial Menu screen. [2] N_Band CDMA Measurement Items (“N_Band CDMA”...
- Page 116 Section 7 Inspection Software 7.5.10.4 Spectrum Analyzer Measurement Items Screen (Measurement Item Selection Screen for Spectrum Analyzer Section) The “Measurement Item Selection Screen for Spectrum Analyzer Section” shown in Fig. 7-14 is displayed when “OPT: 07 Spectrum Anal.” is selected in item [2] “Measure Mode”...
- Page 117 7.5 Outline of Displayed Screen 7.5.10.5 MX880231A/32A Measurement Items Screen (Measurement Item Selection Screen for MX880231A/32A Measurement Software) The “Measurement Item Selection Screen for MX880231A/32A Measurement Soft- ware” shown in Fig. 7-15 is displayed when “MX880231A/32A” is selected in item [2] “Measure Mode”...
-
Page 118: Operation Procedure
Section 7 Inspection Software Operation Procedure This program offers a range of other functions in addition to the measurement func- tions. See the following sections for more information on the operation procedure for each function. 7.6.1 Selecting Output Destination of Measured Results This program enables the measured results of each measurement item to be outputted to the printer or saved on the disk. -
Page 119: Selecting Data File Output Directory
7.6 Operation Procedure 7.6.2 Selecting Data File Output Directory This program enables the data file output destination (displayed in item [3] “Data File Path” on the “Measured Results Output Destination Selection Screen” shown in Fig. 7- 2) to be changed. Follow the procedure shown below to change the output destination of measured re- sults. -
Page 120: Calibration Factor
Section 7 Inspection Software 7.6.3 Registering Power Sensor and Setting Calibration Factor The “Power Sensor and Calibration Factor Input Screen” shown in Fig. 7-5 is dis- played, for example, when the level calibration of the signal generator is performed; and the editing is enabled. Follow the procedure described below to select and register the serial number of the sensor to be used and to input the calibration factor of the sensor. - Page 121 7.6 Operation Procedure Fig. 7-18 Message Prompting Confirmation for Saving Changed Information “No (N)” ..... Although the initial file is not updated, the changes to the in- formation are applied until this program comes to the end. “Cancel” ....Restores the screen back to the “Power Sensor and Calibra- tion Factor Input Screen”...
-
Page 122: Factor
Section 7 Inspection Software 7.6.4 Setting Reference and 100 MHz Calibration Factor The “100 MHz Calibration Factor Data Input Screen” shown in Fig. 7-7 is displayed when the prior calibration of the signal generator is performed for the measurement of reference level accuracy of the spectrum analyzer. - Page 123 7.6 Operation Procedure 7.6.5 Inputting Programmable Attenuator Calibration Factor The “Attenuator Calibration Factor Input Screen” shown in Fig. 7-8 is displayed when the m easurement of “reference level accuracy” or “log linearity” of the spectrum analyzer function is selected. Follow the procedure listed below to input the data. Enter the serial number of the programmable attenuator to be used in the item [3]”Serial Number”...
-
Page 124: Inputting Attenuator Calibration Factor For Cdma Measurement
Section 7 Inspection Software 7.6.6 Inputting Attenuator Calibration Factor for CDMA Measurement The “Attenuator Calibration Factor Input Screen for CDMA Measurement” shown in Fig. 7-9 is displayed when the measurement of the IF level meter of CDMA measure- ment software is selected. Follow the procedure listed below to input the data. -
Page 125: Starting Measurement
7.6 Operation Procedure 7.6.7 Starting Measurement In this program, all the items selected in item [2] “Measure Mode” for the measurement section are continuously measured, and the measured results are saved in the set output destination (paragraph 7.6.1). Follow the procedure listed below to start the measurements. The numbers in the brackets [ ] on the text are the control numbers of the “Initial Menu Screen”... -
Page 126: Start
Section 7 Inspection Software 7.6.8 Confirmation Items Before Measurement Start When the item [7] “Measure” button is selected on the “Initial Menu Screen” shown in Fig. 7-1, a series of checks are performed before the measurement start. The confirmation items and the displayed massages are as follows. The numbers in the brackets [ ] on the text are the control numbers of the “Initial Menu Screen”... - Page 127 7.6 Operation Procedure (4) Check of address number overlap When an item with an address number (which overlaps with that of the device under test and with that of the selected equipment to be used for the measure- ment) exists, a message as shown in Fig. 7-24 is displayed. Fig.
- Page 128 Section 7 Inspection Software (6) Check of printer output selection When a printer has not been selected from the list of measured result output des- tinations in item [5], a message as shown in Fig. 7-26 is displayed. Select the “OK” button to start a measurement with no output to a printer. Selection of the “Cancel”...
- Page 129 7.6 Operation Procedure (8) Check of address number setting The settings of the address numbers of the device under test and the selected equipment to be used for the measurement are checked. The check is made based on the response to be returned when a command unique to the equipment is sent to the address numbers set in items [4] and [9].
-
Page 130: Quitting Program
Section 7 Inspection Software 7.6.9 Quitting Program Follow the procedure below to quit this program. Select the item [10] “Quit” button on the “Initial Menu Screen” shown in Fig. 7- 1. A “Message Prompting Confirmation of Quit from Program” shown in Fig. 7- 31 is displayed. -
Page 131: Section 8 Check Of Call Processing Function
Section 8 Check of Call Processing Function Outline ..............Instrument to be required ......... Check Procedure ............8.3.1 Setting parameters ........8.3.2 Checking mobile radio ........ -
Page 132: Outline
When the state display is changed from Start to Idle, turn On the power of the radio. Step 3: When the state display of the MT8802A is changed to Idle (Regist), set the NW Origination. Step 4: Confirm that the MT8802A is enabled to become the Loop Back mode. -
Page 133: Section 9 Mechanical Configuration
Fig. 9-15 A131 SG LOCAL Disassembly (1/2) Fig. 9-16 A131 SG LOCAL Disassembly (2/2) CAUTION When disassembling/reassembling the MT8802A, turn off the power switches on the front and rear panels, and discon- nect the power supply cord for the ac outlet. - Page 134 Section 9 Mechanical Configuration...
- Page 135 Section 9 Mechanical Configuration [45] 33B41481 Cover [18] HY122R1GN Z4 POWER SUPPLY2 [44] 332B41482 Plate [46] 332B41675 Bracket (for Z4 Power Supply 2) [47] 342B110670 Bracket (for Reference) [17] SEC200-5222 Z3 POWER SUPPLY1 [16] 34Y110740 A15 REFERENCE [1] 322U13212 A01 MAIN CPU [2] 322U13214 A02 BASE BAND1 [15] MM00005A SG1 [3] 322U13216 A03 BASE BAND2...
- Page 136 Section 9 Mechanical Configuration Fig. 9-2 Rear Disassembly...
- Page 137 Section 9 Mechanical Configuration [19] MM00002A RF INTERFACE [21] HPS-2H (10) POWER DIVIDER [20] 339H40998 HR S-ATT Fig. 9-3 Bottom Disassembly (1/2)
- Page 138 Section 9 Mechanical Configuration...
- Page 139 Section 9 Mechanical Configuration [58] 34Z103322 Shield Wire (EMR-24-MST) Fig. 9-5 LCD Disassembly (1/3)
- Page 140 Section 9 Mechanical Configuration [57] 34Z119925 Gasket Fig. 9-6 LCD Disassembly (2/3)
- Page 141 Section 9 Mechanical Configuration [22] LTM08C015KA Z5 LCD [23] INVC193 Z6 LCD INVERTER [49] 332B37694 Cover [26] 322U13222 A07 PANEL CONTROL [50] 332B37684 Bracket 2 (for LCD) [59] 332B37683 Bracket 1 (for LCD Inverter) Fig. 9-7 LCD Disassembly (3/3)
- Page 142 Section 9 Mechanical Configuration [35] 32E11804 Foot, Rear Left Side Top [30] 33B32676 Cover, Top [36] 32E11803B Foot, Rear Left Side Bottom [41] 339E32669 Handle [60] 332B37786B Cover, Left Side [31] 33B37421 Cover, Bottom [61] 332B38349 Side Frame [43] 323B14518 Rear Panel [32] 332B37786 Cover, Right Side [39] 32E11802 Foot, Front Left Side Top [33] 32E11804B Foot, Rear Right Side Top...
- Page 143 Section 9 Mechanical Configuration 9-11...
- Page 144 Section 9 Mechanical Configuration Fig. 9-10 A10 CONVERTER Disassembly (2/3) 9-12...
- Page 145 Section 9 Mechanical Configuration Fig. 9-11 A10 CONVERTER Disassembly (3/3) 9-13...
- Page 146 Section 9 Mechanical Configuration [15] MM00005A SG1 [14] 34Y113322 SG LOCAL UNIT Fig. 9-12 A13 SG1 Disassembly (1/3) 9-14...
- Page 147 Section 9 Mechanical Configuration [15] MM00005A SG1 [24] 339H36932C HR S-ATT Fig. 9-13 A13 SG1 Disassembly (2/3) 9-15...
- Page 148 Section 9 Mechanical Configuration Fig. 9-14 A13 SG1 Disassembly (3/3) 9-16...
- Page 149 Section 9 Mechanical Configuration [15] MM00005A SG1 [14] 34Y113322 SG LOCAL UNIT Fig. 9-15 A131 SG LOCAL Disassembly (1/2) 9-17...
- Page 150 Section 9 Mechanical Configuration [14] 34Y113322 SG LOCAL UNIT [51] 34B113336 Mounting Plate (Upper) [15] MM00005A SG1 [52] 34B113337 Mounting Plate (Under) Fig. 9-16 A131 SG LOCAL Disassembly (2/2) 9-18 ..
-
Page 151: Section 10 Exchange Module List
Section 10 Exchange Module List No PC Board/Module Name MS reference/Mfg. No. 322U13212 A01 MAIN CPU 34Y109569 322U13214 A02 BASE BAND1 34Y109570 322U13216 A03 BASE BAND2 34Y109571 MM00006A CDMA BASE BAND 34Y117989 MM00007A CDMA IQ 34Y117990 322U13220 A05 MOD DSP1 34Y109573 322U13616 A16 AF... - Page 152 Section 10 Exchange Module List 10-2 ..
Need help?
Do you have a question about the MT8802A and is the answer not in the manual?
Questions and answers