Anritsu MT8212E User Manual
Cell master
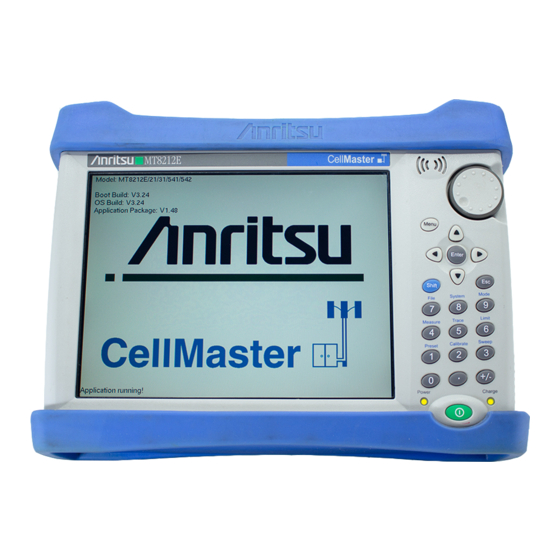
mt8212e
2 mhz to 4 ghz cable and antenna analyzer
100 khz to 4 ghz spectrum analyzer
10 mhz to 4 ghz power meter
mt8213e
2 mhz to 6 ghz cable and antenna analyzer
100 khz to 6 ghz spectrum analyzer
10 mhz to 6 ghz power meter
Hide thumbs
Also See for MT8212E:
- Maintenance manual (188 pages) ,
- User manual (92 pages) ,
- User manual (118 pages)
Table of Contents
Advertisement
Quick Links
User Guide
Cell Master
MT8212E and MT8213E
MT8212E
2 MHz to 4 GHz Cable and Antenna Analyzer
100 kHz to 4 GHz Spectrum Analyzer
10 MHz to 4 GHz Power Meter
MT8213E
2 MHz to 6 GHz Cable and Antenna Analyzer
100 kHz to 6 GHz Spectrum Analyzer
10 MHz to 6 GHz Power Meter
Appendix A provides a list of supplemental documentation for the
Cell Master features and options. The documentation set is
available as PDF files on the documentation disc and the
Anritsu website.
Anritsu Company
490 Jarvis Drive
Morgan Hill, CA 95037-2809
USA
Part Number: 10580-00250
Revision: K
Published: December 2014
Copyright 2009, 2014 Anritsu Company
Advertisement
Chapters
Table of Contents

Related Manuals for Anritsu MT8212E


Summary of Contents for Anritsu MT8212E
- Page 1 Cell Master features and options. The documentation set is available as PDF files on the documentation disc and the Anritsu website. Part Number: 10580-00250 Anritsu Company Revision: K 490 Jarvis Drive Published: December 2014 Morgan Hill, CA 95037-2809 Copyright 2009, 2014 Anritsu Company...
- Page 2 LIMITATION OF WARRANTY The foregoing warranty does not apply to Anritsu connectors that have failed due to normal wear. Also, the warranty does not apply to defects resulting from improper or inadequate maintenance, unauthorized modification or misuse, or operation outside of the environmental specifications of the product.
- Page 4 This product and its manuals may require an Export License or approval by the government of the product country of origin for re-export from your country. Before you export this product or any of its manuals, please contact Anritsu Company to confirm whether or not these items are export-controlled.
- Page 5 European Parliament and Council Directive 2002/96/EC Chinese RoHS Compliance Statement...
- Page 7 Some or all of the following five symbols may or may not be used on all Anritsu equipment. In addition, there may be other labels attached to products that are not shown in the diagrams in this manual.
- Page 8 This equipment is supplied with a rechargeable battery that could potentially leak hazardous compounds into the environment. These hazardous compounds present a risk of injury or loss due to exposure. Anritsu Company recommends removing the battery for long-term storage of the instrument and storing the battery in a leak-proof, plastic container.
-
Page 9: Table Of Contents
Chapter Overview ..........1-1 Contacting Anritsu . - Page 10 Table of Contents (Continued) Connector Care..........2-12 Connecting Procedure .
- Page 11 Table of Contents (Continued) Chapter 4—File Management Introduction ..........4-1 Managing Files .
- Page 12 Anritsu Software Tool Box ........
-
Page 13: Introduction
This chapter provides information about frequency range, available options, additional documents, general overview, preventive maintenance, and annual verification requirements for the Anritsu Handheld MT821xE Cell Master models. Throughout this manual, the term Cell Master will refer to both the MT8212E and MT8213E. -
Page 14: Contacting Anritsu
From here, you can select the latest sales, select service and support contact information in your country or region, provide online feedback, complete a "Talk to Anritsu" form to have your questions answered, or obtain other services offered by Anritsu. - Page 15 General Information 1-5 Available Options Table 1-2. Available Options (Sheet 2 of 3) MT8212E MT8213E Description MT8212E-0431 MT8213E-0431 Coverage Mapping EMF Measurement (Requires Anritsu Isotropic MT8212E-0444 MT8213E-0444 Antenna) MT8212E-0090 MT8213E-0090 Gated Sweep C/W Signal Generator (Requires CW Signal Generator MT8212E-0028 MT8213E-0028...
- Page 16 1-5 Available Options General Information Table 1-2. Available Options (Sheet 3 of 3) MT8212E MT8213E Description MT8212E-0062 MT8213E-0062 CDMA2000 1xEV-DO RF Signal Analyzer MT8212E-0063 MT8213E-0063 CDMA2000 1xEV-DO Demodulated Signal Analyzer MT8212E-0034 MT8213E-0034 CDMA2000 1xEV-DO Over-the-Air Signal Analyzer MT8212E-0046 MT8213E-0046 IEEE 802.16 Fixed WiMAX RF Signal Analyzer IEEE 802.16 Fixed WiMAX Demodulated Signal...
-
Page 17: Standard Accessories
General Information 1-6 Standard Accessories Standard Accessories The Anritsu Cell Master includes a one year warranty which includes: battery, firmware, software, and Certificate of Calibration and Conformance. The Cell Master Technical Data Sheet (P/N 11410-00485) contains a list and description of standard accessories. -
Page 18: Trace Storage
The Cable and Antenna Analyzer mode requires calibration standards for OPEN, SHORT, and LOAD (OSL) or InstaCal module, which are sold separately. Anritsu recommends allowing the instrument to warm up to typical operation Note temperature (~15 minutes) before calibrating. -
Page 19: Annual Verification
1-13 Annual Verification Anritsu recommends an annual calibration and performance verification of the Cell Master and the OSL calibration components and InstaCal module by local Anritsu service centers. The Cell Master is self-calibrating and there are no field-adjustable components. The OSL calibration components are crucial to the integrity of the calibration. - Page 20 Cell Master with the optional Dual Battery Charger. Refer to “Battery Symbols” on page 2-13 for a description of battery symbols. Use only Anritsu Company approved batteries, adapters, and chargers with this Note instrument. When using the Automotive Cigarette Lighter Adapter, always verify that the...
-
Page 21: Soft Carrying Case
General Information 1-16 Soft Carrying Case 1-16 Soft Carrying Case The Cell Master can be operated while in the soft carrying case. On the back of the case is a large storage pouch for accessories and supplies. To install the instrument into the soft carrying case: 1. -
Page 22: Tilt Bail Stand
1-17 Tilt Bail Stand General Information The soft carrying case includes a detachable shoulder strap, which can be connected to the D-rings of the case. The soft case has panel openings for the fan inlet and exhaust ports. Do not block Caution the air flow through the panels when the unit is operating. -
Page 23: Secure Environment Workplace
General Information 1-18 Secure Environment Workplace 1-18 Secure Environment Workplace This section details the types of memory in the Cell Master, how to delete stored user files in internal memory, and recommended usage in a secure environment workplace. Cell Master Memory Types The instrument contains non-volatile disk-on-a-chip memory, EEPROM, and volatile DRAM memory. -
Page 24: Recommended Usage In A Secure Environment
1-18 Secure Environment Workplace General Information Recommended Usage in a Secure Environment Set the Cell Master to save files to the external USB Flash drive: 1. Attach the external Flash drive and turn the instrument on. 2. Press the Shift button then the File (7) button. 3. -
Page 25: Introduction
Chapter 2 — Instrument Overview Introduction This chapter provides a brief overview of the Anritsu Cell Master. The intent of this chapter is to acquaint the user with the instrument. For detailed measurement information, refer to a specific measurement guide listed in Appendix A, “Measurement... -
Page 26: Front Panel Overview
2-4 Front Panel Overview Instrument Overview To turn on the Cell Master, press the green On/Off button on the front panel (Figure 2-1) Figure 2-1. Cell Master Overview Fan Inlet Port Touch Screen Submenu Keys Menu Key Shift Key Numeric Keypad and Shift Menu Keys (1 to 9, printed in blue above each key) Fan Inlet Port On/Off Button Touch Screen Main Menu Keys... -
Page 27: Front Panel Keys
Instrument Overview 2-4 Front Panel Overview Numeric keys 1 through 9 are dual purpose, depending upon the current mode of operation. The dual-purpose keys are labeled with a number on the key itself and the alternate function is printed in blue above each of the keys. Use the blue Shift key to access the functions printed on the panel. - Page 28 2-4 Front Panel Overview Instrument Overview The display of the Menu screen will vary depending on Cell Master model and Note installed options. Figure 2-3 shows the Menu key screen with shortcut icons for the installed measurement modes and four rows of user-defined shortcuts to menus and setup files. Press and hold down any submenu key or main menu key for a few seconds to add a shortcut to this screen.
-
Page 29: Touch Screen Keys
Instrument Overview 2-4 Front Panel Overview Esc Key Press this key to cancel any setting that is currently being made. Enter Key Press this key to finalize data input or select a highlighted item from a list. Arrow Keys The four arrow keys (around the Enter key) are used to scroll up, down, left, or right. The arrow keys can often be used to change a value or to change a selection from a list. -
Page 30: Keypad Menu Keys (1 To 9)
2-4 Front Panel Overview Instrument Overview Submenu Touch Screen Keys These submenu keys are arranged along the right-hand edge of the touch screen. The submenu labels change as instrument measurement settings change. The current submenu title is shown at the top of the submenu key block. Keypad Menu Keys (1 to 9) Pressing the Shift key and then a number key selects the menu function that is printed in... -
Page 31: Display Overview
Instrument Overview 2-5 Display Overview Display Overview Figure 2-5 Figure 2-6 illustrate some of the key information areas of the Cell Master in Cable & Antenna mode and Spectrum Analyzer mode. For detailed information on either mode, refer to the Measurement Guides listed in Appendix A, “Measurement Guides”. - Page 32 2-5 Display Overview Instrument Overview Figure 2-6. Spectrum Analyzer Display Measurement Settings Summary (Touch Screen Shortcuts) Frequency Standard Date and Time GPS Icon GPS Location Save Icon Battery Charge Indicator Trace Measurement Title Submenu Touch Screen Keys Main Menu Touch Screen Keys Marker Table Many of the measurement settings are used as touch screen shortcuts.
-
Page 33: Test Panel Connector Overview
Instrument Overview 2-6 Test Panel Connector Overview Test Panel Connector Overview Test panel connectors for the Cell Master are shown in Figure 2-7. Figure 2-7. Test Panel Connectors External Reference External Trigger, T1 E1 Ref. Freq. RF In (Type N) Headset jack USB Mini-B GPS (Type SMA) - Page 34 Cell Master is connected to a PC, the normal USB device detection by the computer operating system will take place. For proper detection, the applicable Anritsu Software Tool should be installed on Note the PC prior to connecting the Cell Master to the USB port.
- Page 35 Instrument Overview 2-6 Test Panel Connector Overview RF Out (Reflection In) RF output, 50 Ω Type-N female connector, for reflection measurements. Maximum ouput and damage level are provided in the Technical Data Sheet (refer to Appendix To prevent damage to your instrument, do not use pliers or a plain wrench to tighten the Type-N connector.
-
Page 36: Connector Care
2-7 Connector Care Instrument Overview Connector Care Visually inspect connectors for general wear, for cleanliness, and for damage such as bent pins or connector rings. Repair or replace damaged connectors immediately. Dirty connectors can limit the accuracy of your measurements. Damaged connectors can damage the instrument. -
Page 37: Battery Symbols
Instrument Overview 2-8 Symbols and Indicators Cal Status: ON, Standard The Cell Master has been calibrated with discrete Open, Short, and Load components. This is a Standard calibration indicating it is not possible to change the frequency range after calibration without performing another calibration. Cal Status: ON, Flex, Insta The Cell Master has been calibrated with the InstaCal module. -
Page 38: Additional Symbols
The green Charge LED flashes when the battery is charging, and remains on steady when the battery is fully charged. Caution Use only Anritsu-approved batteries, adapters, and chargers with this instrument. When operating from external power without a battery installed, the battery symbol is replaced by a red plug body (Figure 2-11). -
Page 39: Text Entry
Instrument Overview 2-9 Data Entry Some parameters (such as for antennas or couplers) can be added to list boxes by creating them and importing them using Master Software Tools (MST) or Anritsu Line Sweep Tools (LST). Text Entry When entering text, as when saving a measurement, the touch screen keyboard is displayed (Figure 2-12). - Page 40 2-10 Mode Selector Menu Instrument Overview 2-10 Mode Selector Menu To access the functions under the Mode menu, select the Shift key, then the Mode (9) key. Use the directional arrow keys, the rotary knob, or the touch screen to highlight the selection, and press the Enter key to select.
-
Page 41: Introduction
Quick Start Guide 3-2 Measurement Mode Selection Chapter 3 — Quick Start Guide Introduction This chapter provides a brief overview of basic measurement setups. For detailed measurement information, refer to a specific measurement guide listed in Appendix A, “Measurement Guides”. This chapter provides quick start measurement information for the following measurement modes: •... -
Page 42: Cable & Antenna Analyzer
3-3 Cable & Antenna Analyzer Quick Start Guide Cable & Antenna Analyzer Set the instrument to Cable & Antenna Analyzer mode as described in the previous section. Select the Measurement Type Press the Measurement main menu key and select the appropriate measurement. Figure 3-2. -
Page 43: Turn On Markers
Quick Start Guide 3-3 Cable & Antenna Analyzer 3. Press the Bottom submenu key and use the keypad, rotary knob, or the arrow keys to edit the bottom scale value. Press Enter to set. For Amplitude in Smith Chart measurements, refer to “Smith Chart” in the Cable & Note Antenna Measurement Guide listed in Appendix... -
Page 44: Single Limit Line
3-3 Cable & Antenna Analyzer Quick Start Guide Single Limit Line 1. Press Shift and then Limit (6) to enter the Limit menu. 2. Press the Limit On/Off key to turn on the Limit. 3. Press Single Limit and then use the numeric keypad, the arrow keys, or the rotary knob to change the limit value and then press Enter. -
Page 45: Dtf Setup
Quick Start Guide 3-3 Cable & Antenna Analyzer DTF Setup 1. Press the Measurements main menu key and select DTF Return Loss or DTF VSWR. 2. Press the Freq/Dist main menu key. 3. Press the Units submenu key and select m to display distance in meters or ft to display distance in feet. -
Page 46: Calibrate With Osl Calibration
3-3 Cable & Antenna Analyzer Quick Start Guide Calibrate with OSL Calibration Refer to the Cable & Antenna Measurement Guide listed in Appendix A Note calibration details. 1. Press the Freq/Dist main menu key and enter the appropriate frequency range 2. - Page 47 Quick Start Guide 3-3 Cable & Antenna Analyzer CALIBRATION OPEN SHORT RF OUT/ LOAD REFLECTION Test Port TEST PORT CABLE (OPTIONAL) MT8212E CellMaster Menu Enter Shift Mode System File Limit Trace Measure Sweep Calibrate Preset Power Charge Figure 3-5. Calibration Setup with OSL Cal...
-
Page 48: Spectrum Analyzer
3-4 Spectrum Analyzer Quick Start Guide Spectrum Analyzer Set the instrument to Spectrum Analyzer mode as described in Section 3-2 “Measurement Mode Selection” on page 3-1. Set Start and Stop Frequencies 1. Press the Freq main menu key. 2. Press the Start Freq submenu key. 3. -
Page 49: Set The Amplitude
Quick Start Guide 3-4 Spectrum Analyzer Set the Amplitude Press the Amplitude main menu key to display the Amplitude menu. Set Amplitude Reference Level and Scale 1. Press the Reference Level submenu key and use the arrow keys, rotary knob, or the keypad to change the reference level. -
Page 50: Single Limit Line
3-4 Spectrum Analyzer Quick Start Guide Single Limit Line Press the Limit menu key to display the Limit menu. 1. Press the Limit (Upper / Lower) submenu key to select the desired limit line, Upper or Lower. 2. Activate the selected limit line by pressing the On Off submenu key so that On is underlined. -
Page 51: Setting Up Markers
Quick Start Guide 3-4 Spectrum Analyzer Setting Up Markers Press the Marker main menu key to display the Marker menu. Selecting, Activating, and Placing a Marker 1. Press the Marker 1 2 3 4 5 6 submenu key and then select the desired marker using the touch screen marker buttons. - Page 52 3-4 Spectrum Analyzer Quick Start Guide 2. Press the Marker Table On Off submenu key so that On is underlined. All marker and delta marker data are displayed in a table under the measurement graph. Figure 3-7. Marker Table 3-12 PN: 10580-00250 Rev.
-
Page 53: Select A Smart Measurement Type
Quick Start Guide 3-4 Spectrum Analyzer Select a Smart Measurement Type In Spectrum Analyzer mode, press Shift then Measure (4) and select a smart measurement using the submenu keys. Figure 3-8. Spectrum Analyzer Measure Menu Cell Master UG PN: 10580-00250 Rev. K 3-13... -
Page 54: Group Edit
3-4 Spectrum Analyzer Quick Start Guide Group Edit The Group Edit feature allows markers and limit lines to be copied from one trace to all of the traces in a folder. In addition, the title and subtitle can be quickly renamed for all of the traces in a folder. -
Page 55: Print All To Pdf
Quick Start Guide 3-4 Spectrum Analyzer Print All to PDF If Adobe Acrobat is installed on the computer with MST, traces can be converted to PDF using Print All and selecting Print to PDF. This creates a compact and portable PDF report of all of the traces in a folder with just one click. -
Page 56: Saving Measurements
Saving files in .VNA or .SPA is recommended as it enables users to edit, view, and analyze traces with Master Software Tools (MST). Anritsu recommends saving files to the internal memory and then transferring the files to an external USB memory device if needed. Refer to Chapter 4, “Copying... -
Page 57: Introduction
(you must select VNA before saving). Note that both DAT and VNA file types support full data point resolution (up to 2204), but older Anritsu PC software programs may support up to only 551 points. While files may appear with less points, full point resolution is available from these files in Line Sweep Tools. -
Page 58: Save Dialog Box
4-2 Managing Files File Management Create a Menu Shortcut for a Setup file Press the Recall submenu key to display saved setup files. Locate the setup file to shortcut and then press and hold on the file name for a few seconds. Select a location in the shortcut grid to save the setup file. -
Page 59: Quick Name Matrix
File Management 4-2 Managing Files Quick Name Matrix The Quick Name Matrix button displays in the Cable and Antenna Analyzer measurement mode. The Quick Name Matrix button allows contractors and field personnel to save time entering files names when they are making measurements. Using the touchscreen, press the Quick Name Matrix key shown in Figure 4-1 to open the Quick Name Matrix shown in... -
Page 60: Recall Files
4-2 Managing Files File Management Recall Files The recall menu enables you to view all the Measurement and Setup files in the internal memory and external USB flash drive. You can sort the recall menu by name, date, or type. You can also select to view only measurement files or setup files by pressing File Type on the Recall dialog box and selecting the file type you want to view. -
Page 61: Copying Files
File Management 4-2 Managing Files Copying Files The steps below detail copying a file from internal memory to an external flash drive. Select the files to copy in the top window and the location for the files to be copied to in the bottom window (Figure 4-4). -
Page 62: Deleting Files
4-2 Managing Files File Management Deleting Files Delete a Selected File or Files Press the Delete submenu key. Highlight the file to be deleted with the touchscreen or the Up/Down arrow keys. Press the Select or De-Select key. The file will be outlined in blue when selected. -
Page 63: File Menu Overview
File Management 4-3 File Menu Overview File Menu Overview Open this menu by pressing the Shift key, then the File (7) key. File Save Measurement As FileName.vna Save Save Measurement Save Change Spectrum Save Analyzer Quick Name Save On... Mode Only Event ...Crossing Limit Change... -
Page 64: File Menu
4-4 File Menu File Management File Menu Key Sequence: File Save Measurement As: This key will save the current setup with a user defined file name. The default file name is changed using the Save submenu. File To change the default file name, type in a new file with the touch screen Save Measurement As keyboard and press Enter. -
Page 65: Save Menu
File Management 4-4 File Menu Save Menu Key Sequence: File > Save Measurement Key Sequence: File > Save Save Change Quick Name: Press this submenu key to change the Quick Names Change at the bottom of the touch screen keyboard (Figure 4-1). -
Page 66: Save Location Menu
4-4 File Menu File Management Save Location Menu Key Sequence: File > Save > Change Save Location This menu and dialog box is used to create folders and select where the Cell Master will save the current file. Select folders or drives with the Save Location Up/Down keys, the rotary knob or the touch screen. -
Page 67: Save On... Menu
File Management 4-4 File Menu Save On... Menu Key Sequence: File > Save On Event In Spectrum Analyzer mode, this menu is used to auto save measurements to internal memory after: Save On..Crossing Limit: Toggling this submenu key to On will save the ...Crossing Limit measurement to internal memory when the measurement has crossed a defined limit line created with the Limit menu. -
Page 68: Recall Menu
4-4 File Menu File Management Recall Menu Key Sequence: File > Recall This menu and dialog box is used to create folders and select where the Cell Master will save the current file. Select folders or drives with the Recall Up/Down keys, the rotary knob or the touch screen. -
Page 69: Copy Menu
File Management 4-4 File Menu Copy Menu Key Sequence: File > Copy This menu and dialog box is used to copy folders and files. Select folders or files with the Up/Down keys, the rotary knob or the touch screen. Figure 4-4 Copy on page 4-5 shows the Copy dialog box with two Jpeg images and one... -
Page 70: Delete Menu
4-4 File Menu File Management Delete Menu Key Sequence: File > Delete This menu and dialog box is used to delete folders and files. Select folders or files with the Up/Down keys, the rotary knob or the touch screen. Delete Sort By: Press this submenu key to sort files and folders by name, by Sort By the type of file, or by the date that the file or folder was saved. -
Page 71: Introduction
Chapter 5 — System Operations Introduction This chapter will review the Cell Master system operations. • “System Menu Overview” on page 5-2 • “System Menu” on page 5-3 • “Preset Menu” on page 5-7 • “Self Test” on page 5-7 •... -
Page 72: System Menu Overview
5-2 System Menu Overview System Operations System Menu Overview To access the functions under the System menu, select the Shift key, then the System (8) key. System System Options Status Date & Self Time GPS Info Reset Test Factory Application GPS Voltage Defaults Self... -
Page 73: System Menu
System Operations 5-3 System Menu System Menu Key Sequence: Shift, System (8) Status: Pressing this submenu key displays the current system status, including the operating system and firmware versions, temperatures and System other details such as current battery information. Press Esc or Enter to return to normal operation. -
Page 74: System Options Menu
5-3 System Menu System Operations System Options Menu Key Sequence: Shift, System (8) > System Options Date and Time: This key brings up a dialog box for setting the current date and time. Use the submenu keys or the Left/Right arrow keys to select the System Options field to be modified. -
Page 75: System Options 2/2 Menu
System Operations 5-3 System Menu System Options 2/2 Menu Key Sequence: Shift, System (8) > System Options > More Share CF & Pwr Offset All Modes Not Shared: Press this submenu key to toggle the setting to System Options 2/2 All Modes or to Not Shared. -
Page 76: Reset Menu
5-3 System Menu System Operations Reset Menu Key Sequence: Shift, System (8) > System Options > Reset Factory Defaults: Restores the instrument to the factory default values, Reset including language, volume, brightness setting, and user created shortcut icons on the Menu screen. Press the Enter key to initiate the reset, and Factory power-cycle the instrument. -
Page 77: Preset Menu
If the Cell Master is within the specified operating range with a charged battery, and the self test fails, then contact your Anritsu Service Center (http://www.anritsu.com/Contact.asp). To start a self test when the system is already powered up: 1. -
Page 78: Updating The Cell Master Firmware
Updating the Cell Master Firmware The Cell Master is updated using a USB memory stick. Updated product information can be found on the Anritsu website: http://www.anritsu.com/ Search for the product model number. The firmware updates are on the product page under the Library tab in the “Drivers, Software Downloads”... -
Page 79: Introduction
(parts per billion). No accuracy specifications apply if no GPS satellites are acquired. In order to acquire data from the GPS satellites, the user must have line-of-sight to the satellites or the antenna must be placed outside without any obstructions. An Anritsu GPS antenna is required. - Page 80 6-3 Activating the GPS Feature GPS (Option 31) 4. When the GPS receiver has tracked at least three satellites, the GPS icon will change to GREEN. Latitude and Longitude information is displayed in the white bar on top of the display.
-
Page 81: Saving And Recalling Traces With Gps Information
GPS (Option 31) 6-4 Saving and Recalling Traces with GPS Information Saving and Recalling Traces with GPS Information Saving Traces with GPS Information The GPS coordinates of a location can be saved along with a measurement trace. Refer to the “Save Menu”... -
Page 82: Gps Menu
Short/Open: A short or open exists between the antenna and the connection. If this message is displayed, then remove and replace the GPS antenna. If the message persists, then try another Anritsu GPS antenna. If the message persists, then contact your nearest Anritsu Service Center. - Page 83 The bias tee menu can be accessed from the applications options menu and in transmission measurement, it can also be accessed from the Measure main menu. TMA-DD RX / TX (Bias Tee) RF OUT RF IN MT8212E CellMaster Menu Enter Shift Mode System...
- Page 84 PN: 10580-00250 Rev. K Cell Master UG...
-
Page 85: Introduction
Chapter 8 — Anritsu Tool Box Introduction The Anritsu Tool Box is a suite of applications that provide an interface between Anritsu handheld RF instruments and a PC. The instrument connects to the computer via a USB, Ethernet, or serial port. Depending on the application selected, available functions range... -
Page 86: Anritsu Software Tool Box
Tool Box Installer on the Anritsu Software DVD Anritsu Software Tool Box The Anritsu Tool Box serves as a central location from which you can open a previously saved measurement, visit the Anritsu website, or launch an application. To open the Tool Box, either double-click the desktop shortcut or select the Tool Box from the Windows Start menu, under All Programs and the Anritsu folder. -
Page 87: Software Tools
Windows Start menu. The following sections list the top features and functions of the tools contained in the Anritsu Tool Box. For a detailed description of these features and how to perform specific tasks, refer to each application’s Help system. -
Page 88: Easytest Tools
Tools easyMap Tools is the new name for Anritsu Map Master. The application allows users to find and prepare geo-referenced maps and to build floor plans suitable for Anritsu Handheld Spectrum Analyzers with Interference Analysis or Coverage Mapping capabilities (Option 25 or Option 431, respectively). -
Page 89: A-1 Introduction
This appendix provides a list of supplemental documentation for Cell Master features and options. These measurement guides are available as PDF files on the documentation disc and the Anritsu website. Table A-1. Analyzers and Analyzer Options (Sheet 1 of 3) - Page 90 Measurement Guides Table A-1. Analyzers and Analyzer Options (Sheet 2 of 3) Related Document Cell Master Feature (Required Option) (Part Number) cdmaOne/CDMA2000 1X Over-the-Air Signal Analyzer (0033) CDMA2000 1xEV-DO Over-the-Air Signal Analyzer (0034) 3GPP2 Signal Analyzer cdmaOne/CDMA2000 1X RF Signal Analyzer (0042) Measurement Guide cdmaOne/CDMA2000 1X Demodulated Signal Analyzer (0043) (10580-00235)
- Page 91 Measurement Guides Table A-1. Analyzers and Analyzer Options (Sheet 3 of 3) Related Document Cell Master Feature (Required Option) (Part Number) Handheld Instruments Documentation Documentation Disc (10920-00060) Cell Master UG PN: 10580-00250 Rev. K...
- Page 92 Measurement Guides PN: 10580-00250 Rev. K Cell Master UG...
- Page 93 ....4-9 contacting Anritsu ... . . 1-2 connector panel ....2-9 S412E product page .
- Page 94 ....4-2 contacting Anritsu ... . . 1-2 recall menu ..... 4-12 connectors .
- Page 96 Anritsu Company 490 Jarvis Drive Anritsu utilizes recycled paper and environmentally conscious inks and toner. Morgan Hill, CA 95037-2809 http://www.anritsu.com...
- Page 97 Measurement Guide 3GPP Signal Analyzer or Anritsu RF and Microwave Handheld Instruments BTS Master™, Cell Master™, Spectrum Master™, LMR Master™ Demod GSM/GPRS/EDGE Option 40 Option 41 W-CDMA/HSPA+ Option 44 Option 65 Option 35 TD-SCDMA/HSPA+ Option 60 Option 61 Option 38...
- Page 98 BTS Master, Cell Master, LMR Master, and Spectrum Master are trademarks of Anritsu Company. NOTICE Anritsu Company has prepared this manual for use by Anritsu Company personnel and customers as a guide for the proper installation, operation and maintenance of Anritsu Company equipment and computer programs.
- Page 99 Some or all of the following five symbols may or may not be used on all Anritsu equipment. In addition, there may be other labels attached to products that are not shown in the diagrams in this manual.
- Page 100 These hazardous compounds present a risk of injury or loss due to exposure. Anritsu Company recommends removing the battery for long-term storage of the instrument and storing the battery in a leak-proof plastic container. Follow the environmental storage requirements specified in the product technical data sheet.
- Page 101 Contacting Anritsu ........
- Page 102 Table of Contents (Continued) Chapter 3—W-CDMA/HSPA+ Signal Analyzer Introduction ..........3-1 W-CDMA/HSPA+ Measurements .
- Page 103 Table of Contents (Continued) 3-11 Setup Menu ..........3-28 Setup 1/2 Menu .
- Page 104 Table of Contents (Continued) TD-SCDMA/HSPA+ Menus ........4-13 Freq (Frequency) Menu .
- Page 105 Table of Contents (Continued) LTE Over-the-Air (OTA) Measurements ......5-16 Antenna Status ......... . 5-16 Scanner .
- Page 106 Table of Contents (Continued) 5-19 Other Menus ..........5-46 Chapter 6—TD-LTE Signal Analyzer Introduction .
- Page 107 Anritsu easyMap Tools ........
- Page 108 Table of Contents (Continued) Coverage Mapping Menu ........7-12 Mapping Save/Recall Menu.
- Page 109 Chapter 1 — General Information Introduction This Measurement Guide documents 3GPP signal analysis for the following Anritsu instruments: • BTS Master • Cell Master • Spectrum Master • LMR Master Not all instrument models offer every option. Please refer to the Technical Data Note Sheet of your instrument for available options.
- Page 110 1-2 3GPP Signal Analysis Overview General Information LTE signal analysis is described in Chapter 5, “LTE Signal Analyzer”. • Option 541: LTE/LTE-A RF Measurements • Option 542: LTE/LTE-A Modulation Measurements • Option 546: LTE/LTE-A OTA Measurements (requires Options 31 and 542 for full functionality) •...
- Page 111 From here, you can select the latest sales, select service and support contact information in your country or region, provide online feedback, complete a “Talk to Anritsu” form to have your questions answered, or obtain other services offered by Anritsu.
- Page 112 1-4 Contacting Anritsu General Information PN: 10580-00234 Rev. T 3GPP MG...
- Page 113 Chapter 2 — GSM/GPRS/EDGE Signal Analyzer Introduction The Global Systems for Mobile (GSM) communication is a globally accepted standard for digital cellular communication. GSM uses a combination of Frequency Division Multiple Access (FDMA) and Time Division Multiple Access (TDMA). Within each band are approximately one hundred available carrier frequencies on 200 kHz spacing (FDMA), and each carrier is broken up into time-slots so as to support eight separate conversations (TDMA).
- Page 114 2-2 Measurement Setup GSM/GPRS/EDGE Signal Analyzer Measurement Setup Please refer to the instrument User Guide for detailed information on how to select the GSM/GPRS/EDGE Signal Analyzer mode, set up the frequency range, amplitude, limit lines, markers, and file management. GSM/GPRS/EDGE RF Measurements GSM RF measurements consists of Spectrum, Power versus Time (frame), Power versus Time (slot), Summary and Demodulator.
- Page 115 GSM/GPRS/EDGE Signal Analyzer 2-4 Measurement Display Figure 2-1. GSM Single Channel Measurement Figure 2-2. GSM Multi-Channel Measurement 3GPP MG PN: 10580-00234 Rev. T...
- Page 116 2-4 Measurement Display GSM/GPRS/EDGE Signal Analyzer To display Power versus Time (Frame) press the Power versus Time (Frame) submenu key to activate the Power versus Time (Frame) measurement (Figure 2-3). Figure 2-3. GSM Power vs. Time (Frame) Measurement To display Power versus Time (Slot) press the Power versus Time (Slot) submenu key to activate the Power versus Time (Slot) measurement (Figure 2-4).
- Page 117 GSM/GPRS/EDGE Signal Analyzer 2-5 Demodulator Demodulator This measurement demodulates the GSM/GPRS/EDGE signal and displays the vector with Phase Error, EVM, Origin Offset, C/I, Modulation Type and Magnitude Error (as applicable). Figure 2-5 Figure 2-6. To demodulate the GSM/EDGE signal: 1. Set the frequency as described in the User Guide. 2.
- Page 118 2-5 Demodulator GSM/GPRS/EDGE Signal Analyzer Figure 2-6. EDGE Demodulator Measurement To display the GSM/EDGE Summary screen (Figure 2-7), press the GSM/EDGE Summary soft key. Figure 2-7. GSM/EDGE Summary PN: 10580-00234 Rev. T 3GPP MG...
- Page 119 GSM/GPRS/EDGE Signal Analyzer 2-6 GSM/GPRS/EDGE Mode Pass/Fail GSM/GPRS/EDGE Mode Pass/Fail The unit can store test sets for testing base station performance and can recall these test sets for quick, easy measurements. These test sets are for reference only and can be edited using Master Software Tools.
-
Page 120: Measurement Results
2-7 Measurement Results GSM/GPRS/EDGE Signal Analyzer Measurement Results Average Burst Power The average burst power over 10 measured burst power values. This average is restarted when a new frequency is selected. Channel Power Channel power measures the average power in a GSM/EDGE frame in the frequency specified. - Page 121 GSM/GPRS/EDGE Signal Analyzer 2-7 Measurement Results Carrier to Interference Ratio – C/I (dB) Carrier to Interference Ratio is the ratio of the desired carrier power to the undesired signal power (interferer) in dB. This value is an estimate that is derived from the measured RMS EVM value.
- Page 122 2-8 GSM/GPRS/EDGE Menus GSM/GPRS/EDGE Signal Analyzer GSM/GPRS/EDGE Menus Figure 2-9 show the map of GSM/GPRS/EDGE menus. The following sections describe GSM/GPRS/EDGE main menus and associated submenus. The submenus are listed in the order they appear on the display from top to bottom under each main menu. Frequency Amplitude Setup...
- Page 123 GSM/GPRS/EDGE Signal Analyzer 2-9 Freq (Frequency) Menu Freq (Frequency) Menu Key Sequence: Freq Center Freq: Press the Freq key followed by the Center Freq submenu key Frequency and enter the desired frequency using the keypad, the arrow keys, or the rotary knob.
- Page 124 2-10 Amplitude Menu GSM/GPRS/EDGE Signal Analyzer 2-10 Amplitude Menu Key Sequence: Amplitude Power Offset: Enter the power offset to automatically adjust for the loss or Amplitude gain through any external cables, attenuators and couplers. The power can be offset from 0 dB to 100 dB in either direction. Press the Power Offset key, Power Offset then enter a value using the arrow keys, rotary knob, or numeric keypad.
- Page 125 GSM/GPRS/EDGE Signal Analyzer 2-12 Measurements Menu 2-12 Measurements Menu Key Sequence: Measurements Spectrum: Opens the “Spectrum Menu” on page 2-14. Measurements Power versus Time (Frame): Displays approximately eight and a half slots of the GSM/EDGE signal frame starting from the first active slot found. The Spectrum screen also displays Channel Power, Occupied Bandwidth, Frequency Error in PPM and Hz, Modulation Type, Burst Power, Avg Burst Power, and BSIC.
- Page 126 2-12 Measurements Menu GSM/GPRS/EDGE Signal Analyzer Spectrum Menu Key Sequence: Measurements > Spectrum Channel Spectrum: Displays the spectrum of the selected channel. The Spectrum screen also displays Channel Power, Occupied Bandwidth, Frequency Error in PPM and Hz, Burst and Average Burst Power, and the Base Channel Station Identity Code (BSIC).
- Page 127 GSM/GPRS/EDGE Signal Analyzer 2-12 Measurements Menu Demodulator Menu Key Sequence: Measurements > Demodulator I/Q View: Allows selection between Vector or Const. Demodulator Back: Returns to the “Measurements Menu”. I/Q View Vector Const Back Figure 2-15. GSM/GPRS/EDGE Freq Menu 3GPP MG PN: 10580-00234 Rev.
- Page 128 2-12 Measurements Menu GSM/GPRS/EDGE Signal Analyzer Pass/Fail Mode Menu Key Sequence: Measurements > Pass/Fail Mode Select Pass/Fail Test: Display the available test sets in the Select Pass/Fail Mode Pass/Fail Test window. Select Reset: Resets the Pass/Fail Mode test. Pass/Fail ScriptMaster: Opens the Select File by Scrolling window and also lists Test Recall and Back submenu keys.
- Page 129 GSM/GPRS/EDGE Signal Analyzer 2-13 Marker Menu 2-13 Marker Menu Key Sequence: Marker This menu is available only in Multi-Channel Spectrum view and opens the MC Spectrum submenu. See the “Spectrum Menu” on page 2-14 for details. 2-14 Sweep Menu Key Sequence: Shift > Sweep (3) key Sweep Single/Continuous: This submenu key toggles between Sweep continuous sweep and single sweep.
- Page 130 2-15 Measure Menu GSM/GPRS/EDGE Signal Analyzer 2-18 PN: 10580-00234 Rev. T 3GPP MG...
- Page 131 Chapter 3 — W-CDMA/HSPA+ Signal Analyzer Introduction The WCDMA/HSPA+ signal analyzer supports the following measurement modes: • RF Measurements • Demodulator • Over-The-Air (OTA) Measurements Connect the instrument to any Node B/BTS for accurate RF and demodulator measurements. The W-CDMA/HSPA+ Demodulator option demodulates both W-CDMA and Note HSPA+ signals.
- Page 132 3-2 W-CDMA/HSPA+ Measurements W-CDMA/HSPA+ Signal Analyzer W-CDMA/HSPA+ Measurements Use an applicable band pass filter to eliminate out of band signals that can cause Note mixer saturation. Carrier Frequency Carrier Frequency is the selected transmitter operating center frequency entered by the user or calculated from the signal standard and channel number entered by the user.
- Page 133 W-CDMA/HSPA+ Signal Analyzer 3-2 W-CDMA/HSPA+ Measurements Channel Power Channel power is the total power transmitted in the 5 MHz W-CDMA channel specified. Channel Power measures the node B/base station transmitting power across the entire 5 MHz W-CDMA (BTS) channel. Channel power is displayed in dBm and Watts. For Over the Air (OTA) measurements, the channel power will vary as the signal path from the node B transmitter to the instrument varies.
- Page 134 3-2 W-CDMA/HSPA+ Measurements W-CDMA/HSPA+ Signal Analyzer Peak to Average Power Peak to Average power is the ratio of the peak power and the RMS power of the signal calculated over one frame interval and is displayed in dB. Peak CD Error (Peak Code Domain Error) PCDE takes the noise and projects the maximum impact it will have on all OVSF codes.
- Page 135 W-CDMA/HSPA+ Signal Analyzer 3-3 General Measurement Setups General Measurement Setups Please refer to the User Guide for information on selecting the W-CDMA/HSPA+ Signal Analyzer mode, setting up frequency, amplitude, power offset for compensating external loss, limit lines, markers, and file management. Scrambling Code Setup The scrambling code can be set up automatically or manually.
- Page 136 3-3 General Measurement Setups W-CDMA/HSPA+ Signal Analyzer Threshold Setup The threshold level is an advanced setting that can be set to indicate which codes are considered active. In the Code Domain Power screen, the threshold level is indicated by a horizontal dotted red line.
- Page 137 W-CDMA/HSPA+ Signal Analyzer 3-4 W-CDMA/HSPA+ RF Measurements W-CDMA/HSPA+ RF Measurements The W-CDMA/HSPA+ RF Measurements consist of three measurements: • Spectrum • Adjacent Channel Leakage Ratio (ACLR) • Spectral Emission Mask To make W-CDMA RF measurements, connect the RF in connector to the node B equipment. Screen captured images are provided as examples.
- Page 138 3-4 W-CDMA/HSPA+ RF Measurements W-CDMA/HSPA+ Signal Analyzer 4. Move the cursor, using the directional arrow keys or the rotary knob, to select the desired channel. The Channel Number can also be directly entered using the numerical keypad. Figure 3-1. Band Spectrum Channel Spectrum Setup The channel spectrum screen displays the selected channel signal and the following measurements: channel power in dBm and Watts, occupied bandwidth, and peak to average...
- Page 139 W-CDMA/HSPA+ Signal Analyzer 3-4 W-CDMA/HSPA+ RF Measurements Figure 3-2. Channel Spectrum ACLR Measurement Setup ACLR (Adjacent Channel Leakage Ratio) is defined as the ratio of the amount of leakage power in an adjacent channel to the total transmitted power in the main channel and is displayed in table format under the bar graph.
- Page 140 3-4 W-CDMA/HSPA+ RF Measurements W-CDMA/HSPA+ Signal Analyzer 3. Press the RF Measurements submenu key. The ACLR measurement uses the filtered channel power to determine the ACLR Note values and it is listed as filtered on the display. In all other screens the unfiltered channel power is displayed as channel power.
- Page 141 W-CDMA/HSPA+ Signal Analyzer 3-4 W-CDMA/HSPA+ RF Measurements ACLR Multi-channel ACLR Procedure 1. Press the Measurements main menu key. 2. Press the RF Measurements submenu key. 3. Press the ACLR submenu key to activate the ACLR measurement. 4. Press the ACLR submenu key again to open the ACLR menu. 5.
- Page 142 3-4 W-CDMA/HSPA+ RF Measurements W-CDMA/HSPA+ Signal Analyzer Spectral Emission Mask Procedure 1. Set the measurement frequency using one of the methods listed in the User Guide. 2. Press the Measurements main menu key. 3. Press the RF Measurements submenu key. 4.
- Page 143 W-CDMA/HSPA+ Signal Analyzer 3-4 W-CDMA/HSPA+ RF Measurements 5. Press the Spectral Emission Summary submenu key to display the Spectral Emission Summary table (Figure 3-6). Figure 3-6. Spectral Emission Mask Summary RF Summary The RF Summary displays the critical transmitter performance measurements in the table format, without demodulating the W-CDMA/HSPA+ signal.
- Page 144 3-5 Demodulator W-CDMA/HSPA+ Signal Analyzer Figure 3-7. RF Summary Demodulator In the demodulator mode, the RF In is connected to the node B equipment and the unit will demodulate the W-CDMA signal. The W-CDMA/HSPA+ demodulator has Code Domain Power (CDP), HSPDA, Codogram and Modulation Summary screens. The W-CDMA/HSPA+ Demodulator option demodulates both W-CDMA and Note HSPA+ signals.
- Page 145 W-CDMA/HSPA+ Signal Analyzer 3-5 Demodulator Code Domain Power (CDP) Procedure 1. Set the measurement frequency using one of the methods listed in the User Guide. 2. Press the Setup main menu key. 3. Press the Scrambling Code submenu key to select Auto so that the scrambling code is automatically detected.
- Page 146 3-5 Demodulator W-CDMA/HSPA+ Signal Analyzer Figure 3-8. CDP Measurement Summary Activating Markers 1. Press the Marker main menu key to display the Marker menu. 2. Press the Marker submenu key to select the appropriate marker (1 through 6). The underlined marker number is the currently selected marker. 3.
- Page 147 W-CDMA/HSPA+ Signal Analyzer 3-5 Demodulator HSPA+ Setup HSPA+ displays the spreading factor (OVSF codes) 256 or 512 codes and high speed downlink physical shared channel codes HS-PDSCH. The right or left active codes can be selected using the cursor. The selected code power versus time and constellation are displayed. The demodulator also displays CPICH, P-CCPCH, S-CCPCH, PICH, P-SCH and S-SCH power in the table format.
- Page 148 3-5 Demodulator W-CDMA/HSPA+ Signal Analyzer 6. Press the IQ Persistence submenu key and use the keypad or rotary knob to set the IQ Persistence to 2. The instrument will display the constellation diagram after the first sample, and then update the constellation diagram after the second sample. IQ Persistence can be set as high as 48.
- Page 149 W-CDMA/HSPA+ Signal Analyzer 3-5 Demodulator 10. Press the Codogram submenu key to activate the Codogram measurement. 11. Press the Codogram submenu key again to list the Codogram menu and set the zoom and test time parameters for the measurement. 12. Press the Zoom submenu key to select the appropriate zoom level. The Zoom key toggles between 32, 64, and 128.
- Page 150 3-6 Over-the-Air Measurements W-CDMA/HSPA+ Signal Analyzer Over-the-Air Measurements OTA Setup In Over-the-Air (OTA) mode, the instrument is not connected to the node B equipment. The OTA screen displays the six strongest scrambling codes as bar graphs. Displayed underneath the bar graphs are the related scrambling code number, CPICH, Ec/Io, Ec, and pilot dominance in the table format.
- Page 151 W-CDMA/HSPA+ Signal Analyzer 3-6 Over-the-Air Measurements Figure 3-11. OTA Measurement Summary 3GPP MG PN: 10580-00234 Rev. T 3-21...
- Page 152 3-6 Over-the-Air Measurements W-CDMA/HSPA+ Signal Analyzer W-CDMA Summary Setup W-CDMA summary (Figure 3-12) displays the critical W-CDMA measurements from RF and demodulation measurements. Figure 3-12. W-CDMA Measurement Summary W-CDMA Summary Procedure 1. Set the measurement frequency using one of the methods listed in the User Guide. 2.
- Page 153 W-CDMA/HSPA+ Signal Analyzer 3-7 Pass/Fail Mode Setup 10. Press the Measurements main menu key. 11. Press the W-CDMA Summary submenu key. Pass/Fail Mode Setup The instrument stores the five test models specified in the 3GPP specification (TS 125.141) for testing base station performance and recalls these models for quick easy measurements. After selection of a test model, the instrument displays test results in tabular format with clear PASS or FAIL indications that include min/max threshold.
- Page 154 3-8 W-CDMA/HSPA+ Menus W-CDMA/HSPA+ Signal Analyzer W-CDMA/HSPA+ Menus Figure 3-14 show the map of the W-CDMA/HSPA+ menus. The following sections describe W-CDMA/HSPA+ main menus and associated submenus. The submenus are listed in the order they appear on the display from top to bottom under each main menu. Frequency Amplitude Setup 1/2...
- Page 155 W-CDMA/HSPA+ Signal Analyzer 3-8 W-CDMA/HSPA+ Menus Demodulator Zoom Table Zoom Start HSDPA HSDPA Selected Code # Control Channels Delta Codogram Codogram Next Active Zoom Code Modulation Left Summary Next Active Zoom Start Code Back Right Total Time Total Time 240 s 240 s Back Single Sweep Time...
- Page 156 3-9 Freq (Frequency) Menu W-CDMA/HSPA+ Signal Analyzer Freq (Frequency) Menu Key Sequence: Freq Center Freq: Press the Freq key followed by the Center Freq submenu key Freq and enter the desired frequency using the keypad, the arrow keys, or the rotary knob.
- Page 157 W-CDMA/HSPA+ Signal Analyzer 3-10 Amplitude Menu 3-10 Amplitude Menu Key Sequence: Amplitude Scale: The scale can be set in 1 dB steps from 1 dB per division to 15 dB Amplitude per division. The value can be changed using the numeric keypad, rotary knob, or the arrow keys.
- Page 158 3-11 Setup Menu W-CDMA/HSPA+ Signal Analyzer 3-11 Setup Menu Setup 1/2 Menu Key Sequence: Setup Setup 1/2 Scrambling Code Scrambling Code: Press the Scrambling Code submenu key to toggle Auto Manual between Auto and Manual Scrambling Code. Manual Scrambling Code: Press the Manual Scrambling Code submenu Manual Scrambling key to manually enter the scrambling code using the arrow keys, rotary knob, Code...
- Page 159 W-CDMA/HSPA+ Signal Analyzer 3-11 Setup Menu Setup 2/2 Menu Key Sequence: Setup > More Setup 2/2 Threshold Threshold: Sets the measurement threshold to be set either automatically by the instrument or manually by the user. Auto Manual Manual Threshold: Change the measurement threshold manually by Manual Threshold entering a desired value and pressing Enter.
- Page 160 3-12 Measurements Menu W-CDMA/HSPA+ Signal Analyzer 3-12 Measurements Menu Key Sequence: Measurements RF Measurement: Opens the “RF Measurement Menu” on page 3-31. Measurements Demodulator: Opens the “Demodulator Menu” on page 3-34. In this mode, the received W-CDMA signal is demodulated. The demodulator has five RF Measurements displays, CDP, CDP Table, HSPA+, Codogram and Modulation Summary.
- Page 161 W-CDMA/HSPA+ Signal Analyzer 3-12 Measurements Menu RF Measurement Menu Key Sequence: Measurements > RF Measurements Band Spectrum: Opens the “Band Spectrum Menu” on page 3-32. RF Measurements Channel Spectrum: Opens the “Channel Spectrum Menu” on page 3-32. Band Press once to select the Channel Spectrum display. The screen also displays Channel Power in dBm and watts, Peak to Average power and Spectrum Occupied Bandwidth.
- Page 162 3-12 Measurements Menu W-CDMA/HSPA+ Signal Analyzer Band Spectrum Menu Key Sequence: Measurements > RF Measurements > Band Spectrum Ref Level: Sets the required reference level. Band Spectrum Scale: Changes the scale. Ref Level Band Channel: Use the cursor to select the required channel to analyze the selected channel signal.
- Page 163 W-CDMA/HSPA+ Signal Analyzer 3-12 Measurements Menu ACLR Menu Key Sequence: Measurements > RF Measurements > ACLR Display Trace: Select On to display the trace. ACLR Select # of Main Channels: Set the main channels from 1 channel to 4 Display Trace channels.
- Page 164 3-12 Measurements Menu W-CDMA/HSPA+ Signal Analyzer Demodulator Menu Key Sequence: Measurements > Demodulator CDP: Open the “CDP Menu” on page 3-35. When Code Domain Power Demodulator (CDP) is selected the screen displays all the selected OVSF codes and selected OVSF zoom codes in the graphical format. The display also displays P-CPICH Abs power, EVM, Carrier Frequency, Channel Power, Carrier Feedthrough, Frequency Error in Hz and PPM, Noise Floor and Peak CD Error.
- Page 165 W-CDMA/HSPA+ Signal Analyzer 3-12 Measurements Menu CDP Menu Key Sequence: Measurements > Demodulator > CDP Zoom: Select a zoom function of 32, 64, or 128 codes. Zoom Start: Enter the required zoom start code. For example, to start at Zoom code 2, enter 2.
- Page 166 3-12 Measurements Menu W-CDMA/HSPA+ Signal Analyzer HSDPA Menu Key Sequence: Measurements > Demodulator > HSDPA Selected Code: Press this submenu key to select the active code, using the HSDPA arrow keys, rotary knob, or numeric keypad. The range is 0 to 255 or 0 to 511 depending on the Max Spreading Factor set under the Setup main menu.
- Page 167 W-CDMA/HSPA+ Signal Analyzer 3-12 Measurements Menu Codogram Menu Key Sequence: Measurements > Demodulator > Codogram Zoom: Select a zoom function of 32, 64, or 128 codes. Codogram Zoom Start: Enter the required zoom start code. For example, to start at Zoom code 2, enter 2.
- Page 168 3-12 Measurements Menu W-CDMA/HSPA+ Signal Analyzer Over-The-Air Menu Key Sequence: Measurements > OTA Scrambling Code: Opens the “OTA Setup Menu” on page 3-39. Over-The-Air Multipath: Opens the “Multipath Menu” on page 3-40. EMF (Option 444 only): When first selected, this submenu key enables the Scrambling Code EMF Measurement mode.
- Page 169 W-CDMA/HSPA+ Signal Analyzer 3-12 Measurements Menu OTA Setup Menu Key Sequence: Measurements > OTA > Scrambling Code Scrambling Code: Set the scrambling codes to manual or auto. OTA Setup Manual Code: Select the scrambling code manually. Scrambling Code On/Off: Switch On/Off the manually selected scrambling code. Manual Auto Code Lock: Lock the measured codes.
- Page 170 3-12 Measurements Menu W-CDMA/HSPA+ Signal Analyzer Multipath Menu Key Sequence: Measurements > OTA > Multipath Scrambling Code: Set the scrambling codes to manual or auto. Multipath Manual Scrambling Code: Sets the manual scrambling code. Scrambling Code Vert Display: Switch vertical display between RSCP and Rel Pwr. Auto Manual Horiz Display: Switch between Chips and uSec for the horizontal display.
- Page 171 W-CDMA/HSPA+ Signal Analyzer 3-12 Measurements Menu Pass/Fail Mode Menu Key Sequence: Measurements > Pass/Fail Mode Select Pass/Fail Test: Select the parameters file from the list. Pass/Fail Mode Reset: Restart the measurement. Select ScriptMaster: Opens the “ScriptMaster Menu” on page 3-41. Pass/Fail Test Back: Returns to the...
- Page 172 3-13 Marker Menu W-CDMA/HSPA+ Signal Analyzer 3-13 Marker Menu Key Sequence: Marker Press the Marker main menu key to open the Marker menu. The instrument is equipped with six markers. Any or all markers can be employed simultaneously. Marker: Selects the active marker (1 to 6). The underlined marker number Marker is the active marker.
- Page 173 W-CDMA/HSPA+ Signal Analyzer 3-15 Measure Menu 3-15 Measure Menu This menu is not available in W-CDMA/HSPA+ measurement mode. 3-16 Trace Menu This menu is not available in W-CDMA/HSPA+ measurement mode. 3-17 Limit Menu This menu is not available in W-CDMA/HSPA+ measurement mode. 3-18 Other Menus Preset, File, Mode and System are described in the instrument User Guide.
- Page 174 3-15 Measure Menu W-CDMA/HSPA+ Signal Analyzer 3-44 PN: 10580-00234 Rev. T 3GPP MG...
- Page 175 Chapter 4 — TD-SCDMA/HSPA+ Signal Analyzer Introduction The TD-SCDMA/HSPA+ Signal Analyzer offers three options: • RF Measurements • Demodulator • Over-The-Air (OTA) Measurements Three display types are provided for RF Measurements: Channel Spectrum display, Power versus Time display, or the RF Summary table. Demodulator measurements can be viewed in either the CDP Data display or the Modulation Summary table.
- Page 176 4-2 General Measurement Setups TD-SCDMA/HSPA+ Signal Analyzer UpPTS Pwr The power in the Uplink Pilot Slot, excluding the gap. DL-UL Delta Power The average difference between the active DL slots and the active UL slots, including pilot slots. UL and DL slots are selected according to the Uplink Switch Point setting. Without UL data slot and without UpPTS, the DL-UL Delta Power value is not applicable.
- Page 177 TD-SCDMA/HSPA+ Signal Analyzer 4-2 General Measurement Setups Channel Spectrum Figure 4-1. TD-SCDMA/HSPA+ Channel Spectrum 1. Press the Setup main menu key. 2. Press the More submenu key. a. Press the Number of Carriers submenu key so that the desired number is underlined.
- Page 178 4-2 General Measurement Setups TD-SCDMA/HSPA+ Signal Analyzer Power versus Time The Power versus Time view shows the time domain view. 1. Press the Setup main menu key. a. Press the Slot Selection submenu key. The Slot Selection window and menu open. In the list window, use the rotary knob or press the touch screen to highlight Auto or the desired slot (0 to 6), then press the Enter key.
- Page 179 TD-SCDMA/HSPA+ Signal Analyzer 4-2 General Measurement Setups Figure 4-2. TD-SCDMA/HSPA+ Power vs. Time: Sub-Frame Measurement Figure 4-3. TD-SCDMA/HSPA+ Power vs. Time: Slot Measurement 3GPP MG PN: 10580-00234 Rev. T...
- Page 180 4-2 General Measurement Setups TD-SCDMA/HSPA+ Signal Analyzer RF Summary The RF Summary displays the critical RF transmitter performance measurements in a table format, without demodulating the TD-SCDMA/HSPA+ signal. The parameters that are displayed in the RF summary table are Channel Power (dBm), Channel Power (RRC) (dBm), Occupied Bandwidth (Hz), DwPTS Power (dBm), UpPTS Power (dBm), On/Off Ratio (dB), Slot PAR (dB), Left Channel Power (dBm), Right Channel Power (dBm), Left Channel Occupied Bandwidth, and Right Channel Occupied Bandwidth.
- Page 181 TD-SCDMA/HSPA+ Signal Analyzer 4-4 TD-SCDMA/HSPA+ Demodulator TD-SCDMA/HSPA+ Demodulator Figure 4-4. TD-SCDMA/HSPA+ Demodulator, CDP Data The following parameters are measured in the Demodulator option. Slot Power The power measured in the selected slot, excluding the gap. If Slot Selection is set to Auto, then the instrument searches for an active downlink slot and uses the detected slot number for measuring slot power.
- Page 182 4-4 TD-SCDMA/HSPA+ Demodulator TD-SCDMA/HSPA+ Signal Analyzer Scrambling Codes The display format is Scrambling Code # (relative power in dB). A measure of the relative powers of the four scrambling codes (relative to Slot Power) that correspond to the detected SYNC-DL code. Only those scrambling codes with high relative power are displayed. Typically, only one scrambling code is displayed unless significant interference occurs from neighboring codes.
- Page 183 TD-SCDMA/HSPA+ Signal Analyzer 4-4 TD-SCDMA/HSPA+ Demodulator g. Press the Meas Speed submenu key to toggle through the measuring speeds: Fast, Norm, and Slow. h. Press More to continue with setups in the Advanced Settings menu. Refer to “Advanced Settings Menu” on page 4-20 for a description of available parameters.
- Page 184 4-5 TD-SCDMA/HSPA+ Over-the-Air Measurements TD-SCDMA/HSPA+ Signal Analyzer TD-SCDMA/HSPA+ Over-the-Air Measurements Figure 4-5. TD-SCDMA/HSPA+ OTA Code Scan Code Scan Scans and displays the power of all 32 SYNC-DL codes in sequential order, including Ec/Io (dB) and Tau (µs). DwPTS Power and Pilot Dominance values are displayed below the table of codes (see Figure 4-5).
- Page 185 TD-SCDMA/HSPA+ Signal Analyzer 4-5 TD-SCDMA/HSPA+ Over-the-Air Measurements Figure 4-6. TD-SCDMA/HSPA+ OTA Tau Scan Measurement Setup Refer to the User Guide for selecting the TD-SCDMA/HSPA+ Signal Analyzer mode. 1. Press the Setup main menu key. Press the Trigger submenu key. The Trigger menu opens.
- Page 186 4-6 TD-SCDMA/HSPA+ Pass/Fail Measurements TD-SCDMA/HSPA+ Signal Analyzer TD-SCDMA/HSPA+ Pass/Fail Measurements The following is an example of a Pass/Fail measurement. Measurement Setup Refer to the User Guide for selecting the TD-SCDMA/HSPA+ Signal Analyzer mode. 1. Press the Measurements main menu key. 2.
- Page 187 TD-SCDMA/HSPA+ Signal Analyzer 4-7 TD-SCDMA/HSPA+ Menus TD-SCDMA/HSPA+ Menus Freq Amplitude Setup Measurements Center Freq Scale / div Slot Selection RF Measurements 871.400 MHz 10 dB/div Signal Power Offset Trigger Demodulator Standard 0.0 dB Ext Loss Channel Auto Range Uplink Switch Point 4357 Set CF Adjust...
- Page 188 4-7 TD-SCDMA/HSPA+ Menus TD-SCDMA/HSPA+ Signal Analyzer Advanced Settings RF Measurements Number of Carriers Channel Spectrum Spreading Factor Power vs. Time Auto Power vs. Time Modulation Type View Auto Sub-Frame Slot DwPTS Spectrum Emission Slot Selection Auto Slot Selection Tau Offset Mask Auto 0 ms...
- Page 189 TD-SCDMA/HSPA+ Signal Analyzer 4-8 Freq (Frequency) Menu Freq (Frequency) Menu Key Sequence: Freq Center Freq: Press this submenu key to set the receiver center frequency to Freq the desired value. Enter the frequency (2.7 GHz is the maximum value that can be entered) by using the keypad, the arrow keys, or the rotary knob.
- Page 190 4-9 Amplitude Menu TD-SCDMA/HSPA+ Signal Analyzer Amplitude Menu Key Sequence: Amplitude Scale/div: Press this submenu key to change the scale of the y-axis in the Amplitude measurement display. The range of the scale can be set from 1 dB/div to 15 dB/div in steps of 1 dB/div.
- Page 191 TD-SCDMA/HSPA+ Signal Analyzer 4-10 Setup Menu 4-10 Setup Menu Key Sequence: Setup Slot Selection: Press this submenu key to display the “Slot Selection Menu” Setup on page 4-18 and open the Slot Selection window. Use the rotary knob or press the touch screen to highlight the desired slot (0 to 6), then press Enter. If Auto is selected, the active slot is automatically detected.
- Page 192 4-10 Setup Menu TD-SCDMA/HSPA+ Signal Analyzer Slot Selection Menu Key Sequence: Setup > Slot Selection Auto: Automatically looks for an active downlink slot. Auto in the Slot Slot Selection Selection window and the Auto submenu key have the same function. The Auto submenu key provides a one-touch method of selecting the Auto Auto setting.
- Page 193 TD-SCDMA/HSPA+ Signal Analyzer 4-10 Setup Menu SYNC-DL Code Menu Key Sequence: Setup > SYNC-DL Code Auto: Automatically seeks the active SYNC-DL code. Auto in the SYNC-DL SYNC-DL Code Code selection window and the Auto submenu key have the same function. The Auto submenu key provides a one-touch method of selecting the Auto Auto setting.
- Page 194 4-10 Setup Menu TD-SCDMA/HSPA+ Signal Analyzer Advanced Settings Menu Key Sequence: Setup > More Number of Carriers: Press this submenu key to select the number of Advanced Settings carriers present in the signal. The setting toggles between 1 and 3. Number of Carriers Spreading Factor: Select the desired spreading factor, Auto, 16 or 1.
- Page 195 TD-SCDMA/HSPA+ Signal Analyzer 4-11 Measurements Menu 4-11 Measurements Menu Key Sequence: Measurements RF Measurements: Press this submenu key to display the Measurements “RF Measurements Menu” on page 4-22. Demodulator: Press this submenu key to display the “Demodulator Menu” RF Measurements on page 4-24 and to set up demodulator testing.
- Page 196 4-11 Measurements Menu TD-SCDMA/HSPA+ Signal Analyzer RF Measurements Menu Key Sequence: Measurements > RF Measurements Channel Spectrum: Displays the spectrum of the input signal. The span is RF Measurements automatically set to 5 MHz. Beneath the graph, values for the following measurements are displayed: Left Channel Power, Channel Power, Right Channel Channel Power, Left Channel Occ BW, Occ BW, and Right Channel Occ...
- Page 197 TD-SCDMA/HSPA+ Signal Analyzer 4-11 Measurements Menu Power vs. Time Menu Key Sequence: Measurements > RF Measurements > Power vs. Time Power vs. Time View: Press this submenu key to display the Power vs. Time graph in View either the Sub-Frame view or the Slot view. Slot Selection: Press this submenu key to display the Slot Selection Sub-Frame Slot...
- Page 198 4-11 Measurements Menu TD-SCDMA/HSPA+ Signal Analyzer Demodulator Menu Key Sequence: Measurements > Demodulator CDP Data: Press this submenu key once to activate this test. Press this Demodulator submenu key again to display the CDP Data menu and further set up the measurement.
- Page 199 TD-SCDMA/HSPA+ Signal Analyzer 4-11 Measurements Menu Over-The-Air Menu Key Sequence: Measurements > OTA Code Scan: Press this submenu key to display the 32 sync codes in table Over-The-Air format. Displayed below the table are DwPTS Power (in dBm) and Pilot Dominance (in dB).
- Page 200 4-11 Measurements Menu TD-SCDMA/HSPA+ Signal Analyzer Pass Fail Mode Menu Key Sequence: Measurements > Pass Fail Mode Select Pass/Fail Test: Press this submenu key to open the Select Pass/Fail Pass/Fail Mode Test selection window. Use the rotary knob or the arrow keys, or press the touch screen to highlight the desired test (PASS_FAIL_RF, Select PASS_FAIL_DEMOD, or PASS_FAIL_ALL), then press the Select Test...
- Page 201 TD-SCDMA/HSPA+ Signal Analyzer 4-12 Sweep Menu 4-12 Sweep Menu Key Sequence: Shift > Sweep (3) key Sweep Hold/Run: Press this submenu key to toggle between Run mode Sweep and Hold mode. Hold mode prevents the instrument from taking any new measurements and freezes the current measurement.
- Page 202 4-13 Measure Menu TD-SCDMA/HSPA+ Signal Analyzer 4-28 PN: 10580-00234 Rev. T 3GPP MG...
- Page 203 Chapter 5 — LTE Signal Analyzer Introduction The Long Term Evolution (LTE) Signal Analyzer offers three measurement options: • RF Measurements The following display types are provided for RF measurements: Channel Spectrum display, ACLR display, Spectral Emission Mask display, and the RF Summary table. •...
- Page 204 5-2 General Measurement Setups LTE Signal Analyzer 4. Press Sync then the Sync Type submenu key to select between the Normal (SS) or RS for synchronization. RS should be selected ONLY when there is no sync signal. This happens only when directly connected to a base station that is configured such that one of the antenna ports does not have a sync signal.
- Page 205 LTE Signal Analyzer 5-3 LTE RF Measurements LTE RF Measurements The following parameters are measured in the RF Measurement mode. Channel Spectrum Channel Spectrum displays the spectrum of the input signal across one channel. The Channel Power and Occupied BW are computed and displayed below the graph. Channel Power Channel power measures the average power within the selected bandwidth and is expressed in dBm or Watts.
- Page 206 5-3 LTE RF Measurements LTE Signal Analyzer RF Measurement Setups Channel Spectrum 1. Press the Measurements main menu key. 2. Press the RF submenu key. 3. Press the Channel Spectrum submenu key to activate this RF measurement view (Figure 5-2). 4.
- Page 207 LTE Signal Analyzer 5-3 LTE RF Measurements ACLR 1. Press the Measurements main menu key. 2. Press the RF submenu key. 3. Press the ACLR submenu key to activate ACLR display and measurement (Figure 5-3). Figure 5-3. Adjacent Channel Leakage Ratio 4.
- Page 208 5-3 LTE RF Measurements LTE Signal Analyzer Spectral Emission Mask 1. Press the Measurements main menu key. 2. Press the RF submenu key. 3. Press the Spectral Emission Mask submenu key to activate the Spectral Emission measurement and display (Figure 5-4).
- Page 209 LTE Signal Analyzer 5-3 LTE RF Measurements RF Summary 1. Press the Measurements main menu key. 2. Press the RF submenu key. 3. Press the RF Summary submenu key to activate and display the RF measurements in table format (Figure 5-5).
- Page 210 5-4 LTE Modulation Measurements LTE Signal Analyzer LTE Modulation Measurements The following parameters are measured in the Modulation Measurement mode. Power vs Resource Block (RB) This measurement displays the Power vs. RB grid with the RB Color Map, the measurement table and measurement progress bar.
- Page 211 LTE Signal Analyzer 5-4 LTE Modulation Measurements Markers Markers are available for use in the Power vs Resource Block measurement. The markers will outline the selected RB. Above the two dimensional grid, the specific RB subcarrier/sub-frame coordinates will be displayed along with its power level. Constellation This measurement displays the constellation of the demodulated symbols over the first sub-frame and a results table of the following measurements.
- Page 212 5-4 LTE Modulation Measurements LTE Signal Analyzer Control Channel Power This measurement shows the power levels of key physical layer Control Channels and also includes the numerical results table described in the “Constellation” section above. EVM per control channel is also available, as well as a table view showing the power in both per-resource-element and total power formats.
- Page 213 LTE Signal Analyzer 5-4 LTE Modulation Measurements Modulation Measurement Setups Power vs Resource Block 1. Press the Measurements main menu key. 2. Press the Modulation submenu key. 3. Press the Power vs Resource Block submenu key to activate the Power vs Resource Block measurement view.
- Page 214 5-4 LTE Modulation Measurements LTE Signal Analyzer Constellation 1. Press the Measurements main menu key. 2. Press the Modulation submenu key. 3. Press the Constellation submenu key to activate the Constellation measurement view (Figure 5-7). Press the Constellation submenu key again to list the Constellation menu and set up the reference points and data legend.
- Page 215 LTE Signal Analyzer 5-4 LTE Modulation Measurements Control Channel Power 1. Press the Measurements main menu key. 2. Press the Modulation submenu key. 3. Press the Control Channel Power submenu key to activate the Control Channel Power display (Figure 5-8). Press the key again to view or change the Display Mode and Control Channel EVM settings.
- Page 216 5-4 LTE Modulation Measurements LTE Signal Analyzer Tx Time Alignment 1. Press the Measurements main menu key. 2. Press the Modulation submenu key. 3. Press the Tx Time Alignment submenu key to set the modulation measurement to Tx Time Alignment view (Figure 5-9).
- Page 217 LTE Signal Analyzer 5-4 LTE Modulation Measurements Modulation Summary 1. Press the Measurements main menu key. 2. Press the Modulation submenu key. 3. Press the Modulation Summary submenu key to activate and display the modulation measurements in table format (Figure 5-10).
- Page 218 5-5 LTE Over-the-Air (OTA) Measurements LTE Signal Analyzer LTE Over-the-Air (OTA) Measurements Scanner, Tx Test, Antenna Status and Mapping are measurements taken over the air. EMF measurements are available only with Option 444. Antenna Status and the PBCH Modulation Results table are displayed when the Show Mod Results are set On for Scanner and Tx Test measurements.
- Page 219 LTE Signal Analyzer 5-5 LTE Over-the-Air (OTA) Measurements Tx Test Tx Test measurements are optimized for remote radio heads and MIMO systems. The first table in Tx Test replicates the Scanner table measurements, except the measurement scans the presence of up to 3 cell IDs. The second table shows the RS power across all detected antennas (transmitters) for the strongest Cell ID.
- Page 220 5-5 LTE Over-the-Air (OTA) Measurements LTE Signal Analyzer EVM (pk) The peak (%) of all the error vectors, between the reconstructed ideal signals and the received signals, divided by the RMS value of the ideal signals. Freq Error This is the difference between the measured carrier frequency and the specified carrier frequency.
- Page 221 LTE Signal Analyzer 5-5 LTE Over-the-Air (OTA) Measurements c. Use the Auto Save submenu key to automatically save measurement records. The instrument logs a data record at the end of each measurement cycle. A maximum of 10,000 records can be stored in a file. 4.
- Page 222 5-5 LTE Over-the-Air (OTA) Measurements LTE Signal Analyzer Figure 5-12. Over-the-Air Tx Test Measurement Mapping Refer to Chapter 7, “LTE and TD-LTE Coverage Mapping”. Carrier Aggregation Refer to “Carrier Aggregation Menu” on page 5-41. Refer to “LTE/TD-LTE EMF Menu” on page 8-2.
- Page 223 LTE Signal Analyzer 5-6 Pass/Fail Tests Pass/Fail Tests 1. Press the Measurements main menu key. 2. Press the Pass/Fail Test submenu key to activate the Pass/Fail display in table format (Figure 5-13). Press the Pass/Fail Test submenu key again to select a Pass/Fail test. a.
- Page 224 5-7 LTE Summary LTE Signal Analyzer LTE Summary The following parameters are displayed in the LTE Summary measurement. Freq Error Frequency error is the difference between the received center frequency and the specified center frequency. This value is linked to the external frequency reference accuracy and is typically useful only with a good external frequency reference or GPS reference.
- Page 225 LTE Signal Analyzer 5-7 LTE Summary Measurement Setup 1. Press the Measurements main menu key. 2. Press the LTE Summary submenu key to activate and display the LTE measurements in table format. Figure 5-14. LTE Summary 3GPP MG PN: 10580-00234 Rev. T 5-23...
- Page 226 5-8 LTE Menus LTE Signal Analyzer LTE Menus in Power vs. RB Measurement Freq Amplitude Setup Measurements Marker Marker Center Freq Scale Marker Select Marker State 1.000 GHz 10 dB/div 10 MHz Power Offset Cyclic Prefix Marker State Marker RB # Signal Standard Modulation 0.0 dB Ext Loss...
- Page 227 LTE Signal Analyzer 5-8 LTE Menus LTE Menus (continued) Modulation Pass/Fail Test Power vs Select Power vs RB Pass/Fail Resource Block Test Autoscale Color Map Constellation Reset Constellation RB Color Map Reference Points Max Value Control Channel 0.0 dBm Control Channels Power RB Color Map Display Mode...
- Page 228 5-8 LTE Menus LTE Signal Analyzer LTE Menus (continued) Carrier Aggregation Center Freq 1.000 GHz Signal Standard Channel Set CF To Closest Channel 10 MHz Back Back Figure 5-17. LTE Menu Layout (3 of 3) 5-26 PN: 10580-00234 Rev. T 3GPP MG...
- Page 229 LTE Signal Analyzer 5-9 Freq (Frequency) Menu Freq (Frequency) Menu Key Sequence: Freq Center Freq: Press this submenu key to set the receiver center frequency to Freq the desired value. Enter the frequency by using the keypad, the arrow keys, or the rotary knob.
- Page 230 5-9 Freq (Frequency) Menu LTE Signal Analyzer Standard List Menu Key Sequence: Freq > Signal Standard Display: Toggles between displaying all available signal standards and the Standard List signal standards marked as favorites (* in the Fav column). Display Select/Deselect Favorite: Press this submenu key to select or deselect a signal standards as a favorite.
- Page 231 LTE Signal Analyzer 5-10 Amplitude Menu 5-10 Amplitude Menu Key Sequence: Amplitude Scale: Press this submenu key to change the scale of the y-axis in the Amplitude RF measurement displays. The range of the scale can be set from 1 dB/div to 15 dB/div in steps of 1 dB/div.
- Page 232 5-11 Setup Menu LTE Signal Analyzer 5-11 Setup Menu Key Sequence: Setup BW: Opens the Select Bandwidth list. Choose from the following Setup bandwidths: 1.4 MHz 3 MHz 10 MHz 5 MHz 10 MHz Cyclic Prefix 15 MHz Auto Norm Extd 20 MHz EVM Max Hold...
- Page 233 LTE Signal Analyzer 5-12 Measurements Menu 5-12 Measurements Menu Key Sequence: Measurements RF: Press this submenu key to display the “RF Menu” on page 5-32. Measurements Modulation: Press this submenu key to display the “Modulation Menu” on page 5-33. Over-the-Air: Press this submenu key to display the “Over-the-Air Menu”...
- Page 234 5-12 Measurements Menu LTE Signal Analyzer RF Menu Key Sequence: Measurements > RF Channel Spectrum: Displays the spectrum of the input signal. Beneath the graph, values for the following measurements are displayed: Channel Power Channel and Occupied BW. Channel Power is displayed in dBm or Watts (based on the Units submenu setting in the Amplitude menu) and Occupied BW is Spectrum displayed in MHz.
- Page 235 LTE Signal Analyzer 5-12 Measurements Menu Modulation Menu Key Sequence: Measurements > Modulation Power vs Resource Block: Press once to display the Power vs. Resource Modulation Block measurement window. Press again to open the “Power vs. Resource Block Menu” on page 5-34 for setting up the Resource Block Color Map Power vs parameters.
- Page 236 5-12 Measurements Menu LTE Signal Analyzer Power vs. Resource Block Menu Key Sequence: Measurements > Modulation > Power vs. Resource Block Autoscale Color Map: Adjusts the RB Max Value and Range automatically Power vs RB on the color map. RB Color Map Max Value: Press to adjust the RB Color Map Max Value Autoscale Color Map manually.
- Page 237 LTE Signal Analyzer 5-12 Measurements Menu Constellation Menu Key Sequence: Measurements > Modulation > Constellation Reference Points: Press this submenu key to display reference points Constellation (small white circles) for the various constellations. On is the default state. Reference Points Data Legend: Turns the legend box in the top right corner of the constellation graph On and Off.
- Page 238 5-12 Measurements Menu LTE Signal Analyzer Control Channel Power Menu Key Sequence: Measurements > Modulation > Control Channel Power Display Mode: Select Bar Graph or Table as the desired view. Control Channels Control Channel EVM On Off: When On, the EVM column is included to Display Mode display the EVM of each control channel.
- Page 239 LTE Signal Analyzer 5-12 Measurements Menu Over-the-Air Menu Key Sequence: Measurements > Over-the-Air Scanner: Press this submenu key to display the Scanner table, which Over-the-Air shows several power measurements for multiple base stations at the same frequency. Measurements include Sync Signal (S-SS) Power, RSRP, RSRQ, and SINR.
- Page 240 5-12 Measurements Menu LTE Signal Analyzer OTA Scanner Menu Key Sequence: Measurements > Over-the-Air > Scanner > Scanner Sort By: Opens the Sort By list dialog. Choose one of the following OTA Scanner parameters to sort the Scanner table rows. Sort By Cell ID Group ID...
- Page 241 LTE Signal Analyzer 5-12 Measurements Menu Over-the-Air Tx Test Menu Key Sequence: Measurements > Over-the-Air > Tx Test Show Mod Results: When set to Off, the PBCH Results table and OTA Tx Test Antenna Status indicators are not displayed. When set to On, the Antenna Status and PBCH Modulation Results table are displayed.
- Page 242 5-12 Measurements Menu LTE Signal Analyzer Coverage Mapping Menu Key Sequence: Measurements > Over-the-Air > Mapping Save/Recall Map Points: Opens the “Mapping Save/Recall Menu” Coverage Mapping on page 7-13. Measurement Setups: Opens the “Measurement Setup Menu” on page 7-14. Point Distance/Time Setup: Opens the “Point Distance/Time Setup Menu”...
- Page 243 LTE Signal Analyzer 5-12 Measurements Menu Carrier Aggregation Menu Key Sequence: Measurements > Over-the-Air > Carrier Aggregation CC1 through CC5: Select the desired Component Carrier to set up for Carrier Aggregation measurement. See Figure 5-34. Note: When switching from the Carrier Aggregation to other measurements, the frequency is automatically set to the currently selected Component Carrier, if it is on.
- Page 244 5-12 Measurements Menu LTE Signal Analyzer Component Carrier Menu Key Sequence: Measurements > Over-the-Air > Carrier Aggregation > CC1 CC1 Off On: Turns On the Component Carrier. Center Freq: Press this submenu key to set the receiver center frequency. Enter the frequency using the keypad, arrow keys, or the rotary knob. When entering a frequency using the keypad, the submenu key labels change to Units: GHz, MHz, kHz, and Hz.
- Page 245 LTE Signal Analyzer 5-12 Measurements Menu Pass/Fail Test Menu Key Sequence: Measurements > Pass/Fail Test > Select Pass/Fail Test Select Pass/Fail Test: Press this submenu key to open the Select Pass/Fail Pass/Fail Test Test list box and select a test type. Choose from: Select PASS_FAIL_RF Pass/Fail...
- Page 246 5-13 Marker Menu LTE Signal Analyzer 5-13 Marker Menu Key Sequence: Marker Available for Channel Spectrum measurements. When making Power vs Resource Block measurements, refer to “Power vs Resource Block Marker Menu” on page 5-45. Marker Select: Selects the active marker M1 or M2. The underlined marker Marker is active marker.
- Page 247 LTE Signal Analyzer 5-15 Sweep Menu Power vs Resource Block Marker Menu Key Sequence: Marker (When Power vs. Resource Block measurement is selected). Marker Select: Selects the active marker M1 or M2. The underlined marker Marker is active marker. Each press of the submenu key moves the underline to the other marker.
- Page 248 5-16 Measure Menu LTE Signal Analyzer 5-17 Trace Menu This menu is not available in LTE measurement mode. 5-18 Limit Menu This menu is not available in LTE measurement mode. 5-19 Other Menus Preset, File, Mode and System are described in the instrument User Guide. 5-46 PN: 10580-00234 Rev.
- Page 249 Chapter 6 — TD-LTE Signal Analyzer Introduction The Time-Division Long Term Evolution (TD-LTE) Signal Analyzer offers three measurement options: • RF Measurements The following display types are provided for RF measurements: Channel Spectrum display, Power vs. Time, ACLR display, Spectral Emission Mask display, and the RF Summary table.
- Page 250 6-3 TD-LTE RF Measurements TD-LTE Signal Analyzer Antenna Status The Antenna Status indicator can show when antennas are detected and which one is currently being measured. Antenna Status is displayed for any EVM measurement shown: Constellation, Control Channel Power, Modulation Summary and LTE Summary. The antennas icons are displayed at the lower-left corner of the display screen (Figure 6-1).
- Page 251 TD-LTE Signal Analyzer 6-3 TD-LTE RF Measurements Cell ID Identifying information sent by the transmitter in the sync signal. Timing Error The error in time between the external trigger input signal and the start of the frame. The Timing Error is only displayed if Triggering is set up to use an external trigger signal to act as a timing reference.
- Page 252 6-3 TD-LTE RF Measurements TD-LTE Signal Analyzer RF Measurement Setups Channel Spectrum 1. Press the Measurements main menu key. 2. Press the RF submenu key. 3. Press the Channel Spectrum submenu key to activate this RF measurement view (Figure 6-2). 4.
- Page 253 TD-LTE Signal Analyzer 6-3 TD-LTE RF Measurements Power vs. Time 1. Press the Measurements main menu key. 2. Press the RF submenu key. 3. Press the Power vs. Time submenu key to select measurement. 4. Press the Power vs. Time submenu key again to set the View and Sub-Frame Number parameters.
- Page 254 6-3 TD-LTE RF Measurements TD-LTE Signal Analyzer ACLR 1. Press the Measurements main menu key. 2. Press the RF submenu key. 3. Press the ACLR submenu key to activate ACLR display and measurement (Figure 6-4). Figure 6-4. Adjacent Channel Leakage Ratio 4.
- Page 255 TD-LTE Signal Analyzer 6-3 TD-LTE RF Measurements Spectral Emission Mask 1. Press the Measurements main menu key. 2. Press the RF submenu key. 3. Press the Spectral Emission Mask submenu key to activate the Spectral Emission measurement and display (Figure 6-5).
- Page 256 6-3 TD-LTE RF Measurements TD-LTE Signal Analyzer RF Summary 1. Press the Measurements main menu key. 2. Press the RF submenu key. 3. Press the RF Summary submenu key to activate and display the RF measurements in table format (Figure 6-6).
- Page 257 TD-LTE Signal Analyzer 6-4 TD-LTE Modulation Measurements TD-LTE Modulation Measurements The following parameters are measured in the Modulation Measurement mode. Power vs Resource Block (RB) This measurement display contains the Power vs RB grid, a RB Color Map, the measurements table and measurement progress bar. Two Dimensional Power vs RB Grid This view shows the PDSCH power of each RB using color.
- Page 258 6-4 TD-LTE Modulation Measurements TD-LTE Signal Analyzer Markers Markers are available for use in the Power vs Resource Block measurement. The markers will outline the selected RB. Above the two dimensional grid, the specific RB subcarrier/sub-frame coordinates will be displayed along with its power level. Constellation This measurement displays the constellation of the demodulated symbols over the first sub-frame.
- Page 259 TD-LTE Signal Analyzer 6-4 TD-LTE Modulation Measurements Control Channel Power This measurement shows the power levels of key physical layer Control Channels and also includes the measurement results described in the “Constellation” section. EVM per control channel is also available, as well as a table view showing the power in both per-resource-element and total power formats.
- Page 260 6-4 TD-LTE Modulation Measurements TD-LTE Signal Analyzer Modulation Measurement Setups Power vs Resource Block 1. Press the Measurements main menu key. 2. Press the Modulation submenu key. 3. Press the Power vs Resource Block submenu key to activate the Power vs Resource Block measurement view.
- Page 261 TD-LTE Signal Analyzer 6-4 TD-LTE Modulation Measurements Constellation 1. Press the Measurements main menu key. 2. Press the Modulation submenu key. 3. Press the Constellation submenu key to activate the Constellation measurement view (Figure 6-8). Press the Constellation submenu key again to list the Constellation menu and set up the reference points and data legend.
- Page 262 6-4 TD-LTE Modulation Measurements TD-LTE Signal Analyzer Control Channel Power 1. Press the Measurements main menu key. 2. Press the Modulation submenu key. 3. Press the Control Channel Power submenu key to activate the Control Channel Power display in table format (Figure 6-9).
- Page 263 TD-LTE Signal Analyzer 6-4 TD-LTE Modulation Measurements Tx Time Alignment 1. Press the Measurements main menu key. 2. Press the Modulation submenu key. 3. Press the Tx Time Alignment submenu key to set the modulation measurement to Tx Time Alignment view (Figure 6-10).
- Page 264 6-4 TD-LTE Modulation Measurements TD-LTE Signal Analyzer Modulation Summary 1. Press the Measurements main menu key. 2. Press the Modulation submenu key. 3. Press the Modulation Summary submenu key to activate and display the modulation measurements in table format (Figure 6-11).
- Page 265 TD-LTE Signal Analyzer 6-5 TD-LTE Over-the-Air (OTA) Measurements TD-LTE Over-the-Air (OTA) Measurements Scanner, Tx Test, Antenna Status and Mapping are measurements taken over the air. EMF measurements are available only with Option 444. Antenna Status and the PBCH Modulation Results table are displayed when the Show Mod Results are set On for Scanner and Tx Test measurements.
- Page 266 6-5 TD-LTE Over-the-Air (OTA) Measurements TD-LTE Signal Analyzer Tx Test Tx Test measurements are optimized for remote radio heads and MIMO systems. The first table in Tx Test replicates the Scanner table measurements, except the measurement scans the presence of up to 3 cell IDs. The second table shows the RS power across all detected antennas (transmitters) for the strongest Cell ID.
- Page 267 TD-LTE Signal Analyzer 6-5 TD-LTE Over-the-Air (OTA) Measurements EVM (pk) The peak (%) of all the error vectors, between the reconstructed ideal signals and the received signals, divided by the RMS value of the ideal signals. Freq Error This is the difference between the measured carrier frequency and the specified carrier frequency.
- Page 268 6-5 TD-LTE Over-the-Air (OTA) Measurements TD-LTE Signal Analyzer c. Use the Auto Save submenu key to automatically save measurement records. The instrument logs a data record at the end of each measurement cycle. A maximum of 10,000 records can be stored in a file. 4.
- Page 269 TD-LTE Signal Analyzer 6-5 TD-LTE Over-the-Air (OTA) Measurements Figure 6-13. Over-the-Air Tx Test Measurement Mapping Refer to Chapter 7, “LTE and TD-LTE Coverage Mapping”. Carrier Aggregation Refer to “Carrier Aggregation Menu” on page 6-45. Refer to “LTE/TD-LTE EMF Menu” on page 8-2.
- Page 270 6-6 Pass/Fail Tests TD-LTE Signal Analyzer Pass/Fail Tests 1. Press the Measurements main menu key. 2. Press the Pass/Fail Test submenu key to activate the Pass/Fail display in table format (Figure 6-14). Press the Pass/Fail Test submenu key again to select a Pass/Fail test. a.
- Page 271 TD-LTE Signal Analyzer 6-7 TD-LTE Summary TD-LTE Summary The following parameters are displayed in the TD-LTE summary measurement. Freq Error Frequency error is the difference between the received center frequency and the specified center frequency. This value is linked to the external frequency reference accuracy and is typically useful only with a good external frequency reference or GPS reference.
- Page 272 6-7 TD-LTE Summary TD-LTE Signal Analyzer Measurement Setup 1. Press the Measurements main menu key. 2. Press the TD-LTE Summary submenu key to activate and display the TD-LTE measurements in table format. Figure 6-15. TD-LTE Summary 6-24 PN: 10580-00234 Rev. T 3GPP MG...
- Page 273 TD-LTE Signal Analyzer 6-8 TD-LTE Menus TD-LTE Menus in Power vs. RB Measurement Setup Freq Amplitude Measurements Marker Marker Center Freq Scale Marker Select Marker State 1.000 GHz 10 dB/div 10 MHz Cyclic Prefix Power Offset Marker State Marker RB # Signal Standard Modulation Auto...
- Page 274 6-8 TD-LTE Menus TD-LTE Signal Analyzer TD-LTE Menus (continued) Modulation Pass/Fail Test Power vs Select Power vs RB Pass/Fail Resource Block Test Autoscale Color Map Constellation Reset Constellation RB Color Map Reference Points Max Value Control Channel 0.0 dBm Control Channels Power RB Color Map Display Mode...
- Page 275 TD-LTE Signal Analyzer 6-8 TD-LTE Menus TD-LTE Menus (continued) Carrier Aggregation Center Freq 1.000 GHz Signal Standard Channel Set CF To Closest Channel 10 MHz Back Back Figure 6-18. TD-LTE Menu Layout (3 of 3) 3GPP MG PN: 10580-00234 Rev. T 6-27...
- Page 276 6-9 Freq (Frequency) Menu TD-LTE Signal Analyzer Freq (Frequency) Menu Key Sequence: Freq Center Freq: Press this submenu key to set the receiver center frequency to Freq the desired value. Enter the frequency by using the keypad, the arrow keys, or the rotary knob.
- Page 277 TD-LTE Signal Analyzer 6-9 Freq (Frequency) Menu Standard List Menu Key Sequence: Freq > Signal Standard Display: Toggles between displaying all available signal standards and the Standard List signal standards marked as favorites (* in the Fav column). Display Select/Deselect Favorite: Press this submenu key to select or deselect a signal standards as a favorite.
- Page 278 6-10 Amplitude Menu TD-LTE Signal Analyzer 6-10 Amplitude Menu Key Sequence: Amplitude Scale: Press this submenu key to change the scale of the y-axis in the Amplitude RF measurement displays. The range of the scale can be set from 1 dB/div to 15 dB/div in steps of 1 dB/div.
- Page 279 TD-LTE Signal Analyzer 6-11 Setup Menu 6-11 Setup Menu Key Sequence: Setup BW: Opens the Select Bandwidth list. Choose from the following Setup bandwidths: 1.4 MHz, 3 MHz, 5 MHz, 10 MHz, 15 MHz, or 20 MHz. Cyclic Prefix: Press this submenu key to set the instrument to measure signal with a Normal or Extended Cyclic Prefix, or to allow the instrument 10 MHz to detect the Cyclic Prefix automatically.
- Page 280 6-11 Setup Menu TD-LTE Signal Analyzer Sync Menu Key Sequence: Setup > Sync Sync Type: Press to choose between the Normal (SS) or RS Sync Type. Sync Only choose RS when there is no sync signal present in the transmitter under test.
- Page 281 TD-LTE Signal Analyzer 6-12 Measurements Menu 6-12 Measurements Menu Key Sequence: Measurements RF: Press this submenu key to display the “RF Menu” on page 6-34. Measurements Modulation: Press this submenu key to display the “Modulation Menu” on page 6-37. Over-the-Air: Press this submenu key to display the “Over-the-Air Menu”...
- Page 282 6-12 Measurements Menu TD-LTE Signal Analyzer RF Menu Key Sequence: Measurements > RF Channel Spectrum: Opens the “Channel Spectrum Menu” on page 6-35. Displays the spectrum of the input signal. Beneath the graph, values for the following measurements are displayed: Channel Power and Occupied BW. Channel Channel Power is displayed in dBm or Watts (based on the Units submenu Spectrum...
- Page 283 TD-LTE Signal Analyzer 6-12 Measurements Menu Channel Spectrum Menu Key Sequence: Measurements > RF > Channel Spectrum Span: Opens the Span list to select a span of Auto, 1.4 MHz, 3 MHz, Channel Spectrum 5 MHz, 10 MHz, 15 MHz, 20 MHz, or 30 MHz. Span Back: Returns to the “RF Menu”...
- Page 284 6-12 Measurements Menu TD-LTE Signal Analyzer Spectral Emission Menu Key Sequence: Measurements > RF > Spectral Emission Category A B (Opt. 1): Select the desired category based on the Spectral Emission information on page 6-34. Category Select Mask (Auto): Displays a list of standard and custom masks for use in SEM measurements.
- Page 285 TD-LTE Signal Analyzer 6-12 Measurements Menu Modulation Menu Key Sequence: Measurements > Modulation Power vs Resource Block: Press once to display the Power vs. Resource Modulation Block measurement window. Press again to open the “Power vs. Resource Block Menu” on page 6-38 for setting up the Resource Block Color Map Power vs parameters.
- Page 286 6-12 Measurements Menu TD-LTE Signal Analyzer Power vs. Resource Block Menu Key Sequence: Measurements > Modulation > Power vs. Resource Block Autoscale Color Map: Adjusts the RB Max Value and Range automatically Power vs RB on the color map. RB Color Map Max Value: Press to adjust the RB Color Map Max Value Autoscale Color Map manually.
- Page 287 TD-LTE Signal Analyzer 6-12 Measurements Menu Constellation Menu Key Sequence: Measurements > Modulation > Constellation Reference Points: Press this submenu key to display reference points Constellation (small white circles) for the various constellations. On is the default state. Reference Points Data Legend: Turns the legend box in the top right corner of the constellation graph On and Off.
- Page 288 6-12 Measurements Menu TD-LTE Signal Analyzer Control Channel Power Menu Key Sequence: Measurements > Modulation > Control Channel Power Display Mode: Select Bar Graph or Table as the desired view. Control Channels Control Channel EVM On Off: When On, the EVM column is included to Display Mode display the EVM of each control channel.
- Page 289 TD-LTE Signal Analyzer 6-12 Measurements Menu Over-the-Air Menu Key Sequence: Measurements > Over-the-Air Scanner: Press this submenu key to display the Scanner table, which Over-the-Air shows several power measurements for multiple base stations at the same frequency. Measurements include Sync Signal (S-SS) Power, RSRP, RSRQ, and SINR.
- Page 290 6-12 Measurements Menu TD-LTE Signal Analyzer OTA Scanner Menu Key Sequence: Measurements > Over-the-Air > Scanner > Scanner Sort By: Opens the Sort By list dialog. Choose one of the following OTA Scanner parameters to sort the Scanner table rows. Sort By Cell ID Group ID...
- Page 291 TD-LTE Signal Analyzer 6-12 Measurements Menu Over-the-Air Tx Test Menu Key Sequence: Measurements > Over-the-Air > Tx Test Show Mod Results: When set to Off, the PBCH Results table and OTA Tx Test Antenna Status indicators are not displayed. When set to On, the Antenna Status and PBCH Modulation Results table are displayed.
- Page 292 6-12 Measurements Menu TD-LTE Signal Analyzer Coverage Mapping Menu Key Sequence: Measurements > Over-the-Air > Mapping Save/Recall Map Points: Opens the “Mapping Save/Recall Menu” Coverage Mapping on page 7-13. Measurement Setups: Opens the “Measurement Setup Menu” on page 7-14. Point Distance/Time Setup: Opens the “Point Distance/Time Setup Menu”...
- Page 293 TD-LTE Signal Analyzer 6-12 Measurements Menu Carrier Aggregation Menu Key Sequence: Measurements > Over-the-Air > Carrier Aggregation CC1 through CC5: Select the desired Component Carrier to set up for Carrier Aggregation measurement. See Figure 6-40. Note: When switching from the Carrier Aggregation to other measurements, the frequency is automatically set to the currently selected Component Carrier, if it is on.
- Page 294 6-12 Measurements Menu TD-LTE Signal Analyzer Component Carrier Menu Key Sequence: Measurements > Over-the-Air > Carrier Aggregation > CC1 CC1 Off On: Turns On the Component Carrier. Center Freq: Press this submenu key to set the receiver center frequency. Enter the frequency using the keypad, arrow keys, or the rotary knob. When entering a frequency using the keypad, the submenu key labels change to Units: GHz, MHz, kHz, and Hz.
- Page 295 TD-LTE Signal Analyzer 6-12 Measurements Menu Pass/Fail Test Menu Key Sequence: Measurements > Pass/Fail Test > Select Pass/Fail Test Select Pass/Fail Test: Press this submenu key to open the Select Pass/Fail Pass/Fail Test Test list box and select a test type. Choose from: Select PASS_FAIL_RF Pass/Fail...
- Page 296 6-13 Marker Menu TD-LTE Signal Analyzer 6-13 Marker Menu Key Sequence: Marker Available for Channel Spectrum and Power vs. Time measurements. Marker Select: Selects the active marker M1 or M2. The underlined marker Marker is active marker. Each press of the submenu key moves the underline to the other marker.
- Page 297 TD-LTE Signal Analyzer 6-15 Sweep Menu Power vs Resource Block Marker Menu Key Sequence: Marker (When Power vs. Resource Block measurement is selected). Marker Select: Selects the active marker M1 or M2. The underlined marker Marker is active marker. Each press of the submenu key moves the underline to the other marker.
- Page 298 6-16 Measure Menu TD-LTE Signal Analyzer 6-16 Measure Menu Displays the “Measurements Menu” on page 6-33. 6-17 Trace Menu This menu is not available in TD-LTE measurement mode. 6-18 Limit Menu This menu is not available in TD-LTE measurement mode. 6-19 Other Menus Preset, File, Mode and System are described in the User Guide.
- Page 299 Introduction Coverage Mapping allows users to measure and map Sync Signal Power, Reference Signal Received Power (RSRP), Reference Signal Receive Quality (RSRQ), and SINR. The Anritsu easyMap Tools program creates special maps compatible with Anritsu handheld spectrum analyzers. The software creates files with or without GPS information. The files compatible with coverage mapping will have a .map extension.
- Page 300 7-3 Coverage Mapping LTE and TD-LTE Coverage Mapping Outdoor Coverage With a valid GPS signal, the instrument identifies the current location on the displayed GeoEmbedded map with a plus sign. Previously saved locations display as colored squares. Using GPS, latitude, longitude, and altitude data is automatically saved for each location. Stop Data Collection Start Data Collection Current Location...
- Page 301 “Save the Coverage Mapping Information” on page 7-7. Anritsu easyMap Tools Anritsu easyMap Tools allows you to capture maps of any location and create Anritsu Map Files. These maps are viewed on the Anritsu instrument during coverage mapping. There are two Anritsu Map File formats: •...
-
Page 302: Instrument Settings
7-3 Coverage Mapping LTE and TD-LTE Coverage Mapping Instrument Settings Setup 1. Create the appropriate map with Anritsu easyMap Tools. Refer to “Anritsu easyMap Tools” on page 7-3 and the software Help. Outdoor mapping requires a GeoEmbedded map or the default grid. - Page 303 Recall the Default Grid The instrument can make coverage mapping measurements even when an Anritsu easyMap Tools file of the current indoor or outdoor location is not available. In such cases, use the default grid map, save the KML points, and recall them at a later time with a map.
- Page 304 7-3 Coverage Mapping LTE and TD-LTE Coverage Mapping Measurement Setup 1. Press the Measurements main menu key. 2. Press the Over-the-Air submenu key. 3. Press the Mapping submenu key to activate the Coverage Mapping display. Press the Mapping key again to display the Coverage Mapping menu. 4.
- Page 305 LTE and TD-LTE Coverage Mapping 7-3 Coverage Mapping Save the Coverage Mapping Information 1. Press the Measurements main menu key. 2. Press the Over-the-Air submenu key, then Mapping. 3. Coverage Mapping has three save options. Refer to “Save KML Points”, “Save Tab Delimited Points”...
- Page 306 7-3 Coverage Mapping LTE and TD-LTE Coverage Mapping 2. Click the File List tab and look for the .kml file you want to view in Google Earth. See Figure 7-4. 3. Click the map file name in the File column. Alternatively, you can select the checkbox next to the .kml file name, then click the Download button.
- Page 307 LTE and TD-LTE Coverage Mapping 7-3 Coverage Mapping Opening the .kml file automatically launches Google Earth if the application is not currently open. Figure 7-5 illustrates a sample coverage mapping .kml file viewed in Google Earth. You can also view the file with Google Maps, provided you have the appropriate plug-in for your browser.
- Page 308 7-3 Coverage Mapping LTE and TD-LTE Coverage Mapping Save JPG In the Coverage Mapping submenu, press Save/Recall Points/Map, then Save JPG. In the Save dialog, change the file name as appropriate, then press Enter. A .jpg file of the current screen is saved to the default location.
- Page 309 LTE and TD-LTE Coverage Mapping 7-4 Coverage Mapping Menus Coverage Mapping Menus Figure 7-7 shows the map of the LTE and TD-LTE Over-the-Air Coverage Mapping and associated submenus. Section 7-5 describes the details of Coverage Mapping menus and associated submenus. Over-the-Air Coverage Mapping Mapping Save/Recall...
- Page 310 7-5 Coverage Mapping Menu LTE and TD-LTE Coverage Mapping Coverage Mapping Menu Key Sequence: Measurements > Over-the-Air > Mapping Save/Recall Map Points: Opens the “Mapping Save/Recall Menu” Coverage Mapping on page 7-13. Measurement Setups: Opens the “Measurement Setup Menu” on page 7-14.
- Page 311 LTE and TD-LTE Coverage Mapping 7-5 Coverage Mapping Menu Mapping Save/Recall Menu Key Sequence: Measurements > Over-the-Air > Mapping > Save/Recall Points/Map Save KML Points: Press this button to save the KML points. Mapping Save/Recall FileName.kml will be stored in the default save location. From the File menu, press Save, then Change Save Location to change default Save location.
- Page 312 7-5 Coverage Mapping Menu LTE and TD-LTE Coverage Mapping Measurement Setup Menu Key Sequence: Measurements > Over-the-Air > Mapping > Measurement Setup Measurement: Press and select which measurement to map on the screen: Measurement Setup S-SS Power, RSRP, RSRQ or SINR. All measurements are stored as part of the saved file: Measurement S-SS Thresholds: Opens the SS Power menu for setting threshold levels.
- Page 313 LTE and TD-LTE Coverage Mapping 7-5 Coverage Mapping Menu Point Distance/Time Setup Menu Key Sequence: Measurements > Over-the-Air > Mapping > Point Distance/Time Setup Repeat Type: Toggles between using a Time or Distance interval for Points Distance/Time capturing data. Refer to “Measurement Setup”...
- Page 314 7-5 Coverage Mapping Menu LTE and TD-LTE Coverage Mapping 7-16 PN: 10580-00234 Rev. T 3GPP MG...
- Page 315 Option 444 adds the EMF Measurement menu to the Over-the-Air LTE and TD-LTE measurement modes. It must be used in conjunction with the Anritsu isotropic antenna, at a frequency range that is within specification of the instrument and antenna used. Refer to the isotropic antenna and signal analyzer technical data sheets.
- Page 316 Key Sequence: Measurements > Over-the-Air > EMF Measurement On/Off: Starts the EMF Measurement and removes access to all other menu buttons. The measurement turns On only if the Center Frequency is set within the valid range and the Anritsu Isotropic Antenna is Measurement connected.
- Page 317 EMF (Option 444) 8-3 LTE/TD-LTE EMF Menu Meas Params Menu (LTE/TD-LTE) Key Sequence: Measurements > Over-the-Air > EMF > Measurement Parameters Meas Params RS Meas RS Meas Display: Opens the “RS Display Menu” on page 8-4. Display P-SS Meas P-SS Meas Display: Opens the “P-SS Display Menu”...
- Page 318 8-3 LTE/TD-LTE EMF Menu EMF (Option 444) RS Display Menu Key Sequence: Measurements > Over-the-Air > EMF > Measurement Parameters > RS Meas Display The displayed Reference Signal parameters below can be changed at the RS Display start or at the end of the measurement cycle. All of the parameters are always computed and stored.
- Page 319 EMF (Option 444) 8-3 LTE/TD-LTE EMF Menu P-SS Display Menu Key Sequence: Measurements > Over-the-Air > EMF > Measurement Parameters > P-SS Meas Display The displayed Primary Synchronization Signal parameters below can be P-SS Display changed at the start or at the end of the measurement cycle. All of the parameters are always computed and stored.
- Page 320 8-3 LTE/TD-LTE EMF Menu EMF (Option 444) S-SS Display Menu Key Sequence: Measurements > Over-the-Air > EMF > Measurement Parameters > S-SS Meas Display S-SS Display The displayed Secondary Synchronization Signal parameters below can be changed at the start or at the end of the measurement cycle. All the parameters are always computed and stored.
- Page 321 EMF (Option 444) 8-3 LTE/TD-LTE EMF Menu Measurement Results (LTE/TD-LTE) The measurement starts by setting the antenna’s X axis and capturing over-the-air data. If a sync signal is found and a valid Cell ID exists, then the following parameters are detected and stored: the channel power in 1.4 MHz bandwidth, the Cell ID, RS, P-SS, and S-SS (all per Resource Element).
- Page 322 8-3 LTE/TD-LTE EMF Menu EMF (Option 444) When the extrapolation factor is turned Off, the Field Strength number is the measured Channel Power in a 1.4 MHz bandwidth. Changing the bandwidth (BW) setting in the Setup menu does not change this number. If the extrapolation factor is On, the Field Strength (E ) is computed as follows: ×...
- Page 323 EMF (Option 444) 8-3 LTE/TD-LTE EMF Menu Pass/Fail The limit check is done at the end of each Measurement Time. If the Field Strength (Avg), with or without extrapolation, exceeds the set limit, the Current and the Final Test Status are marked as Fail in red.
- Page 324 Key Sequence: Measurements > OTA > EMF Measurement On/Off: Starts the EMF Measurement and removes access to all other menu buttons. The measurement turns On only if the Center Frequency is set within the valid range and the Anritsu Isotropic Antenna is Measurement connected.
- Page 325 EMF (Option 444) 8-4 W-CDMA EMF Menu Measurement EMF Units: The unit choices are dBm/m , V/m, W/m , % of Limit (V/m), and % of Limit (W/m ). V/m is the default unit. % of Limit (V/m) and % of Limit (W/m ) display the measured numbers as a Measurement Time percentage of the selected limit.
- Page 326 8-4 W-CDMA EMF Menu EMF (Option 444) Meas Params Menu (W-CDMA) Key Sequence: Measurements > OTA > EMF > Measurement Parameters Scrambling Code: Press this key to toggle between Auto or Manual Meas Params scrambling code. Auto scrambling code determines the scrambling code automatically.
-
Page 327: Display Menu
EMF (Option 444) 8-4 W-CDMA EMF Menu Display Menu Key Sequence: Measurements > OTA > EMF > Measurement Parameters > Display Params Press one of the keys in this submenu to select which parameter is displayed in the rightmost column of the measurement results table. The default Display Menu selection is Total Avg. - Page 328 8-4 W-CDMA EMF Menu EMF (Option 444) Measurement Results (W-CDMA) The measurement starts by setting the antenna’s X axis and capturing over-the-air data. If a sync signal is found and there is a valid scrambling code, the PCPICH and Channel Power in 5 MHz bandwidth are stored.
- Page 329 EMF (Option 444) 8-4 W-CDMA EMF Menu The extrapolation factor k is the ratio of the maximum total output power at the base station to the power of PCPICH at the base station. If there is a power boosting factor (BF), k = (max total output power ÷ P(PCPICH)) ÷ BF. Note Changing the extrapolation factor immediately updates the displayed values, except for Field Strength.
- Page 330 8-4 W-CDMA EMF Menu EMF (Option 444) 8-16 PN: 10580-00234 Rev. T 3GPP MG...
- Page 331 Appendix A — Error Messages Introduction This Appendix provides a list of 3GPP error messages. Self Test and General Operation error messages are in the User Guide. 3GPP Messages Warning Messages 1. External Reference not found. Internal reference Locked successfully This message is displayed when the instrument has detected an external reference but couldn’t lock to the reference.
- Page 332 A-3 LTE Messages LTE Messages 1. Sync signal not found When the firmware does not find a synchronization signal (P-SS and S-SS), this message is displayed. Measurement results are cleared (‘--’ is seen in the result area for all modulation and Scanner results. Channel Power will continue to be displayed). 2.
- Page 333 ..2-8, 3-3, 4-7, 5-9, 6-10 Anritsu contact ....1-3 freq menu Anritsu easyMap Tools .
- Page 334 N to S measurements menu pass/fail test menu EMF ....8-2, 8-10 LTE ......5-43 GSM/GPRS/EDGE .
- Page 335 T to Z spectrum menu ....2-14 threshold ......3-3 spreading factor .
- Page 336 Index-4 PN: 10580-00234 Rev. T 3GPP MG...
- Page 338 Anritsu Company 490 Jarvis Drive Anritsu utilizes recycled paper and environmentally conscious inks and toner. Morgan Hill, CA 95037-2809 http://www.anritsu.com...
- Page 339 Measurement Guide Cable and Antenna Analyzer for Anritsu RF and Microwave Handheld Instruments Site Master™ Cell Master™ PIM Master™ MW82119B Part Number: 10580-00241 Anritsu Company Revision: B 490 Jarvis Drive Published: October 2014 Morgan Hill, CA 95037-2809 Copyright 2009, 2014 Anritsu Company...
- Page 340 Anritsu Company. UPDATES Updates, if any, can be downloaded from the Documents area of the Anritsu web site at: http://www.us.anritsu.com...
- Page 341 Some or all of the following five symbols may or may not be used on all Anritsu equipment. In addition, there may be other labels attached to products that are not shown in the diagrams in this manual.
- Page 342 For Safety Warning Always refer to the operation manual when working near locations at which the alert mark, shown on the left, is attached. If the operation, etc., is performed without heeding the advice in the operation manual, there is a risk of personal injury. In addition, the equipment performance may be reduced.
- Page 343 Table of Contents Chapter 1—General Information General Measurement Setups ........1-2 Chapter 2—Cable and Antenna Analyzer Cable and Antenna Measurement Setup .
- Page 344 Table of Contents (Continued) Calibration Procedures ........3-3 OSL Calibration Procedure (Standard and FlexCal) .
- Page 345 From here, you can select the latest sales, select service and support contact information in your country or region, provide online feedback, complete a “Talk to Anritsu” form to have your questions answered, or obtain other services offered by Anritsu.
- Page 346 General Measurement Setups The User Guide for your instrument provides a general overview of file management, system settings, and GPS. Chapter 2 of this guide provides specific setup, measurement, and menu information for cable and antenna measurements. Selecting the Cable and Antenna Mode The current measurement mode is displayed on screen below the battery symbol.
- Page 347 Chapter 2 — Cable and Antenna Analyzer Overview This chapter shows how to setup the instrument and perform basic line sweep measurements. Confirm that the instrument is in Cable and Antenna Analyzer mode. Refer to Note “Selecting the Cable and Antenna Mode” on page 1-2.
- Page 348 2-2 Cable and Antenna Measurement Setup Cable and Antenna Analyzer Frequency (for VSWR, Return Loss, Cable Loss, Smith Chart, 1-Port Phase measurements) Setting up the Measurement Frequency using Start and Stop Frequencies 1. Press the Freq/Dist main menu key. 2. Press the Start Freq submenu key and use the keypad to enter the start frequency. When entering a frequency using the keypad, the soft key labels change to GHz, MHz, kHz, and Hz.
- Page 349 Cable and Antenna Analyzer 2-2 Cable and Antenna Measurement Setup Amplitude (For Amplitude in Smith Chart measurements, see “Smith Chart” on page 2-23) Setting the Amplitude using Top and Bottom Keys 1. Press the Amplitude main menu key. 2. Press the Top submenu key and use the keypad, rotary knob, or the Up/Down arrow key to edit the top scale value.
- Page 350 2-2 Cable and Antenna Measurement Setup Cable and Antenna Analyzer RF Immunity High / Low The instrument defaults to RF Immunity High. This setting protects the instrument from stray signals from nearby or co-located transmitters that can affect frequency and DTF measurements.
- Page 351 Cable and Antenna Analyzer 2-2 Cable and Antenna Measurement Setup Smoothing % Smoothing is a mathematical function that calculates a rolling average of the trace data. This provides a way to look at the general shape of a measurement while smoothing out smaller variations.
-
Page 352: Display Setup
2-2 Cable and Antenna Measurement Setup Cable and Antenna Analyzer Display Setup Single and Dual Display The instrument can display two measurements simultaneously using the Dual Display function. Top and Bottom display can be set independently and it is possible to display all measurements either on the top or bottom. - Page 353 Cable and Antenna Analyzer 2-2 Cable and Antenna Measurement Setup Limit Lines Pressing the Shift key and the Limit (6) key brings up the Limit menu. The cable and antenna analyzer supports both single limit and multi-segment limit lines. The multi-segment limit lines can have as many as 40 segments across the entire frequency or distance span.
- Page 354 2-2 Cable and Antenna Measurement Setup Cable and Antenna Analyzer Segmented Limit Lines The following procedure creates limit lines for a Return Loss Measurement. Limits are set to: • 0 dB between 1800 MHz and 1830 MHz • 13.5 dB between 1830 and 1870 MHz, and •...
- Page 355 Cable and Antenna Analyzer 2-3 Markers Markers Pressing the Marker main menu key will bring up the Marker menu. Markers can be applied to active or recalled measurements. The instrument supports six reference and six delta markers. Markers can be stored in the setups and recalled with the setup file at a later time. Select, Activate, and Place a Marker / Delta Marker 1.
- Page 356 2-3 Markers Cable and Antenna Analyzer Peak/Valley Auto When making Return Loss and VSWR measurements, the Peak / Valley Auto feature can be used to automatically turn on Marker 1 to peak, Marker 2 to valley, and display M1 & M2 in the Marker Table.
- Page 357 Cable and Antenna Analyzer 2-3 Markers Marker Table The Marker Table allows for viewing of up to six reference markers and six delta markers. 1. Press the Marker main menu key. 2. Press the Marker Table On/Off submenu key. Figure 2-7. Marker Table Displays Six Markers Peak Between M1 &...
- Page 358 2-4 Trace Cable and Antenna Analyzer Trace Pressing the Shift key and the Trace (5) key brings up the Trace main menu. The trace math menu inside the cable and antenna analyzer supports Trace Overlay features to allow viewing a two traces at the same time. This is useful when comparing a stored trace to a live trace.
- Page 359 Cable and Antenna Analyzer 2-4 Trace Trace Math Example The example below illustrates how the Trace – Memory feature can be used to compare the phase of two cables. 1. Press Shift and Trace (5) to enter the Trace menu. 2.
- Page 360 2-5 Cable and Antenna Measurements Overview Cable and Antenna Analyzer Cable and Antenna Measurements Overview Line Sweep Fundamentals In wireless communication, the transmit and receive antennas are connected to the radio through a transmission line. This transmission line is usually a coaxial cable or waveguide. This connection system is referred to as a transmission feed line system.
- Page 361 Cable and Antenna Analyzer 2-5 Cable and Antenna Measurements Overview Line Sweep Types Return Loss / VSWR Measurement Return Loss measures the reflected power of the system in decibels (dB). This measurement can also be taken in the Standing Wave Ratio (SWR) mode, which is the ratio of the transmitted power to the reflected power.
- Page 362 2-6 Line Sweep Measurements Cable and Antenna Analyzer Line Sweep Measurements This section provides typical line sweep measurements used to analyze the performance of a transmission feed line system including Return Loss, Cable Loss, and DTF. Return Loss Measurement Return Loss measures the reflected power of the system in decibels (dB). This measurement can also be taken in the Standing Wave Ratio (SWR) mode, which is the ratio of the transmitted power to the reflected power.
- Page 363 Cable and Antenna Analyzer 2-6 Line Sweep Measurements Cable Loss Measurement The transmission feed line insertion loss test verifies the signal attenuation level of the cable system in reference to the specification. The average cable loss of the frequency range is displayed in the status display window.
- Page 364 2-6 Line Sweep Measurements Cable and Antenna Analyzer Distance-To-Fault (DTF) DTF reveals the precise fault location of components in the transmission line system. This test helps to identify specific problems in the system, such as connector transitions, jumpers, kinks in the cable or moisture intrusion. To measure the distance of a cable, DTF measurements can be made with an open or a short connected at the end of the cable.
- Page 365 Cable and Antenna Analyzer 2-6 Line Sweep Measurements Fault Resolution Fault resolution is the system's ability to separate two closely spaced discontinuities. If the fault resolution is 10 feet and there are two faults 5 feet apart, the instrument will not be able to show both faults unless Fault Resolution is improved by widening the frequency span.
- Page 366 2-6 Line Sweep Measurements Cable and Antenna Analyzer Figure 2-14. DTF Aid Example 1 – DTF Transmission Line Test The Distance-To-Fault transmission line test verifies the performance of the transmission line assembly and its components and identifies the fault locations in the transmission line system.
- Page 367 Cable and Antenna Analyzer 2-6 Line Sweep Measurements Figure 2-15. Typical Passing DTF Return Loss Measurement Figure 2-16. Typical Failing DTF Return Loss Measurement Cable & Antenna Analyzer MG PN: 10580-00241 Rev. B 2-21...
- Page 368 2-6 Line Sweep Measurements Cable and Antenna Analyzer Example 2 – DTF with a short To measure the distance of a cable, DTF measurements can be made with an open or a short connected at the end of the cable. The peak indicating the end of the cable should be between 0 dB and 5 dB.
- Page 369 Smith Chart. When markers are used, the real and imaginary components of the Smith Chart value are displayed. Anritsu Master Software Tools includes additional options and a calculator that can easily show what the return loss, VSWR, or reflection coefficient values of a specific Smith Chart value are.
- Page 370 2-7 1-Port Measurements Cable and Antenna Analyzer 5. Connect the antenna to the RF Out connector on the instrument. Figure 2-18. Typical Smith Chart display of a PCS Antenna 2-24 PN: 10580-00241 Rev. B Cable & Antenna Analyzer MG...
- Page 371 Cable and Antenna Analyzer 2-8 Cable and Antenna Analyzer Menus Cable and Antenna Analyzer Menus Figure 2-19 Figure 2-20 show the map of the Cable and Antenna Analyzer menus. The following sections describe main menus and associated submenus. The submenus are listed in the order they appear on the display from top to bottom under each main menu.
- Page 372 2-8 Cable and Antenna Analyzer Menus Cable and Antenna Analyzer When Marker 5 is Active Averaging/Smoothing Measurement 2/2 Sweep/Setup Averaging/Smoothing Marker Options Averaging Run/Hold Averaging Peak 1-Port Phase Between Hold M1&M2 Averaging Factor Sweep Type Averaging Factor Valley Smith Chart Between Single Continuous...
- Page 373 Cable and Antenna Analyzer 2-9 Freq Menu Freq Menu The Freq/Dist main menu key opens the Freq menu, or the Freq/Dist menu, depending upon the type of measurement selected with the “Measurement Menu” on page 2-33. Pressing the Freq/Dist main menu key after selection of DTF Return Loss or DTF VSWR on the Measurement main menu will open the “Freq/Dist Menu”...
- Page 374 2-9 Freq Menu Cable and Antenna Analyzer Signal Standard Menu Key Sequence: Freq/Dist > Signal Standard Select Standard: Opens the Signal Standards dialog box. Select the Signal Standard signal standard using the arrow keys, the rotary knob, or the touch Select screen.
- Page 375 Cable and Antenna Analyzer 2-10 Freq/Dist Menu 2-10 Freq/Dist Menu The Freq/Dist main menu key opens the Freq menu, or the Freq/Dist menu, depending upon the type of measurement selected with the “Measurement Menu” on page 2-33. Pressing the Freq/Dist main menu key after selection of VSWR, Return Loss, or Cable Loss on the Measurement main menu will open the “Freq Menu”...
- Page 376 2-10 Freq/Dist Menu Cable and Antenna Analyzer DTF Setup Menu Key Sequence: Freq/Dist > More Cable Loss: Press the Cable Loss submenu key and enter the loss in DTF Setup dB/ft or dB/m for the selected cable using the keypad, the arrow keys, or the rotary knob and press Enter.
- Page 377 Cable and Antenna Analyzer 2-11 Amplitude Menu 2-11 Amplitude Menu Key Sequence: Amplitude Top: Sets the top amplitude value. Amplitude Bottom: Sets the bottom amplitude value. Autoscale: Automatically sets the top and bottom scales to the minimum 100.0 dB and maximum values of the measurement with some margin on the y-axis of the display.
- Page 378 2-12 Sweep/Setup Menu Cable and Antenna Analyzer 2-12 Sweep/Setup Menu Key Sequence: Sweep/Setup Run/Hold: Toggles between Run and Hold. When in Hold mode, Sweep/Setup pressing this key starts the sweeping and provides a trigger. When in the Run/Hold Run mode, pressing this key pauses the sweep. Hold Sweep Type: This toggles the sweep between single sweep and Sweep Type...
- Page 379 Cable and Antenna Analyzer 2-13 Measurement Menu 2-13 Measurement Menu Key Sequence: Measurement. VSWR: Press the VSWR submenu key to view the match in VSWR. Measurement 1/2 Return Loss: Return Loss is used to characterize RF components and systems. The Return Loss indicates how well the system is matched by VSVR taking the ratio of the reflected signal to the incident signal, and measuring the reflected power in dB.
- Page 380 2-14 Marker Menu Cable and Antenna Analyzer 2-14 Marker Menu Key Sequence: Marker Marker: Press the marker key the select M1 to M6 on the Marker touch screen to choose the active marker. The underlined Marker marker number is the active marker. 1 2 3 4 5 6 On/Off: Turns the selected marker underlined in the Marker key On or Off.
- Page 381 Cable and Antenna Analyzer 2-17 Trace Menu 2-16 Measure Menu This menu open the “Measurement Menu” on page 2-33. 2-17 Trace Menu Key Sequence: Shift > Trace (5) key Recall Trace: Opens the Recall dialog box to recall a previously saved Trace measurement.
- Page 382 2-18 Limit Menu Cable and Antenna Analyzer 2-18 Limit Menu Limit lines can be used for visual reference only, or for pass/fail criteria using the limit alarm. Limit alarm failures are reported whenever a signal crosses the limit line. Each limit line can consist of a single segment, or as many as 40 segments across the entire frequency span of the instrument.
- Page 383 Cable and Antenna Analyzer 2-18 Limit Menu Limit Edit Menu Key Sequence: Shift > Limit (5) key > Limit Edit Point Frequency: The frequency of each point in a limit line can be individually Limit Edit set. When a new point is added, it takes on a value halfway between two Point Freq existing points, or the stop frequency of the current sweep if there is no point higher in frequency than the one being added.
- Page 384 2-19 Other Menus Cable and Antenna Analyzer 2-19 Other Menus Preset, File, Mode and System are described in the User Guide. Calibrate is described in Chapter 2-38 PN: 10580-00241 Rev. B Cable & Antenna Analyzer MG...
- Page 385 Chapter 3 — Calibration Introduction This chapter provides details and procedures about the following calibration methods: InstaCal, Open-Short-Load, Standard Cal, Flexcal Chapter Overview • Section 3-3 “Calibration Methods” on page 3-1 • Section 3-4 “Calibration Verification” on page 3-2 • Section 3-5 “Calibration Procedures”...
- Page 386 3-4 Calibration Verification Calibration Table 3-1. Summary of Calibration Methods and Tools Calibration Tool Calibration Type InstaCal Standard Cal Most Accurate Cal Method/ Fastest Calibration Method. (recalibrate every time Need to recalibrate if frequency Need to recalibrate if frequency frequency is changed) changes changes This will provide the best...
- Page 387 Calibration 3-5 Calibration Procedures Calibration Procedures In Cable and Antenna Analyzer Mode, calibration is required when the “Not Calibrated” message is displayed or when the test port cable has been changed. The following sections detail how to perform OSL and InstaCal calibration. If a Test Port Extension Cable is to be used, it must be connected to the Site Master before calibration.
- Page 388 3-5 Calibration Procedures Calibration InstaCal Module Calibration Procedures (Standard and FlexCal) InstaCal MODULE TEST PORT CABLE (OPTIONAL) RF OUT/REFLECTION TEST PORT S331E SiteMaster Menu Enter Shift Mode System File Limit Trace Measure Sweep Calibrate Preset Power Charge Figure 3-2. Calibration Setup InstaCal 1.
- Page 389 Calibration 3-6 InstaCal Module Verification InstaCal Module Verification Verifying the InstaCal module before any line sweeping measurements is critical to the measured data. InstaCal module verification identifies any failures in the module due to circuitry damage or failure of the control circuitry. This test does not attempt to characterize the InstaCal module, which is performed at the factory or the service center.
- Page 390 PN: 10580-00241 Rev. B Cable & Antenna Analyzer MG...
- Page 391 Appendix A — Windowing Introduction The theoretical requirement for inverse FFT is for the data to extend from zero frequency to infinity. Side lobes appear around a discontinuity because the spectrum is cut off at a finite frequency. Windowing reduces the side lobes by smoothing out the sharp transitions at the beginning and the end of the frequency sweep.
- Page 392 Rectangular Windowing –5 –10 –15 –20 –25 –30 –35 –40 –45 –50 Figure A-1. Rectangular Windowing Example This Distance To Fault graph has Return Loss (dB) on the vertical scale (y-axis) and distance in feet on the horizontal scale (x-axis). This view of Rectangular Windowing shows the maximum side lobe display and the greatest waveform resolution.
- Page 393 Nominal Side Lobe Windowing –5 –10 –15 –20 –25 –30 –35 –40 –45 –50 Figure A-2. Nominal Side Lobe Windowing Example This Distance To Fault graph has Return Loss (dB) on the vertical scale (y-axis) and distance in feet on the horizontal scale (x-axis). This view of Nominal Side Lobe Windowing shows less side lobe resolution than Rectangular Windowing and more side lobe resolution than Low Side Lobe Windowing.
- Page 394 Low Side Lobe Windowing –5 –10 –15 –20 –25 –30 –35 –40 –45 –50 Figure A-3. Low Side Lobe Windowing Example This Distance To Fault graph has Return Loss (dB) on the vertical scale (y-axis) and distance in feet on the horizontal scale (x-axis). This view of Low Side Lobe Windowing shows less side lobe resolution than Nominal Side Lobe Windowing and more side lobe resolution than Minimum Side Lobe Windowing.
- Page 395 Minimum Side Lobe Windowing –5 –10 –15 –20 –25 –30 –35 –40 –45 –50 Figure A-4. Minimum Side Lobe Windowing Example This Distance To Fault graph has Return Loss (dB) on the vertical scale (y-axis) and distance in feet on the horizontal scale (x-axis). This view of Minimum Side Lobe Windowing shows less side lobe resolution than Low Side Lobe Windowing and displays the lowest side lobe and waveform resolution.
- Page 396 PN: 10580-00241 Rev. B Cable & Antenna Analyzer MG...
- Page 397 ....2-33 Anritsu, contact ....1-1 measurement mode ....1-2 autoscale .
- Page 398 Index-2 PN: 10580-00241 Rev. B Cable & Antenna Analyzer MG...
- Page 400 Anritsu Company 490 Jarvis Drive Anritsu utilizes recycled paper and environmentally conscious inks and toner. Morgan Hill, CA 95037-2809 http://www.anritsu.com...
- Page 401 LTE eNodeB Troubleshooting Guide – utilizing Anritsu’s Handheld BTS Master , Cell Master or Spectrum Master with Options 0541, 0542 and 0546 ™ ™ ™ Start Here Troubleshooting Hints Locating Over-the-Air Test Spots Multiple Sector Coverage Checks Sync Signal Power, Dominance, Cell ID,...
- Page 402 ® ® Anritsu. All tra ademarks are reg gistered tradema arks of their resp pective companie es. Data subject to change witho out notice. For th he most recent s specifications visi it: www.anritsu.c...
- Page 403 TD-LTE e eNodeB Troubles shooting g Guide – utilizing g Anritsu’s Handheld BTS Maste , Cell M aster or S Spectrum M Master with Option ns 0551, 05 52 and 05 ™ ™ ™ Start Here oubleshoo oting Hints ocating O...
- Page 404 ® ® Anritsu. All tra ademarks are reg gistered tradema arks of their resp pective companie es. Data subject to change witho out notice. For th...
- Page 405 2 MHz to 6 GHz Cable and Antenna Analyzer 100 kHz to 6 GHz Spectrum Analyzer 10 MHz to 6 GHz Power Meter Anritsu Company Part Number: 10580-00255 490 Jarvis Drive Revision: J Morgan Hill, CA 95037-2809 Published: June 2014 Copyright 2014 Anritsu Company...
- Page 407 Some or all of the following five symbols may or may not be used on all Anritsu equipment. In addition, there may be other labels attached to products that are not shown in the diagrams in this manual.
- Page 408 These hazardous compounds present a risk of injury or loss due to exposure. Anritsu Company recommends removing the battery for long-term storage of the instrument and storing the battery in a leak-proof, plastic container.
- Page 409 Anritsu Customer Service Centers ........
- Page 410 5-14 TD-SCDMA Signal Analyzer Verification, Options 60 and 61......5-69 Contents-2 PN: 10580-00255 Rev. J MT8212E and MT8213E MM...
- Page 411 7-12 Touch Screen Replacement ..........7-12 MT8212E and MT8213E MM PN: 10580-00255 Rev.
- Page 412 ..........A-14 Contents-4 PN: 10580-00255 Rev. J MT8212E and MT8213E MM...
- Page 413 ..... . . A-56 TD-LTE Signal Analyzer Verification, Options 551 and 552 (continued) ... . . A-57 MT8212E and MT8213E MM PN: 10580-00255 Rev. J Contents-5...
- Page 414 Contents-6 PN: 10580-00255 Rev. J MT8212E and MT8213E MM...
-
Page 415: Introduction
Appendix A-1 and use them to record measured values. These test records form a record of the performance of your instrument. Anritsu recommends that you make a copy of the blank test records to document the measurements each time a Performance Verification is performed. -
Page 416: Recommended Test Equipment
1-3 Recommended Test Equipment General Information Recommended Test Equipment The following test equipment is recommended for use in testing and maintaining Anritsu Cell Master Models MT8212E and MT8213E. Table 1-1 is a list of test equipment that is required for verifying the spectrum analyzer functions. - Page 417 Instrument Critical Specification Manufacturer/Model Synthesized Signal Source Frequency: 0.1 Hz to 20 GHz Anritsu Model MG3692A or B with Power Output: +13 dBm options 2A, 4, 22, 15 Power Meter Power Range: –70 to +20 dBm Anritsu Dual Channel Model...
- Page 418 Power Meter Power Range: –70 to + 20 dBm Anritsu Model ML2438A Power Sensor Frequency: 10 MHz to 18 GHz Anritsu Model MA2482D with Option 1 Power Range: –60 to +20 dBm (Quantity 2) Frequency Reference Frequency: 10 MHz Symmetricom Model RubiSource T&M Programmable Attenuator (Opt.
- Page 419 Adapter (Opt. 44, 45, 65) Frequency: DC to 20 GHz N(m) Maury Microwave Model 8828B to N(m), 50 ohm Quantity: 2 each [One each required only if Anritsu Coupler and Circulator are used] Adapter Frequency: DC to 20 GHz K(m) Anritsu Model 34RKNF50...
- Page 420 Replaceable Parts Table 1-5. List of Replaceable Parts Part Number Description ND70944 MT8212E MB/VNA/SPA PCB Assy (Instruments without options 57/79) s/n < 1147089 ND74530 MT8212E MB/VNA/SPA PCB Assy , with 20 MHz IF BW (Instruments without options 57/79) s/n > 1147088 and s/n < 1230032...
- Page 421 Main PCB Assembly, in order to ensureinstallation of correct options, all options that areinstalled on the instrument must be declared on the order. The options are listed and shown in the System / Status display. MT8212E and MT8213E MM PN: 10580-00255 Rev. J...
- Page 422 1-4 Replaceable Parts General Information PN: 10580-00255 Rev. J MT8212E and MT8213E MM...
- Page 423 “Spectrum Analyzer Absolute Amplitude Accuracy Verification” on page 2-9 • “Residual Spurious Response Verification” on page 2-17 • “Displayed Average Noise Level (DANL)” on page 2-19 • “Third Order Intercept (TOI) Verification” on page 2-21 MT8212E and MT8213E MM PN: 10580-00255 Rev. J...
-
Page 424: Frequency Accuracy Verification
Do not connect the external 10 MHz Reference to the Cell Master. Caution 2. Turn On the 10 MHz Reference Standard and the Anritsu MG3692X Synthesized Signal Source. 3. Set the MG3692X output to 1 GHz CW, with an RF Output Level of –30 dBm. - Page 425 5.9 GHz ± 8.85 kHz (± 1.5 ppm) for the MT8213E only, and record in Table A-1. If the instrument fails the Section 2-2 “Frequency Accuracy Verification” test, then contact your local Note Anritsu Service Center (http://www.anritsu.com/Contact.asp). MT8212E and MT8213E MM PN: 10580-00255 Rev. J...
- Page 426 1. Connect the 10 MHz reference source to the Anritsu MG3692X Synthesized Signal Source. 2. Turn On the 10 MHz reference source and the Anritsu MG3692X Synthesized Signal Source. 3. Set the MG3692X output to 1.00 GHz CW, with an RF output level of +0 dBm.
- Page 427 Step 25 for 100 kHz (set Span to 220 kHz) and 1 MHz offset (set Span to 2.04 MHz). Enter the test results and calculations in the appropriate rows of Table A-2. MT8212E and MT8213E MM PN: 10580-00255 Rev. J...
- Page 428 1. Connect the 10 MHz reference source to the Anritsu MG3692X Synthesized Signal Source. 2. Turn On the 10 MHz reference source and the Anritsu MG3692X Synthesized Signal Source. 3. Set the MG3692X output to 50.1 MHz CW, with an RF Output Level of –30 dBm.
- Page 429 Second Harmonic Level Amplitude at 100.2 MHz = 100.2 MHz amplitude – 50.1 MHz amplitude = _____ dBc 33. Verify that the calculated Second Harmonic Level is ≤ –56 dBc and record in the test records. Table A-3. MT8212E and MT8213E MM PN: 10580-00255 Rev. J...
- Page 430 • BNC male to BNC male Coaxial Cable Procedure 1. Connect the 10 MHz reference source to the Anritsu MG3692X Synthesized Signal Source and the MT821xE Cell Master. 2. Turn On the MG3692X, set the frequency to 1 GHz CW, and set the level to –30 dBm.
- Page 431 • Anritsu MG3692X Synthesized Signal Source • 10 MHz Reference Standard • Anritsu ML2438A Dual Channel Power Meter • Anritsu MA2442D High Accuracy Power Sensors (2) • Anritsu 34NN50A 50 ohm Adapter • Anritsu 34RKNF50 50 ohm Adapter • Anritsu 15NN50-1.5C RF Coaxial Cable •...
- Page 432 –4 dBm to –50 dBm, as listed in Table A-5. Caution Before continuing, allow a 30 minute warm-up period for the internal circuitry to stabilize. 2-10 PN: 10580-00255 Rev. J MT8212E and MT8213E MM...
- Page 433 8. Use the keypad to enter 1 and press the kHz submenu key. 9. Press the VBW submenu key and use the keypad to enter 10, then press the Hz submenu key. MT8212E and MT8213E MM PN: 10580-00255 Rev. J...
- Page 434 Refer to Table A-5 for Required Sensor B Readings. Use Table A-6 to record test results. The last two settings are with the pre-amp turned on, to ensure pre-amp functionality. 2-12 PN: 10580-00255 Rev. J MT8212E and MT8213E MM...
- Page 435 Equipment Required • Anritsu MG3692X Synthesized Signal Source • Anritsu ML2438A Dual Channel Power Meter • Anritsu MA2442D High Accuracy Power Sensors (2) • 10 MHz Reference Standard • Anritsu 34NN50A 50 ohm Adapter • Anritsu 34RKNF50 50 ohm Adapter •...
- Page 436 10. Repeat Step 2 through Step 9 for all of the frequencies that are listed in Table A-7. Caution Before continuing, allow a 30 minute warm-up for the internal circuitry to stabilize. 2-14 PN: 10580-00255 Rev. J MT8212E and MT8213E MM...
- Page 437 6. Press the Freq soft key and set the Center Frequency to 10.1 MHz. 7. Press the Amplitude soft key and set the Reference Level to -40 dBm and turn the Pre-Amp On. MT8212E and MT8213E MM PN: 10580-00255 Rev. J...
- Page 438 14. Verify that the Marker 1 amplitude reading is within the specification. 15. Repeat Step 6 Step 14 for other frequencies, input power, reference level, attenuation and pre-amp settings in Table A-8. 2-16 PN: 10580-00255 Rev. J MT8212E and MT8213E MM...
- Page 439 2-18. Residual Spurious Response Test with Preamp Off Equipment Required • Anritsu 28N50-2 50 ohm Termination Procedure 1. Connect the 50 ohm Termination to the MT821xE Spectrum Analyzer RF In connector. 2. Press the On/Off key to turn On the MT821xE Cell Master.
- Page 440 Residual Spurious Response Test with Preamp On Equipment Required • Anritsu 28N50-2 50 ohm Termination Procedure 1. Connect the 50 ohm Termination to the MT821xE Spectrum Analyzer RF In connector. 2. Press the On/Off key to turn On the MT821xE Cell Master.
- Page 441 The following test is used to verify the Displayed Average Noise Level (DANL) of the spectrum analyzer systems in the MT821xE Cell Master. This test is performed using the RMS detection mode. Equipment Required • Anritsu 28N50-2 50 ohm Termination Procedure 1. Connect the 50 ohm Termination to the MT821xE Spectrum Analyzer RF In connector.
- Page 442 28. Repeat Step 11 through Step 29. Record the Marker reading and calculated value in the test record using Table A-12, “Spectrum Analyzer DANL with Pre Amp On” on page A-12. 2-20 PN: 10580-00255 Rev. J MT8212E and MT8213E MM...
- Page 443 The following test verifies the Third Order Intercept point (also known as TOI or IP3) of the Spectrum Analyzer in the MT821xE Equipment Required • Anritsu MG3692x Synthesizer (Quantity 2) • Anritsu ML2438A Power Meter • Anritsu MA2442D Power Sensor •...
- Page 444 TOI = -20 + [(-20 - max) / 2] dBm 20. Record the Measured Max Value and Calculated TOI value into the test record using Table A-13, “Third Order Intercept (TOI) Verification” on page A-12. 2-22 PN: 10580-00255 Rev. J MT8212E and MT8213E MM...
- Page 445 Antenna Analyzer mode. Equipment Required • Frequency Counter, Anritsu Model MF2412B • RF Coaxial Cable, Anritsu Model 15NNF50-1.5C Procedure 1. Verify that the MT821xE is in Cable and Antenna Analyzer mode and preset the instrument. 2. Verify that no external 10 MHz reference is connected to the MT821xE.
- Page 446 Equipment Required • Open/Short, Anritsu Model 22N50 • Termination, Anritsu Model 28N50-2 • 6 dB Offset Termination, Anritsu Model SC7424 • 20 dB Offset Termination, Anritsu Model SC7423 Procedure 1. Verify that the MT821xE is in Cable and Antenna Analyzer mode and preset the instrument.
- Page 447 Equipment Required • Anritsu MG3692X Synthesized Signal Source • Anritsu ML2438A Dual Channel Power Meter • Anritsu MA2442D High Accuracy Power Sensors (2) • 10 MHz Reference Standard • Anritsu 34NN50A 50 ohm Adapter • Anritsu 34RKNF50 50 ohm Adapter •...
- Page 448 Table A-16, recording the Sensor B reading in the second column. 8. Repeat Step 4 through Step 7 for the next input frequency. PN: 10580-00255 Rev. J MT8212E and MT8213E MM...
- Page 449 A-14. 7. Repeat Step 5 through Step 6 for the next test power level in Table A-16. 8. Repeat Step 4 through Step 6 for the next test frequency in Table A-16. MT8212E and MT8213E MM PN: 10580-00255 Rev. J...
- Page 450 4-1 Power Meter Level Accuracy Power Meter Verification PN: 10580-00255 Rev. J MT8212E and MT8213E MM...
- Page 451 “Mobile WiMAX Signal Analyzer Verification, Options 66 and 67” on page 5-93 • “LTE Signal Analyzer Verification, Options 541 and 542” on page 5-100 • “TD-LTE Signal Analyzer Verification, Options 551 and 552” on page 5-105 MT8212E and MT8213E MM PN: 10580-00255 Rev. J...
- Page 452 • Anritsu T3377 105 ohm Load Procedure 1. Connect the external power supply (Anritsu PN 40-187-R) to the MT821xE Cell Master. 2. Press the On/Off key to turn On the MT821xE. 3. Set the MT821xE to Cable and Antenna Analyzer mode and preset the instrument.
- Page 453 A-18. Verify that the voltage and current readings are within the specifications. 5. Press the Bias Tee On/Off submenu key to turn Off the Bias Tee. Disconnect the Anritsu T2904 40 ohm load and connect the Anritsu T3536 78 ohm load to the RF In port.
- Page 454 • Anritsu T2904 40 ohm Load Procedure 1. Connect the external power supply (Anritsu PN 40-187-R) to the MT821xE Cell Master. 2. Press the On/Off key to turn On the MT821xE. 3. Set the MT821xE to Cable and Antenna Analyzer mode and preset the instrument.
- Page 455 9. Press the Amplitude main menu key and set the Top to –50 dB and Scale to 10 dB/div. 10. For MT8212E Cell Masters, verify that the trace is below –80 dB for the entire frequency band (2 MHz to 4 GHz).
- Page 456 • Anritsu MA2482D Power Sensors (2) • Anritsu 1N50C RF Limiter • Anritsu 34NN50A Adapter • Anritsu 15NNF50-1.5C RF Coaxial Cables (3) • Aeroflex/Weinschel 1870A Power Splitter • Aeroflex/Weinschel 44-10 10 dB Fixed Attenuator • Mini-Circuits TIA-1000-1R8 RF Power Amplifier •...
- Page 457 7. Using the Down Arrow key, step through the selection list until the “Digital_Broadcast” option is highlighted. 8. Press the Set key. 9. Press the F6 (Return) soft key. 10. Press the Set key. MT8212E and MT8213E MM PN: 10580-00255 Rev. J...
-
Page 458: Frequency Lock Range Verification
Table A-20. Frequency Lock Range Verification The test in this section can be used to verify the frequency lock range of the MT821xE in ISDB-T Signal Analyzer mode. PN: 10580-00255 Rev. J MT8212E and MT8213E MM... - Page 459 16. On the MG3700A, set the frequency to 473.05285714 MHz. 17. Press Execute Measure to read the new frequency. 18. Wait until Average (10/10) appears at the top of the display. 19. Record the frequency error in Table A-21. MT8212E and MT8213E MM PN: 10580-00255 Rev. J...
-
Page 460: Level Accuracy Verification
10. Adjust the MN63A attenuator so that the Sensor A reading is –10 dBm ± 1 dB. Record the attenuation reading in the AT(–10) column of Table A-22, “Level Accuracy Verification, AT(–10)” on page A-16. 5-10 PN: 10580-00255 Rev. J MT8212E and MT8213E MM... - Page 461 21. Press the Meas Setup main menu key and then the Meas Mode submenu key. 22. Use Up/Down arrow keys, highlight Average, and then press the Enter key. 23. Change the Average Count to 50. MT8212E and MT8213E MM PN: 10580-00255 Rev. J 5-11...
- Page 462 47. On the MG3700A, adjust power level so that the Power Meter Sensor A reading is –50.0 dBm ± 0.2 dB. 48. Record Power Meter Sensor A and Sensor B readings in Table A-23. 5-12 PN: 10580-00255 Rev. J MT8212E and MT8213E MM...
-
Page 463: Displayed Average Noise Level (Danl) Verification
2. Set the MG3700A frequency to 473.14285714 MHz. Set the level to –10 dBm. 3. Press the Mod On/Off key so that the LED is Off. 4. Input the RF signal from MG3700A into the MT821xE Spectrum Analyzer RF In. MT8212E and MT8213E MM PN: 10580-00255 Rev. J 5-13... - Page 464 16. Set the frequency of the MG3700A to 767.14285714 MHz and change the MT821xE Channel to 62. 17. Wait until Average counter displays (10/10). 18. Record the 10 kHz and the 100 kHz phase noise readouts in Table A-29. 19. Record the Frequency Error in Table A-29. 5-14 PN: 10580-00255 Rev. J MT8212E and MT8213E MM...
-
Page 465: Ber Measurement Functional Check, Option 79 Only
Option 79 in the Cell Master ISDB-T Field Analyzer. Equipment Required: • Anritsu MG3700A Vector Signal Generator • RF Coaxial Cable, Anritsu Model 15NN50-1.5C Procedure: 1. Turn On the MG3700A and the Cell Master. 2. Connect the MG3700A Signal Generator and Cell Master as shown in Figure 5-1 on page 5-7. - Page 466 32. Press the Meas Selection main menu key, then press BER. Press the Stop Measurement main menu key. 33. To verify option 79 is functional, press the Start Measurement main menu key and verify the Signal Sync turns from Unlocked to Locked. 5-16 PN: 10580-00255 Rev. J MT8212E and MT8213E MM...
-
Page 467: Gps Verification, Option 31
1. Connect the GPS antenna to the GPS Antenna connector on the MT821xE. On the MT821xE, change the mode to Spectrum Analyzer and preset the instrument. If a fixed GPS antenna is not available, then the Anritsu 2000-1528-R GPS antenna can be used for this test. - Page 468 19. If the value of Reference Source indicates GPS High Accuracy, then remove the GPS antenna and wait until the Reference Source indicates Int Std Accy and repeat Step 16 through Step 5-18 PN: 10580-00255 Rev. J MT8212E and MT8213E MM...
-
Page 469: Isdb-T Sfn Verification, Option 32
• Anritsu MA2482D Power Sensors (2) • Anritsu 1N50C RF Limiter • Anritsu 34NN50A Adapter • Anritsu 15NNF50-1.5C RF Coaxial Cables (3) • Aeroflex/Weinschel 1870A Power Splitter • Aeroflex/Weinschel 44-10 10 dB Fixed Attenuator • Mini-Circuits TIA-1000-1R8 RF Power Amplifier •... -
Page 470: Level Accuracy Verification
The MG3700A has two Set keys, and they both have the same function. 7. Press the (F1) soft key to select “Load File to Memory”. 8. Press the (F1) soft key again to select “Select Package”. 5-20 PN: 10580-00255 Rev. J MT8212E and MT8213E MM... - Page 471 34. Record the result into the Dev column under Pre Amp Off in Table A-32 and verify that it is within specification. 35. Set the MN63A attenuation to the next AT(set) value in Table A-32. MT8212E and MT8213E MM PN: 10580-00255 Rev. J 5-21...
- Page 472 44. Record the result to the Dev column under Pre Amp Off in Table A-32 and verify that it is within specification. 45. Press the Frequency/Level main menu key and set Pre Amp to On. Change Reference Level if required. 5-22 PN: 10580-00255 Rev. J MT8212E and MT8213E MM...
- Page 473 Table A-34, “ISDB-T SFN Analyzer Level Accuracy Measurement Channel = 38ch at 623.14285714 MHz” on page A-27 Table A-35, “ISDB-T SFN Signal Analyzer Level Accuracy Measurement Channel = 62ch at 767.14285714 MHz” on page A-28. MT8212E and MT8213E MM PN: 10580-00255 Rev. J 5-23...
-
Page 474: Displayed Average Noise Level (Danl) Verification
10. Repeat Step 4 through Step 8 for Channel 38 11. Change the channel to 62. Set the Pre Amp to Off. 12. Repeat Step 4 through Step 8 for Channel 62. 5-24 PN: 10580-00255 Rev. J MT8212E and MT8213E MM... -
Page 475: Gsm/Gprs/Edge Signal Analyzer Verification, Options 40 And 41
Option 40, Option 41, or Both The tests in this section verify that the optional GSM/GPRS/EDGE Signal Analyzer functions correctly in Anritsu Model MT821xE Cell Master. The tests are as follows: • “GSM Signal Analyzer Option Verification (Option 40 and Option 41)”... - Page 476 8. Press the Set key. Note The MG3700A has two Set keys, and they both have the same function. 9. Press the (F1) soft key to select Load File to Memory. 5-26 PN: 10580-00255 Rev. J MT8212E and MT8213E MM...
- Page 477 0.2 dB. Then subtract this value from the power meter reading in Step Then record the calculated Burst Power error and the displayed value of Freq Error in section At 1800 MHz, –10 dBm Level, TCH ALL Pattern in Table A-38. MT8212E and MT8213E MM PN: 10580-00255 Rev. J 5-27...
- Page 478 40. For an MT821xE with Option 41 (GSM/GPRS/EDGE Demodulator), record the displayed Phase Err RMS (deg) in section At 1800 MHz, –50 dBm Level, TCH Pattern in Table A-39. 41. Verify that the measured values in Step 39 Step 40 (or both) are within specifications. 5-28 PN: 10580-00255 Rev. J MT8212E and MT8213E MM...
-
Page 479: Edge Burst Power, Frequency Error, And Residual Error Tests (Options 40 And 41)
• Anritsu 34NN50A Adapter • Anritsu 15NN50-1.5C RF Coaxial Cable • Aeroflex/Weinschel 1870A Power Splitter • Anritsu PN 2000-1627-R Coaxial Cables (2) • 10 MHz Reference Standard Procedure 1. Confirm that the equipment settings are unchanged from the previous test. Refer to... - Page 480 22. For an MT821xE with Option 41 (GSM/GPRS/EDGE Demodulator), record the displayed EVM (rms) in section At 850 MHz, –10 dBm Level, DL_MCS-9_1SLOT Pattern in Table A-39. 23. Verify that the measured values in Step 21 Step 22 (or both) are within specifications. 5-30 PN: 10580-00255 Rev. J MT8212E and MT8213E MM...
-
Page 481: Cdma Signal Analyzer Verification, Options 42 And 43
5-8 CDMA Signal Analyzer Verification, Options 42 and 43 CDMA Signal Analyzer Verification, Options 42 and 43 Option 42, Option 43, or Both The tests in this section verify the optional CDMA Signal Analyzer functions in Anritsu Model MT821xE Cell Master. The tests are as follows: •... - Page 482 8. Press the (F1) soft key to select Load File to Memory. 9. Press the (F1) soft key again to select Select Package. 10. Using the Down Arrow key, step through the selection list until the “CDMA2000” option is highlighted. 5-32 PN: 10580-00255 Rev. J MT8212E and MT8213E MM...
- Page 483 Freq Error, Rho, and Tau in section At 1930.05 MHz, –y30 dBm Level, cdmaOne in Table A-41. 31. Verify that the measured values in Step 29 Step 30 (or both) are within specifications. MT8212E and MT8213E MM PN: 10580-00255 Rev. J 5-33...
-
Page 484: Cdma2000 Channel Power, Frequency Error, Rho, And Tau Verification
• Anritsu 34NN50A Adapter • Anritsu 15NN50-1.5C RF Coaxial Cable • Aeroflex/Weinschel 1870A Power Splitter • Anritsu PN 2000-1627-R Coaxial Cables (2) • 10 MHz Reference Standard Procedure 1. Confirm that the equipment settings are unchanged from the previous test. Refer to... -
Page 485: Wcdma/Hsdpa Signal Analyzer Verification, Options 44, 45, 65
WCDMA/HSDPA Signal Analyzer Verification, Options 44, 45, 65, Option 44 and Option 45 or Option 65 The tests in this section verify the optional WCDMA Signal Analyzer functions in Anritsu Model MT821xE Cell Master. The tests are as follows •... - Page 486 6. Press the Shift key, the Preset (1) key, and then the Preset submenu key. 7. On the MG3700A, press the Preset key (Yellow key on the upper left hand side). 8. Press the Down Arrow key to select Yes. 5-36 PN: 10580-00255 Rev. J MT8212E and MT8213E MM...
- Page 487 32. Turn Off the RF output of the MG3700A. 33. Disconnect the coupler from Sensor B and connect the coupler to the MT821xE SPA RF In connector. Refer to Figure 5-9 MT8212E and MT8213E MM PN: 10580-00255 Rev. J 5-37...
- Page 488 “Option 44, WCDMA Absolute Power Accuracy” on page A-34. 41. Use the following formula to calculate the absolute power accuracy of the MT821xE at +10 dBm: Error = Measured Power –10 5-38 PN: 10580-00255 Rev. J MT8212E and MT8213E MM...
- Page 489 69. Turn Off the RF output of the MG3700A. 70. Use the following formula to calculate the absolute power accuracy of MT821xE at –20 dBm: Error = Measured Power – (–20) MT8212E and MT8213E MM PN: 10580-00255 Rev. J 5-39...
-
Page 490: Wcdma Occupied Bandwidth (Obw) Verification (Option 44)
• Anritsu MA2482D Power Sensor • Anritsu 34NN50A Adapter • Anritsu 15NN50-1.5C RF Coaxial Cable • Aeroflex/Weinschel 1870A Power Splitter • Anritsu PN 2000-1627-R Coaxial Cables (2) • Aeroflex/Weinschel Model 44-10 Attenuator (2) • 10 MHz Reference Standard 5-40 PN: 10580-00255 Rev. J... - Page 491 6. Press the Shift key, the Preset (1) key, and then the Preset submenu key. 7. On the MG3700A, press the Preset key (Yellow key on the upper left hand side). 8. Press the Down Arrow key to select Yes. MT8212E and MT8213E MM PN: 10580-00255 Rev. J 5-41...
- Page 492 25. Record the OBW reading in the OBW column of Table A-45 and verify that it is within 4.2 MHz ± 100 kHz. 26. Repeat Step 19 through Step 25 for the other frequencies that are listed Table A-45. 5-42 PN: 10580-00255 Rev. J MT8212E and MT8213E MM...
-
Page 493: Wcdma Rf Channel Power Accuracy (Option 44)
• Anritsu MA2482D Power Sensor • Anritsu 34NN50A Adapter • Anritsu 15NN50-1.5C RF Coaxial Cable • Aeroflex/Weinschel 1870A Power Splitter • Anritsu PN 2000-1627-R Coaxial Cables (2) • Aeroflex/Weinschel Model 44-10 Attenuator (2) • 10 MHz Reference Standard Procedure 1. Turn On the MG3700A Vector Signal Generator and the ML2438A power meter. - Page 494 27. Record calculated value into the RF CH Power Error column of Table A-46 and verify that it is within specification (± 1.25 dB). 28. Repeat Step 19 Step 27 for the other frequencies listed in Table A-46. 5-44 PN: 10580-00255 Rev. J MT8212E and MT8213E MM...
-
Page 495: Hsdpa Rf Channel Power Accuracy (Option 44)
• Anritsu MA2482D Power Sensor • Anritsu 34NN50A Adapter • Anritsu 15NN50-1.5C RF Coaxial Cable • Aeroflex/Weinschel 1870A Power Splitter • Anritsu PN 2000-1627-R Coaxial Cables (2) • Aeroflex/Weinschel Model 44-10 Attenuator (2) • 10 MHz Reference Standard Procedure 1. Turn On the MG3700A Vector Signal Generator and the ML2438A power meter. - Page 496 Measured RF Channel Power – 0.246 – Power Meter reading 27. Record calculated value to the RF CH Power Accuracy column of Table A-47 and verify that it is within specification (± 1.25 dB). 5-46 PN: 10580-00255 Rev. J MT8212E and MT8213E MM...
-
Page 497: Error Vector Magnitude (Evm) Verification (Option 45 Or 65)
• Anritsu MA2482D Power Sensor • Anritsu 34NN50A Adapter • Anritsu 15NN50-1.5C RF Coaxial Cable • Aeroflex/Weinschel 1870A Power Splitter • Anritsu PN 2000-1627-R Coaxial Cables (2) • Aeroflex/Weinschel Model 44-10 Attenuator (2) • 10 MHz Reference Standard Procedure 1. Turn On the MG3700A Vector Signal Generator and the ML2438A power meter. - Page 498 48. Press the Amplitude key, then press the Adjust Range submenu key. 49. Record the EVM reading in Table A-49, “Option 65, HSDPA Error Vector Magnitude (Test Model 5)” on page A-36 and verify that it is within 2.5%. 5-48 PN: 10580-00255 Rev. J MT8212E and MT8213E MM...
- Page 499 Option Verification 5-9 WCDMA/HSDPA Signal Analyzer Verification, Options 44, 45, 65, This completes the two EVM tests for an MT821xE with Option 65. MT8212E and MT8213E MM PN: 10580-00255 Rev. J 5-49...
-
Page 500: Fixed Wimax Signal Analyzer Verification, Options 46 And 47
• Anritsu 34NN50A Adapter • Anritsu 15NN50-1.5C RF Coaxial Cable • Aeroflex/Weinschel 1870A Power Splitter • Aeroflex/Weinschel 44-10 10 dB Fixed Attenuator (2) • Anritsu PN 2000-1627-R Coaxial Cables (3) • 10 MHz Reference Standard 5-50 PN: 10580-00255 Rev. J... - Page 501 Press the Set key. The Select Package list box appears. Again select WiMax and the Set key. i. Another file list appears. Select (highlight) Mx10g32. j. Press the Set key. MT8212E and MT8213E MM PN: 10580-00255 Rev. J 5-51...
- Page 502 20. Set the calibration factor frequency of the power sensor to 5600.5 MHz. 21. Set the MG3700A frequency to 5600.5 MHz. 22. Change the MT821xE center frequency to 5600.5 MHz. 23. Repeat Step 18 Step 5-52 PN: 10580-00255 Rev. J MT8212E and MT8213E MM...
-
Page 503: Fixed Wimax Signal Analyzer Option Verification (Option 47)
• Anritsu 15NN50-1.5C RF Coaxial Cable • Aeroflex/Weinschel 1870A Power Splitter • Aeroflex/Weinschel 44-10 10 dB Fixed Attenuator (2) • Anritsu PN 2000-1627-R Coaxial Cables (2) • 10 MHz Reference Standard Procedure 1. Connect the MA2482D Power Sensor to the power meter and zero the sensor. - Page 504 A-51. 28. Verify that the measured EVM is within specification. 29. Record the MT821xE frequency error reading in Table A-52. 30. Verify that the measured frequency error is within the specification. 5-54 PN: 10580-00255 Rev. J MT8212E and MT8213E MM...
-
Page 505: T1 Analyzer Verification, Option 51
Equipment Required • Anritsu MP1570A Sonet Analyzer with MP0121A and MP0122A modules • Anritsu PN 806-16 Cable T1 Bantam Plug to Bantam Plug (Quantity 2) • LeCroy Model WaveRunner 62Xi Digital Oscilloscope with ET-PMT Electrical Telecom Mask software and TF-ET Telecom Adapter Set •... -
Page 506: T1 Clock Frequency Test Verification
6. Using an 806-16 bantam cable, connect the MT821xE TX connector to the MP1570A AMI/B8ZS Input (on the MP0122A module). 7. Using another 806-16 bantam cable, connect the MT821xE RX connector to the MP1570A AMI/B8ZS Output (on the MP0122A module). 5-56 PN: 10580-00255 Rev. J MT8212E and MT8213E MM... -
Page 507: T1 Transmit Level Test Verification
13. Change Tx LBO to –15 dB on the MT821xE. 14. Record the displayed peak-to-peak voltage in the Tx LBO: –15 dB row of Table A-54 and verify that it is between 0.5 volts and 1.7 volts. MT8212E and MT8213E MM PN: 10580-00255 Rev. J 5-57... - Page 508 22. Change Tx LBO to 0 dB on the MT821xE. 23. Record the displayed peak-to-peak voltage in the Tx LBO: 0 dB row of Table A-55 and verify that it is between 4.8 volts and 7.6 volts. 5-58 PN: 10580-00255 Rev. J MT8212E and MT8213E MM...
-
Page 509: E1 Analyzer Verification, Option 52
Equipment Required • Anritsu MP1570A Sonet Analyzer with MP0121A and MP0122A modules • Anritsu PN 3-806-169 Cable 75 ohm BNC(m) to BNC(m) (Quantity 2) • Anritsu PN 2000-1627-R Coaxial Cable • Anritsu PN 806-117 Cable RJ48 to dual Bantam •... - Page 510 16. Record the Frequency reading on the display in the Recover Clock Frequency row of Table A-56. 17. Press the Start/Stop main menu key to stop the measurement. 5-60 PN: 10580-00255 Rev. J MT8212E and MT8213E MM...
-
Page 511: E1 Transmit Level Test Verification
22. Press the Auto Setup key and then tap the Confirm button. Wait until the oscilloscope displays a stable trace. 23. Tap on Measure on the Toolbar and select Std Vertical. 24. Record the displayed P1 peak-to-peak voltage in the 120 ohm row of Table A-57. MT8212E and MT8213E MM PN: 10580-00255 Rev. J 5-61... - Page 512 29. Press the Start/Stop main menu key to turn measurement On (“Measure ON” appears in the lower-left corner of the display). 30. Read the Vpp value from the displayed table and record it in the 120 ohm row of Table A-58. 5-62 PN: 10580-00255 Rev. J MT8212E and MT8213E MM...
-
Page 513: T1/T3 Analyzer Verification, Option 53
Equipment Required • Anritsu MP1570A Sonet Analyzer with MP0121A and MP0122A modules • Anritsu PN 806-16 Cable T1 Bantam Plug to Bantam Plug (Quantity 2) • LeCroy Model WaveRunner 62Xi Digital Oscilloscope with ET-PMT Electrical Telecom Mask software and TF-ET Telecom Adapter Set •... -
Page 514: T1 Clock Frequency Test Verification
Use the arrow keys to highlight different parameters that will need to be changed. Use the Set key to display the menu of choices for each parameter. Use the Up/Down arrow keys to highlight the desired setting, then press the Set key to accept the highlighted setting. 5-64 PN: 10580-00255 Rev. J MT8212E and MT8213E MM... - Page 515 14. Press the Start/Stop main menu key so that Measure On is displayed in the lower-left corner of the monitor screen. 15. Record the Frequency value on the MT821xE in the Recovered Clock Frequency row of Table A-59. MT8212E and MT8213E MM PN: 10580-00255 Rev. J 5-65...
-
Page 516: T1 Transmit Level Test Verification
22. Change Tx LBO to 0 dB on the MT821xE. 23. Record the displayed peak-to-peak voltage in the Tx LBO: 0 dB row of Table A-61 and verify that it is between 4.8 volts and 7.2 volts. 5-66 PN: 10580-00255 Rev. J MT8212E and MT8213E MM... -
Page 517: T3 Clock Frequency Test Verification
16. Press the Start/Stop main menu key to turn the measurement On (“Measure ON” appears in the lower-left corner of the display). 17. Record the Frequency reading (center of display) in the Recovered Clock Frequency row in Table A-62. MT8212E and MT8213E MM PN: 10580-00255 Rev. J 5-67... -
Page 518: T3 Transmit Level Test Verification
14. Change the Tx LBO (press the Configuration main menu key) to Low. 15. Press the Measurements main menu key, view the Vpp value, and record in the LOW row of Table A-64. 5-68 PN: 10580-00255 Rev. J MT8212E and MT8213E MM... -
Page 519: Td-Scdma Signal Analyzer Verification, Options 60 And 61
• Anritsu MA2482D Power Sensor • Anritsu 34NN50A Adapter • Anritsu 15NN50-1.5C RF Coaxial Cable • Aeroflex/Weinschel 1870A Power Splitter • Aeroflex/Weinschel 44-10 10 dB Fixed Attenuator (2) • Anritsu PN 2000-1627-R Coaxial Cables (3) • 10 MHz Reference Standard Setup 10 MHz Reference... - Page 520 24. For an MT821xE with Option 61 (TD-SCDMA Demodulator), record the displayed Freq error and Tau values in Table A-65. 25. Verify that the measured values in Step 23 Step 24 are within specifications. 5-70 PN: 10580-00255 Rev. J MT8212E and MT8213E MM...
- Page 521 5-15 EVDO Signal Analyzer Verification, Options 62 and 63 5-15 EVDO Signal Analyzer Verification, Options 62 and 63 Option 62, Option 63, or Both The tests in this section verify the optional EVDO Signal Analyzer functions in Anritsu Model MT821xE Cell Master. The tests are as follows: •...
-
Page 522: Evdo Signal Analyzer Verification, Options 62 And 63
6. Press the Down Arrow key or turn the knob to select Yes. 7. Press the Set key. Note The MG3700A has two Set keys, and they both have the same function. 5-72 PN: 10580-00255 Rev. J MT8212E and MT8213E MM... -
Page 523: Qpsk Modulation Channel Power, Frequency Error, Rho, And Tau Verification
5. Adjust the MG3700A output so that the power meter reads 0 dBm ± 0.2 dB. 6. On the MT821xE, press the Frequency main menu key and set 1930.05 MHz as Center Frequency. Then wait 15 seconds to allow the MT821xE to update its measured results. MT8212E and MT8213E MM PN: 10580-00255 Rev. J 5-73... -
Page 524: 16-Qam Modulation Channel Power, Frequency Error, Rho, And Tau Verification
6. For an MT821xE with Option 63 (EVDO Demodulator), record the displayed Freq Error, Rho Pilot, and Tau in the At 1930.05 MHz, –50 dBm Level, 2457.6kps 16-QAM Modulation section of Table A-67. 7. Verify that the measured values in Step 5 Step 6 are within specifications. 5-74 PN: 10580-00255 Rev. J MT8212E and MT8213E MM... -
Page 525: Idle Slot Channel Power, Frequency Error, Rho, And Tau Verification, Options 62 And 63
13. For an MT821xE with Option 63 (EVDO Demodulator), record the displayed Freq Error, Rho Pilot, and Tau in the At 870.03 MHz, –10 dBm Level, IDLE SLOT section of Table A-67. 14. Verify that the measured values in Step 12 Step 13 are within specifications. MT8212E and MT8213E MM PN: 10580-00255 Rev. J 5-75... -
Page 526: Dvb-T/H Signal Analyzer Verification, Options 64 And 57
“BER Measurement Functional Check, Option 57 Only” on page 5-86 Equipment Required • Anritsu MG3700A Vector Signal Generator • Anritsu 15NN50-1.5C RF Coaxial Cable • Anritsu PN 2000-1627-R Coaxial Cables (2) • 10 MHz Reference Standard 5-76 PN: 10580-00255 Rev. J... -
Page 527: Frequency Accuracy And Residual Mer Verification
11. Use the Down Arrow key to step through the selection list until the Digital_Broadcast option is highlighted. 12. Press the Set key. 13. Use the Down Arrow key to step through the selection list until the DVB-T_H_00 option is highlighted. MT8212E and MT8213E MM PN: 10580-00255 Rev. J 5-77... - Page 528 43. Set the MG3700A Frequency to 662 MHz and Level to –20 dBm. 44. Change the Cell Master to Channel 45, and set Reference Level to –20 dBm. 45. Repeat Step 34 through Step 46. Set Cell Master Pre Amp to Off. 5-78 PN: 10580-00255 Rev. J MT8212E and MT8213E MM...
-
Page 529: Frequency Lock Range Verification
• RF Coaxial Cable, Anritsu Model 15NN50-1.5C • Anritsu PN 2000-1627-R Coaxial Cables (2) Procedure: 1. Connect the 10 MHz Frequency Reference source to the Anritsu MG3700A and Cell Master as shown in Figure 5-14 on page 5-77. 2. On the MG3700A, press the yellow Preset key located on the upper-left side of the instrument. -
Page 530: Level Accuracy Verification
• Power Sensor, Anritsu Model MA2482D (2) • Power Splitter, Aeroflex⁄Weinschel Model 1870A • Fixed Attenuator, Aeroflex/Weinschel Model 44-10 • RF Coaxial Cable, Anritsu Model 15NN50-1.5C (3) • Adapter, Anritsu Model 34NN50A • Midwest Microwave ADT-2615-NF-BNM-02 Adapters (2) • Anritsu 1N50C RF Limiter •... - Page 531 10. Press the F6 (Return) soft key. 11. Press the Set key. 12. Use the Down Arrow key to step through the selection list until the Digital_Broadcast option is highlighted. 13. Press the Set key. MT8212E and MT8213E MM PN: 10580-00255 Rev. J 5-81...
- Page 532 25. Calculate the AT(set) values for Test Levels –10 dBm through –45 dBm and record the values in the “AT(set) (dB)” column in Table A-75, “Option 64, DVB-T/H Signal Analyzer, Level Accuracy Measurement, Channel = 21 at 474 MHz” on page A-47 5-82 PN: 10580-00255 Rev. J MT8212E and MT8213E MM...
- Page 533 35. Calculate the Deviation by using the following formula: Deviation = M(Level) – SB(–10) – ΔAB(–10) – AT(–10) + AT(set) Note Because AT(–10) is the same as AT(set), the value of [–AT(–10) + AT(set)] is equal to zero. MT8212E and MT8213E MM PN: 10580-00255 Rev. J 5-83...
- Page 534 59. Subtract the value of the Sensor A reading from the value of the Sensor B reading and record the result in the “DAB(–50)” column in Table A-74. DAB(–50) = Sensor B Reading – Sensor A Reading 5-84 PN: 10580-00255 Rev. J MT8212E and MT8213E MM...
-
Page 535: Displayed Average Noise Level (Danl) Verification
Displayed Average Noise Level (DANL) Verification The tests in this section verify the DANL of the Cell Master in DVB-T/H Signal Analyzer mode. Equipment Required: • 50 ohm termination, Anritsu Model 28N50-2 • Cell Master MT821xE Procedure: 1. Set the mode of the Cell Master to DVB-T/H Analyzer and preset the instrument. -
Page 536: Ber Measurement Functional Check, Option 57 Only
• Power Splitter, Aeroflex⁄Weinschel Model 1870A • Power Sensor, Anritsu Model MA2482D • Adapter, Anritsu Model 34NN50A • RF Coaxial Cable, Anritsu Model 15NN50-1.5C • RF Coaxial Cable, BNC-to-BNC, 75 ohm, Anritsu Model 3-806-169 5-86 PN: 10580-00255 Rev. J MT8212E and MT8213E MM... - Page 537 MP8931A as shown in Figure 5-17. Use a 75 ohm BNC cable to connect between the DVB-ASI Input connector of the MP8931A and the Note DVB-ASI Out connector of the Cell Master. MT8212E and MT8213E MM PN: 10580-00255 Rev. J 5-87...
- Page 538 37. Ensure that MS8911B-057_Inspection is highlighted and press the Set key. 38. Ensure that 8M_8k_64QAM_2_3_ALL0 is highlighted and press the Set key. 39. Use the Arrow keys to highlight the Frequency Offset and enter 4 MHz. 5-88 PN: 10580-00255 Rev. J MT8212E and MT8213E MM...
-
Page 539: Introduction
• Anritsu MA2482D Power Sensors (2) • Anritsu 34NN50A Adapter • Anritsu 15NNF50-1.5C RF Coaxial Cables • Aeroflex/Weinschel 1870A Power Splitter • Anritsu 28N50-2 50 Ohm Terminator • Anritsu PN 2000-1627-R Coaxial Cables (2) MT8212E and MT8213E MM PN: 10580-00255 Rev. J 5-89... -
Page 540: Level Accuracy Verification
7. Press the (F1) soft key again to select “Select Package”. 8. Using the Down Arrow key, step through the selection list until the “Digital_Broadcast” option is highlighted. 9. Press the Set key. 5-90 PN: 10580-00255 Rev. J MT8212E and MT8213E MM... - Page 541 30. Repeat steps 1 through 29 for frequency 666 MHz and record results in Table A-81. 31. Repeat steps 1 through 29 for frequency 858 MHz and record results in Table A-82. MT8212E and MT8213E MM PN: 10580-00255 Rev. J 5-91...
-
Page 542: Displayed Average Noise Level (Danl) Verification
10. After Average (50/50) appears, record the Channel Power in Table A-84, “Option 78, DVB-T/H SFN Analyzer DANL with Pre Amp On” on page A-51. 11. Repeat for the other frequencies in Table A-84. 5-92 PN: 10580-00255 Rev. J MT8212E and MT8213E MM... -
Page 543: Mobile Wimax Signal Analyzer Verification, Options 66 And 67
• Anritsu 15NN50-1.5C RF Coaxial Cable • Aeroflex/Weinschel 1870A Power Splitter • Aeroflex/Weinschel 44-10 10 dB Fixed Attenuator (2) • 10 MHz Reference Standard • Anritsu PN 2000-1627-R Coaxial Cables (2) MT8212E and MT8213E MM PN: 10580-00255 Rev. J 5-93... - Page 544 Press the yellow Preset button (answer Yes to the question). b. Press the Set key c. Press the (F1) soft key to select Load File to Memory. d. Press the (F1) soft key again to select Select Package. 5-94 PN: 10580-00255 Rev. J MT8212E and MT8213E MM...
- Page 545 Press the yellow Preset button (answer Yes to the question). b. Press the Set key c. Press the (F1) soft key to select Load File to Memory. d. Press the (F1) soft key again to select Select Package. MT8212E and MT8213E MM PN: 10580-00255 Rev. J 5-95...
- Page 546 26. Repeat Step 9 through Step 20, recording the results into the test record in Table A-86, “Option 66, Mobile WiMAX Channel Power Accuracy (5 MHz Bandwidth and 5 ms Frame Length)”. 5-96 PN: 10580-00255 Rev. J MT8212E and MT8213E MM...
-
Page 547: Mobile Wimax Residual Evm And Frequency Error Tests (Option 67)
The tests in this section verify the function of the optional Mobile WiMAX Signal Analyzer in Model MT821xE Cell Master. Equipment Required • Anritsu MG3700A Vector Signal Generator • Anritsu 15NN50-1.5C RF Coaxial Cable • Anritsu PN 2000-1627-R Coaxial Cables (2) • 10 MHz Reference Standard Setup 10 MHz Reference... - Page 548 17. Verify that the measured EVM is within specification. 18. Repeat Step 10 through Step 12 to measure the Frequency Error at –50 dBm, and record the results in Table A-88. 5-98 PN: 10580-00255 Rev. J MT8212E and MT8213E MM...
- Page 549 Mobile WiMAX Frequency Error (5 MHz Bandwidth and 5 ms Frame Length)”. 24. Repeat Step 19 through Step 22, using the differenct frequencies and power levels within Table A-89 Table A-90. MT8212E and MT8213E MM PN: 10580-00255 Rev. J 5-99...
-
Page 550: Lte Signal Analyzer Verification, Options 541 And 542
• Anritsu 34NN50A Adapter • Anritsu 15NN50-1.5C RF Coaxial Cable • Aeroflex/Weinschel 1870A Power Splitter • Aeroflex/Weinschel 44-10 10 dB Fixed Attenuator (2) • Anritsu PN 2000-1627-R Coaxial Cables (2) • 10 MHz Reference Standard 5-100 PN: 10580-00255 Rev. J... -
Page 551: Lte Channel Power Accuracy Tests (Option 541)
Averaging NUMBER to 256. 3. Set the calibration factor frequency of the power sensor to 750 MHz. 4. Connect the equipment as shown in Figure 5-21 5. Set the MG3700A as follows: MT8212E and MT8213E MM PN: 10580-00255 Rev. J 5-101... - Page 552 19. Measure the Channel Power for –20 dBm and –50 dBm and then record the measured result in the Measured Channel Power column and the calculated error in the Error column of Table A-91. 20. Verify that the error is within specification. 5-102 PN: 10580-00255 Rev. J MT8212E and MT8213E MM...
-
Page 553: Lte Frequency Error Tests (Option 542)
9. Record the MT821xE Frequency Error reading in the 750 MHz, –20 dBm section of Table A-92, “Option 542, Frequency Accuracy” on page A-55. 10. Verify that the value is within specification. MT8212E and MT8213E MM PN: 10580-00255 Rev. J 5-103... - Page 554 22. Verify that the value is within specification. 23. For units with 20 MHz IF BW Available, which can be seen within the System Status window, repeat Step 3 through Step 22 using the 20 MHz pattern, E-TM_3-1_20M. 5-104 PN: 10580-00255 Rev. J MT8212E and MT8213E MM...
-
Page 555: Td-Lte Signal Analyzer Verification, Options 551 And 552
• Anritsu 34NN50A Adapter • Anritsu 15NN50-1.5C RF Coaxial Cable • Aeroflex/Weinschel 1870A Power Splitter • Aeroflex/Weinschel 44-10 10 dB Fixed Attenuator (2) • Anritsu PN 2000-1627-R Coaxial Cables (2) • 10 MHz Reference Standard MT8212E and MT8213E MM PN: 10580-00255 Rev. J... -
Page 556: Td-Lte Channel Power Accuracy Tests (Option 551)
Averaging NUMBER to 256. 3. Set the calibration factor frequency of the power sensor to 750 MHz. 4. Connect the equipment as shown in Figure 5-22. 5. Set the MG3700A as follows: 5-106 PN: 10580-00255 Rev. J MT8212E and MT8213E MM... - Page 557 19. Measure the Channel Power for –20 dBm and –50 dBm and then record the measured result in the Measured Channel Power column and the calculated error in the Error column of Table A-93. 20. Verify that the error is within specification. MT8212E and MT8213E MM PN: 10580-00255 Rev. J 5-107...
-
Page 558: Td-Lte Frequency Error Tests (Option 552)
9. Record the MT821xE Frequency Error reading in the 750 MHz, –20 dBm section of Table A-94, “Option 552, TD-LTE Frequency Accuracy” on page A-57. 10. Verify that the value is within specification. 5-108 PN: 10580-00255 Rev. J MT8212E and MT8213E MM... - Page 559 22. Verify that the value is within specification. 23. For units with 20 MHz IF BW Available, which can be seen within the System Status window, repeat Step 3 through Step 22 using the 20 MHz pattern, TDLTE-E-TM_3-3_20M. MT8212E and MT8213E MM PN: 10580-00255 Rev. J 5-109...
- Page 560 5-20 TD-LTE Signal Analyzer Verification, Options 551 and 552 Option Verification 5-110 PN: 10580-00255 Rev. J MT8212E and MT8213E MM...
-
Page 561: Chapter 6-Battery Information
Chapter 6 — Battery Information Introduction The following information relates to the care and handling of the Anritsu battery pack and Lithium-Ion batteries in general. • The battery supplied with the Cell Master may need charging before use. Before using the instrument,... -
Page 562: Battery Pack Removal And Replacement
Battery Door Notch Figure 6-2. Battery Access Door Notch 3. Remove the battery access door, the top will pop out a bit and then pull it up out of the access enclosure. PN: 10580-00255 Rev. J MT8212E and MT8213E MM... - Page 563 5. Replacement is the opposite of removal. Note the orientation of the battery contacts, and be sure to insert the new battery with the contacts facing the front of the instrument, as illustrated in Figure 6-4. Battery Contacts Figure 6-4. Battery Contacts MT8212E and MT8213E MM PN: 10580-00255 Rev. J...
- Page 564 6-2 Battery Pack Removal and Replacement Battery Information PN: 10580-00255 Rev. J MT8212E and MT8213E MM...
-
Page 565: Chapter 7-Assembly Replacement
2. Remove the top and bottom bumpers (Figure 7-1) to expose the screw holes on the back of the instrument. Top Bumper GPS Connnector for Option 31 Figure 7-1. Top Bumper and Option 31 MT8212E and MT8213E MM PN: 10580-00255 Rev. J... - Page 566 Cell Master Opened 180 Degrees Figure 7-3. 7. Closing the case is the reverse of opening. Ensure all cables are properly seated and none are pinched before closing the case. PN: 10580-00255 Rev. J MT8212E and MT8213E MM...
-
Page 567: Pcb Assembly Replacement
Also take care to properly fit the connector panel into the grooves in the top of the case and confirm that none of the cables will be pinched when the back case is replaced. MT8212E and MT8213E MM PN: 10580-00255 Rev. J... -
Page 568: Spa Assembly Replacement
8. Installation is the reverse of removal. Remove Castle Nuts Disconnect MCX Cables Remove Remove 3 screws SPA Board 3 Screws Disconnect Ribbon Cable DSP Board Figure 7-5. Removing the SPA Assemblies PN: 10580-00255 Rev. J MT8212E and MT8213E MM... -
Page 569: Spa And Mb/Vna N Connector Replacement
6. Disconnect the N connector from the SPA or MB/VNA by gently pulling the N connector away from the SPA or MB/VNA (Figure 7-7). Figure 7-7. Remove N Connector from SPA or MB/VNA 7. Installation is the reverse of removal. MT8212E and MT8213E MM PN: 10580-00255 Rev. J... -
Page 570: Gps (Option 31) Replacement
7. Installation is the reverse of removal. Remove nut and washer from GPS SMA connector Remove 2 screws Figure 7-8. Removing the GPS Module from the Motherboard (SPA board set to the side) PN: 10580-00255 Rev. J MT8212E and MT8213E MM... -
Page 571: Motherboard/Vna Pcb Assembly Replacement
The fan connector cable is routed through the LCD Assembly housing Fan Assembly Fan Connector cables go though the LCD Assembly housing Figure 7-9. Front Panel Keypad Bezel 4. Reverse the above steps to install the replacement Fan Assembly. MT8212E and MT8213E MM PN: 10580-00255 Rev. J... -
Page 572: Lcd Assembly Replacement
3. Remove the 9 screws connecting the LCD Assembly to the front half of the case (Figure 7-10). Remove the 9 screws holding the LCD Assembly to the case. Figure 7-10. Removing the LCD Assembly PN: 10580-00255 Rev. J MT8212E and MT8213E MM... - Page 573 5. Use a Phillips screw driver to remove the four screws securing the LCD to the housing (Figure 7-12). LCD Backlight Cable LCD Cable to Motherboard LCD Backlight Remove 4 screws to replace LCD Figure 7-12. Replacing the LCD MT8212E and MT8213E MM PN: 10580-00255 Rev. J...
-
Page 574: 7-10 Lcd Backlight Pcb Removal And Replacement
7. Reverse the above steps to install the replacement LCD backlight PCB. Pay attention to the routing of the LCD Backlight Cable. The cable must be positioned so it is not Note pinched when the instrument is reassembled. 7-10 PN: 10580-00255 Rev. J MT8212E and MT8213E MM... -
Page 575: Keypad And Keypad Pcb Replacement
If no touch screen calibration data is stored in the new Keypad PCB when powering on a instrument, it will stay at the boot up screen with the Anritsu logo shown and a message at the bottom of the screen stating: Failed to load touch screen calibration data. -
Page 576: 7-12 Touch Screen Replacement
ND73867. Ensure that firmware version 1.30 or greater is installed. If not, install the latest firmware. 8. Perform a touch screen calibration by pressing the Shift key and then the 0 key, and follow the on-screen calibration directions. 7-12 PN: 10580-00255 Rev. J MT8212E and MT8213E MM... -
Page 577: Chapter 8-Troubleshooting
DC converter (Anritsu part number 40-187-R) to the instrument allowing the battery to charge. 2. Battery may be the wrong type. Use only Anritsu approved battery packs. Some non-approved battery packs will fit into the MT821xE, but are electrically incompatible and will not charge correctly. - Page 578 1. Perform a Master Reset. 2. If the message relates to the RTC battery, replace the RTC battery on the Main PCB. 3. The Main PCB has failed. Replace the Main PCB/Spectrum Analyzer assembly. PN: 10580-00255 Rev. J MT8212E and MT8213E MM...
-
Page 579: Other Problems
No recalibration is required. Other Issues: 1. Perform a Master Reset. 2. Refer to the User Guide. 3. Update system software using Master Software Tools (via Tools menu). 4. Replace the Main PCB/Spectrum Analyzer assembly. MT8212E and MT8213E MM PN: 10580-00255 Rev. J... - Page 580 8-3 Other Problems Troubleshooting PN: 10580-00255 Rev. J MT8212E and MT8213E MM...
-
Page 581: Appendix A-Test Records
Appendix A — Test Records Test Records This appendix provides test records that can be used to record the performance of the MT8212E and MT8213E. Anritsu recommends that you make a copy of the following test record pages and document the measurements each time a Performance Verification is performed. -
Page 582: Test Records For Spectrum Analyzer Verification
1 MHz dBc/Hz dBc/Hz Spurious Response (Second Harmonic Distortion) Verification Table A-3. Spectrum Analyzer Spurious Response (Second Harmonic Distortion) Frequency Measured Value 2nd Harmonic Distortion Specification 50.1 MHz ≤ –56 dBc 100.2 MHz PN: 10580-00255 Rev. J MT8212E and MT8213E MM... - Page 583 Below settings are used only for units with 20 MHz IF BW Available (found in System Status menu) 3 Hz 10 Hz 1 Hz 2.7 Hz 3.3 Hz 1 Hz 10 Hz 1 Hz 0.9 Hz 1.1 Hz MT8212E and MT8213E MM PN: 10580-00255 Rev. J...
- Page 584 A-2 Test Records for Spectrum Analyzer Verification MT821_E Firmware Rev: ______________ Operator: _________________ Date: _____________ Serial Number: _______________ Options: ___________________________________________________ PN: 10580-00255 Rev. J MT8212E and MT8213E MM...
-
Page 585: Spectrum Analyzer Absolute Amplitude Accuracy Verification
–40 dBm 0 dB ± 1.25 dB Turn Pre-Amp On (for the below measurement) -44 dBm -40 dBm 10 dB ± 1.25 dB -50 dBm -45 dBm 5 dB ± 1.25 dB MT8212E and MT8213E MM PN: 10580-00255 Rev. J... -
Page 586: Spectrum Analyzer Absolute Amplitude Accuracy Verification (Continued
–30 dBm at Attenuator for –50 dBm at Attenuator Frequency Attenuator output output output 10.1 MHz 50 MHz 100 MHz 500 MHz 1000 MHz 2000 MHz 3000 MHz 3990 MHz 5000 MHz 5990 MHz PN: 10580-00255 Rev. J MT8212E and MT8213E MM... - Page 587 ±1.25 –2 ±1.25 –2 ±1.25 –2 ±1.25 –2 ±1.25 –50 –40 ±1.25 –30 –20 ±1.25 –30 –20 ±1.25 –30 –20 ±1.25 –30 –20 ±1.25 –2 ±1.25 –2 ±1.25 –2 ±1.25 –2 ±1.25 MT8212E and MT8213E MM PN: 10580-00255 Rev. J...
- Page 588 –2 ±1.25 –2 ±1.25 –2 ±1.25 –2 ±1.25 1000 –50 –40 ±1.25 –30 –20 ±1.25 –30 –20 ±1.25 –30 –20 ±1.25 –30 –20 ±1.25 –2 ±1.25 –2 ±1.25 –2 ±1.25 –2 ±1.25 PN: 10580-00255 Rev. J MT8212E and MT8213E MM...
- Page 589 –2 ±1.25 –2 ±1.25 –2 ±1.25 –2 ±1.25 3990 –50 –40 ±1.25 –30 –20 ±1.25 –30 –20 ±1.25 –30 –20 ±1.25 –30 –20 ±1.25 –2 ±1.25 –2 ±1.25 –2 ±1.25 –2 ±1.25 MT8212E and MT8213E MM PN: 10580-00255 Rev. J...
- Page 590 ±1.50 –2 ±1.50 –2 ±1.50 5990 –50 –40 ±1.50 (MT8213E –30 –20 ±1.50 Only) –30 –20 ±1.50 –30 –20 ±1.50 –30 –20 ±1.50 –2 ±1.50 –2 ±1.50 –2 ±1.50 –2 ±1.50 A-10 PN: 10580-00255 Rev. J MT8212E and MT8213E MM...
-
Page 591: Residual Spurious Response Verification
≤ –137 dBm 2.4 GHz 4.0 GHz 100 kHz 1 kHz ≤ –134 dBm 4.0 GHz 5.0 GHz 100 kHz 1 kHz ≤ –126 dBm 5.0 GHz 6.0 GHz 100 kHz 1 kHz MT8212E and MT8213E MM PN: 10580-00255 Rev. J A-11... -
Page 592: Displayed Average Noise Level (Danl) (Continued
Table A-13. Third Order Intercept (TOI) Verification Calculated TOI Frequency Measured Max Value TOI = –20 + [(–20 - max) / 2] Specification ≥ 16 dBm 800 MHz ≥ 20 dBm 2400 MHz A-12 PN: 10580-00255 Rev. J MT8212E and MT8213E MM... -
Page 593: Test Records For Cable And Antenna Analyzer Verification
Return Loss Accuracy Verification Table A-15. VNA Return Loss Accuracy Verification Frequency Measured Value Specification -4.8 dB ≥ x ≥ -7.2 dB 6 dB -18.3 dB ≥ x ≥ -21.7 dB 20 dB MT8212E and MT8213E MM PN: 10580-00255 Rev. J A-13... -
Page 594: Test Records For Power Meter Verification
± 1.25 dB –50 dBm ± 1.25 dB 4.0 GHz 0 dBm ± 1.25 dB –50 dBm ± 1.25 dB 6.0 GHz 0 dBm ± 1.50 dB –50 dBm ± 1.50 dB A-14 PN: 10580-00255 Rev. J MT8212E and MT8213E MM... -
Page 595: Test Records For Options Verification
System Dynamic Range Verification, Option 21 Table A-19. VNA System Dynamic Range Verification Frequency Measured Value Specification ≤ –80 dB 2 MHz to 4 GHz ≤ –70 dB > 4 GHz to 6 GHz MT8212E and MT8213E MM PN: 10580-00255 Rev. J A-15... -
Page 596: Isdb-T And Ber Verification, Options 30 And 79
Table A-22. Level Accuracy Verification, AT(–10) Frequency Sensor A Sensor B MN63A Attenuation ΔAB(–10) (Channel) Reading Reading Reading, AT(–10) 473.14285714 MHz (Ch 13) 623.14285714 MHz (Ch 38) 767.14285714 MHz (Ch 62) A-16 PN: 10580-00255 Rev. J MT8212E and MT8213E MM... - Page 597 Table A-23. Level Accuracy Verification, AT(–50) Frequency Sensor A Sensor B MN63A Attenuation (Channel) Reading Reading ∆AB(–50) Reading, AT(–50) 473.14285714 MHz (Ch 13) 623.14285714 MHz (Ch 38) 767.14285714 MHz (Ch 62) MT8212E and MT8213E MM PN: 10580-00255 Rev. J A-17...
-
Page 598: Isdb-T And Ber Verification, Options 30 And 79
– NA – NA / –50 – NA – – NA – ± 2.0 –84 AT(–50) + 34 = – NA – NA / –50 – NA – – NA – ± 2.0 A-18 PN: 10580-00255 Rev. J MT8212E and MT8213E MM... -
Page 599: Isdb-T And Ber Verification, Options 30 And 79
– NA – NA / –50 – NA – – NA – ± 2.0 –84 AT(–50) + 34 = – NA – NA / –50 – NA – – NA – ± 2.0 MT8212E and MT8213E MM PN: 10580-00255 Rev. J A-19... -
Page 600: Isdb-T And Ber Verification, Options 30 And 79
– NA – NA / –50 – NA – – NA – ± 2.0 –84 AT(–50) + 34 = – NA – NA / –50 – NA – – NA – ± 2.0 A-20 PN: 10580-00255 Rev. J MT8212E and MT8213E MM... -
Page 601: Isdb-T And Ber Verification, Options 30 And 79
Table A-28. ISDB-T Signal Analyzer DANL with Pre Amp On Channel Frequency Ref Level Measured Value Specification ≤ –90 dBm 473.14285714 MHz –50 dBm ≤ –90 dBm 623.14285714 MHz –50 dBm 767.14285714 MHz –50 dBm ≤ –90 dBm MT8212E and MT8213E MM PN: 10580-00255 Rev. J A-21... -
Page 602: Isdb-T And Ber Verification, Options 30 And 79
Freq Error 473.14285714 ≤ –100 dBc/Hz ≤ –105 dBc/Hz ± 0.2 Hz ≤ –100 ≤ –105 623.14285714 dBc/Hz dBc/Hz ± 0.2 Hz ≤ –100 ≤ –105 767.14285714 dBc/Hz dBc/Hz ± 0.2 Hz A-22 PN: 10580-00255 Rev. J MT8212E and MT8213E MM... -
Page 603: Gps Verification, Option 31
Spectrum Analyzer Frequency Accuracy with GPS High Frequency Accuracy 4.0 GHz ± 200 Hz (± 50 ppb) Spectrum Analyzer Frequency Accuracy with Internal Standard Frequency Accuracy 4.0 GHz ± 1.2 kHz (± 0.3 ppm) MT8212E and MT8213E MM PN: 10580-00255 Rev. J A-23... -
Page 604: Isdb-T Sfn Verification, Option 32
Table A-31. ISDB-T SFN Level Accuracy Verification, AT(–10) Frequency Sensor A Sensor B MN63A Attenuation (Channel) Reading Reading ∆AB(–10) Reading, AT(–10) 473.14285714 MHz (Ch 13) 623.14285714 MHz (Ch 38) 767.14285714 MHz (Ch 62) A-24 PN: 10580-00255 Rev. J MT8212E and MT8213E MM... -
Page 605: Isdb-T Sfn Verification, Option 32
– NA – NA / –50 – NA – – NA – ± 2.0 –84 AT(–50) + 34 = – NA – NA / –50 – NA – – NA – ± 2.0 MT8212E and MT8213E MM PN: 10580-00255 Rev. J A-25... - Page 606 Table A-33. ISDB-T SFN Level Accuracy Verification, AT(–50) Frequency Sensor A Sensor B MN63A Attenuation (Channel) Reading Reading ∆AB(–50) Reading, AT(–50) 473.14285714 MHz (Ch 13) 623.14285714 MHz (Ch 38) 767.14285714 MHz (Ch 62) A-26 PN: 10580-00255 Rev. J MT8212E and MT8213E MM...
-
Page 607: Isdb-T Sfn Verification, Option 32
– NA – NA / –50 – NA – – NA – ± 2.0 –84 AT(–50) + 34 = – NA – NA / –50 – NA – – NA – ± 2.0 MT8212E and MT8213E MM PN: 10580-00255 Rev. J A-27... -
Page 608: Isdb-T Sfn Verification, Option 32
– NA – NA / –50 – NA – – NA – ± 2.0 –84 AT(–50) + 34 = – NA – NA / –50 – NA – – NA – ± 2.0 A-28 PN: 10580-00255 Rev. J MT8212E and MT8213E MM... -
Page 609: Isdb-T Sfn Verification, Option 32
Table A-37. ISDB-T SFN Analyzer DANL with Pre Amp On Channel Frequency Ref Level Measured Value Specification ≤ –90 dBm 473.14285714 MHz –50 dBm ≤ –90 dBm 623.14285714 MHz –50 dBm ≤ –90 dBm 767.14285714 MHz –50 dBm MT8212E and MT8213E MM PN: 10580-00255 Rev. J A-29... -
Page 610: Gsm/Gprs/Edge Signal Analyzer Verification, Options 40 And 41
At 1800 MHz, –10 dBm Level, DL_MCS-9_4SLOT Pattern Burst Power Error ±1.5 dB Frequency Error ±10 Hz At 1800 MHz, –50 dBm Level, DL_MCS-9_1SLOT Pattern Burst Power Error ±1.5 dB Frequency Error ±10 Hz A-30 PN: 10580-00255 Rev. J MT8212E and MT8213E MM... - Page 611 At 850 MHz, –50 dBm Level, DL_MCS-9_4SLOT Pattern ≤ 2.5% EVM RMS At 1800 MHz, –10 dBm Level, DL_MCS-9_4SLOT Pattern ≤ 2.5% EVM RMS At 1800 MHz, –50 dBm Level, DL_MCS-9_1SLOT Pattern ≤ 2.5% EVM RMS MT8212E and MT8213E MM PN: 10580-00255 Rev. J A-31...
-
Page 612: Cdma Signal Analyzer Verification, Options 42 And 43
At 1930.05 MHz, –30 dBm Level, cdmaOne Channel Power ±1.5 dB At 1930.05 MHz, –30 dBm Level, CDMA2000 Channel Power ±1.5 dB At 870.03 MHz, –30 dBm Level, CDMA2000 Channel Power ±1.5 dB A-32 PN: 10580-00255 Rev. J MT8212E and MT8213E MM... - Page 613 ± 10 Hz 0.99 ≤ x ≤ 1 µs ± 1 µs At 870.03 MHz, –30 dBm Level, CDMA2000 Frequency Error ± 10 Hz 0.99 ≤ x ≤ 1 µs ± 1 µs MT8212E and MT8213E MM PN: 10580-00255 Rev. J A-33...
-
Page 614: Wcdma/Hsdpa Signal Analyzer Verification, Options
Table A-45. Option 44, WCDMA Occupied Bandwidth (OBW) Frequency Power Meter Reading Specification 881.5 MHz 4.2 MHz ± 100 kHz 1962.5 MHz 4.2 MHz ± 100 kHz 2680.5 MHz 4.2 MHz ± 100 kHz A-34 PN: 10580-00255 Rev. J MT8212E and MT8213E MM... - Page 615 Table A-46. Option 44, WCDMA RF Channel Power Accuracy Power Meter Measured RF RF Channel Frequency Reading Channel Power Power Error Specification 881.5 MHz ±1.25 dB 1962.5 MHz ±1.25 dB 2680.5 MHz ±1.25 dB MT8212E and MT8213E MM PN: 10580-00255 Rev. J A-35...
-
Page 616: Wcdma/Hsdpa Signal Analyzer Verification, Options
Table A-48. Option 45 or 65, WCDMA Error Vector Magnitude (Test Model 4) Frequency (MHz) Measured Value Specification ≤ 2.5% 1962.5 Table A-49. Option 65, HSDPA Error Vector Magnitude (Test Model 5) Frequency (MHz) Measured Value Specification ≤ 2.5% 1962.5 A-36 PN: 10580-00255 Rev. J MT8212E and MT8213E MM... -
Page 617: Fixed Wimax Signal Analyzer Verification, Options 46 And 47
± 1.5 dB 3600.5 MHz –15 dBm ± 1.5 dB 3600.5 MHz –50 dBm ± 1.5 dB 5600.5 MHz –15 dBm ± 1.5 dB 5600.5 MHz –50 dBm ± 1.5 dB MT8212E and MT8213E MM PN: 10580-00255 Rev. J A-37... - Page 618 –50 dBm 10 MHz Table A-52. Option 47, Fixed WiMAX Frequency Error Frequency Power Frequency Error Specification 2600.5 MHz –50 dBm ± 182 Hz 5600.5 MHz –50 dBm ± 392 Hz A-38 PN: 10580-00255 Rev. J MT8212E and MT8213E MM...
-
Page 619: T1 Analyzer Verification, Option 51
Table A-55. T1 Transmitted Level Vpp Reading Measurement Vpp Reading Specification Tx LBO: 0 dB 4.8 to 7.6 Vp-p Tx LBO: –7.5 dB 1.9 to 3.1 Vp-p Tx LBO: –15 dB 0.5 to 1.7 Vp-p MT8212E and MT8213E MM PN: 10580-00255 Rev. J A-39... -
Page 620: E1 Analyzer Verification, Option 52
4.2 to 5.2 Vp-p Table A-58. Option 52, E1 Transmitted Level Vpp Reading Measurement Vpp Reading Specification 120 ohm (RJ48 Interface) 5.4 to 6.6 Vp-p 75 ohm (BNC Interface) 4.2 to 5.2 Vp-p A-40 PN: 10580-00255 Rev. J MT8212E and MT8213E MM... -
Page 621: T1/T3 Analyzer Verification, Option 53
Tx LBO: –15 dB 0.5 to 1.7 Vp-p Table A-62. Option 53, T3 Frequency Clock Measurement Measured Value Specification Internal Clock Error ± 5 ppm Recovered Clock Frequency 44735776 to 44736224 Hz MT8212E and MT8213E MM PN: 10580-00255 Rev. J A-41... -
Page 622: T1/T3 Analyzer Verification, Option 53
Table A-65. Option 60, 61, TD-SCDMA Verification (at 2010 MHz, –45 dBm Level, TD-SCDMA) Measurement Measured Value Specification Channel Power (Error) ± 1.5 dB Frequency Error ± 10 Hz ± 0.2 µs A-42 PN: 10580-00255 Rev. J MT8212E and MT8213E MM... -
Page 623: Evdo Signal Analyzer Verification, Options 62 And 63
± 1.5 dB At 1930.05 MHz, –50 dBm Level, Idle Slot Channel Power Error ± 1.5 dB At 870.03 MHz, –10 dBm Level, Idle Slot Channel Power Error ± 1.5 dB MT8212E and MT8213E MM PN: 10580-00255 Rev. J A-43... - Page 624 0.99 ≤ x ≤ 1 µs ± 1 µs At 870.03 MHz, –10 dBm Level, Idle Slot Frequency Error ± 10 Hz Rho Pilot 0.99 ≤ x ≤ 1 µs ± 1 µs A-44 PN: 10580-00255 Rev. J MT8212E and MT8213E MM...
-
Page 625: Dvb-T/H Signal Analyzer Verification, Options 64 And 57
≥ 42 dB ≥ 42 dB Table A-71. Option 64, DVB-T/H Signal Analyzer, Residual MER Pre Amp On Channel Total MER Specification ≥ 37 dB ≥ 37 dB ≥ 37 dB MT8212E and MT8213E MM PN: 10580-00255 Rev. J A-45... - Page 626 Table A-74. Option 64, DVB-T/H Signal Analyzer, Level Accuracy Verification, –50 Frequency MN63A Attenuation (Channel) Sensor A Reading Sensor B Reading DAB(–50) Reading, AT(–50) 474 MHz (Ch 21) 666 MHz (Ch 45) 858 MHz (Ch 69) A-46 PN: 10580-00255 Rev. J MT8212E and MT8213E MM...
-
Page 627: Dvb-T/H Signal Analyzer Verification, Options 64 And 57
– NA – NA / –50 – NA – – NA – ± 2.0 –80 AT(–50) + 30 = – NA – NA / –50 – NA – – NA – ± 2.0 MT8212E and MT8213E MM PN: 10580-00255 Rev. J A-47... -
Page 628: Dvb-T/H Signal Analyzer Verification, Options 64 And 57
– NA – NA / –50 – NA – – NA – ± 2.0 –84 AT(–50) + 34 = – NA – NA / –50 – NA – – NA – ± 2.0 A-48 PN: 10580-00255 Rev. J MT8212E and MT8213E MM... - Page 629 – NA – NA / –50 – NA – – NA – ± 2.0 –84 AT(–50) + 34 = – NA – NA / –50 – NA – – NA – ± 2.0 MT8212E and MT8213E MM PN: 10580-00255 Rev. J A-49...
- Page 630 (dBm) Off(dBm) Level (dBm) Amp On (dBm) Level (dBm) Specification (dBm) –10 –10 -10 ± 2.0 –20 –10 -20 ± 2.0 –30 –10 -30 ± 2.0 –40 –10 -40 ± 2.0 A-50 PN: 10580-00255 Rev. J MT8212E and MT8213E MM...
- Page 631 Table A-84. Option 78, DVB-T/H SFN Analyzer DANL with Pre Amp On Frequency Ref Level Measured Value Specification ≤ –89 dBm 474 MHz –50 dBm ≤ –89 dBm 666 MHz –50 dBm ≤ –89 dBm 858 MHz –50 dBm MT8212E and MT8213E MM PN: 10580-00255 Rev. J A-51...
-
Page 632: Mobile Wimax Channel Power Accuracy Tests
Frequency Input Power Measured Channel Power (MHz) (dBm) (RSSI) Error Specification 2600.5 –15 ± 1.5 dB 2600.5 –50 ± 1.5 dB 3600.5 –15 ± 1.5 dB 3600.5 –50 ± 1.5 dB A-52 PN: 10580-00255 Rev. J MT8212E and MT8213E MM... -
Page 633: Mobile Wimax Residual Evm And Frequency Error Tests (Option 67)
Table A-90. Option 67, Mobile WiMAX Frequency Error (5 MHz Bandwidth and 5 ms Frame Length) Frequency (MHz) Power (dBm) Freq Error Specification 2600.5 –50 ± 52.01 Hz 3600.5 –50 ± 72.01 Hz MT8212E and MT8213E MM PN: 10580-00255 Rev. J A-53... -
Page 634: Lte Signal Analyzer Verification, Options 541 And 542
20 MHz IF BW, Pattern E-TM_1-1_20M (Only for units with 20 MHz IF BW Available) –20 ± 1.5 dB –50 ± 1.5 dB 2150 –20 ± 1.5 dB 2150 –50 ± 1.5 dB A-54 PN: 10580-00255 Rev. J MT8212E and MT8213E MM... - Page 635 750 MHz at –20 dBm ± 10 Hz 750 MHz at –50 dBm ± 10 Hz 2150 MHz at –20 dBm ± 10 Hz 2150 MHz at –50 dBm ± 10 Hz MT8212E and MT8213E MM PN: 10580-00255 Rev. J A-55...
-
Page 636: Td-Lte Signal Analyzer Verification, Options 551 And 552
20 MHz IF BW, Pattern TDLTE-E-TM_1-1_20M (Only for units with 20 MHz IF BW Available) –20 ± 1.5 dB –50 ± 1.5 dB 2150 –20 ± 1.5 dB 2150 –50 ± 1.5 dB A-56 PN: 10580-00255 Rev. J MT8212E and MT8213E MM... - Page 637 750 MHz at –20 dBm ± 10 Hz 750 MHz at –50 dBm ± 10 Hz 2150 MHz at –20 dBm ± 10 Hz 2150 MHz at –50 dBm ± 10 Hz MT8212E and MT8213E MM PN: 10580-00255 Rev. J A-57...
- Page 638 A-5 Test Records for Options Verification A-58 PN: 10580-00255 Rev. J MT8212E and MT8213E MM...
- Page 640 Anritsu Company 490 Jarvis Drive Anritsu utilizes recycled paper and environmentally conscious inks and toner. Morgan Hill, CA 95037-2809 http://www.anritsu.com...
Need help?
Do you have a question about the MT8212E and is the answer not in the manual?
Questions and answers