Table of Contents
Advertisement
Quick Links
A l l t e s t I n s t r u me n t s , I n c .
5 0 0 C e n t r a l A v e .
F a r mi n g d a l e , N J 0 7 7 2 7
P : ( 7 3 2 ) 9 1 9 - 3 3 3 9
F : ( 7 3 2 ) 9 1 9 - 3 3 3 2
a l l t e s t . n e t
s s a l e s @ a l l t e s t . n e t
T h e t e s t & me a s u r e me n t
e q u i p me n t y o u n e e d a t
t h e p r i c e y o u w a n t .
A l l t e s t c a r r i e s t h e w o r l d ' s l a r g e s t s e l e c t i o n o f
u s e d / r e f u r b i s h e d b e n c h t o p t e s t & me a s u r e me n t
e q u i p me n t a t 5 0 % t h e p r i c e o f n e w .
O O u r e q u i p me n t i s g u a r a n t e e d w o r k i n g , w a r r a n t i e d , a n d
a v a i l a b l e w i t h c e r t i f i e d c a l i b r a t i o n f r o m o u r i n - h o u s e s t a f f
o f t e c h n i c i a n s a n d e n g i n e e r s .
• 1 0 + f u l l t i me t e c h n i c i a n s w i t h o v e r 1 5 0 y e a r s o f
s p e c i a l i z a t i o n
• 9 0 d a y w a r r a n t y & 5 d a y r i g h t o f r e t u r n o n a l l
e q u i p me n t
• • 1 - 3 y e a r w a r r a n t i e s f o r n e w a n d
p r e mi u m- r e f u r b i s h e d e q u i p me n t
• E v e r y u n i t t e s t e d t o O E M s p e c i f i c a t i o n s
• S a t i s f a c t i o n g u a r a n t e e d
Y o u h a v e p l a n s , w e w i l l h e l p y o u a c h i e v e t h e m.
A n y p r o j e c t . A n y b u d g e t .
t
G e t a q u o t e t o d a y !
C C a l l ( 7 3 2 ) 9 1 9 - 3 3 3 9 o r e ma i l s a l e s @a l l t e s t . n e t .
Advertisement
Chapters
Table of Contents

Related Manuals for Anritsu MT8801C


Summary of Contents for Anritsu MT8801C
- Page 1 T h e t e s t & me a s u r e me n t e q u i p me n t y o u n e e d a t t h e p r i c e y o u w a n t . A l l t e s t I n s t r u me n t s , I n c .
- Page 2 MT8801C Option 12: CDMA Measurement Operation Manual Fourth Edition Read this manual before using the equipment. Keep this manual with the equipment. ANRITSU CORPORATION Document No.: M-W1673AE-4.0...
- Page 3 Insure that you clearly understand the meanings of the symbols BEFORE using the equipment. Some or all of the following five symbols may not be used on all Anritsu equipment. In addition, there may be other labels attached to products which are not shown in the diagrams in this manual.
- Page 4 For Safety WARNING 1. ALWAYS refer to the operation manual when working near locations at which the alert mark shown on the left is attached. If the operation, etc., is performed without heeding the advice in the operation manual, there is a risk of personal injury.
- Page 5 WARNING 4. This equipment cannot be repaired by the user. DO NOT attempt to Repair open the cabinet or to disassemble internal parts. Only Anritsu-trained service personnel or staff from your sales representative with a knowl- WARNING edge of electrical fire and shock hazards should service this equipment.
- Page 6 For Safety CAUTION 1. Before Replacing the fuses, ALWAYS remove the power cord from the poweroutlet and replace the blown fuses. ALWAYS use new fuses of the type and rating specified on the fuse marking on the rear panel of Replacing Fuse the cabinet.
- Page 7 (Backed-up memory) • Isolate the memory from static electricity. Disposing of Product The MT8801C uses chemical compound semiconductor including arsenic. At the end of its life, the MT8801C should be recycled or disposed properly according to the local disposal regulations.
- Page 8 Anritsu Corporation Contact If this equipment develops a fault, contact Anritsu Service and Sales offices at the address at the end of paper-edition manual or the separate file of CD-edition manual.
- Page 9 If you do not agree to these terms, return the unopened software package to Anritsu Corporation (hereafter Anritsu). 1. License (1) This License gives you the right to use this software on one MT8801C Radio Communication Analyzer, MX880201A CDMA Measurement Software (hereafter computer system).
- Page 10 Front Panel Power Switch To prevent malfunction caused by accidental touching, the front power switch of this equipment turns on the power if it is pressed continuously for about one second in the standby state. If the switch is pressed continu- ously for one second in the power-on state, the equipment enters the standby state.
- Page 11 Notes On Export Management This product and its manuals may require an Export License/Approval by the Government of the product's country of origin for re-export from your country. Before re-exporting the product or manuals, please contact us to confirm whether they are export-controlled items or not. When you dispose of export-controlled items, the products/manuals are needed to be broken/shredded so as not to be unlawfully used for military purpose.
- Page 12 CE Conformity marking Anritsu affixes the CE Conformity marking on the following product (s) in accordance with the Council Directive 93/68/EEC to indicate that they conform with the EMC and LVD directive of the European Union (EU). CE Marking 1. Product Model...
- Page 13 C-tick Conformity marking Anritsu affixes the C-tick marking on the following product (s) in accordance with the regulation to indicate that they conform with the EMC framework of Australia/New Zealand. C-tick marking N274 1. Product Model Model: MT8801C Radio Communication Analyzer 2.
- Page 14 Power Line Fuse Protection For safety, Anritsu products have either one or two fuses in the AC power lines as requested by the customer when ordering. Single fuse: A fuse is inserted in one of the AC power lines. Double fuse: A fuse is inserted in each of the AC power lines.
- Page 16 About This Manual This manual describes the operation of the MT8801C Radio Communication Analyzer using the measurement software installed. MT8801C Operation Manual MT8801C CDMA Measurement Operation Manual consist of the following two manuals. Use the manuals matching the usage objective.
- Page 18 MT8801C Option 12: CDMA Measurement Operation Manual (Panel Operation)
-
Page 19: Table Of Contents
Table of Contents For Safety ............About This Manual ........Section 1 General ......... 1.1 General ................1.2 Manual Composition ............1.3 Equipment Configuration ..........1.4 Optional Accessories and Peripherals ......1.5 Specifications ..............Section 2 Preparations Before Use .... 2.1 Installation Site and Environmental Conditions .... - Page 20 Section 5 Measurement Examples ..... 5.1 Preparation for the CDMA Mobile station Measurement 5.2 Testing CDMA Mobile station Output ......5.3 Testing CDMA Mobile station Input ........ 5-31 Section 6 Peformance Tests ....... 6.1 Requirements for Performance Tests ......6.2 Instruments Required for Performance Test ....6.3 Performance Tests ............
-
Page 22: Section 1 General
Section 1 General General ..............Manual Composition ..........Equipment Configuration ........... 1.3.1 Standard configuration ........1.3.2 Option ............Optional Accessories and Peripherals ...... Specifications ............ -
Page 23: General
By using measurement software MX880201A, you can use the MT8801C as an inte- grated measuring instrument (hereafter called this analyzer) that can evaluate the functions and performance of the mobile telecommunication equipment conforming to CDMA. -
Page 24: Manual Composition
1.2 Manual Composition Manual Composition This manual is made up of the following sections. Section 1 General Describes the introduction, composition, function specifications and performance of this instrument. Section 2 Preparations before Use Explains various work to be performed before using this instrument. Section 3 Panel Layout and Overview of Operation Explains the basic items for operating this equipment. -
Page 25: Equipment Configuration
This paragraph describes the configuration of the MT8801C (with Option 12) stan- dard accessories. 1.3.1 Standard configuration The table below shows the configuration of the MT8801C (with Option 12) with the standard accessories. Table 1-1 MT8801C (with Option 12) standard accessories Item Order No. -
Page 26: Optional Accessories And Peripherals
1.4 Optional Accessories and Peripherals Optional Accessories and Peripherals The following table shows the optional accessories and peripherals for the MT8801C which are all sold separately. Table 1-5 Optional Accessories and Peripherals <Optional accessories> Model*/Order No. Name* Remarks J0127C Coaxial cord BNC-P·RG-58A/U·BNC-P, 0.5 m... -
Page 27: Specifications
Section 1 General Specifications The specifications of the MT8801C CDMA Measurement are listed in Table 1-6 be- low. The specifications of the MT8801C Option 12 are listed in Table 1-7 below. Table 1-6 MT8801C Specifications Frequency range 300 kHz to 3 GHz... - Page 28 1.5 Specifications Table 1-6 MT8801C Specifications (continued) Color TFT LCD display Display Size : 8.4 inches Number of dots : 640 × 480 Enables data hard copy on the display through a parallel interface. Hard copy (applicable only for EPSON VP-series or equivalent) Function : This equipment is specified as a device, can be controlled from external controller.
- Page 29 Section 1 General Table 1-7 MT8801C Option 12 : CDMA Measurement Specifications 824.01 MHz to 848.97 MHz, 30 kHz step (IS-95A, TSB74) 1850.00 MHz to 1909.95 MHz, 50 kHz step (J-STD-008) Frequency range 887.0125 MHz to 888.9875 MHz, 898.0125 MHz to 900.9875 MHz, 915.0125 MHz to 924.9875 MHz, 12.5 kHz step (ARIB STD-T53)
- Page 30 1.5 Specifications Table 1-7 MT8801C Option 12 : CDMA Measurement Specifications (continued) 869.01 MHz to 893.97 MHz, 30 kHz step (IS-95A, TSB74) 1930.00 MHz to 1989.95 MHz, 50 kHz step (J-STD-008) Frequency range 832.0125 MHz to 833.9875 MHz, 843.0125 MHz to 845.9875 MHz, 860.0125 MHz to 869.9875 MHz, 12.5 kHz step (ARIB STD-T53)
- Page 31 Section 1 General 1-10.
-
Page 32: Section 2 Preparations Before Use
Section 2 Preparations Before Use Installation Site and Environmental Conditions ..Safety Measures ............2.2.1 Safety measures for power supply ....2.2.2 Maximum power to connector ....... Preparations before Power-on ........2.3.1 Protective grounding ........2.3.2 Replacing fuse ..........Installation ..............2-10 2.4.1 Rack mounting .......... -
Page 33: Installation Site And Environmental Conditions
MT8801C has been allowed to dry out sufficiently. Fan clearance: To suppress any internal temperature increase, the MT8801C has a fan on the rear panel as shown in the diagram below. Leave a gap of at least 10 cm between the rear panel and the wall, nearby equipment or obstructions so that fan ventilation is not blocked. -
Page 34: Safety Measures
Safety measures for power supply WARNING I Before power-on: • Protective grounding The MT8801C must be connected to ground. If the power is turned on without taking this countermeasure, there is a risk of receiving an accidental electric shock. • Power supply voltage In addition, it is essential to check the power supply volt- age. -
Page 35: Maximum Power To Connector
Section 2 Preparations Before Use 2.2.2 Maximum power to connector The allowable maximum power to the MT8801C connectors are as follows. Connector Allowable maximum power Main Input/Output 10 W (40 dBm) AUX Input 100 mW (20 dBm) AUX Output Exclusive output connector, 0.5 mW (–3 dBm) -
Page 36: Preparations Before Power-On
2.3 Preparations before Power-on Preparations before Power-on The MT8801C operates normally when connected to 100 to 120 Vac, 47.5 to 63 Hz, or 200 to 240 Vac, 47.5 to 63 Hz AC power supply via the power inlet. To prevent the following problems, take the necessary procedures described on the following pages before power is supplied. -
Page 37: Protective Grounding
The power supply polarity of the 3-pole (grounded, 2-pole type) matches that of the 3-core power cord plug. Therefore, the MT8801C is connected to ground potential when the power cord is connected to the plug. As a result, it is not necessary to connect the FG terminal to ground. - Page 38 (FG) terminal on the rear panel must be connected to ground potential be- fore power is supplied to the MT8801C. Fuse holder Label indicating protective...
-
Page 39: Replacing Fuse
Section 2 Preparations Before Use 2.3.2 Replacing fuse The MT8801C with standard accessories has two spare fuses (T6.3A250V). Use these fuses to replace the blown fuses. If the fuses must be replaced, locate and rem- edy the cause before replacing the blown fuses. - Page 40 Remove the fuse from the fuse cap and replace it with a spare fuse*. Return the fuse cap with the fuse to the fuse holder, then fasten it by turning it clockwise with the screwdriver. * Contact the Anritsu service department for fuses by specifying the model name, order number, name, and quantity.
-
Page 41: Installation
The installation method is included in the rack mount kit diagram. 2.4.2 Stacking When stacking several MT8801C’s or stacking the MT8801C with equipment of the same width as the MT8801C, the B0332 Coupling Plate (sold separately, Table 1-3) are required. 2-10... -
Page 42: Precautions For Handling Storage Media
2.5 Precautions for Handling Storage Media Precautions for Handling Storage Media 2.5.1 Floppy disk The following explains how to handle the floppy disk media of this instrument. Front Rear Fig. 2-1 3.5-inch Floppy Disk (1) Precautions The plastic case of the 3.5-inch floppy disk has a shutter to protect the disk inside. - Page 43 Section 2 Preparations Before Use (2) Write-protection tab A write-protection tab is provided on the 3.5-inch floppy disk. Sliding this tab downward in the arrow direction beforehand prevents accidental writing and deletion. (A write operation is disabled in this state.) Write enable Write disable Fig.
-
Page 44: Section 3 Panel Layout And Overview Of Operation
Section 3 Panel Layout and Overview of Operation Panel Layout ............. 3.1.1 Front panel layout ......... 3.1.2 Rear panel layout .......... 3.1.3 Panel layout ..........Overview of Operation ..........3.2.1 Overview of functions ........3.2.2 Overview of operation ........ -
Page 45: Panel Layout
Section 3 Panel Layout and Overview of Operation Panel Layout This paragraph describes the keys, switches, LEDs, and connectors on the front and rear panels of the MT8801C Radio Communication Analyzer. 3.1.1 Front panel layout This paragraph describes the keys, switches, LED, connectors, and the rotary knob on the front panel. - Page 46 3.1 Panel Layout Display Function Measure Key group used to start measurement. Single Key used to execute measurement once. Continuous Key used to execute measurement continuously. Copy Outputs display screen to the specified printer. (Hard copy function) Cursor Key group used to control the cursor on the LCD screen. Opens the input window for data in the item pointed to by the cursor.
-
Page 47: Rear Panel Layout
Section 3 Panel Layout and Overview of Operation 3.1.2 Rear panel layout This paragraph describes the switch and connectors on the rear panel. Display Function 19 O I Input switch for AC power supply. If this switch is turned off, the Power switch on the front panel cannot be turned on. -
Page 48: 3.1 Panel Layout
3.1 Panel Layout [Specifications of CDMA Timing connector] CDMA Timing connector is a connector of 25-pin, female, and D-SUB. Pin No. Signal name Remarks Specifications Signal ground 1.25MSEC_OUT Reference signal of 1.25-ms period Note 1 5 V TTL level 26.7MSEC_OUT Reference signal of 26.7-ms period Note 1 5 V TTL level... -
Page 49: Panel Layout
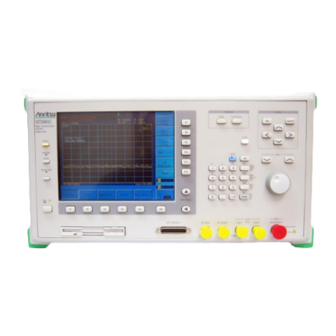
The front panel and rear panel layouts are shown in Figs. 3-1 and 3-2, respectively. The numbers in the diagram correspond to those in paragraphs 3.1.1 and 3.1.2. 1 2 3 4 Measure Cursor Single Continuous MT8801C Cancel Radio Communication Analyzer 300kHz-3GHz Copy Preset... -
Page 50: Overview Of Operation
• Time response of open-loop power control (2) Analog transmitter measurement The MT8801C can measure the items below by outputting an AF signal to the microphone terminal of an analog transmitter (DUT) and receiving the analog modulated signal from the transmitter. - Page 51 (5) AF signal measurement The MT8801C sends an AF signal from the AF Output connector to a DUT, and an AF signal from the DUT is input to the AF Input connector of the MT8801C. Then the MT8801C measures the following items: •...
-
Page 52: Overview Of Operation
Save (Parameter file save) File Operation (File retrieval/deletion/protect, FD initialization) Change System (Measurement system change) Instrument Set (MT8801C main-frame setting) Change Color (Selection of screen color) First press the [Main Func On/Off] F6 key to ON, then select the desired func-... - Page 53 Section 3 Panel Layout and Overview of Operation (4) Outline of screen configuration The screen configuration is shown below. A tree-shaped Hierarchical configu- ration of items below each the main menu is indicated. (Details of operation are explained in Section 4. The screens, setup items and function key flowchart for each screen are summarized in Appendix A, “Screen and Function Key Transi- tion Diagrams.”) [Overview of screens]...
- Page 54 (Screen for changing TX&RX Tester mode measurement system) • Instrument Setup mode Instrument Setup screen (Screen for setting up RS232C/GPIB, etc. for MT8801C main frame) Note: Change Color mode (Selection for screen display color) is setup using the function key menu. There is no screen in Change Color mode.
- Page 55 Section 3 Panel Layout and Overview of Operation 3-12.
-
Page 56: Section 4 Operation
Section 4 Operation Turning on and off the Power ........4.1.1 Turning on the Power ........4.1.2 Turning off the Power ........4.1.3 Setup state after power-on ......Screen Descriptions ..........CDMA Transmitter and Receiver Test --- TX and RX Tester Mode ........4-16 4.3.1 Preparations .......... -
Page 57: Turning On And Off The Power
Section 4 Operation Turning on and off the Power The MT8801C has two power switches: The Stby/On switch on the front panel and I (main power) switch on the rear panel. MT8801C Front Panel Measure Cursor Stby Single Continuous MT8801C... - Page 58 Frequency: 47.5 to 63 Hz For normal MT8801C operation, leave the power switch on the rear panel set to on when the AC power inlet is connected to the power outlet, and only use the Stby/On switch on the front panel to turn the power on and off.
-
Page 59: Turning On The Power
Section 4 Operation 4.1.1 Turning on the Power Perform the power-on procedure through warming up the internal reference oscillator to normal MT8801C operation in order of the following steps: Step Operation Result check • When using a three-pole power cable with a grounding ter- Connect the frame grounding terminal minal, the MT8801C need not be grounded. - Page 60 Notes: The left figure shows the reference signal input/output connectors on the MT8801C rear panel. The internal 10 MHz reference signal is output from the 10 MHz OUTPUT connector at TTL level. When the internal reference signal is not used, input an external reference signal satisfying the following condi- tions to the 10 MHz/13 MHz Reference Input connector: i) Frequency: 10 MHz ±1 ppm, signal level: 2 to 5 Vp-p...
-
Page 61: Turning Off The Power
Section 4 Operation 4.1.2 Turning off the Power Turn off the power as described below. (1) Normal power-off procedures Step Operation Result check Stby Press the Stby/On switch • The On lamp of the Power switch on the front Stby on the front panel for a few panel goes off, and the Stby lamp lights. -
Page 62: Screen Descriptions
The composition of the measurement screen is described below. • Title display area The type MT8801C, and date (**_**_**) time (**:**:**), or user-defined character string (title) are displayed on the top left line. These are set on the Instrument Setup Screen. - Page 63 Main Input, AUX Output AUX Input, Main Output • Calibrated display If the MT8801C is already calibrated, “C” is displayed on the second line from the top center. This is appeared after executing calibration on the Modulation Analysis screen etc..
- Page 64 4.2 Screen Descriptions Stop: Call Processing function stops. Idle: Standby state on Paging Channel. The MT8801C generates the Pilot Channel, Synch Channel and Paging Channel signal, then wait for the Reverse Access Channel signal from the DUT. Registration: Sequence execution state for location registration...
- Page 65 Section 4 Operation • Menu display area The titles of up to six main function keys (F1 to F6) are displayed horizontally along the bottom. When the [Main Func on off] (F6) key on the right is set On, the main function menu is displayed.
- Page 66 4.2 Screen Descriptions (2) Function keys The symbols displayed on the top right of the function keys indicate the follow- ing functions: Indicates a lower level function key is displayed when this function key is pressed. -> : Indicates the screen is changed by pressing this function key. Indicates a window is opened to set a value using the ten-keypad, Step key, or rotary knob when this function key is pressed.
- Page 67 Section 4 Operation Menu on which a set item is selected [Example of the function key menu] Trace Format Constel- Selected item lation Eye Diagram Vector Error Phase Error Magnitude Error Return [Example of the main function key menu] Call Main Func Measure Measure...
- Page 68 4.2 Screen Descriptions (3) Entering the data Entering numeric data by opening/closing the window Entering numeric data by moving the cursor and opening/closing the win- Move the cursor to the brackets enclosing the item to be set, then press the Set key.
- Page 69 Section 4 Operation Entering selection item by opening/closing the window Move the cursor to the brackets enclosing the item to be set, then press the Set key. The selected item setting window shown below is opened and the selected item can be set. Main RF Input Main...
- Page 70 4.2 Screen Descriptions Entering selected items using function keys with lower hierarchy When the key marked * on the top right of the menu is pressed, the menu set of the lower hierarchy shown below is displayed. Select an item from the menu set and press the corresponding function key. The menu display of the selected item is changed.
-
Page 71: Cdma Transmitter And Receiver Test
This paragraph describes the setup, zero-point calibration of the power meter, and RF cable loss correction when measuring the DUT. (1) Setup This paragraph explains how to set the MT8801C and device under test (DUT) when conducting tests. [DUT Interface connector] The DUT Interface connector is equipped on the bottom of the MT8801C front panel to transmit and receive signals for control and measurement. - Page 72 Pin number Signal name Signal type Specification Direction Signal ground DUT_TXD12 Spare output 12 V level MT8801C -> DUT DUT_RXD Spare input 5 V TTL/3 V C-MOS/12 V MT8801C <- DUT DUT_RTS12 Spare output 12 V level MT8801C -> DUT...
- Page 73 Output is made from AF Output (BNC connector) at the same time. The output impedance is fixed to 600 Ω. Connect the GND of the MT8801C to the GND of the DUT. Connect the floating output – side to the low impedance side of DUT microphone in- put.
- Page 74 25 contacts 10W Max 30V Max 20dBm Max (Tx/Rx OUT/IN) RF cable Note: The RF measurement connectors of the MT8801C are composed of the Main Input/Output, and AUX Input and Output. The CDMA system uses only the Main Input/Output connector. 4-19...
- Page 75 Section 4 Operation Setup for Analog TX measurement In the Analog TX measurement, the MT8801C sends the AF signal to the DUT for modulating the transmission signal of the DUT, and receives the transmission signal. Then, modulates the signal to measure the modulation degree.
- Page 76 4.3 CDMA Transmitter and Receiver Test --- TX and RX Tester Mode Setup for Analog RX measurement Send the modulated RF test signal from the MT8801C to the DUT which demodulates the signal, input the demodulated result to the MT8801C, then measure the distortion ratio.
- Page 77 Adjust Range: Optimizes the internal RF ATT, A/D input level, and power meter range of the MT8801C for the signal to be measured. This function can increase the measurement range for the on/ off ratio. Calibration: The MT8801C has two types of level calibration functions of Power Meter Calibration (using an internal power meter) and Internal Osc.
- Page 78 TX measurement screens. 2. If the MT8801C input level is small or the input frequency does not match the setup frequency, the Adjust Range and Calibration may not be per- formed properly.
- Page 79 Setting User Cal Factor When conducting transmitter measurement, set the loss of the RF cable connect- ing the MT8801C and transmitter under test as a correction value (User Cal Factor) to measure RF power in the transmitter under test.
-
Page 80: Selecting And Changing The Measurement System: Change System Screen
4.3 CDMA Transmitter and Receiver Test --- TX and RX Tester Mode 4.3.2 Selecting and changing the measurement system: Change Sys- tem screen Change the measurement system according to the following steps. For measurement after change, refer to the manual of the selected measurement sys- tem. - Page 81 Step Key operation Description Set the floppy disk containing measuring system files in the floppy disk driver of the MT8801C. [Floppy Disk Dir] F8 Displays measuring system files on the floppy disk. Here, confirm the “Unused area” under “Application Memory”, and also the size of the measuring systems on the floppy disk.
-
Page 82: Setting The Measurement System Conditions: Instrument Setup Screen
4.3 CDMA Transmitter and Receiver Test --- TX and RX Tester Mode 4.3.3 Setting the measurement system conditions: Instrument Setup screen Set the standard frequency of the measurement system (10 MHz or 13 MHz), RF connector (Main or AUX), screen title/date/time display, interface (GPIB or RS232C), printer (ESC/P), and alarm (on or off) on this screen. - Page 83 Entering the title: A title up to 32 characters can be entered in the title display area. (User Define) MT8801C**_**_** (date) **:**:** (time) is displayed as an initial value. (Date/Time) Enter a title according to the following steps. (User Define)
- Page 84 4.3 CDMA Transmitter and Receiver Test --- TX and RX Tester Mode Step Key operation Description 1. Cursor [ Moves the cursor to the Title entry area. 2. [Set] Opens the Tile entry window. 3. Step [ Moves the cursor into position in the Title entry area to enter character. 4.
- Page 85 Section 4 Operation • Selecting Power On Initial mode The following describes how to select parameter initialization mode after power-on. 1. Selecting Previous Status mode Step Operation Press the [Power On Initial] F9 key. Press the [Previous Status] F7 key. Press the [return] F12 key to define the parameters then return to the previous menu.
- Page 86 4.3 CDMA Transmitter and Receiver Test --- TX and RX Tester Mode • Changing the time and date of the built-in clock 1. Changing the date Step Key operation Description 1. [Date] F7 Opens the date setting window. Displays the current date and time of the built-in clock. 2.
-
Page 87: Setting The Screen Display Color: Change Color Menu
[Define User Color] F11: Displays the Define Clr. menu to set a user-specified color. [Copy Color Ptn from] F7 Displays the [Copy from] menu to select an Anritsu-specified color as an origi- nal color to set a user-specified color. [Color Pattern 1] F7: Selects Anritsu-specified color 1 as an original color. - Page 88 4.3 CDMA Transmitter and Receiver Test --- TX and RX Tester Mode • Relation between screen assignment and number ** in [Select Item Frame **] F8 key [Select Item Frame 0] Back-screen of function keys [Select Item Frame 1] Back-screen of the main function keys [Select Item Frame 2] Display frame of function and main function keys [Select Item Frame 3]...
-
Page 89: Setting The Common Measurement Parameters: Setup Common Parameter Screen
Section 4 Operation 4.3.5 Setting the common measurement parameters: Setup Common Parameter screen • Switch to the Setup Common Parameter screen according to the following steps. Set common measurement conditions on this screen. Step Key operation Description [Main Func on off] F6 Sets the Main Function on to display the Main Menu at the bottom of the screen. - Page 90 4.3 CDMA Transmitter and Receiver Test --- TX and RX Tester Mode When the Call Proc. State is Idle or Idle (Regist), the following measurements can be executed: TX Measure (Transmitter measurement) Parameter setting Setup TX Measure Parameter screen Template setting Setup Template screen Power meter Power Meter screen...
- Page 91 Section 4 Operation Call Proc. state: Stop, CDMA mode TX Measure TX Measure MT8801 99-12-31 12:00:00 << Setup Common Parameter (CDMA) >> Call Proc. : Stop DUT Control (Tester Mode) : (Call Proc.) Using Specification : [IS-95A ] -> Frequency Modulation Band Traffic Band...
- Page 92 4.3 CDMA Transmitter and Receiver Test --- TX and RX Tester Mode Call Proc. Call Proc. MT8801 99-12-31 12:00:00 << Setup Common Parameter (CDMA) >> Call Proc. : Stop DUT Control (Tester Mode) : (Call Proc.) Using Specification : [IS-95A ] Frequency Band Traffic Band...
- Page 93 Section 4 Operation RX Measure RX Measure MT8801 99-12-31 12:00:00 << Setup Common Parameter (CDMA) >> Call Proc. : Idle DUT Control (Tester Mode) : (Call Proc.) Using Specification : [IS-95A ] Frequency Band Traffic Band : [C800MHz] Control Band : [C800MHz] CDMA Channel : [ 1CH]...
- Page 94 4.3 CDMA Transmitter and Receiver Test --- TX and RX Tester Mode Call Proc. state: Loop Back, Conversation, CDMA mode TX Measure TX Measure MT8801 99-12-31 12:00:00 << Setup Common Parameter (CDMA) >> Call Proc. : Loop Back DUT Control (Tester Mode) : (Call Proc.) Using Specification : [IS-95A ]...
- Page 95 Section 4 Operation Call Proc. Call Proc. MT8801 99-12-31 12:00:00 << Setup Common Parameter (CDMA) >> Call Proc. : Loop Back DUT Control (Tester Mode) : (Call Proc.) Using Specification : [IS-95A ] Frequency Band Traffic Band : [C800MHz] Control Band : [C800MHz] CDMA Channel : [ 1CH]...
- Page 96 4.3 CDMA Transmitter and Receiver Test --- TX and RX Tester Mode RX Measure RX Measure MT8801 99-12-31 12:00:00 -> Analog << Setup Common Parameter (CDMA) >> Call Proc. : Stop Measure DUT Control (Tester Mode) : (Call Proc.) Using Specification : [IS-95A ] Frequency Band...
- Page 97 Section 4 Operation Call Proc. state: Idle, Idle (Regist), Analog mode TX Measure TX Measure MT8801 99-12-31 12:00:00 << Setup Common Parameter (CDMA) >> Call Proc. : Idle DUT Control (Tester Mode) : (Call Proc.) Using Specification : [IS-95A ] Frequency Band Traffic Band...
- Page 98 4.3 CDMA Transmitter and Receiver Test --- TX and RX Tester Mode Call Proc. Call Proc. MT8801 99-12-31 12:00:00 << Setup Common Parameter (CDMA) >> Call Proc. : Idle DUT Control (Tester Mode) : (Call Proc.) Using Specification : [IS-95A ] Frequency Band Traffic Band...
- Page 99 Section 4 Operation RX Measure RX Measure MT8801 99-12-31 12:00:00 Analog -> << Setup Common Parameter (CDMA) >> Call Proc. : Conversation Measure DUT Control (Tester Mode) : (Call Proc.) Using Specification : [IS-95A ] Frequency Band Traffic Band : [A800MHz] Control Band : [A800MHz] CDMA Channel : [ 1CH]...
- Page 100 • The 2nd page of the main function keys on the Setup Common Parameter screen When the MT8801C is at the Call Processing status of Stop: Start Main Func When the MT8801C is at the Call Processing status of Idle or Idle (Regist): NW Originate Register Stop...
- Page 101 Section 4 Operation • Set the following items: Item Range Initial value Using Specification IS-95A,J-STD-008,ARIB-T53,KOREA-PCS,TSB74 IS-95A Note1 Frequency Control Band C800MHz (Using Specification:IS-95A,ARIB-T53,TSB74) C800MHz Note1 C1.9GHz (Using Specification:J-STD-008) C1.7GHz (Using Specification:KOREA-PCS) A800MHz (Using Specification:IS-95A,TSB74) Traffic Band C800MHz (Using Specification:IS-95A,ARIB-T53,TSB74) C800MHz Note10 C1.9GHz (Using Specification:J-STD-008) C1.7GHz (Using Specification:KOREA-PCS)
- Page 102 4.3 CDMA Transmitter and Receiver Test --- TX and RX Tester Mode Item Range Initial value RX Meas.frequency Using Specification:IS-95A,TSB74 870.030MHz Note2 870.000+0.030N[MHz] (Channel(N):1 to 799CH) 870.000+0.030(N-1023)[MHz] (Channel(N):990 to 1023CH) Using Specification:J-STD-008 1930.000+0.050N[MHz] (Channel(N):0 to 1199CH) Using Specification:ARIB-T53 860.000+0.0125N[MHz] (Channel(N):1 to 799CH) 843.000+0.0125(N-800)[MHz] (Channel(N):801 to 1039CH) 832.000+0.0125(N-1040)[MHz]...
- Page 103 AWGN absolute power within 1.23 MHz bandwidth. 6. <Access Parameter NOM_PWR, INIT_PWR> These parameters are specified from the MT8801C to the mobile station to be set at the access parameter message in the Paging channel. NOM_PWR and INIT_PWR are the nominal TX power offset and initial power offset for access, respectively.
- Page 104 When SO1 (Service option 1) or SO3 (Service option 3) is set, normal voice communication state comes on. In this case, the MT8801C returns the voice from mobile station after approx. 1 sec. delay. Note that this parameter can be set at all Call Process- ing states.
- Page 105 The On/Off of this item selects the execution of this function. 12. <Echo Delay> In voice communication state, this echo delay is set for returning the voice from the MT8801C to the mobile station. The delay time: 0 to 5 seconds can be set. 4-50...
- Page 106 4.3 CDMA Transmitter and Receiver Test --- TX and RX Tester Mode • Notes on setup items (1) Relationship between measurement frequencies and channels The IS-95A/TSB74/J-STD-008/ARIB-T53 system uses different transmit and receive frequencies for the same frequency channel. If a frequency channel is selected, the relationship between the channel and the transmit/receive frequen- cies depend on the unit to be measured (that is, signals to be measured).
- Page 107 [Register] F4: Executes Forced Registration. [Start] F5: Executes the Call-Processing function for the MT8801C to enter the “Idle” state. [Stop] F5: Stops the Call-Processing function for the MT8801C to enter “Stop” state. • Function keys for Stop State CDMA transmitter measurement:...
- Page 108 4.3 CDMA Transmitter and Receiver Test --- TX and RX Tester Mode • Function keys for Stop State Analog transmitter measurement: 1st page [Analog TX Measure with SG] F10: Displays the Analog TX Measure SG screen. 2nd page [Setup Analog TX Parameter] F9: Displays the Setup Analog TX Parameter screen.
- Page 109 Section 4 Operation • Function keys for Idle State CDMA receiver measurement: 1st page (None) 2nd page [Setup RX Parameter] F9: Displays the Setup RX Measure Parameter screen. [Setup Signal] F10: Displays the Setup Signal screen. • Function keys for Idle State Analog receiver measurement: 1st page (None) 2nd page...
- Page 110 4.3 CDMA Transmitter and Receiver Test --- TX and RX Tester Mode • Function keys for Loop Back and Conversation States Analog receiver measurement: 1st page [Analog RX Measure] F7: Displays the Analog RX Measure screen. 2nd page [Setup Analog RX Parameter] F9: Displays the Setup Analog RX Parameter screen. •...
-
Page 111: Cdma Transmitter Measurement
Section 4 Operation 4.3.6 CDMA Transmitter Measurement On the Setup Common Parameter screen; set the Control Band to C800 MHz, C1.9 GHz, or C1.7 GHz; and press the [TX Measure] F1 main function key to set CDMA trans- mitter measurement mode. This paragraph describes the following CDMA transmitter measurement items: Setting the parameters (Setup TX Measure Parameter screen) Modulation analysis (Modulation Analysis screen) - Page 112 4.3 CDMA Transmitter and Receiver Test --- TX and RX Tester Mode (1) Setting the parameters: Setup TX Measure Parameter screen This paragraph describes how to set parameters (on the Setup TX Measure Pa- rameter screen) for transmitter measurement. • Switch to the Setup TX Measure Parameter screen according to the following steps: Step Key operation Description...
- Page 113 2. <User Cal Factor> When there is a loss in the cable between the mobile-station RF output and the MT8801C RF input, set the User Cal. Factor to convert the TX power measured results to the output level of the mobile station.
- Page 114 4.3 CDMA Transmitter and Receiver Test --- TX and RX Tester Mode 5. <Power Control Bit Pattern> This sets the Power Control Bit Pattern. Closed Loop: Performs power control of the TX level of the mobile station to the desired value using the Closed Loop Power Control Bit.
- Page 115 Section 4 Operation (2) Modulation analysis: Modulation Analysis screen Use the parameters set on the Setup Common Parameter screen (see paragraph 4.3.5) and Setup TX Measure Parameter screen (see paragraph 4.3.6, (1)) to analyze a modulated signal from the transmitter, and display a measured value or waveform.
- Page 116 –133.0 dBm to –4.0 dBm (RF Output: AUX, AWGN On) Resolution: 0.1 dB [Pilot Channel Level] F2: Sets the level of Pilot Channel output from the MT8801C. Initial value: –7.0 dB Setting range:–5.0 dB to –10.0 dB, 0 dB Setting 0 dB at Pilot Channel can be performed only by GPIB command. (See para.
- Page 117 Initial value: 1 Setting range:1 to 799, 900 to 1023 (Band: 800 MHz) [Reference Level] F3: Sets the reference level of signal input to the MT8801C. Initial value: 30 dBm Setting range:42 dBm to –60 dBm (RF Input: Main) 22 dBm to –60 dBm (RF Input: AUX) Resolution: 1 dB •...
- Page 118 4.3 CDMA Transmitter and Receiver Test --- TX and RX Tester Mode (3) Gated output power measurement: Gated Power screen Measure the Gated output power (in-burst power) of the transmitter with the parameters specified on the Setup Common Parameter screen (Section 4.3.5) and Setup TX Measure Parameter screen (Section 4.3.6, (1)).
- Page 119 Section 4 Operation Gated Power Gated Power MT8801 99/12/31 12:00:00 Measure : Continuous << Gated Power (CDMA) >> Storage : Normal Window [dB] TX Power : Marker -6.52 dBm Carrier Off Power : -35.33 dBm On/Off ratio : Storage Unit 28.81 dB Mode Calibration...
- Page 120 4.3 CDMA Transmitter and Receiver Test --- TX and RX Tester Mode RF Power RF Power MT8801 99/12/31 12:00:00 Measure : Continuous << RF Power (CDMA) >> Storage : Normal Window [dB] TX Power : Marker -6.52 dBm Carrier Off Power : -35.33 dBm On/Off ratio : Storage...
- Page 121 –133.0 dBm to –4.0 dBm (RF Output: AUX, AWGN On) Resolution: 0.1 dB [Pilot Channel Level] F2: Sets the level of Pilot Channel output from the MT8801C. Initial value: –7.0 dB Setting range:–5.0 dB to –10.0 dB, 0 dB Setting 0 dB at Pilot Channel can be performed only by GPIB command.
- Page 122 4.3 CDMA Transmitter and Receiver Test --- TX and RX Tester Mode • Function keys: 1st page [Window] F7: Displays a waveform-window setup menu. [Slot] F7: Displays a waveform corresponding to one slot. [Leading] F9: Displays a waveform at the leading edge of the burst signal. [Trailing] F10: Displays a waveform at the trailing edge of the burst signal.
- Page 123 Section 4 Operation 2nd page [Unit] F9: Displays the power measurement unit menu. [dBm] F7: Sets the power measurement value unit to dBm (initial value) [nW/µW/mW/W] F8: Switches the power measurement value unit to the watt system. [return] F12: Returns to the previous menu. [Level Rel./Abs.] F10: Displays the menu for selecting absolute or relative display of the waveform vertical axis scale.
- Page 124 4.3 CDMA Transmitter and Receiver Test --- TX and RX Tester Mode (4) Setting the template: Setup Template screen Sets the template of the Gated output power measurement. • Display the Setup Template according to the following steps: Step Key operation Description 1.
- Page 125 Section 4 Operation • Standard template Limit 1 (off level): –20.0 dB Limit 2 (on level, lower): –3.0 dB Standard pattern (LIMIT-1) –20 dB (fixed) (LIMIT-2) –3 dB • Set the following items on the Setup Template screen. Item Range Resolution Initial value –90.0 dB to 10.0 dB...
- Page 126 4.3 CDMA Transmitter and Receiver Test --- TX and RX Tester Mode (5) Power meter: Power Meter screen Use the power sensor or IF level meter to measure the average power on the Power Meter screen. When the Call Processing state is the “Loop Back” or “Conversation”, and power meter uses the IF Level Meter;...
- Page 127 Section 4 Operation Power Power Measure : Continuous MT8801 99-12-31 12:00:00 << Power Meter (CDMA) >> Storage : Normal Power Measure Method Power Control Bit Pattern POWER : ******* dBm Closed Loop ******* pW Storage Power Mode Control Level Calibration TX POWER : ******* dBm Linearity...
- Page 128 –133.0 dBm to –4.0 dBm (RF Output: AUX, AWGN On) Resolution: 0.1 dB [Pilot Channel Level] F2: Sets the level of Pilot Channel output from the MT8801C. Initial value: –7.0 dB Setting range:–5.0 dB to –10.0 dB, 0 dB Setting 0 dB at Pilot Channel can be performed only by GPIB command.
- Page 129 Section 4 Operation • Function keys: • For Power Meter 1st page [Set Relative] F7: Enables to display the power measurement result using a relative value. The reference value is the power measurement value immediately before setting the relative value display. If the Power Meter screen is switched to another screen or the power is turned off, the screen enters absolute value display mode and the set reference value is invalid.
- Page 130 4.3 CDMA Transmitter and Receiver Test --- TX and RX Tester Mode • For IF Level Meter 1st page [Storage Mode] F9: Displays the Storage Mode Setting menu. [Normal] F7: Sets normal mode. [Average] F8: Sets averaging mode. The Measure mode becomes Single, automatically. [Average Count] F9: Sets an averaging count.
- Page 131 Section 4 Operation 2nd page [Power Measure Method] F7: Sets the measurement method of Power Measure measurement , selecting Power Meter or IF Level Meter. [Power Control Bit Pattern] F8: Sets power control bits. (Initial value: Closed Loop) Closed Loop: Performs power control of the TX level of the mobile station to the desired value using the Closed Loop Power Control Bit.
- Page 132 4.3 CDMA Transmitter and Receiver Test --- TX and RX Tester Mode • Power meter zero calibration To make accurate RF power measurement in transmitter measurement (TX Measure mode), calibrate the zero position of the power meter as described below. Step Key operation Description...
- Page 133 Section 4 Operation • Level linearity calibration for IF level meter Follow the procedure below for 0-point level linearity calibration to correctly measure a low level using the IF level meter on the Power Meter screen and a low level on the Standby Output Power screen. Step Key operation Description...
- Page 134 4.3 CDMA Transmitter and Receiver Test --- TX and RX Tester Mode (6) Standby Output Power measurement: Standby Output Power screen Step Key operation Description 1. [Main Func on off] F6 Sets the Main Func on to display the Main Menu at the bottom of the screen. 2.
- Page 135 –133.0 dBm to –4.0 dBm (RF Output: AUX, AWGN On) Resolution: 0.1 dB [Pilot Channel Level] F2: Sets the level of Pilot Channel output from the MT8801C. Initial value: –7.0 dB Setting range:–5.0 dB to –10.0 dB, 0 dB Setting 0 dB at Pilot Channel can be performed only by GPIB command.
- Page 136 4.3 CDMA Transmitter and Receiver Test --- TX and RX Tester Mode Function keys 1st page [Start/Stop] F7: Starts Standby Output Power measurement. (Note) [Calibration] F10: Displays the level calibration execution menu. [Int. Osc. Calibration] F8: Performs the level calibration using an internal oscillator. Calibration progress window is displayed during calibration.
- Page 137 Section 4 Operation (7) Access Probe output power measurement: Access Probe Measure screen • The Access Probe Measure screen appears by the following operation: Step Key operation Description 1. [Main Func on off] F6 Sets the Main Func on to display the Main Menu at the bottom of the screen. [TX&RX Tester] F1 Sets TX&RX Tester mode.
- Page 138 4.3 CDMA Transmitter and Receiver Test --- TX and RX Tester Mode Access Probe Access Probe MT8801 99/12/31 12:00:00 << Access Probe Measure (CDMA) >> Start/Stop Measure State : Running Measured Level of Access Probes (-- bursts / 999 Frames) AP Frame Level Frame...
- Page 139 –133.0 dBm to –4.0 dBm (RF Output: AUX, AWGN On) Resolution: 0.1 dB [Pilot Channel Level] F2: Sets the level of Pilot Channel output from the MT8801C. Initial value: –7.0 dB Setting range:–5.0 dB to –10.0 dB, 0 dB Setting 0 dB at Pilot Channel can be performed only by GPIB command.
- Page 140 4.3 CDMA Transmitter and Receiver Test --- TX and RX Tester Mode 2nd page [Reference Level] F3: Sets the reference level of signal input to the MT8801C. Initial value: 30 dBm Setting range:42 dBm to –60 dBm (RF Input: Main) 22 dBm to –60 dBm (RF Input: AUX)
- Page 141 Section 4 Operation (8) Open Loop Power Control Time Response measurement: Open Loop Time Response screen • The Open Loop Time Response screen appears by the following operation: Step Key operation Description 1. [Main Func on off] F6 Sets the Main Func on to display the Main Menu at the bottom of the screen. [TX&RX Tester] F1 Sets TX&RX Tester mode.
- Page 142 –133.0 dBm to –4.0 dBm (RF Output: AUX, AWGN On) Resolution: 0.1 dB [Pilot Channel Level] F2: Sets the level of Pilot Channel output from the MT8801C. Initial value: –7.0 dB Setting range:–5.0 dB to –10.0 dB, 0 dB Setting 0 dB at Pilot Channel can be performed only by GPIB command.
- Page 143 [BS Level Step Up Start] F7: Starts measurement with increasing the MT8801C BS Output Level by a Step value. [BS Level Step Down Start] F8: Starts measurement with decreasing the MT8801C BS Output Level by a Step value. (Initial state) (Note) [BS Level Step Down Ready] F8: Prepares the Step Down of the BS Output Level.
- Page 144 4.3 CDMA Transmitter and Receiver Test --- TX and RX Tester Mode (9) Measuring the occupied frequency bandwidth: Occupied Band- width screen Use the parameters set on the Setup Common Parameter screen (see paragraph 4.3.5) to measure an occupied frequency bandwidth of a send signal from the transmitter.
- Page 145 Section 4 Operation • Function keys Main function keys: [Channel] F1: Changes the channel number. [Reference Level] F3: Changes the reference level. [OccBW Ratio] F4: Sets the percentage of total power that resides in the occupied bandwidth. Initial Value: 99.0 % Range: 80.0 to 99.9 % Resolution: 0.1 [RBW] F5:...
- Page 146 4.3 CDMA Transmitter and Receiver Test --- TX and RX Tester Mode (10) Spurious close to the Carrier measurement: Spurious close to the Carrier screen, Setup Spurious Template screen Measures adjacent spurious of transmission signal (of transmitter) using param- eters set on Setup Common Parameter screen (paragraph 4.3.5). Also, sets the spurious waveform template (amplitude standard line) at Setup Spurious Template screen, and can save/recall upto 100 types to/from an FD (3.5-inch floppy disk) at Save Spurious Template screen or Recall Spurious...
- Page 147 Section 4 Operation Adj.CH Adj.CH MT8801 99-12-02 06:15:00 Measure : Single Recall << Spurious close to Carrier(CDMA) >> Measure Spurious Method : Spectrum Method Template Template : IS-95(Relative) [dB] Setup -> Tx Power (Modulation): Spurious Unit -1.17 dBm Template Offset Freq. vs Power -1.980 MHz : -52.34 dB Storage -0.900 MHz :...
- Page 148 4.3 CDMA Transmitter and Receiver Test --- TX and RX Tester Mode Function key: 1st page [Measure Method] F7: Displays the selection menu for the measurement method. [Spectrum] F7: Uses the spectrum analyzer method. [Return] F12: Returns to the previous menu. [Unit] F8: Displays the menu for the power measurement value units.
- Page 149 Section 4 Operation (b) Setting spurious template screen: Setup Spurious Template Screen • Display the Setup Spurious Template Screen in the following operation. Step Key operation Description [Main Func on off] F6 Turns on the Main Func, and displays the main menu on the bottom of the screen.
- Page 150 4.3 CDMA Transmitter and Receiver Test --- TX and RX Tester Mode Setup Temp. MT8801 99-04-30 12:00:00 << Setup Spurious Template (CDMA) >> Save Spurious Template Reverse Template : IS-95(Reverse, Absolute) [dB] Line Level 1) [-60.0 dBm] 2) [-60.0 dBm] Line Level Offset Frequency Rel./Abs.
- Page 151 Section 4 Operation • Standard data of the Template IS-95, ARIB, MKK Standard • Relative value 0 dB: TX Power – 42 dB – 54 dB 900 kHz 1.98 MHz • Absolute value – 60 dBm 900 kHz 4-96...
- Page 152 4.3 CDMA Transmitter and Receiver Test --- TX and RX Tester Mode IS-95B Standard • Relative value (1) 0 dB: TX Power – 42 dB – 54 dB 885 kHz 1.98 MHz • Relative value (2) 0 dB: TX Power –...
- Page 153 Section 4 Operation J-STD-008 Standard • Relative value 0 dB: TX Power – 42 dB 1.25 MHz • Absolute value – 60 dBm 1.25 MHz • Set items of the Setup Spurious Template Screen are shown below. Item Range Resolution Initial value Line Level –100.0 to (Set value of Line Level 2) dB/dBm...
- Page 154 4.3 CDMA Transmitter and Receiver Test --- TX and RX Tester Mode • Function key Main function key: None Function key: [Save Spurious Template] F7: Displays the menu for saving the spurious measurement template. (See paragraph 4.3.11) [Line Level Rel./Abs.] F9: Displays the menu for absolute/relative selection of the template level.
- Page 155 Section 4 Operation (11) Spurious measurement: Spurious Emission screen, Setup Fre- quency Table screen Measures the specified spurious emission of the signal from the transmitter ac- cording to the specified parameter in the Setup Common Parameter Screen (paragraph 4.3.5). Sets a table of measuring spurious frequency (Setup Frequency Table Screen), and 100 different table saving (Save Frequency Table Screen) and recalling (Re- call Frequency Table Screen) can be done in the FD (3.5-inch floppy disk).
- Page 156 4.3 CDMA Transmitter and Receiver Test --- TX and RX Tester Mode Notes: 1. Forced to single measurement. 2. For a frequency of 1.6 GHz or more, a high pass filter is used for the mea- surement. • Function key Main function key: [Channel] F1: Changes the Channel number.
- Page 157 Section 4 Operation (b) Setting of frequency table for spurious measurement: Setup Frequency Table Screen • Display the Setup Frequency Table Screen as follows. Step Key operation Description [Main Func on off] F6 Turns on the Main Func and displays the main menu at the bottom of the screen.
- Page 158 4.3 CDMA Transmitter and Receiver Test --- TX and RX Tester Mode • Items to be set in the Setup Frequency Table Screen are listed below. Item Range Resolution Initial value Frequency 100 Hz to 3 GHz 1 Hz 1775.300000 MHz 100 Hz to 3 GHz 1 Hz 2662.950000 MHz...
- Page 159 CDMA as the measured equipment is given below. Setup As described in paragraph 4.3.1 (1), connect the MT8801C to the measured equipment (mobile station). Setting and measurement procedures Perform transmission measurement (modulation analysis and Access Probe out- put power measurement) as described below.
- Page 160 4.3 CDMA Transmitter and Receiver Test --- TX and RX Tester Mode Step Operation (Connecting call) Press the Next Menu [ ] key and function key F5 (Start) in this order to set the Call Proc. state to Idle. Turn on the power of the mobile station under test. Confirm that the Registration is executed for the mobile station and the Idle (Regist) state comes (Setting and measurement on Access Probe Measure screen) Press the Next Menu key [ ] and function key F1 (TX Measure) in this order to switch to the TX...
- Page 161 Section 4 Operation 4.3.7 Analog transmitter measurement Set Control Band to A800MHz on the Setup Common Parameter screen, then press the [TX Measure] F1 main function key to set analog transmitter measurement mode. This paragraph describes the following analog transmitter measurement items: 1.
- Page 162 4.3 CDMA Transmitter and Receiver Test --- TX and RX Tester Mode TX Parameter MT8801 99-12-31 12:00:00 << Setup Analog TX Measure Parameter (CDMA) >> User Cal Factor 0.00dB] Power meter method : (IF Level Meter) RF measure mode : [All AF Output Impedance : [600‰]...
- Page 163 Section 4 Operation (2) Signal generator + analog transmitter measurement: Analog TX Meas with SG screen On the Analog TX Meas with SG screen, output an RF signal from the MT8801B and measure the RF signal from the DUT. AF Osc.2 signal can also be output to the AF output terminal as required. Switch to the Analog TX Meas with SG screen according to the following steps: Step Key operation...
- Page 164 4.3 CDMA Transmitter and Receiver Test --- TX and RX Tester Mode The 2nd page of the main function keys on the Analog TX Meas with SG screen. (Call Proc.: Conversation) AF Level RX RF RX RF MS Power Modulation Main Func Frequency Level...
- Page 165 Changes the MS (mobile station under test) transmission level. [Modulation] F5 Displays the Modulation function keys on F7 to F12. (Settings of the modulation degree of the RF signal from the built-in signal generator of the MT8801C, the same as the 1st-page F5 key) 4-110...
- Page 166 4.3 CDMA Transmitter and Receiver Test --- TX and RX Tester Mode Function key: Function keys for 1st page of the main function key— Settings used for TX measurement • AF Level function keys: 1st page [Distortion Unit] F7 Selects the distortion measurement unit of dB or %. Initial value: % [Set Relative] F8 Displays the relative value with the reference value that is the measured level when...
- Page 167 Section 4 Operation • TX RF Level/Power function keys: 1st page [Ref Level] F7 Changes the reference level. (See para. 4.4 for the changing method.) [Set Relative] F8 Displays the relative value with the reference value that is the measured level when this key is pressed.
- Page 168 4.3 CDMA Transmitter and Receiver Test --- TX and RX Tester Mode • Deviation function keys: 1st page [Demod.] F7 Selects the demodulation function of FM (measurement unit: kHz) or øM (measure- ment unit: rad). Initial value: FM [Relative On Off] F8 Displays the relative value with the reference value that is the measured level when this key is pressed.
- Page 169 Section 4 Operation • Modulation function keys: 1st page ----- AF Osc.1 is used only to modulate (Mod) the internal signal generator (SG) in this device. When the Call Proc. State is “conversation”, it is used for SAT modulation; so, the frequency, deviation , and On/Off setting cannot be changed. [AF Osc.1 Frequency] F8 Sets AF Osc.1 frequency (modulation frequency of the internal signal generator).
- Page 170 4.3 CDMA Transmitter and Receiver Test --- TX and RX Tester Mode [AF Osc.2 Level] F10 In AF mode, sets the AF signal output level as shown below. Initial value: 100.0 mV When 600 Ω is set for Impedance of AF Output on the Setup Analog TX Measure Parameter screen: •...
- Page 171 Section 4 Operation Function key: Function keys for 2nd page of the main function key • AF Level function key — The same as the AF Level function keys at the 1st page of the main function key • RX RF Frequency function key: [Incremental Step Value] F7 Sets the step value to up/down the RF frequency of the built-in signal generator (SG) of the MT8801B with [Step] keys.
- Page 172 4.3 CDMA Transmitter and Receiver Test --- TX and RX Tester Mode 2nd page [Offset Value] F7: Sets an offset value in output level offset display mode. Range: –55.0 to 55.0 dB Resolution: 0.1 dB Initial value: 0 dB [Offset On Off] F8: Increases or decreases the real output level to display.
- Page 173 Section 4 Operation 4.3.8 CDMA Receiver measurement On the Setup Common Parameter screen; set the Control Band to C800MHz or C1.9GHz, and press the [RX Measure] F2 main function key to set CDMA receiver measurement mode. This paragraph describes how to set parameters (on the Setup RX Measure Parameter screen) and how to measure the frame error rate (on the Frame Error Rate screen) for CDMA receiver measurement.
- Page 174 5. <User Cal Factor> When there is a loss in the cable between the mobile-station RF input and the MT8801C RF output, set the User Cal. Factor to convert the BS Output Level to the input level of the mobile station.
- Page 175 Section 4 Operation (2) Setting signal: Setup Signal screen Sets the Forward signal at Signal Setup screen. • The Signal Setup screen appears by the following operation: Step Key operation Description 1. [Main Func on off] F6 Sets the Main Func on to display the Main Menu at the bottom of the screen. [TX&RX Tester] F1 Sets TX&RX Tester mode.
- Page 176 4.3 CDMA Transmitter and Receiver Test --- TX and RX Tester Mode Item Range Resolution Initial value Channel Level Note 1 Pilot Channel Level –5.0 dB to –10.0 dB 0.1 dB –7.0 dB Sync Channel Level –7.0 dB to –20.0 dB 0.1 dB –16.0 dB Paging Channel Level...
- Page 177 Section 4 Operation (3) Measuring the frame error rate (FER): Frame Error Rate screen The following describes how to measure the frame error rate (on the Frame Error Rate screen) of the receiver by using the parameters set on the Setup Common Parameter, Setup RX Measure Parameter, and Setup Signal screens.
- Page 178 –133.0 dBm to –4.0 dBm (RF Output: AUX, AWGN On) Resolution: 0.1 dB [Pilot Channel Level] F2: Sets the level of Pilot Channel output from the MT8801C. Initial value: –7.0 dB Setting range:–5.0 dB to –10.0 dB, 0 dB Setting 0 dB at Pilot Channel can be performed only by GPIB command. (See para.
- Page 179 Initial value: 1 Setting range:1 to 799, 900 to 1023 (Band: 800 MHz) [Reference Level] F3: Sets the reference level of signal input to the MT8801C. Initial value: 30 dBm Setting range:42 dBm to –60 dBm (RF Input: Main) 22 dBm to –60 dBm (RF Input: AUX)
- Page 180 An example of receiver measurement (FER measurements) on the CDMA mo- bile station is given below. Setup As described in paragraph 4.3.1 (1), connect the MT8801C to the measured equipment (mobile station). Measurement Setting Procedure Set the receiver measurement (FER measurements) of the MT8801C in the fol-...
- Page 181 Section 4 Operation Step Operation (Connecting call) Press the Next Menu key [ ] and function key F5 (Start) in this order to set the Call Proc. state to Idle. Turn on the power of the mobile station under test. Confirm that the Registration is executed for the mobile station and the Idle (Regist) state comes on.
- Page 182 4.3 CDMA Transmitter and Receiver Test --- TX and RX Tester Mode 4.3.9 Analog receiver measurement Set Control Band to A800MHz on the Setup Common Parameter screen, then press the [RX Measure] F2 main function key to set analog receiver measurement mode. This paragraph describes how to set parameters (on the Setup Analog RX Measure Parameter screen) and how to measure the analog receiver (on the Analog RX Mea- sure screen) for analog receiver measurement.
- Page 183 Section 4 Operation RX Parameter MT8801 99-12-31 12:00:00 << Setup Analog RX Measure Parameter (CDMA) >> User Cal Factor : [ 0.00dB] AF Input Range : [ 30V] Impedance : [100k‰] -> Back Screen Main Func Fig. 4-24 Setup Analog RX Measure Parameter Screen •...
- Page 184 4.3 CDMA Transmitter and Receiver Test --- TX and RX Tester Mode (2) Analog receiver measurement: Analog RX Measure screen On the Analog RX Measure screen, output an RF signal from the MT8801B and measure the AF signal from the DUT. Switch to the Analog RX Measure screen according to the following steps: Step Key operation...
- Page 185 Section 4 Operation The 1st page of the main function key on the Analog RX Measure screen. (Call Proc.: Stop) AF Level RF Level Modulation Main Func Frequency Level Note 1: Relative value (of AF Level, which is always displayed) is displayed with --.- dB until the [Set Relative] F8 key is pressed.
- Page 186 4.3 CDMA Transmitter and Receiver Test --- TX and RX Tester Mode 2nd page [Range Up] F7 Up the measurement range of the AF level meter. [Range Down] F8 Down the measurement range of the AF level meter. [Storage Mode] F9 Displays the Storage Mode menu for all the measured results on the screen.
- Page 187 Section 4 Operation • RF Level function keys: 1st page [Incremental Step Value] F7 Sets the step value for up/down the RF level by the [Step] keys. Range: 0.1 dB ≤ Set value ≤ 80.0 dB, 0.1 dB step Initial value: 1.0 dB [Relative On Off] F8 Displays the relative value with the reference value that is the set value when this key is pressed.
- Page 188 4.3 CDMA Transmitter and Receiver Test --- TX and RX Tester Mode • Modulation function keys: 1st page ----- AF Osc.1 is used only to modulate (Mod) the internal signal generator (SG) in this device. When the Call Proc. State is “conversation”, it is used for SAT modulation; so, the frequency, deviation, and On/Off setting cannot be changed.
- Page 189 Section 4 Operation • For Tone of signal type 0.400 V< Set value ≤ 3.000 V, 0.001 V step 40.0 mV< Set value ≤ 400.0 mV, 0.1 mV step 4.00 mV< Set value ≤ 40.00 mV, 0.01 mV step 0.010 mV< Set value ≤ 4.000 mV, 0.001 mV step •...
- Page 190 4.3 CDMA Transmitter and Receiver Test --- TX and RX Tester Mode 4.3.10 Call processing function On the Setup Common Parameter screen, press the [Call Processing] F3 main function key to set call processing function mode. This paragraph describes how to set parameters (on the Setup Call Proc. Parameters screen) to conduct the call processing function.
- Page 191 Section 4 Operation • Set the following items: These are settable only when Call. Proc. state is Stop. Item Range Resolution Initial value Paging Channel Walsh Code 1 to 7 Traffic Channel Walsh Code 8 to 31, 33 to 63 OCNS Channel Walsh Code 1 to 31, 33 to 63 0 to 32767...
- Page 192 4.3 CDMA Transmitter and Receiver Test --- TX and RX Tester Mode • Main function key: (None) • Function keys: [Default] F9: Sets each item to the initial value. [Back Screen] F12: Displays the previous screen (Setup Common Parameter screen). Note 1: <Register SID, Register NID>...
- Page 193 Section 4 Operation 4.3.11 Closed Loop Power Control function When the following conditions in the table below are satisfied on each the Setup screen, FER screen, Power Meter screen (with IF Level Meter) and Modulation Analysis screen; the Closed Loop Power Control function mode can be obtained. This function controls the Tx power of the mobile station to the desired level using the Closed Loop Power Control Bit.
- Page 194 4.3 CDMA Transmitter and Receiver Test --- TX and RX Tester Mode 4.3.12 Saving and recalling parameter data: Save Parameter screen, Recall Parameter screen Display the Save Parameter and Recall Parameter screens according to the following steps to save or recall parameters set for the transmitter and receiver test. Step Key operation Description...
- Page 195 • Notes when displaying the Save Parameter screen and Recall Parameter screen: Before pressing the [Save] F5 or [Recall] F4 function key, insert a floppy disk (FD) in the FD driver of the MT8801C. Then press the key. The MT8801C automati- cally starts the FD-driver operation.
- Page 196 4.3 CDMA Transmitter and Receiver Test --- TX and RX Tester Mode • Function keys on the Recall Parameter screen Main function key: None Recall function keys: [Display Dir.] F8: Accesses the floppy disk and displays the directory of the parameter data file. The lower-order Recall menu appears.
- Page 197 Section 4 Operation • Function keys on the Save Parameter screen Main function key: None Save function keys: [Display Dir.] F8: Accesses the floppy disk and displays the directory of the parameter data file. The low-order Save menu appears. [Previous Page] F7: Displays the previous page of the directory.
- Page 198 4.3 CDMA Transmitter and Receiver Test --- TX and RX Tester Mode • Saving parameters and data This paragraph describes how to save the measurement parameters of the MT8801C to a floppy disk. Step Key operation Description A When the [Save] F5 main function key is used Insert a saving floppy disk (FD) into the FD driver on the bottom left of the MT8801C.
- Page 199 Section 4 Operation • Write-protecting or write-enabling the file to be saved This paragraph describes how to write-protect or write-enable the file containing data in the Save screen. Step Key operation Description Execute the Steps 1 to 4 of the saving procedure in the previous paragraph to display the Save menu.
- Page 200 Proceed to Step 5 below. B When [Recall Template] F7 function key of Gated Power Measure screen is used Insert a recall FD into the FD driver at the bottom left of the MT8801C. 2. [Recall Template] F7 Changes to the Recall Template screen. Displays the Recall function keys in F7 to F12, then moves to the Recall screen for parameter and data.
- Page 201 Section 4 Operation • Changing the recall-file display format (WIDE/NARROW) This paragraph describes how to change the recall-file display format (WIDE/NARROW). Step Key operation Description Execute the Steps 1 to 5 of the recalling procedure in the previous paragraph to display the recalled file. Next Menu [ Displays the second page of the function keys.
- Page 202 4.3 CDMA Transmitter and Receiver Test --- TX and RX Tester Mode 4.3.13 Operating the file: File Operation screen To access the floppy disk and display the parameter file directory, delete or write- protect the parameter file, and initialize the floppy disk; display the File Operation screen according to the following steps.
- Page 203 Section 4 Operation • Functions keys on the File Operation screen Main function key: None Function keys: 2 pages. Use the Next Menu [ ] key to scroll to the next page. ** 1st page ** [Previous Page] F7: Displays the previous page of the directory. [Display Dir./Next Page] F8: Accesses the floppy disk and displays the next page of the directory.
- Page 204 Key operation Description Insert a floppy disk (FD) into the FD driver at the bottom left of the MT8801C. 2. [Main Func on off] F6 Turn the Main Func on to display the main function keys. 3. Next Menu [ ] Displays the second page of the main function keys.
- Page 205 Step Key operation Description Insert a floppy disk (FD) into the FD driver at the lower left of the MT8801C. The acceptable FD is the 2HD (1.44 M-bytes) or 2DD (720 k-bytes) type. Next Menu [ Displays the second page of the function keys.
- Page 206 4.3 CDMA Transmitter and Receiver Test --- TX and RX Tester Mode 4.3.14 Screen hard copy ... Copy The copy function transfers a screen display to the printer or floppy disk. Specify a transfer destination and mode on the Instrument Setup screen. Press the Copy key on the front panel to activate the Copy function.
- Page 207 Remote control status If MT8801C is used for remote control, the REMOTE lamp on the left of the front panel lights. While the REMOTE lamp is on, key entry and rotary knob entry from the front panel are disabled. To change the remote control status to the front panel entry status, execute the following steps: Halt the remote control.
- Page 208 Section 5 Measurement Examples This section describes the measurement procedures to perform the performance test of the CDMA mobile station using the MT8801C. Preparation for the CDMA Mobile station Measurement ............. 5.1.1 Connecting the CDMA mobile station and MT8801C ............
-
Page 209: Preparation For The Cdma Mobile Station Measurement
Section 5 Measurement Examples Preparation for the CDMA Mobile station Measure- ment This section explains the connection method of MT8801C and the CDMA mobile station, and basic settings to test the CDMA mobile station. 5.1.1 Connecting the CDMA mobile station and MT8801C... -
Page 210: Setting Mt8801C And The Cdma Mobile Station
5.1 Preparation for the CDMA Mobile station Measurement 5.1.2 Setting MT8801C and the CDMA mobile station Setting for the ARIB-T53 system is explained in the following section. This section explains the common settings to perform measurements described in sec- tions 5.2 “Testing CDMA Mobile station Output” and 5.3 “Testing CDMA Mobile station Input”. - Page 211 Section 5 Measurement Examples (11) The Setup Signal screen (shown below) is displayed. (12) Put the cursor on Pilot Channel Level using the Cursor keys. Then press the Set key of Cursor. Set Pilot Channel Level at –7.0 dBm using the numeric keypad when the setting window is opened.
- Page 212 5.1 Preparation for the CDMA Mobile station Measurement (19) Put the cursor on Power Control Bit Pattern using the Cursor keys. Then press the Set key of Cursor. Select Closed Loop using the Cursor • keys when the setting window is opened. Then press the Set key of Cursor to set it. (20) Press the F6 (Main Func On Off) key to turn On the Main Func.
- Page 213 CDMA mobile station power is turned ON. (26) Press the F2 (NW Originate) key. (27) The Call Proc. status becomes Loopback (shown below). The basic setting of the MT8801C and the CDMA mobile station has now been com- pleted.
- Page 214 Measurement procedure The explanation in this section starts at the completion of the setting explained in section 5.1.2 “Setting MT8801C and the CDMA mobile station”. Press the F6 (Main Func On Off) key to turn On the Main Func. Press the F1 (TX & RX Tester) key.
- Page 215 Section 5 Measurement Examples (10) Press the Single key or the Continuous key to start the modulation analysis. The modulation analysis result is shown below:...
-
Page 216: 5.2 Testing Cdma Mobile Station Output
Measurement procedure The explanation in this section starts at the completion of the setting explained in 5.1.2 “Setting MT8801C and the CDMA mobile station”. Press the F6 (Main Func On Off) key to turn On the Main Func. Press the F1 (TX & RX Tester) key. - Page 217 Section 5 Measurement Examples (12) Press the F9 (Storage Mode) key and F7 (Normal) to set Storage Mode to be Normal. (13) Press the F12 (return) key. (14) Press the F11 (Adjust Range) key to optimize the measurement range. (15) Press the Single key or the Continuous key to start the open loop output power measurement.
- Page 218 5.2 Testing CDMA Mobile station Output (19) Press the F1 (BS Output Level) key and set BS Output Level at –104.0 dBm. (20) Press the F11 (Adjust Range) key to optimize the measurement range. (21) Press the Single key or the Continuous key to start the open loop output power measurement.
-
Page 219: Measuring Open Loop Time Response
Open loop time response measures the time response of output power of the CDMA mobile station when the output power of the CDMA base station is changed stepwise. MT8801C is used in place of the CDMA base station. Measurement procedure The explanation in this section starts at the completion of the setting explained in 5.1.2... - Page 220 5.2 Testing CDMA Mobile station Output (13) The Open Loop Time Response screen (shown below) is displayed. (14) Press the key of Next Menu to display the second page of function keys (F7 to F12). (15) Press the F7 (Step Value) key and input 20.0 dBm using the numeric keypad. (16) Press the key of Next Menu to display the first page of function keys (F7 to F12).
- Page 221 Section 5 Measurement Examples (21) Press the F8 (BS Level Step Down Start) key. (22) When you press the F8 (BS Level Step Down Start) key, the time response mea- surement is started for the last transition of the CDMA base station power out- put.
-
Page 222: Measuring Maximum Rf Output Power
Measurement procedure The explanation in this section starts at the completion of the setting explained in 5.1.2 “Setting MT8801C and the CDMA mobile station”. Press the F6 (Main Func On Off) key to turn the Main Func On. Press the F1 (TX & RX Tester) key. - Page 223 Section 5 Measurement Examples (23) Press the Single key or the Continuous key to start the maximum RF output power measurement. The measurement result is shown as follows: 5-16...
-
Page 224: Measuring Minimum Output Power
Measurement procedure The explanation in this section starts at the completion of the setting explained in “5.1.2 Setting MT8801C and the CDMA mobile station”. Press the F6 (Main Func On Off) key to turn On the Main Func. Press the F1 (TX & RX Tester) key. -
Page 225: Measuring Gated Power
Measurement procedure The explanation in this section starts at the completion of the setting explained in “5.1.2 Setting MT8801C and the CDMA mobile station”. Press the F6 (Main Func On Off) key to turn On the Main Func. Press the F1 (TX & RX Tester) key. - Page 226 5.2 Testing CDMA Mobile station Output (16) Press the F1 (TX & RX Tester) key. (17) Press the F9 (Gated Power) key. (18) The Gated Power screen (shown below) is displayed. (19) Press the F9 (Storage Mode) key and the F8 (Average) key to set Storage Mode to be Average.
-
Page 227: Measuring Tx Spurious Closed To Fc
Measurement procedure The explanation in this section starts at the completion of the setting explained in 5.1.2 “Setting MT8801C and the CDMA mobile station”. Check whether the Loopback status is displayed on the Setup Common Param- eter screen. - Page 228 5.2 Testing CDMA Mobile station Output Press the Single key or the Continuous key to start the TX spurious closed to fc measurement. The measurement result is shown as follows: 5-21...
-
Page 229: Measuring Tx Spurious Points
Measurement procedure The explanation in this section starts at the completion of the setting explained in 5.1.2 “Setting MT8801C and the CDMA mobile station”. Press the F6 (Main Func On Off) key to turn On the Main Func. Press the F1 (TX & RX Tester) key. - Page 230 5.2 Testing CDMA Mobile station Output (12) The Setup Frequency Table screen (shown below) is displayed. (13) Put the cursor on f1 using the Cursor keys. Then press the Set key of Cursor. Set f1 at 1800 MHz using the numeric keypad. Similarly set f2 at 2700 MHz.
-
Page 231: Measuring Occupied Bandwidth
Measurement procedure The explanation in this section starts at the completion of the setting explained in 5.1.2 “Setting MT8801C and the CDMA mobile station”. Press the F6 (Main Func On Off) key to turn On the Main Func. Press the F1 (TX & RX Tester) key. - Page 232 5.2 Testing CDMA Mobile station Output (10) Press the Single key or the Continuous key to start the occupied bandwidth mea- surement. The occupied bandwidth measurement result is shown as follows: 5-25...
-
Page 233: Measuring Access Probe Output Power
Measurement procedure The explanation in this section starts at the completion of the setting explained in 5.1.2 “Setting MT8801C and the CDMA mobile station”. Press the F6 (Main Func On Off) key to turn On the Main Func. Press the F1 (TX & RX Tester) key. - Page 234 5.2 Testing CDMA Mobile station Output (19) The Access Probe Measure screen (shown below) is displayed. (20) Press the F10 (Calibration) key and the F8 (Int. Osc.) key to perform the calibra- tion using the internal oscillator. (21) Press the Single key or the Continuous key to start the access probe output power measurement.
- Page 235 Section 5 Measurement Examples (27) Press the key of Next Menu to display the second page of function keys (F7 to F12). (28) Press the F9 (Setup TX Parameter) key. (29) Set the following items on the Setup TX Measure Parameter screen: ♦...
-
Page 236: Measuring Standby Output Power
Measurement procedure The explanation in this section starts at the completion of the setting explained in 5.1.2 “Setting MT8801C and the CDMA mobile station”. Press the F6 (Main Func On Off) key to turn On the Main Func. Press the F1 (TX & RX Tester) key. - Page 237 Section 5 Measurement Examples (17) The Standby Output Power screen (shown below) is displayed. (18) Press the F10 (Calibration) key and the F8 (Int. Osc. Calibration) key to perform the internal oscillator calibration. (19) Press the Single key or the Continuous key to start the standby output power measurement.
-
Page 238: Testing Cdma Mobile Station Input
Measurement procedure The explanation in this section starts at the completion of the setting explained in 5.1.2 “Setting MT8801C and the CDMA mobile station”. Press the F6 (Main Func On Off) key to turn On the Main Func. Press the F1 (TX & RX Tester) key. - Page 239 Section 5 Measurement Examples (12) Set the following items on the Setup RX Measure Parameter screen: ♦ Set Sample to be 100 Frame. ♦ Set FER at 3.0 %. ♦ Set FER Upper Limit at 3.0 %. (13) Press the F12 (Back Screen) key. (14) Press the key of Next Menu to display the first page of function keys (F7 to F12).
-
Page 240: Measuring Rx Sensitivity
Measurement procedure The explanation in this section starts at the completion of the setting explained in 5.1.2 “Setting MT8801C and the CDMA mobile station”. Press the F6 (Main Func On Off) key to turn On the Main Func. Press the F1 (TX & RX Tester) key. - Page 241 Section 5 Measurement Examples (15) Press the Single key or the Continuous key to start the RX sensitivity measure- ment. The measurement result is shown as follows: 5-34...
-
Page 242: Measuring Dynamic Range
Measurement procedure The explanation in this section starts at the completion of the setting explained in 5.1.2 “Setting MT8801C and the CDMA mobile station”. Press the F6 (Main Func On Off) key to turn On the Main Func. Press the F1 (TX & RX Tester) key. - Page 243 Section 5 Measurement Examples (15) Press the Single key or the Continuous key to start the dynamic range measure- ment 1. The measurement result is shown as follows: (16) Press the F1 (BS Output Level) key and set BS Output Level at –25.0 dBm. (17) Press the Single key or the Continuous key to start the dynamic range measure- ment 2.
- Page 244 Section 6 Peformance Tests Requirements for Performance Tests ....... Instruments Required for Performance Test ..... Performance Tests ............ 6.3.1 Reference oscillator frequency stability ..6.3.2 Frequency/waveform quality ......6.3.3 Relative level accuracy of signal generator .. 6.3.4 Waveform quality of signal generator ... 6-11 6.3.5 Power meter (IF Level Meter) measurement accuracy ............
-
Page 245: Requirements For Performance Tests
MT8801C performance. Use the performance test procedure during acceptance inspection, periodic inspec- tion, and after repair to check the MT8801C performance. The items which is re- garded important should be tested periodically as preventive maintenance. This sec- tion explains the following test procedures: •... -
Page 246: Instruments Required For Performance Test
6.2 Instruments Required for Performance Test Instruments Required for Performance Test The instruments required for performance test are shown below. Instruments Required for Performance Test Recommended instrument Required performance Test item name (model name) Synthesized signal • Frequency range: 100 MHz to 2 GHz IF Level Meter measurement generator 1-Hz resolution available... - Page 247 Section 6 Peformance Tests Recommended instrument Required performance Test item name (model name) Frequency counter • 100 kHz to 3 GHz Reference oscillator frequency (MF1603A) • Number of display digits: 10 accuracy • Resolution: 1 Hz • External reference input: (10 MHz) possible Frequency standard •...
-
Page 248: Performance Tests
–8 (0°C to 50°C, reference at 25°C) (2) Test instruments • Frequency counter: MF1603A with stability of ≤ ± 1 × 10 • Frequency standard: –9 (3) Setup MT8801C Ext Trig Ext Trig Input Output Ext FM Demod Input Output... - Page 249 Set the reference signal changeover switch (FREQ STD:INT/EXT) on the MF1603A rear panel to EXT. Set the power supply switch on the MT8801C rear panel to On. Then, set the Power switch on the MT8801C front panel to On. Measure the frequency of the output from the 10 MHz Reference Buffered Out connector using the MF1603A after 24-hour operation with 0.1 Hz digit resolution.
-
Page 250: Frequency/Waveform Quality
(The above specifications are guaranteed after the Adjust Range execution.) (2) Test instrument • Digital modulation signal generator: MG3670B or the equivalent (3) Setup 10 MHz Buffered Output 10 MHz Reference Input MT8801C MG3670B Digital modulation signal generator Measure Cursor Single Continuous... - Page 251 SPEC1 CH1 (Channel Assign): Traffic CH2 to CH4: Execute “Measure Single” after the “Adjust Range” execution of MT8801C Read the measured value as shown in the table below, and check whether it is within the specification value. Change the settings as “Using Specification: J-STD-008” and “CDMA Channel: 600” and perform the measurement as same as above to read the result.
-
Page 252: Relative Level Accuracy Of Signal Generator
• Power meter: ML4803A or the equivalent • Power sensor: MA4602A or the equivalent • 30-dB attenuator for sensitivity adjustment: MP47A or the equivalent • PC (3) Setup GPIB MT8801C Measure Cursor Single Continuous MT8801C Cancel Radio Communication Analyzer 300kHz-3GHz... - Page 253 Command: TESTPILOTCH ON Execute BS Output Power Cal. using the GPIB command. Press the Local key (release the external control) of MT8801C to display the Open Loop Time Response screen. Read the value (X) indicated on the power meter (about –33-dBm value indicated).
-
Page 254: Waveform Quality Of Signal Generator
6.3 Performance Tests 6.3.4 Waveform quality of signal generator Waveform quality of the CDMA modulation signal of MT8801C is measured. (1) Specifications • ρ >0.99 (Pilot channel: 0 dB) (2) Test instruments • Digital mobile radio transmission tester: MS8606A or the equivalent •... - Page 255 835.2 MHz (IS-95A)/1880 MHz (J-STD-008) Reference Level: –20 dBm Execute Start on the Setup Common Parameter screen of MT8801C. When “Call Proc. status: Idle” is displayed, set the Loop mode using the GPIB command. Command: TESTMODE INSPECLOOPBACK Set the Pilot signal generation mode using the GPIB command.
-
Page 256: Power Meter (If Level Meter) Measurement Accuracy
6.3 Performance Tests 6.3.5 Power meter (IF Level Meter) measurement accuracy The accuracy of IF level meter of MT8801C is measured. (1) Specifications • ±0.4 dB (+40 to 0 dBm after the Power Meter Calibration execution) • ±0.4 dB (+40 to –10 dBm after the Power Meter Calibration execution at 18 to 28 ˚C) - Page 257 Section 6 Peformance Tests (3) Setup 1 (linearity measurement) 10 MHz Reference Input 10 MHz Buffered Output MT8801C Measure Cursor Single Continuous MT8801C Cancel Radio Communication Analyzer 300kHz-3GHz Copy Preset HP8665B Remote F 10 Shift Step Intelligent RF Local F 11...
- Page 258 Display the Power Meter screen. Configure the setup 1 measurement system. Set the measurement frequency for the MT8801C and the signal generator. Set the level (+10 dBm) for the signal generator and set 0 dB for the receiver for calibration.
- Page 259 Set “Power Meter Method” as “Power Meter” and execute “Zero Set”. Return “Power Meter Method” to “IF Level Meter” and turn On the signal generator output. Execute “Adjust Range” and “Manual Calibration” of MT8801C. Read the measurement result after the “Measure Single” sweep and check whether the result is within the specification value.
-
Page 260: Power Meter (Power Meter) Measurement Accuracy
ML4803A or the equivalent • Power sensor: MA4601A or the equivalent • Fixed attenuator: MP721A or the equivalent • PC (3) Setup GPIB Ext.Ref.In 10 MHz Buffered Output MT8801C Measure Cursor Single Continuous MT8801C Cancel Radio Communication Analyzer 300kHz-3GHz Copy... - Page 261 Set it on the Setup Common Parameter screen. Display the Power Meter screen. Execute “Zero Set”. Set the frequency of the table below for the MT8801C using the GPIB command: Command: TXFREQ ####MHZ (* #### is the frequency value to be set in the table below.) Set the above measurement frequency for the signal generator.
-
Page 262: Neighboring Spurious Measurement
• 1.98 MHz detuning: (2) Test instruments • Digital modulation signal generator: MG3670B or the equivalent • PC (3) Setup GPIB 10 MHz Buffered Output 10 MHz Reference Input MT8801C MG3670B Cursor Measure Digital modulation signal generator Single Continuous MT8801C Cancel... - Page 263 Set it on the Setup Common Parameter screen. Press Next Menu [ ] and [Start] F5 key on the Setup Common Parameter screen of MT8801C to start Call Processing. Set the Loop mode using the GPIB command when “Call Proc. status: Idle”...
-
Page 264: Spurious Measurement
Spurious measurement (1) Specifications • ≥60 dB (2) Test instruments • Digital modulation signal generator: MG3670B or the equivalent (3) Setup 10 MHz Buffered Output 10 MHz Reference Input MT8801C MG3670B Measure Cursor Digital modulation signal generator Single Continuous MT8801C Cancel... - Page 265 USER PTN (0000) Switch the Setup Common Parameter screen to “Spurious Emission” and to “Set Frequency Table” screen of MT8801C. Set the measurement frequencies from 200 MHz to 3000 MHz at the 200-MHz interval. Return to the Spurious Emission screen and set as “Unit: dB”.
- Page 266 6.3 Performance Tests Spurious measurement Measurement Effective lower limit MEAS Freq Main uncertainty ________ 200 MHz ________ 400 MHz ________ 600 MHz ________ 800 MHz ________ 1000 MHz ________ 1200 MHz ________ ±1 dB 61 dB 1400 MHz ________ 1600 MHz ________ 1800 MHz ________...
-
Page 267: Example Of Performance Test Result Entry Sheet
Example of performance test result entry sheet This paragraph gives an example of sheets used to summarize the test results before conducting the performance test of the MT8801C radio communication analyzer. Use a copy of this sheet for the performance test. - Page 268 6.3 Performance Tests 4. Waveform quality of signal generator 340 CH (880.2 MHz) 600 CH (1960 MHz) __________ __________ Waveform quality __________ __________ Measurement uncertainty <0.001 0.99 Effective lower limit 5. Power meter (IF Level Meter) measurement accuracy Linearity measurement Measurement Effective Effective...
- Page 269 Section 6 Peformance Tests 6. Power meter (Power Meter) measurement accuracy Main 10 MHz 800 MHz 1.9 GHz 3 GHz Freq. Effective Effective Measurement Error (dB) Error Error (dB) Error Error (dB) Error Error (dB) Error lower upper uncertainty limit limit –...
- Page 270 6.3 Performance Tests 8. Spurious measurement Measurement Effective lower limit MEAS Freq Main uncertainty ________ 200 MHz ________ 400 MHz ________ 600 MHz ________ 800 MHz ________ 1000 MHz ________ 1200 MHz ________ ±1 dB 61 dB 1400 MHz ________ 1600 MHz ________ 1800 MHz...
-
Page 271: About Service
If the equipment is fractured or does not operate as specified, contact the head office, a branch office, a sales office, a local office, or Customer Service Department of Anritsu Corporation to ask the repair. Addresses and telephone numbers are de- scribed on the back cover. - Page 272 Section 7 Calibration This section describes the measuring instruments required to calibrate the MT8801C, and the setup and calibration method for these instruments. Calibration Requirements .......... Equipment Required for Calibration ......Calibration ..............7.3.1 Calibrating the reference crystal oscillator ..
- Page 273 Calibration should be performed periodically even if the MT8801C is operating nor- mally. We recommend that the MT8801C be calibrated once or twice a year. Contact the Service Department of Anritsu Corporation if the MT8801C fails to meet the specifications during calibration. Equipment Required for Calibration The table below shows the equipment required to calibrate each item.
- Page 274 7.3 Calibration Calibration Do not start the performance tests until the MT8801C and measuring instruments have warmed up for at least 24 hours and they have stabilized completely. To obtain the best measurement accuracy, do the calibration at room temperature. Keep AC power voltage fluctuations, noise, vibration, dust, humidity, and any other factors which can affect results to a minimum.
- Page 275 Apply the standard frequency signal to the external reference input of the frequency counter. Move to the RX Measure screen in the Analog Tester mode on the MT8801C. Set the frequency of the signal generator of the MT8801C to 1 000.000 000 MHz, the level to –28 dBm, and the modulation to off.
- Page 276 Section 8 Storage and Transportation This section describes the long-term storage, repacking, and transportation of the MT8801C and the regular maintenance procedures. Cleaning the Cabinet ..........Storage Precautions ..........8.2.1 Precautions before storage ......8.2.2 Recommended storage conditions ....Repacking and Transportation ........
- Page 277 Section 8 Storage and Transportation Cleaning the Cabinet Always turn the MT8801C power switch OFF and disconnect the power plug from the AC power inlet before cleaning the cabinet. To clean the external cabinet: • Use a soft, dry cloth.
- Page 278 8.3 Repacking and Transportation Repacking and Transportation Take the following precautions if the MT8801C must be returned to Anritsu Corpora- tion for servicing. 8.3.1 Repacking Use the original packing materials. If the MT8801C is packed in other materials, observe the following packing procedure: Wrap the MT8801C in a plastic sheet or similar material.
- Page 279 Section 8 Storage and Transportation...
- Page 280 Appendixes Appendix A Screen and Function Key Transition Diagrams .. A-1 Appendix B Initial Values ............ B-1 Appendix C Index ............... C-1 App-1...
- Page 281 Appendixes App-2.
- Page 282 Appendix A Screen and Function Key Transition Diagrams This appendix gives the screen and function-keys transition diagrams. [Screen transitions] See Paragraph 3.2. • On any type of screen, the main menu shown below can be displayed by turning the [Main Func On Off] (F6) key to On. When main function keys F1 to F5 and Next Menu key [ ] are used to select a main menu item, the screen transits to the corre- sponding screen or key menu.
- Page 283 Appendix A Screen and Function Key Transition Diagrams...
- Page 284 Appendix A Screen and Function Key Transition Diagrams <F8>Modulation Analysis Modulation Analysis screen (Analysis screen) <F11>Occupied Bandwidth Occupied Bandwidth screen (Occupied bandwidth measurement) <F12>Power Meter Power Meter screen ↑ The Next Menu key [ ] can be (Power measurement) ↓ used to scroll the screen vertically. <F9>Setup TX Parameter Setup TX Measure Parameter screen TX Measure...
- Page 285 Appendix A Screen and Function Key Transition Diagrams <F9>Setup RX Parameter Setup RX Measure Parameter screen RX Measure (RX measurement parameter setup) (Call Proc.: Stop, CDMA) <F10>Setup Signal Setup Signal screen (Signal output level parameter setup) <F7>Analog RX Measure Analog RX Measure screen ↑...
- Page 286 Appendix A Screen and Function Key Transition Diagrams [Function key transitions on various screens] Note: If [F12] ([Back Screen] or [return]) displayed at the bottom of the function key is selected, the screen returns to the upper hierarchy. Setup Common Parameter screen When “<F1>TX Measure”...
- Page 287 Appendix A Screen and Function Key Transition Diagrams...
- Page 301 Appendix A Screen and Function Key Transition Diagrams A-20.
- Page 302 Appendix B Initial Values • The initial value is the value set at factory shipping. • Items marked with an asterisk (*) is not displayed or selected by default. • “PS” in the “Initialization” column on the rightmost on the table indicates the item that is initialized with the [Preset] key on the front panal or PRE/INI of the remote control commands.
- Page 303 Appendix B Initial Values • Setup Common Parameter screen Item Initial value Initialization Call Proc. Stop DUT Control Call Proc. Using Specification IS-95A Frequency Band 800 MHz Channel TX Meas. frequency 825.030 MHz RX Meas. frequency 870.030 MHz Channel Spacing 30.000 kHz Level Reference Level...
- Page 304 Appendix B Initial Values • RF Power screen Item Initial value Initialization 1st pager [Window] F7 Slot [Marker] F8 Off mode The screen center: 700.00 µs [Normal] F7 [Storage Mode] F9 Normal mode [Average Count] F9 2nd page [Unit] F9 [Level Rel./Abs.] F10 Relative •...
- Page 305 Appendix B Initial Values • Standby Output Power screen No initial values. • Access Probe Measure screen No initial values. • Open Loop Time Response screen Power Meter screen Item Initial value Initialization 1st page [Marker] F9 Off mode [Normal] F7 The screen center: 50.0 ms •...
- Page 306 Appendix B Initial Values Item Initial value Initialization • TX RF Level/Power function key : First page [Ref level]F7 (MAIN) 30.0 dBm (AUX) 22.0 dBm [Strage Mode]F9 Normal [Average Count]F9 • Deviation function key : First page [Demod.]F7 [Relative On Off]F8 [Det Mode]F9 (P-P)/2 [HPF]F10...
- Page 307 Appendix B Initial Values • Setup RX Measure Parameter screen Item Initial value Initialization FER Parameters Sample 1000 frames Confidence Level 95.0% 3.0% FER Upper Limit 10.0% Measure Stop Mode User Cal Factor 0.00 dB • Setup Signal screen Item Initial value Initialization Channel Level...
- Page 308 Appendix B Initial Values • Analog RX Measure screen Item Initial value Initialization • Main function key : First page [RF Level On Off]F4 • AF Level function key : First page [HPF]F9 [LPF]F10 [Filter]F11 Second page [Strage Mode]F9 Normal [Average Count]F9 [AF Level Unit]F10 [Distortion Unit]F11...
- Page 309 Appendix B Initial Values • Setup Call Proc. Parameter screen Item Initial value Initialization Paging Channel Walsh Code Traffic Channel Walsh Code OCNS Channel Walsh Code Register SID Register NID BASE_ID Default ESN FFFFFFFF (hex) IDT (Default MSID) MSIN MSID (Default MSID) DEC 000000000 B-8.
- Page 310 Appendix C Index • Numbers on the right indicate section and paragraph numbers in this operation manual. Access Probe Measure Screen ..........4.3.6 (7) Access Probe Output Power measurement ......4.3.6 (7) Access Probe TX power measurement ........ 4.3.6 (7) ACCH DCC ................
- Page 311 Appendix C Index Closed Loop ................4.3.6 (5) Closed Loop Down ............... 4.3.6 (5) Closed Loop Up ..............4.3.6 (5) Coaxial adapter ..............4.3.1 Compensation for RF cable loss at TX measurement ..4.3.1 (3) Confidence Level ..............4.3.8 (1) Connection test, Sequence monitor ........
- Page 312 Appendix B Initial Values Handling FD ................. 2.5 Handling storage media ............2.5.1 Handling the MT8801C ............2.5.2 Hard Copy ................4.3.3, 4.3.12 Idle ..................4.3.5 IDT (Default MSID) ............. 4.3.10 (1) IF Level Meter ..............4.3.6 (1), 4.3.6 (5) INIT_PWR ................
- Page 313 Appendix C Index OCNS Channel Walsh Code ..........4.3.10 (1) On/Off ratio ................4.3.6 (5) Open Loop Power Control measurement ......4.3.6 (8) Open-loop power-control time response screen ....4.3.6 (8) Operating the file ..............4.3.11 Optional accessories and peripherals ........1.4 Options ..................
- Page 314 Appendix B Initial Values Recommended storage conditions ........7.2.2 Reference crystal oscillator ..........4.1.1 Reference frequency ............. 4.1.1, 4.3.3 Reference Level ..............4.3.5 Repacking ................7.3.1 Repacking and transportation ..........7.3 Replacing the fuse ..............2.3.2 RF measure mode ..............4.3.7 (1) RF Power screen ..............
- Page 315 Appendix C Index Software options ..............1.3.2 Specifications ............... 1.5 Stacking ................2.4.2 Standard ................4.3.6 (1) (b), 4.3.6 (4) (b) Standby ................. 4.3.10 (2) Standby Output Power measurement ........4.3.6 (6) Standby TX power measurement ......... 4.3.6 (6) Stop ..................4.3.5 Storage and transportation ............
- Page 316 MT8801C Option 12: CDMA Measurement Operation Manual (Remote Control)
- Page 317 Table of Contents Section 1 General ......... 1.1 General Description ............1.2 Remote Control Functions ..........1.3 Example of System Configuration Using RS-232C/GPIB ............. 1.4 RS-232C Specifications ..........1.5 GPIB Specifications ............Section 2 Device Messages ......2.1 General Description ............2.2 Suffix Code ..............
- Page 318 5.4 Standard Event Status Register ........5-10 5.5 Extended Event Status Register ........5-14 5.6 Techniques for Synchronizing the MT8801C with a Controller ........5-18 Section 6 Initial Settings ......6.1 General Description ............6.2 Bus Initialization by the IFC Statement ......
-
Page 320: Section 1 General
Section 1 General This section outlines the Remote Control functions of the MT8801C Radio Communi- cation Analyzer. General Description ........... Remote Control Functions ........Example of System Configuration Using RS-232C/GPIB ............RS-232C Specifications ..........GPIB Specifications ........... -
Page 321: General Description
General Description The MT8801C Radio Communication Analyzer, when combined with an external controller, can automate your measurement system. For this purpose, the MT8801C is equipped with an RS-232C interface port and a GPIB interface bus (IEEE Std 488.2-1987) as a standard feature. -
Page 322: Example Of System Configuration Using Rs-232C/Gpib
1.3 Example of System Configuration Using RS-232C/GPIB Example of System Configuration Using RS-232C/GPIB (1) Control by the host computer (1) Host computer MT8801C Radio Communication Analyzer RS-232C/GPIB Printer Parallel (2) Control by the host computer (2) Host computer MT8801C Radio Communication Analyzer... -
Page 323: Rs-232C Specifications
Section 1 General RS-232C Specifications The RS-232C specifications of the MT8801C are shown in the table below. Item Specification Function Control from an external controller (except power switch) Communication system Asynchronous (start-stop method), half-duplex Communication control X-ON/OFF control Baud rate... -
Page 324: Gpib Specifications
1.5 GPIB Specifications GPIB Specifications The GPIB of the MT8801C provides the IEEE488.1 interface function subsets listed in the table below. GPIB Interface Functions Code Interface function All source handshake functions are provided. Synchronizes the timing of data transmission. All acceptor handshake functions are provided. - Page 325 Section 1 General...
- Page 326 Section 2 Device Messages This section outlines and lists the device messages of the MT8801C. General Description ........... Suffix Code ..............IEEE488.2 Common Commands and Supported Commands ..........Status Messages ............Device Message List ..........2.5.1 MT8801C common commands ..... 2-11 2.5.2...
-
Page 327: General Description
Program messages are classified into program commands and program que- ries. Program commands are classified into device-specific commands used exclusively to control the MT8801C, and IEEE488.2 common commands. IEEE488.2 common commands are also used for other measuring instruments conforming to IEEE488.2 connected to the bus. -
Page 328: Suffix Code
2.2 Suffix Code Suffix Code The table below shows the suffixes used for the MT8801C. MT8801C Suffix Codes Type Unit Suffix code GHZ, GZ MHZ, MZ Frequency KHZ, KZ Default second m second Time µ second Default DBM, DM Level dBµ... -
Page 329: Section 2 Device Messages
Section 2 Device Messages 2.3 IEEE488.2 Common Commands and Supported Commands The table below lists 39 common commands specified in the IEEE488.2 standard. IEEE488.2 common commands which are supported by the MT8801C are indicated with the symbol in the table. - Page 330 2.3 IEEE488.2 Common Commands and Supported Commands Table below lists the IEEE488.2 common commands used in the MT8801C. IEEE488.2 common command Program Query Response Command name Remarks Clear status *CLS — — Standard event status enable *ESE n *ESE? n:0 to 255 Standard event status register —...
-
Page 331: Status Messages
Section 2 Device Messages Status Messages The diagram below shows the structure of service-request summary messages for the status byte register (STB) used with the MT8801C. Bit 7 Bit 6 Bit 5 Bit 4 Bit 3 Bit 2 Bit 1... -
Page 332: 2.4 Status Messages
2.4 Status Messages To previous page Logical OR END summary bit & Not used & Output level setting end & Not used & AVERAGE end & Not used & Calibration end (Manual Cal, & Adjust Range, Zero Set) & Sweep/measurement end Extended END event status Extended END event status enable register (ESE2) -
Page 333: Device Message List
Section 2 Device Messages Device Message List MT8801C-specific program commands, query messages, and response messages are listed from paragraph 2.5.1. • Device message table (a) Program messages (Program Msg)/query message (Query Msg) Uppercase characters : Reserved words (ii) Numeric :... - Page 334 Valid in a range defined on each Call Processing screen These device messages are listed below. • Relationship between screen hierarchies and commands [MT8801C common commands]: Valid in all MT8801C modes regardless of screen hierarchies Save/Recall command FD command (Verify) Copy command...
- Page 335 Section 2 Device Messages [Screen hierarchies and commands] Panel mode switching command (PNLMD) Instrument Setup panel mode Instrument Setup screen: Instrument Setup command TX/RX tester panel mode TX/RX tester command Measure screen switching command (MEAS) Setup Common Parameter screen switching commands Setup Common Parameter screen Setup Common Parameter screen commands TX Measure screen switching commands...
-
Page 336: Mt8801C Common Commands
2.5 Device Message List 2.5.1 MT8801C common commands MT8801C common commands are valid in all MT8801C modes. (1) Save/Recall commands (parameter saving and recalling) Intermediate Response Function Function details Program Msg Query Msg Remarks class Recall Recall file RCM n... - Page 337 Section 2 Device Messages Panel-mode switching commands (TX/RX tester panel mode, Instrument Setup panel mode) Intermediate Response Function Function details Program Msg Query Msg Remarks class TX/RX tester PNLMD TESTER PNLMD? TESTER Analog PNLMD ANALOG PNLMD? ANALOG Instrument setup PNLMD SYSTEM PNLMD? SYSTEM Switch to upper screen command (BS) Intermediate...
-
Page 338: Instrument Setup Commands
2.5 Device Message List 2.5.2 Instrument Setup commands The Instrument Setup command is valid in Instrument Panel mode. Intermediate Response Function Function details Program Msg Query Msg Remarks class Hardware Reference frequency 10MHz REF 1ØMHZ REF? 1ØMHZ ○ ○ ○ ○... - Page 339 Section 2 Device Messages Intermediate Function Function details Program Msg Query Msg Response Msg Remarks class Time out TOUT t TOUT? t:0 to 255 Delimiter DELM Ø ○ ○ ○ ○ ○ ○ ○ ○ ○ ○ ○ ○ ○ ○...
-
Page 340: Tx/Rx Tester Commands
2.5 Device Message List 2.5.3 TX/RX tester commands • TX/RX tester commands are valid at all the screens of the TX/RX tester (screens under the Setup Common Parameter screen). (1) System-mode switching command (IS-95) Response Function Function details Program Msg Query Msg Remarks System... - Page 341 Section 2 Device Messages Analog TX Measure screen switching commands The analog TX measure screen switching command is valid in analog measure mode. Response Function Function details Program Msg Query Msg Remarks Setup Analog TX Measure MEAS SETATX MEAS? SETATX Parameter MEAS SETTX MEAS?
- Page 342 2.5 Device Message List Response value n of MSTAT? For CDMA measure mode Value of n Explanation Normal termination RF input limit Level over Level under Un measurable Short code not found Time-out Unmeasured For analog measure mode Value of n Explanation Normal termination RF input limit...
-
Page 343: Setup Common Parameter Screen Commands
Section 2 Device Messages 2.5.4 Setup Common Parameter screen commands • Setup Common Parameter screen commands are valid at all the screens of the TX/ RX tester (screens under the Setup Common Parameter screen). Intermediate Function Response Function Program Msg Query Msg Remarks Mode Switching DUT control... -
Page 344: Tx Measure Commands
2.5 Device Message List 2.5.5 TX Measure commands (1) Setup TX Measure Parameter screen commands • Setup TX Measure Parameter screen commands are valid at all the screens of the TX/RX measurement. Response Intermediate Function Function details Program Msg Query Msg Remarks class User Cal... - Page 345 Section 2 Device Messages Access Probe Measure screen commands • Program Msg of the Access Probe Measure screen commands are valid only at Ac- cess Probe Measure screen. Query Msg of the Access Probe Measure screen commands are valid at all the screens of the TX/RX measurement screens.
- Page 346 2.5 Device Message List (3) Modulation Analysis screen commands • Program Msg of the Modulation Analysis screen commands are valid only at Modu- lation Analysis screen. Query Msg of the Modulation Analysis screen commands are valid at all the screens of the TX/RX measurement screens.
- Page 347 Section 2 Device Messages Power Meter screen commands • Program Msg of the Power Meter screen commands are valid only at Power Meter screen. Query Msg of the Power Meter screen commands are valid at all the screens of the TX/RX measurement screens.
- Page 348 2.5 Device Message List Intermediate Response Function details Function Program Msg Query Msg Remarks class Range Range 30dBm (Power Meter) RNG 4 Note 3 Range 10dBm (Power Meter) RNG 4 Range 40dBm (Power Meter) RNG 5 Note 3 Range 20dBm (Power Meter) RNG 5 BS Output BS Output Power Cal...
- Page 349 Section 2 Device Messages Gated Power screen commands • Program Msg of the Gated Power screen commands are valid only at Gated Power screen. Query Msg of the Gated Power screen commands are valid at all the screens of the TX/RX measurement screens.
- Page 350 2.5 Device Message List (6) Setup Template screen commands • Setup Template screen commands are valid at all the screens of the TX/RX mea- surement screens (screens under the Setup Common Parameter screen). Response Function Program Msg Query Msg Remarks Intermediate class Function details Template...
- Page 351 Section 2 Device Messages Standby Output Power screen commands • Program Msg of the Standby Output Power screen commands are valid only at Standby Output Power screen. Query Msg of the Standby Output Power screen commands are valid at all the screens of the TX/RX measurement screens.
- Page 352 2.5 Device Message List (10) Spurious close to the Carrier commands Intermediate Response Function Function details Program Msg Query Msg Remarks class Measure Method Method Spectrum MEAS ADJ,SPECT MEAS? ADJ,SPECT ○ ○ ○ ○ ○ ○ ○ ○ ○ ○ ○...
- Page 353 Section 2 Device Messages Intermediate Response Function details Function Program Msg Query Msg Remarks class Measure Result Adjacent Channel Power ADJCH? ps ps:LOW1,LOW2, UP1,UP2 ○ ○ ○ ○ ○ ○ ○ ○ ○ ○ ○ ○ ○ ○ ○ ○ ○...
- Page 354 ○ ○ ○ Harmonics SPUFREQ HRM (14) Waveform memory read commands • Waveform memory read commands are valid in all the modes of the MT8801C. See Section 8 for such details as data format. Intermediate Response Function Function details Program Msg...
-
Page 355: Analog Tx Measure Commands
Section 2 Device Messages 2.5.6 Analog TX measure commands • Program messages for the analog TX measure command are valid in ranges defined on each analog TX measure screen. (1) Setup Analog TX Measure Parameter screen commands Intermediate Response Function Function details Program Msg Query Msg... - Page 356 2.5 Device Message List (2) Analog TX Meas with SG screen commands Intermediate Response Function Function details Program Msg Query Msg Remarks class Storage Mode Storage Mode Normal STRG NRM STRG? ○ ○ ○ ○ ○ ○ ○ ○ ○ ○...
- Page 357 Section 2 Device Messages Intermediate Response Function Function details Program Msg Query Msg Remarks class AF Level/ Filter ITU-T P.53 AFLT P53 AFLT? Distortion ○ ○ ○ ○ ○ ○ ○ ○ ○ ○ ○ ○ ○ ○ ○ ○ ○...
- Page 358 2.5 Device Message List Intermediate Response Function Function details Program Msg Query Msg Remarks class AF Oscillator 1 Frequency AFREQ1 f AFREQ1? f[Hz / 0.1Hz] (Mod.) Deviation ADEV1 f ADEV1? f[Hz / 0.1Hz] Oscillator Switch On AOUT1 ON AOUT1? ○ ○...
- Page 359 Section 2 Device Messages NIOTE: *1 RDEVALL? command (which readouts all the measured results of the De- viation) outputs the measured results of the (P-P)/2, +P, -P, RMS, (P-P)/2 Hold, +P Hold, and -P Hold, in this order with commas for these data sepa- ration.
-
Page 360: Rx Measure Commands
2.5 Device Message List 2.5.7 RX Measure commands (1) Setup RX Measure Parameter screen commands • Setup RX Measure Parameter screen commands are valid at all the screens of the TX/RX measurement screens (screens under the Setup Common Parameter screen). Intermediate Response Function... - Page 361 Section 2 Device Messages Frame Error Rate screen commands • Program Msg of the Frame Error Rate screen commands are valid only at Frame Error Rate screen. Query Msg of the Frame Error Rate screen commands are valid at all the screens of the TX/RX measurement screens.
-
Page 362: 2.5.8 Analog Rx Measure Commands
2.5 Device Message List 2.5.8 Analog RX measure commands • Program messages for the analog RX measure commands are valid in ranges de- fined on each analog RX measure screen. (1) Setup Analog RX Measure Parameter screen commands Response Intermediate Function Function details Remarks... - Page 363 Section 2 Device Messages Analog RX Measure screen commands • Program messages of the analog RX Measure command are valid on the analog RX Measure screen. Response Intermediate Function Function details Remarks Program Msg Query Msg class Storage Mode Storage Mode Normal STRG NRM STRG?
- Page 364 2.5 Device Message List Response Intermediate Function Function details Remarks Program Msg Query Msg class Specifies the input level Unit can be changed RF Level RX Measure OLVL OLVL? [dBm/0.1dB] with dBm unit. by inputing the set ○ ○ ○ ○...
- Page 365 Section 2 Device Messages Intermediate Program Response Function Function details Query Msg Remarks class ∗The input level Measure Result AF Level AFLVL? DBM [dBm / 0.01dBm] with 100kΩ is invalid. ○ ○ ○ ○ ○ ○ ○ ○ ○ ○ ○...
-
Page 366: 2.5.9 Call Processing Commands
2.5 Device Message List 2.5.9 Call Processing commands (1) Setup Call Processing Parameters screen commands • Setup Call Processing screen commands are valid at all the screens of the TX/RX measurement screens (screens under the Setup Common Parameter screen). Intermediate Function Response Function... - Page 367 Section 2 Device Messages Call Processing Status screen commands • Program Msg of the Call Processing Status commands are valid only at Setup Com- mon Parameter screen. Query Msg of the Call Processing Status commands are valid at all the screens of the TX/RX measurement screens.
-
Page 368: Maintenance Commands
2.5 Device Message List 2.5.10 Maintenance commands Intermediate Function Function details Program Msg Query Msg Response Msg class marks Maintenance Mode Maintenance TESTMODE TESTLOOPBACK TESTMODE? TESTLOOPBACK *1 Mode On ○ ○ ○ ○ ○ ○ ○ ○ ○ ○ ○ ○... - Page 369 Section 2 Device Messages 2-44...
-
Page 370: Section 3 Setup
Section 3 Setup This section describes the RS-232C/GPIB connections to external devices and setting the remote-control interface of the MT8801C. Connecting Devices with GPIB Cables ..... Setting GPIB Interface Conditions ......Connection of RS-232C Interface Signal ....Setting RS-232C Interface Conditions ...... -
Page 371: Connecting Devices With Gpib Cables
Section 3 Setup Connecting Devices with GPIB Cables The rear panel has connectors for connecting GPIB cables. Up to 15 devices, including the controller, can be connected to one system. Connect devices under the conditions described to the right of the diagram below. Total cable length ≤20 m Cable length between devices ≤4 m Number of devices which can be connected ≤15... -
Page 372: Setting Gpib Interface Conditions
3.2 Setting GPIB Interface Conditions Setting GPIB Interface Conditions Set the GPIB interface on the Instrument Setup screen at the front panel. Set the following items: Interface: Connect to Controller (Initial value: GPIB) GPIB: Address (Initial value: 01) An example of the setting when the GPIB interface is set with the GPIB address03 is given below. -
Page 373: Connection Of Rs-232C Interface Signal
Section 3 Setup Connection of RS-232C Interface Signal Connection of RS-232C interface signal between the MT8801C and a personal com- puter is shown below. • Connection to PC98-series personal computer (NEC) MT8801C side (Serial) PC9801-series personal computer side CD (NC) 1... -
Page 374: Setting Rs-232C Interface Conditions
3.4 Setting RS-232C Interface Conditions Setting RS-232C Interface Conditions Set the RS-232C interface on the Instrument Setup screen at the front panel. Set the following items: (1) Interface: Connect to Controller (Initial value: GPIB) (2) RS-232C: Baud Rate (Initial value: 2400) Parity (Initial value: Even) Data Bit (Initial value: 8 bits) Stop Bit (Initial value: 1 bit) -
Page 375: Setting The Items Relating To Remote Control And Panel Key Control
3.5.2 Remote control status If the MT8801C is controlled remotely, the REMOTE lamp on the left of the front panel lights. While the REMOTE lamp is on, key entry and rotary encoder entry from the front panel are disabled. To change from the remote control to front panel entry status, execute the following steps: (1) Halt the remote control. -
Page 376: Section 4 Device Message Format
Section 4 Device Message Format This section describes the format of the device messages transmitted between a con- troller and the MT8801C via the GPIB system. General Description ........... Program Message Format ......... Response Message Format ........ -
Page 377: General Description
There are two types of data messages: program messages output from the controller to the MT8801C, and response messages input from the MT8801C by the controller. There are also two types of program commands and program queries in the program message. - Page 378 4.2 Program Message Format (2) PROGRAM MESSAGE PROGRAM MESSAGE UNIT Multiple commands can be output sequentially by concatenating each of them with a semicolon. <Example> PRINT @1 2,"TFREQ 1GHZ;RFLVL UP" (3) PROGRAM MESSAGE UNIT PROGRAM HEADER PROGRAM DATA • Each IEEE488.2 common command has a leading asterisk “*” that is always placed before the program header.
- Page 379 Section 4 Device Message Format (6) NUMERIC PROGRAM DATA Numeric program data has two types of formats: integer format (NR1) and fixed-point real number format (NR2). <Integer Format (NR1)> < 0 to 9 > — • Zeros can be inserted at the beginning. → 005, + 000045 •...
- Page 380 A single quotation mark used within the character string must be repeated as shown in ’ or ”. PRINT @1,"TITLE 'MT8801C''NOISE MEAS''' " Executing TITLE results in MT8801C ‘NOISE MEAS’. Note: To use the double quotation mark ” in the PRINT statement, specify CHR$...
-
Page 381: Response Message Format
Section 4 Device Message Format Response Message Format To transfer responses messages from the MT8801C to the controller by using the INPUT statement, the response message formats are defined as follows: RESPONSE MESSAGE RESPONSE MESSAGE TERMINATOR (1) RESPONSE MESSAGE TERMINATOR The response message terminator to be used depends on the TRM command. - Page 382 4.3 Response Message Format (4) RESPONSE DATA CHARACTER RESPONSE DATA NUMERIC RESPONSE DATA STRING RESPONSE DATA (5) CHARACTER RESPONSE DATA Character response data consists of uppercase alphabetic characters from A to Z, lowercase alphabetic characters from a to z, the underline “_”, and the numbers 0 to 9.
- Page 383 Section 4 Device Message Format (7) STRING RESPONSE DATA < inserted ” > ” ” ” Non-single quote ASCII character String response data is output as an ASCII character string, which is enclosed with double quotation marks. (8) Response message to input the waveform data using binary data For details on reading binary format, see paragraph 7.2.3 (4) in Section 7, “SAMPLE PROGRAMS.”...
- Page 384 Section 5 Status Messages This section describes MT8801C status messages, their data structure and models, and explains the techniques for synchronizing the controller and the MT8801C. To obtain more detailed status information, the IEEE488.2 standard has more com- mon commands and common queries than the IEEE488.1 standard.
- Page 385 The following pages explain the status summary message and structure of status data that constitutes the status summary message bits, as well as techniques for synchro- nizing the MT8801C and controller, which use these status messages. These functions are used by an external controller with the GPIB interface bus.
-
Page 386: Ieee488.2 Standard Status Model
5.1 IEEE488.2 Standard Status Model IEEE488.2 Standard Status Model The diagram below shows the standard model for the status data structure stipulated in the IEEE488.2 standard. & Power on (PON) & User request (URQ, not used) & Command error (CME) &... - Page 387 Section 5 Status Messages The IEEE488.1 status byte is used in the status model. This status byte is composed of seven summary message bits given from the status data structure. To create the sum- mary message bits, there are two models for the data structure: the register model and the queue model.
-
Page 388: Status Byte (Stb) Register
5.2 Status Byte (STB) Register Status Byte (STB) Register The STB register consists of device STB and RQS (or MSS) messages. The IEEE488.1 standard defines the method of reporting STB and RQS messages, but not the setting and clearing of protocols or the meaning of STB. The IEEE488.2 standard defines the device status summary message and the Master Summary Status (MSS) which is sent to bit 6 together with STB in response to an *STB? common query. -
Page 389: Device-Dependent Summary Messages
As shown below, the MT8801C does not use bits 0, 1 and 7. As it uses bits 2 and 3 as the summary bit of the status register, it has 3 register model types (where 2 types are extended) and one queue model type (with no extension). -
Page 390: Reading And Clearing The Stb Register
5.2 Status Byte (STB) Register 5.2.3 Reading and clearing the STB register Serial poll or the *STB? common query are used to read the contents of the STB register. STB messages conforming to IEEE488.1 can be read by either method, but the value sent to bit 6 (position) is different for each message. - Page 391 Section 5 Status Messages (3) Definition of MSS (Master Summary Status) MSS indicates that there is at least one cause for a service request. The MSS message is represented by bit 6 in a device response to the *STB? query, but it is not generated response to serial poll.
-
Page 392: Enabling The Service Request (Srq)
5.3 Enabling the Service Request (SRQ) Enabling the Service Request (SRQ) All types of summary messages in the STB register can be enabled or disabled for service requests (SRE) by using the program-controlling service request (SRQ) en- able operation. The service request enable (SRE) register controls the generation of SRQ in bits 0 to 7 as shown in the diagram below. -
Page 393: Standard Event Status Register
Section 5 Status Messages Standard Event Status Register 5.4.1 Bit definition of standard event status register The standard event status register must be available on all devices conforming to the IEEE488.2 standard. The diagram below shows the operation of the standard event status register model. - Page 394 This bit is produced regardless of whether a device is in remote or User Request (URQ) local mode. It is not used for the MT8801C so, it is always set to 0. An illegal program message, a misspelt command or a GET Command Error (CME) command within a program is received.
-
Page 395: Query Error Details
Section 5 Status Messages 5.4.2 Query error details Item Description If a device receives an MTA from the controller before it receives the terminator Incomplete of the program message it is receiving, it aborts the incomplete program message program message and waits for the next one. -
Page 396: Reading, Writing To And Clearing The Standard Event Status Register
5.4 Standard Event Status Register 5.4.3 Reading, writing to and clearing the standard event status register The register is read by the *ESR? common query. Reading The register is cleared after being read. The response message is an integer format data value obtained by binary weighting the event bit and converting it to a decimal number. -
Page 397: Extended Event Status Register
For the MT8801C, as shown in the diagram below, bits 7, 1 and 0 are unused; bits 2 and 3 are assigned to the END and ERR summary bits as the status-summary bits supplied by the extended-register model. -
Page 398: Bit Definition Of End Event Status Register
5.5 Extended Event Status Register 5.5.1 Bit definition of END event status register The following describes the operation of the END event status register model, the naming of its event bits, and what they mean. & Not used disabled = 0, enabled = 128(2 &... -
Page 399: Bit Definition Of Err Event Status Register
Section 5 Status Messages 5.5.2 Bit definition of ERR event status register The following describes the operation of the ERR event status register model, the naming of its event bits, and what they mean. & disabled = 0, enabled = 128(2 &... -
Page 400: Reading, Writing To And Clearing The Extended Event Status Register
5.5 Extended Event Status Register 5.5.3 Reading, writing to and clearing the extended event status register The register is destructively read by a query (e.g., it cleared after being read). The END/ERR event status register is read by ESR2?/ESR3? query. The read value, Reading an integer format data (NR1), is obtained by binary weighting the event bit and converting it to decimal. -
Page 401: Techniques For Synchronizing The Mt8801C With A Controller
Wait for SRQ by the status register. 5.6.1 Wait for SWP or TS command termination When the MT8801C starts measurement using the SWP or TS command, it stops accepting the next measurement command until it terminates the measurement. Use this feature to set a synchronization. -
Page 402: Wait For Response After *Opc? Query Is Sent
5.6.2 Wait for response after *OPC? query is sent When executing the *OPC? query command, the MT8801C outputs “1” as the re- sponse message at the end of the previous command. The controller is synchronized with the MT8801C by waiting for the request message to be entered. -
Page 403: Wait For Service Request After *Opc Is Sent
5.6.3 Wait for service request after *OPC is sent The MT8801C sets the operation-complete bit (bit 0) to 1 when executing the *OPC command. The controller is synchronized with the MT8801C by waiting for SRQ when the operation-complete bit is set for SRQ. -
Page 404: Wait For Status Generation Of The Status Register
5.6.4 Wait for status generation of the status register An event status register bit of the MT8801C is set to 1 when the corresponding event occurs. When the *ESR?, ESR2?, or ESR3? query is executed, the MT8801C outputs the value of the corresponding status register as a response message. The controller reads this response message and waits until the response becomes the specified value for synchronization. -
Page 405: Wait For Service Request Issuance From The Status Register
Wait for service request issuance from the status register An event status register bit of the MT8801C is set to 1 when the corresponding event occurs. After setting these bits to set the RQS, the controller waits the SRQ for syn- chronization. - Page 406 5.6 Techniques for Synchronizing the MT8801C with a Controller • <Controller program 2: Synchronization by the sweep/measurement termination bit> PRINT @1:"*CLS" [1] Clears the status register [2] Sets bit (1) of the extended END event status enable PRINT @1:"ESE2 1"...
- Page 407 Section 5 Status Messages 5-24...
-
Page 408: Section 6 Initial Settings
Section 6 Initial Settings This section outlines initialization for the system and describes how to initialize the system. An example of initial settings are written for IBM-PC commands. General Description ........... Bus Initialization by the IFC Statement ..... Initialization for Message Exchange by DCL and SDC Bus Commands .......... -
Page 409: General Description
Section 6 Initial Settings General Description There are three levels of initialization for the GPIB system. The first level is bus initialization using the IFC statement with the system bus in the idle state. The second level is initialization for message exchange using the DCL command to enable devices to receive program messages. -
Page 410: Bus Initialization By The Ifc Statement .......................... 6.3 Initialization For Message Exchange By Dcl And Sdc Bus Commands
6.2 Bus Initialization by the IFC Statement Bus Initialization by the IFC Statement I Example Call ibsic(ud%) I Explanation The IFC statement initializes the interface functions of all devices connected to the GPIB bus line. The initialization of interface functions involves erasing the settings (e.g. talker, lis- tener) made by the controller and resetting to the initial states. - Page 411 GPIB of the specified select code. I Items to be initialized for message exchange The MT8801C by which the DCL or SDC bus command is accepted executes the following: Input buffer and Output Queue: Cleared; the MAV bit is also cleared at the same time.
-
Page 412: Device Initialization By The *Rst Command
The ∗RST(Reset) command is an IEEE488.2 common command which resets a de- vice with level 3. The ∗RST(Reset) command is used to reset a device (MT8801C) to a specific initial state. Refer to the separate Operation Manual Vol. 1 Appendix B for details of initial- ization items and initial values. -
Page 413: Device Initialization By The Pre/Ini/Ip Command
I Syntax I Example (program message) Call ibwrt(ud%,"PRE"): Initializes the device (MT8801C) whose address is 1 with level 3. I Explanation The PRE, INI and IP commands are MT8801C device-dependent messages which initialize a device with level 3. Refer to the separate Operation Manual Vol. 1 Appendix B for details of items initial-... -
Page 414: Device Status At Power-On
6.6 Device Status at Power-on Device Status at Power-on When the power is switched on: [1] Preset value: When a power-off time (POWERON LAST) is selected, the device is set to the status before the last power off. Preset value: When Recall memory No. (POWERON n) is selected, the device is set to file (number [n]) status. - Page 415 Section 6 Initial Settings...
-
Page 416: Section 7 Sample Programs
Section 7 Sample Programs This section gives some examples of the Visual B programs that control the ASIC MT8801C from the IBM-PC personal computer used as a controller. Notes on Creating the Program ........ Sample Program (Example of Program Using Visual Basic) ........... -
Page 417: Notes On Creating The Program
Section 7 Sample Programs Notes on Creating the Program Note the items listed in the table below when creating the remote control program Note Explanation The state of each device in actual use such as operating the operator panel of the device itself or executing another program may not be appropriate. -
Page 418: Sample Program (Example Of Program Using Visual Basic)
7.2 Sample Program (Example of Program Using Visual Basic) Sample Program (Example of Program Using Vi- sual Basic) 7.2.1 Common items for sample program (1) Notes on use Note 1: The sample programs are used in any personal computer for control with the following environmental conditions: •... - Page 419 Section 7 Sample Programs (2) Common module This paragraph describes the program module used commonly when writing the sample programs: 1) Response message read module To simplify the program, create the following routines based on the functions provided by the BASIC library for the GPIB board to read response messages. Code module file: RESP01.BAS Function ReceiveResp() As String ' Response message processing routine...
-
Page 420: Sample Program (Example Of Program Using Visual Basic)
7.2 Sample Program (Example of Program Using Visual Basic) 2) SG output control module MX880201A uses downlink and uplink RF signals together for measurement. Therefore, the transmission measurement program also requires SG output control. Code module file: SGOUT. BAS Sub SG_out (Control%) ' Processing routine for output control. - Page 421 Section 7 Sample Programs 3) Form file As described in Note 3 above, the display window data of the form file (file name FORM***.FRM) is simplified. Write the contents indicating the display window data described below into the description of frame files in paragraph 7.2.2 and later.
-
Page 422: Initializing The Mt8801C
3) Code module file: INIT001.BAS '---------------------------- ' MT88Ø1C GPIB Sample Program ' Initialize '---------------------------- Global Const RCA% = 1' Defines the MT8801C addrress in variable RCS. Variable for GPIB board Global Ans%' GPIB initialization routine Sub initial_gpib ()' 1Ø... - Page 423 Appendix B of the volume “Panel Operations” describes the parameters to be initial- ized by the above programs. Use the GPIB address value defined on the Instrument Setup screen of the MT8801C as the address value on line 6 (see paragraph 3.2).
-
Page 424: Transmission (Tx) Measurement
Transmission (TX) measurement (1) Setting the TX measurement parameters <Example 2.1> Setting the TX measurement parameters (carrier frequency, ref- erence level, and burst type) in the MT8801C. 1) Project file: SMPL201.MAK Specifies the form file. FORM2Ø1.FRM Use the code file of the initialization mod- INITØØ1.BAS... - Page 425 Section 7 Sample Programs Call ibwrt(Ans%, "MEAS SETCOM")' Moves to common parameter setting screen. Call ibwrt(Ans%, "DUTCTRL NONE")' Sets DUT Control to One. Call ibwrt(Ans%, "FREQBAND D8ØØMHZ")' Sets frequency band to digital 800 MHz band. Call ibwrt(Ans%, "CHAN 1")' Sets measurement frequency channel to CH1. Call ibwrt(Ans%, "RFLVL 1ØDBM")' Sets TX reference level to 10 dBm.
- Page 426 7.2 Sample Program (Example of Program Using Visual Basic) (2) Executing modulation analysis and reading the result of analysis <Example 2.2> Executing modulation analysis and reading the result of measur- ing the vector error. 1) Project file: SMPL202.MAK FORM2Ø2.FRM Use the code file of the initialization mod- INITØØ1.BAS ule described in paragraph 7.2.2.
- Page 427 Section 7 Sample Programs Dim Verr$, PVerr$ 1Ø Call ibwrt(Ans%, "MEAS MODANAL")' Transits to the Modulation Analysis screen. Call ibwrt(Ans%, "STORAGE NRM")' Sets the normal mode. Call ibwrt(Ans%, "SWP")' Starts measurement. Call ibwrt(Ans%, "VECTERR?")' Inquires about the measured value of an rms vector error.
- Page 428 7.2 Sample Program (Example of Program Using Visual Basic) (3) Executing modulation analysis and reading the result of analysis (reading analytical data row in ASCII format) <Example 2.3> Executing modulation analysis and reading the data row of the vector error at each symbol. 1) Project file: SMPL203.MAK FORM2Ø3.FRM Use the code file of the initialization mod-...
- Page 429 Section 7 Sample Programs Specifies the number of data items to be Const NUM% = 156' read. Declares the data storage array. 1Ø Dim TRACE%(NUM%)' Dim Verr$ Dim I% Call ibwrt(Ans%, "MEAS WAVEFORM")' Transits to the Vector Error Waveform Display screen. Call ibwrt(Ans%, "TRFORM VECT")' Transits to the Vector Error Waveform Display screen.
- Page 430 7.2 Sample Program (Example of Program Using Visual Basic) (4) Executing modulation analysis and reading the result of analysis (reading analytical data in binary format) <Example 2.4> Executing modulation analysis and reading the data row of a vector error at each symbol in binary format. 1) Project file: SMPL204.MAK FORM2Ø4.FRM Use the code file of the initialization mod-...
- Page 431 Section 7 Sample Programs Specifies the number of data items to be Const NUM% = 156' read. Declares the data storage array. 1Ø Dim TRACE%(NUM%)' Declares the receive data buffer. Dim dbuf%(NUM%)' Dim UPRBYTE%, LWRBYTE% Dim I% Call ibwrt(Ans%, "MEAS WAVEFORM")' Transits to the Vector Error Waveform Display screen.
- Page 432 7.2 Sample Program (Example of Program Using Visual Basic) Line 19 “BIN 1” sets the data format to binary. Line 22 inquires about data after one measurement is executed by line 20. Line 23 receives the data of the NUM%*2 bytes at controller.
- Page 433 Section 7 Sample Programs [Transferring 2-byte binary data] The 2-byte binary data can represent the 65,536 integers from -32,768 to 32,767 as shown in the figure below. The lower bytes of the data are sent after the upper byte. 16-Bit Binary With Sign No Sign 1000000000000000...
- Page 434 7.2 Sample Program (Example of Program Using Visual Basic) For example, when integer value 16,706 is transferred in ASCII and binary formats are compared. As shown in the figure below, five bytes are required to transfer the data in ASCII format.
- Page 435 Section 7 Sample Programs (5) RF power measurement (average power measurement) <Example 2.5> Measuring RF power and reading average power. 1) Project file: SMPL205.MAK FORM2Ø5.FRM Uses file of the initialization module in INITØØ1.BAS paragraph 7.2.2. Uses code file of the response read module RESPØ1.BAS in paragraph 7.2.1 (2).
- Page 436 End Sub Set the RF power measurement mode in line 11. Line 12 sets the MT8801C screen to slot display. Set the measurement unit to dBm in line 13. Line 14 optimizes the range to improve the precision of the RF power measurement.
- Page 437 Section 7 Sample Programs VBIB.BAS NIGLOBAL.BAS ProjWinSize=87,394,243,136 1Ø ProjWinShow=2 2) Form file: FORM206.FRM The following procedures are added and described. Sub Form_click () Calls GPIB initialization routine. Call initial_gpib' Call Set_TX_parameter' Calls TX parameter setting routine. Calls test signal output routine. Call SG_out(1)' Calls RF power measurement routine.
- Page 438 7.2 Sample Program (Example of Program Using Visual Basic) 2Ø Call ibwrt(Ans%, "MKRS " + Str$(Pmak!))' Specifies marker point. Call ibwrt(Ans%, "MKL?")' Inquires about measurement level of marker point. sbuf = ReceiveResp() Form2Ø6.Print "RF power at marker "; Pmak!; "sym- bol = ";...
- Page 439 Section 7 Sample Programs (7) RF power measurement (reading of measured data string) <Example 2.7> Measuring RF power, reading and displaying data string 1) Project file: SMPL207.MAK FORM2Ø6.FRM Uses code file of the initialization module INITØØ1.BAS in paragraph 7.2.2. Uses code file of the response read module RESPØ1.BAS in paragraph 7.2.1 (2).
- Page 440 7.2 Sample Program (Example of Program Using Visual Basic) Dim sbuf As String * 4Ø Dim I% Call ibwrt(Ans%, "MEAS RFPWR")' Moves to RF power measurement screen. Call ibwrt(Ans%, "WINDOW SLOT")' Sets waveform display to Slot. Call ibwrt(Ans%, "UNIT DBM")' Sets measurement unit to dBm.
- Page 441 Section 7 Sample Programs (8) RF power measurement (setting of template) <Example 2.8> Setting the template for RF power measurement 1) Project file: SMPL208.MAK FORM2Ø8.FRM Uses the code file of the initialization mod- INITØØ1.BAS ule in paragraph 7.2.2. This is the code file of the parameter set- SETTX.BAS ting module for TX measurement in para- graph 7.2.3 (1).
- Page 442 7.2 Sample Program (Example of Program Using Visual Basic) (9) Power meter (Average power measurement) <Example 2.9> Measuring RF average power using a power meter. 1) Project file: SMPL209.MAK FORM2Ø9.FRM Uses the code file of the initialization mod- INITØØ1.BAS ule in paragraph 7.2.2. Uses the code file of the response read RESPØ1.BAS module in paragraph 7.2.1 (2).
- Page 443 Section 7 Sample Programs Call ibwrt(Ans%, "ADJRNG")' Optimizes power measurement range. Call ibwrt(Ans%, "SWP")' Starts measurement. Call ibwrt(Ans%, "POWER? DBM")' Inquires about result of power measure- ment. sbuf = ReceiveResp() Form2Ø9.Print "Average RF Power = "; Val(sbuf); "dBm" End Sub Set the power meter measurement mode in line 11.
- Page 444 7.2 Sample Program (Example of Program Using Visual Basic) (10) Power meter (zero point calibration) <Example 2.10> Zero point calibration of power meter 1) Project file: SMPL210.MAK FORM21Ø.FRM Uses the code file of the initialization mod- INITØØ1.BAS ule in paragraph 7.2.2. Uses the code file of the response reading RESPØ1.BAS module described in paragraph 7.2.1 (2).
- Page 445 Section 7 Sample Programs Call ibwrt(Ans%, "MEAS PWRMTR")' Moves to power meter measurement screen. Call ibwrt(Ans%, "*CLS")' Clears GPIB status register. Call ibwrt(Ans%, "ZEROSET")' Starts adjustment of zero point. For I% = Ø To 1ØØØØ: Next I% Call ibwrt(Ans%, "ESR2?")' 2Ø...
- Page 446 7.2 Sample Program (Example of Program Using Visual Basic) (11) Measurement of occupied frequency bandwidth <Example 2.11> Measuring occupied frequency bandwidth 1) Project file: SMPL211.MAK FORM211.FRM Uses the code file of the initialization mod- INITØØ1.BAS ule in paragraph 7.2.2. Uses the code file of the response read RESPØ1.BAS module in paragraph 7.2.1 (2).
- Page 447 Section 7 Sample Programs Call ibwrt(Ans%, "MEAS OBW,HIGH")' Moves to occupied frequency bandwidth measurement (High Speed) screen. Call ibwrt(Ans%, "STORAGE AVG")' Sets the mode to average mode. Call ibwrt(Ans%, "AVR 3")' Sets average number to 3. Call ibwrt(Ans%, "ADJRNG")' Optimizes measurement range. Call ibwrt(Ans%, "*CLS")' Clears GPIB status register.
- Page 448 7.2 Sample Program (Example of Program Using Visual Basic) (12) Measurement of adjacent channel leakage power <Example 2.12> Measuring adjacent channel leakage power 1) Project file: SMPL212.MAK FORM212.FRM Uses the code file of the initialization mod- INITØØ1.BAS ule in paragraph 7.2.2. Uses the code file of the response read RESPØ1.BAS module in paragraph 7.2.1 (2).
- Page 449 Section 7 Sample Programs Call ibwrt(Ans%, "MEAS ADJ,HIGH")' Moves to adjacent channel leakage power measurement (High Speed method) screen. Call ibwrt(Ans%, "STORAGE NRM")' Sets the normal mode. Call ibwrt(Ans%, "ADJRNG")' Optimizes measurement range. Call ibwrt(Ans%, "SWP")' Starts measurement. Call ibwrt(Ans%, "MODPWR? LOW9Ø,DBM")' Inquires about measurement rsults of lowerside next-to-next adjacent channel leakage power.
- Page 450 7.2 Sample Program (Example of Program Using Visual Basic) Form212.Print "Modulation (-9ØØkHz) "; Val(Low9Ø$); "dBm" Form212.Print " (-6ØØkHz) = "; Val(Low6Ø$); "dBm" Form212.Print " (-3ØØkHz) = "; Val(Low3Ø$); "dBm" Form212.Print " ( 3ØØkHz) = "; Val(Up3Ø$); "dBm" Form212.Print " ( 6ØØkHz) = "; Val(Up6Ø$); "dBm" Form212.Print "...
- Page 451 Section 7 Sample Programs (13) Analog transmitter measurement <Example 2.13> Measuring the analog modulation signal 1) Project file: SMPL213.MAK FORM213.FRM Uses the code file of the initialization mod- INITØØ1.BAS ule described in paragraph 7.2.2. Uses the code file of the response reading RESPØ1.BAS module described in paragraph 7.2.1 (2).
- Page 452 7.2 Sample Program (Example of Program Using Visual Basic) Call ibwrt(Ans%, "MEAS SETCOM")' Moves to common parameter setting screen. Call ibwrt(Ans%, "DUTCTRL NONE")' Sets DUT Control to None. Call ibwrt(Ans%, "FREQBAND A8ØØMHZ")' Sets frequency band to analog 800 MHz band. Call ibwrt(Ans%, "CHAN 1")' Sets measurement frequency channel to CH 1.
- Page 453 Section 7 Sample Programs 4) Code module file: ATXMEAS.BAS '---------------------------- ' MT88Ø1C GPIB Sample Program ' Analog TX Measure '---------------------------- Sub ATX_Measure () Dim RFFreq$, RFPwr$, RFDev$, AFLvl$, AFDstn$, AFFreq$ 1Ø Call ibwrt(Ans%, "MEAS ATXSG")' Moves to the screen of analog TX measure- ment with signal generator.
- Page 454 7.2 Sample Program (Example of Program Using Visual Basic) Call ibwrt(Ans%, "AFLT CMESS")' Sets the evaluation fileter to C-MESSAGE. Call ibwrt(Ans%, "STRG NRM")' Sets the normal mode. Call ibwrt(Ans%, "ADJRNG")' Optimizes measurement range. 3Ø Call ibwrt(Ans%, "SWP")' Starts measurement. Call ibwrt(Ans%, "RFFREQ?")' Requests for the measured results of RF frequency.
- Page 455 Section 7 Sample Programs Call ibwrt(Ans%, "AOUT2 OFF")' Sets AF oscillator (for microphone input use) to Off. Call ibwrt(Ans%, "RRLVL OFF")' Sets RF output to Off. End Sub Set the analog TX measurement with signal generator screen in line 11. Set the SAT modulation signals of 6 kHz in lines 12 to 16.
-
Page 456: 7.2.4 Reception (Rx) Measurement
7.2.4 Reception (RX) measurement (1) Setting of parameter for RX measurement <Example 3.1> Setting parameters for RX measurement (measurement signal, BER input interface, etc.) for MT8801C. 1) Project file: SMPL301.MAK FORM3Ø1.FRM Uses the code file of the initialization mod- INITØØ1.BAS ule in paragraph 7.2.2. - Page 457 Section 7 Sample Programs Call ibwrt(Ans%, "MEAS SETCOM")' Moves to common parameter setting screen. Call ibwrt(Ans%, "DUTCTRL NONE")' Sets DUT Control to None. Call ibwrt(Ans%, "FREQBAND D8ØØMHZ")' Sets frequency band to digital 800 MHz band. Call ibwrt(Ans%, "CHAN 1")' Sets measurement frequency channel to CH1.
- Page 458 7.2 Sample Program (Example of Program Using Visual Basic) (2) Setting of transmission signal for RX tests <Example 3.2> Setting transmission signal parameter of RX measurement for MT8801C to output test signal. 1) Project file: SMPL302.MAK FORM3Ø2.FRM Uses the code file of the initialization mod- INITØØ1.BAS...
- Page 459 Section 7 Sample Programs (3) BER measurement (1) BER measurement at stipulated level <Example 3.3> Performing the BER measurement using the test signal of the specified level. 1) Project file: SMPL303.MAK FORM3Ø3.FRM Uses the code file of the initialization mod- INITØØ1.BAS ule in paragraph 7.2.2.
- Page 460 7.2 Sample Program (Example of Program Using Visual Basic) Call ibwrt(Ans%, "MEAS BER") Call ibwrt(Ans%, "CHAN 1") Call ibwrt(Ans%, "OLVL " + Str$(SGLVL!) + "DBM")' Sets RX test signal level. Call ibwrt(Ans%, "LVL ON") Call ibwrt(Ans%, "MOD ON") Call ibwrt(Ans%, "*CLS")' Clears GPIB status register.
- Page 461 Section 7 Sample Programs (4) BER measurement (2) BER measurement to test the receiving level that produces the specified error rate <Example 3.4> BER measurement to look for test signal level of specified error ratio 1) Project file: SMPL304.MAK FORM3Ø4.FRM Uses the code file of the initialization mod- INITØØ1.BAS ule in paragraph 7.2.2.
- Page 462 7.2 Sample Program (Example of Program Using Visual Basic) Const SGLVL2! = -7Ø!' Const LVLSTEP! = 1!' Sets level step to 1 dB. Dim sbuf As String * 4Ø Dim Endsts%, I% Dim SGLVL! Call ibwrt(Ans%, "MEAS BER") Call ibwrt(Ans%, "CHAN 1") SGLVL! = SGLVL1! 2Ø...
- Page 463 Section 7 Sample Programs sbuf = ReceiveResp() SGLVL! = Val(sbuf) Loop While SGLVL! >= SGLVL2! End Sub Output test signal in lines 18 to 23. Set the measurement unit of the BER measurement data to 10000 bits in line 25. Measure BER while lowering the test signal level in lines 26 to 47.
- Page 464 7.2 Sample Program (Example of Program Using Visual Basic) (5) Analog receiver measurement <Example 3.5> Measuring the analog receiver 1) Project file: SMPL305.MAK FORM3Ø5.FRM Uses the code file of the initialization mod- INITØØ1.BAS ule described in paragraph 7.2.2. Uses the code file of the response reading RESPØ1.BAS module described in paragraph 7.2.1 (2).
- Page 465 Section 7 Sample Programs Call ibwrt(Ans%, "PNLMD TESTER")' Sets measurement mode to “TX/RX tester.” Call ibwrt(Ans%, "MEAS SETCOM")' Moves to common parameter setting screen. Call ibwrt(Ans%, "DUTCTRL NONE")' Sets DUT Control to None. Call ibwrt(Ans%, "FREQBAND A8ØØMHZ")' Sets frequency band to analog 800 MHz band.
- Page 466 7.2 Sample Program (Example of Program Using Visual Basic) 4) Code module file: ARXMEAS.BAS '---------------------------- ' MT88Ø1C GPIB Sample Program ' Analog RX Measure '---------------------------- Sub ARX_Measure () Dim AFLvl$, AFDstn$, AFFreq$ 1Ø Call ibwrt(Ans%, "MEAS ARX")' Moves to the analog RX measure screen. Call ibwrt(Ans%, "AFREQ1 1ØØ4HZ")' Sets AF oscillator frequency for modula- tion to 1004 Hz.
- Page 467 Section 7 Sample Programs Call ibwrt(Ans%, "STRG NRM")' Sets the mode to normal mode. Call ibwrt(Ans%, "ADJRNG")' Optimizes measurement range. Call ibwrt(Ans%, "SWP")' Starts measurement. 3Ø Call ibwrt(Ans%, "AFLVL? V")' Inquires about results of AF level measure- ment. AFLvl$ = ReceiveResp() Call ibwrt(Ans%, "DSTN? DB")' Inquires about result of AF distortion mea- surement.
-
Page 468: Digital Tx All Measure Item Measurement, Af Measurement
Selects Template On & Off. End Sub Shift to the Select All Measure Item screen in line 10. First, set the default param- eter “Standard” of the MT8801C in line 11. Next, add or change required items in lines 12 and 13. 7-53... - Page 469 Section 7 Sample Programs (2) Digital TX all measure item measurement <Example 4.2> Set the measurement items and perform Digital TX all measure item measurement based on the set items. 1) Project file: SMPL402.MAK FORM4Ø2.FRM Uses the code file of the initialization mod- INITØØ1.BAS ule in paragraph 7.2.2.
- Page 470 7.2 Sample Program (Example of Program Using Visual Basic) Sub TX_all_measure () Specifies the number of groups of read Const NUM% = 7' data. 1Ø Dim JDGE%(NUM%), MDAT$(NUM%)' Declares the array for storing read data. Dim P% Dim JUDGE$, RCVDAT$ Dim JMODPWR$, JTMPLAT$ Dim sbuf As String * 4Ø...
- Page 471 Section 7 Sample Programs If JDGE%(6) = Ø Then JTMPLAT$ = "PASS" Else JTMPLAT$ = "FAIL" 4Ø Form4Ø2.Print " Template: "; JTMPLAT$ End Sub Shift to the digital TX all item measurement screen in line 16. Optimize the measurement range in line 18. Start the measurement in line 20.
- Page 472 7.2 Sample Program (Example of Program Using Visual Basic) (3) AF signal measurement <Example 4.3> Measure the AF signal. 1) Project file: SMPL403.MAK FORM4Ø3.FRM Uses the code file of the initialization mod- INITØØ1.BAS ule described in paragraph 7.2.2. Uses the code file of the response reading RESPØ1.BAS module described in paragraph 7.2.1 (2).
- Page 473 Section 7 Sample Programs Call ibwrt(Ans%, "DUTCTRL NONE")' Sets DUT Control to None. Call ibwrt(Ans%, "FREQBAND A8ØØMHZ")' Sets frequency band to analog 800 MHz band. Call ibwrt(Ans%, "MEAS SETAF")' Moves to analog TX parameter setting screen. Call ibwrt(Ans%, "AIMP 1ØØK")' Sets AF input impedance to 100 kΩ.
- Page 474 7.2 Sample Program (Example of Program Using Visual Basic) Call ibwrt(Ans%, "AFREQ1 1ØØØHZ") ' Sets the AF oscillator frequency to 1000 Hz. Call ibwrt(Ans%, "AOUT1 ON") ' Sets AF oscillator for modulation to On. Call ibwrt(Ans%, "ALVL1 1V") ' Sets AF oscillator level to 1 V. Call ibwrt(Ans%, "AOUT2 OFF") ' Sets AF oscillator 2 to Off.
- Page 475 Section 7 Sample Programs Form4Ø3.Print "AF Level (C-MESSAGE) "; Val(AFLvl$(5)); "V" F o r m 4 Ø 3 . P r i n t " A F L e v e l ( 6 k H z B P F ) "...
- Page 476 7.2 Sample Program (Example of Program Using Visual Basic) Read the measurement results in lines 28 to 33. Divide the batched read results (character strings delimited by commas) into character strings of individual items in lines 35 to 41. Lines 50 to 65 are an examples of batched frequency characteristic measurement us- ing the white noise.
- Page 477 Section 7 Sample Programs 7-62...
-
Page 478: Section 8 Waveform Data Storage Format
Section 8 Waveform Data Storage Format This section describes the storage format of waveform data fetched by an external computer. The use examples are described in the IBM-PC instructions. Notes on Fetching the Waveform Data ..... Waveform Data Storage Format ....... -
Page 479: Notes On Fetching The Waveform Data
Notes on Fetching the Waveform Data (1) Fetching screen • The waveform data to be fetched must be displayed on the MT8801C screen. • Check that the measurement terminates before fetching the waveform data. If Continuous measurement mode is set or measurement does not terminate, the correct data cannot be fetched. -
Page 480: Waveform Data Storage Format
8.2 Waveform Data Storage Format Waveform Data Storage Format (1) XMD (RF power measurement waveform) Format –80.0 (µs) –79.5 (µs) –79.0 (µs) 1000 420.0 (µs) 1001 420.5 (µs) 2818 1329.0 (µs) 2819 1329.5 (µs) 2820 1330.0 (µs) • Number of data items is fixed to 2821 points, which correspond to the holizontal axis of the screen display of RF Power measurement. - Page 481 Section 8 Waveform Data Storage Format (2) XMO (Open Loop Power Control measurement waveform) Format 0.0 (ms) 0.5 (ms) 1.0 (ms) 49.5 (ms) 50.0 (ms) 50.5 (ms) 99.0 (ms) 99.5 (ms) 100.0 (ms) • Number of data items is fixed to 201 points, which correspond to the holizontal axis of the screen display of Open Loop Power Control mea- surement.
-
Page 482: Appendixes
Appendixes Appendix A ................A-1 Appendix B ................B-1 Appendix C Index ............... C-1 App-1... - Page 483 Appendixes App-2.
- Page 484 Appendix A ASCII* CODE TABLE NUMBERS BITS CONTROL UPPER CASE LOWER CASE SYMBOLS " & ÷ < > RUBOUT (DEL) Address Universal Listen Talk address Secondary address or command command address command *American Standard Code for Information Interchange octal GPIB code ASCII character decimal...
- Page 487 Apenndix A A-4.
- Page 488 Appendix B COMPARISON TABLE OF CONTROLLERS’ GPIB INSTRUCTIONS Controller Function PACKET V (Anritsu) PC-9800 series (NEC) IBM-PC HP9000 series Outputs data to a WRITE PRINT CALL OUTPUT device device @ listener address; data IBWRT( ) @ device number; data selector;data...
- Page 489 Appendix B Controller Function PACKET V (Anritsu) PC-9800 series (NEC) IBM-PC HP9000 series CLEAR DCL @ select code WBYTE &H3F,&H14; device selector (all devices bearing a (selector code) Initializes devices specified select code) CALL CLEAR DCL @ device number WBYTE &H3F,...
- Page 490 Initialization for message exchange by DCL and SDC statements ................6.3 INSTRUMENT SETUP command ........2.5.2 MAV summary messages ............. 5.2.1 (2) MT8801C common commands ..........2.5.1 Notes on fetching the waveform data ........8.1 Overview ................1.1 Overview (device message) ..........2.1 Overview (device message format) ........
- Page 491 String program data .............. 4.2 (7) String response data .............. 4.3 (7) Suffix code ................2.2 Techniques for synchronizing the MT8801C with a controller ..........5.6 TX tester command .............. 2.5.5 TX/RX tester command ............2.5.3 Updating the SRE register ............ 5.3 (1)
- Page 492 Appendix C Index Value program data .............. 4.2 (6) Value response data .............. 4.3 (6) Wait for response after *OPC? query is sent ....... 5.6.2 Wait for response by executing the SWP or TS command ............. 5.6.1 Wait for service request by the *OPC command ....5.6.3 Waveform data storage format ..........
- Page 493 Appendix C...
Need help?
Do you have a question about the MT8801C and is the answer not in the manual?
Questions and answers