Huawei LUNA2000-97KWH-1H1 User Manual
Hide thumbs
Also See for LUNA2000-97KWH-1H1:
- Quick manual (288 pages) ,
- Maintenance manual (144 pages) ,
- Quick manual (62 pages)

Related Manuals for Huawei LUNA2000-97KWH-1H1


Summary of Contents for Huawei LUNA2000-97KWH-1H1
- Page 1 LUNA2000-(97KWH-1H1, 129KWH-2H1, 161KWH-2H1, 200KWH-2H1) Smart String ESS User Manual Issue Date 2023-11-07 HUAWEI DIGITAL POWER TECHNOLOGIES CO., LTD.
- Page 2 Notice The purchased products, services and features are stipulated by the contract made between Huawei Digital Power Technologies Co., Ltd. and the customer. All or part of the products, services and features described in this document may not be within the purchase scope or the usage scope. Unless otherwise specified in the contract, all statements, information, and recommendations in this document are provided "AS IS"...
-
Page 3: About This Document
Indicates a hazard with a low level of risk which, if not avoided, could result in minor or moderate injury. Issue 10 (2023-11-07) Copyright © Huawei Digital Power Technologies Co., Ltd. - Page 4 Issue 09 (2023-10-24) Updated 2 Product Description. Added 2.2 Product Description. Updated 4.2 Battery Pack Storage and Single Battery Pack Charge. Updated 8.7 Installing AC Input Power Cables for the UPS. Issue 10 (2023-11-07) Copyright © Huawei Digital Power Technologies Co., Ltd.
- Page 5 Updated 10 Commissioning the ESS (SmartLogger WebUI). Updated G Contact Information. Issue 03 (2023-03-30) Updated Appearance. Updated 2.4.3.1 Air Conditioner. Updated 5.1 Site Selection Requirements. Updated 5.2 Clearance Requirements. Issue 10 (2023-11-07) Copyright © Huawei Digital Power Technologies Co., Ltd.
- Page 6 8.7 Installing AC Input Power Cables for the UPS. Updated 14 Technical Specifications. Updated C Emergency Handling. Issue 01 (2022-10-30) This issue is used for first office application (FOA). Issue 10 (2023-11-07) Copyright © Huawei Digital Power Technologies Co., Ltd.
-
Page 7: Table Of Contents
2.4.3.3 Door Status Sensor................................ 43 2.4.3.4 Electrode Water Sensor..............................44 2.4.4 Fire Suppression System..............................45 2.4.4.1 Rack Mounted Fire Extinguishing System......................45 2.4.4.2 T/H Sensor..................................47 2.4.4.3 CO Sensor..................................48 Issue 10 (2023-11-07) Copyright © Huawei Digital Power Technologies Co., Ltd. - Page 8 7.4.3 Installing the Smart Rack Controller.......................... 97 7.4.4 Installing the Smart PCS............................... 100 7.4.5 (Optional) Installing a Maintenance Socket......................102 7.4.6 (Optional) Installing a DDSU666-H......................... 103 8 Installing Cables........................104 Issue 10 (2023-11-07) Copyright © Huawei Digital Power Technologies Co., Ltd.
- Page 9 14 Technical Specifications....................162 A Crimping an OT or DT Terminal..................164 B How Do I Repair Paint Damage?..................167 C Emergency Handling......................172 D How Do I Recycle Used Batteries?.................. 175 Issue 10 (2023-11-07) Copyright © Huawei Digital Power Technologies Co., Ltd. viii...
- Page 10 E.2.2 Logging In to the App..............................188 E.2.3 Changing a Password..............................190 F Certificate Management and Maintenance..............191 G Contact Information......................193 H Digital Power Customer Service..................195 I Acronyms and Abbreviations.....................196 Issue 10 (2023-11-07) Copyright © Huawei Digital Power Technologies Co., Ltd.
-
Page 11: Safety Information
● The equipment is operated beyond the conditions specified in this document. Issue 10 (2023-11-07) Copyright © Huawei Digital Power Technologies Co., Ltd. -
Page 12: Personal Safety
D ANGER During operations, use dedicated insulated tools to prevent electric shocks or short circuits. The dielectric withstanding voltage level must comply with local laws, regulations, standards, and specifications. Issue 10 (2023-11-07) Copyright © Huawei Digital Power Technologies Co., Ltd. - Page 13 Personnel who will perform special tasks such as electrical operations, working at heights, and operations of special equipment must possess the required local qualifications. ● Only certified high-voltage electricians are allowed to operate medium- voltage equipment. Issue 10 (2023-11-07) Copyright © Huawei Digital Power Technologies Co., Ltd.
-
Page 14: Electrical Safety
Observe the power plant safety regulations, such as the operation and work ticket mechanisms. ● Install temporary fences or warning ropes and hang "No Entry" signs around the operation area to keep unauthorized personnel away from the area. Issue 10 (2023-11-07) Copyright © Huawei Digital Power Technologies Co., Ltd. - Page 15 Do not use solvents such as water, alcohol, or oil to clean electrical components inside or outside of the equipment. Grounding ● Ensure that the grounding impedance of the equipment complies with local electrical standards. Issue 10 (2023-11-07) Copyright © Huawei Digital Power Technologies Co., Ltd.
- Page 16 0°C. Handle cables with caution, especially at a low temperature. – Cables stored at subzero temperatures must be stored at room temperature for at least 24 hours before they are laid out. Issue 10 (2023-11-07) Copyright © Huawei Digital Power Technologies Co., Ltd.
-
Page 17: Environment Requirements
1.3 Environment Requirements D ANGER Do not expose the equipment to flammable or explosive gas or smoke. Do not perform any operation on the equipment in such environments. Issue 10 (2023-11-07) Copyright © Huawei Digital Power Technologies Co., Ltd. - Page 18 Do not install the equipment in an area conducive to the growth of microorganisms such as fungus or mildew. ● Do not install the equipment in an area with strong vibration, noise, or electromagnetic interference. Issue 10 (2023-11-07) Copyright © Huawei Digital Power Technologies Co., Ltd.
-
Page 19: Mechanical Safety
Do not mount it on an insecure moveable object or metal object with sharp edges. Make sure that the hooks will not slide off. Issue 10 (2023-11-07) Copyright © Huawei Digital Power Technologies Co., Ltd. - Page 20 ● Use correct tools and operate them in the correct way. Moving Heavy Objects ● Be cautious to prevent injury when moving heavy objects. Issue 10 (2023-11-07) Copyright © Huawei Digital Power Technologies Co., Ltd.
- Page 21 Only trained and qualified personnel are allowed to work at heights. ● Do not work at heights when steel pipes are wet or other risky situations exist. After the preceding conditions no longer exist, the safety owner and Issue 10 (2023-11-07) Copyright © Huawei Digital Power Technologies Co., Ltd.
- Page 22 When climbing up the ladder, keep your body stable and your center of gravity between the side rails, and do not overreach to the sides. ● When a step ladder is used, ensure that the pull ropes are secured. Issue 10 (2023-11-07) Copyright © Huawei Digital Power Technologies Co., Ltd.
-
Page 23: Equipment Safety
To avoid short circuits or other risks, do not drill holes into buried pipes or cables. ● When drilling holes, protect the equipment from shavings. After drilling, clean up any shavings. 1.5 Equipment Safety Issue 10 (2023-11-07) Copyright © Huawei Digital Power Technologies Co., Ltd. -
Page 24: Ess Safety
To avoid battery short circuits, do not maintain batteries with power on. Issue 10 (2023-11-07) Copyright © Huawei Digital Power Technologies Co., Ltd. - Page 25 Professionals must wear safety goggles, rubber gloves, gas masks, and protective clothing, power off the equipment, remove the battery, and contact technical engineers. Issue 10 (2023-11-07) Copyright © Huawei Digital Power Technologies Co., Ltd.
- Page 26 Ensure that the batteries do not fall or get damaged. Otherwise, they will need to be scrapped. Issue 10 (2023-11-07) Copyright © Huawei Digital Power Technologies Co., Ltd.
- Page 27 (for example, in an environment that is damp or prone to rain). ● Batteries are not charged as required during storage due to your reasons, resulting in capacity loss or other irreversible damages to the batteries. Issue 10 (2023-11-07) Copyright © Huawei Digital Power Technologies Co., Ltd.
- Page 28 When installing batteries, do not place installation tools, metal parts, or sundries on the batteries. After the installation is complete, clean up the objects on the batteries and the surrounding area. Issue 10 (2023-11-07) Copyright © Huawei Digital Power Technologies Co., Ltd.
- Page 29 Electrolyte is corrosive and can cause irritation and chemical burns. If you come into direct contact with the battery electrolyte, do as follows: Issue 10 (2023-11-07) Copyright © Huawei Digital Power Technologies Co., Ltd.
- Page 30 Do not place waste batteries in environments with high humidity or corrosive substances. ● Do not use faulty batteries. Contact a battery recycling company to scrap them as soon as possible to avoid environmental pollution. Issue 10 (2023-11-07) Copyright © Huawei Digital Power Technologies Co., Ltd.
-
Page 31: Product Description
LUNA2000: Smart String ESS name Capacity level 200KWH: nominal energy of 193.5 kWh 161KWH: nominal energy of 161.3 kWh 129KWH: nominal energy of 129.0 kWh 97KWH: nominal energy of 96.8 kWh Issue 10 (2023-11-07) Copyright © Huawei Digital Power Technologies Co., Ltd. -
Page 32: Product Description
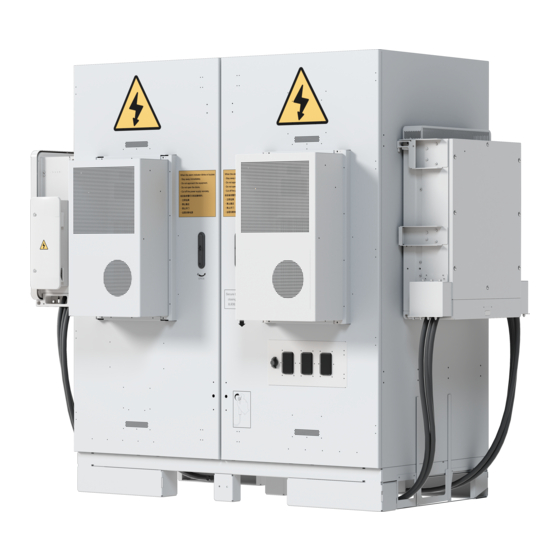
This function is supported in LUNA2000B V100R023C00SPC120 and later versions. 2.3 Appearance NO TE This document uses the 200 kWh model as an example. The actual structure of a model may vary. Issue 10 (2023-11-07) Copyright © Huawei Digital Power Technologies Co., Ltd. - Page 33 The site foundation must be designed by professional technical personnel such as those from a design institute. The technical personnel can refer to the foundation drawings of the Company. Contact the product manager of the Company to obtain the drawings. Issue 10 (2023-11-07) Copyright © Huawei Digital Power Technologies Co., Ltd.
-
Page 34: Components
Pressure relief window If an explosion occurs inside the equipment, the windows are open to release pressure. Installation position of the Where the rack rack controller controller is installed. Issue 10 (2023-11-07) Copyright © Huawei Digital Power Technologies Co., Ltd. - Page 35 (2) Black start button (3) CO sensors (4) Door status sensors (5) Installation position of (6) Smoke detector battery packs (7) Exhaust controller (8) Exhaust module (9) T/H sensor Issue 10 (2023-11-07) Copyright © Huawei Digital Power Technologies Co., Ltd.
- Page 36 Measures the real-time ambient temperature and humidity in the cabinet. Rack Used for fire alarm and automatic mounted fire fire extinguishing control. extinguishing system Embedded Provides installation positions for power components. subrack Issue 10 (2023-11-07) Copyright © Huawei Digital Power Technologies Co., Ltd.
- Page 37 I/O expansion Controls and monitors the door board status sensor, sensors, and air conditioners in the ESS, connects cables to the fire suppression system, and black starts the system. Issue 10 (2023-11-07) Copyright © Huawei Digital Power Technologies Co., Ltd.
- Page 38 (11) Fiber adapter (12) Fiber management (10) Fuse (1F1) tray (13) DC switches (1Q1 and 1Q2) Note [1]: The 97 kWh, 129 kWh, and 161 kWh models have two fuses. Issue 10 (2023-11-07) Copyright © Huawei Digital Power Technologies Co., Ltd.
- Page 39 Provides short-circuit protection. Fiber adapter Used to connect optical fibers. Fiber Holds optical fibers. management tray DC switch Used to protect against short circuits and disconnect the DC bus. Issue 10 (2023-11-07) Copyright © Huawei Digital Power Technologies Co., Ltd.
-
Page 40: Power Supply And Distribution System
(ESM57280AS1) Cell capacity 3.2 V/320 Ah 3.2 V/280 Ah Cell material Lithium iron phosphate Lithium iron phosphate Combination mode 16S 1P 18S 1P Rated voltage 51.2 V 57.6 V Issue 10 (2023-11-07) Copyright © Huawei Digital Power Technologies Co., Ltd. -
Page 41: Smart Rack Controller
Communications port CAN 2.0 CAN 2.0 2.4.1.2 Smart Rack Controller Figure 2-7 Rack controller Table 2-6 Efficiency Technical Specifications Rack Controller Maximum efficiency ≥ 98.5% Full-load efficiency ≥ 98.5% Issue 10 (2023-11-07) Copyright © Huawei Digital Power Technologies Co., Ltd. - Page 42 Rated operating current of a single 76.3 A battery rack Maximum operating current of a 92 A single battery rack Table 2-9 Protection Technical Specifications Rack Controller Reverse connection protection Supported Issue 10 (2023-11-07) Copyright © Huawei Digital Power Technologies Co., Ltd.
- Page 43 Smart air cooling IP rating IP66 Maximum operating altitude 4000 m Input and output terminals OT terminals Power response time (from no load to < 30 ms full load) Issue 10 (2023-11-07) Copyright © Huawei Digital Power Technologies Co., Ltd.
-
Page 44: Embedded Power Subrack
CAN, RS485, FE 2.4.1.3 Embedded Power Subrack Figure 2-8 Appearance (1) Ground screw (2) Input terminals (3) Battery switches (4) Load switches (5) Monitoring module (6) PSU installation positions (SMU11B) Issue 10 (2023-11-07) Copyright © Huawei Digital Power Technologies Co., Ltd. -
Page 45: Monitoring Module (Smu11B)
Steady on A minor alarm or warning is generated. Major alarm No critical or major alarm is indicator generated. Steady on A critical or major alarm is generated. Issue 10 (2023-11-07) Copyright © Huawei Digital Power Technologies Co., Ltd. -
Page 46: Psu
The PSU has no AC input. The PSU is damaged. Blinking (0.5 Querying is in progress. Blinking (4 The PSU is loading an application program. Alarm Yellow The PSU has no protection alarm. indicator Issue 10 (2023-11-07) Copyright © Huawei Digital Power Technologies Co., Ltd. -
Page 47: Monitoring System
Steady on The module locks out due to output overvoltage. The PSU has no output due to internal faults. 2.4.2 Monitoring System Figure 2-11 Position of the monitoring system Issue 10 (2023-11-07) Copyright © Huawei Digital Power Technologies Co., Ltd. -
Page 48: Central Monitoring Unit (Cmu)
(13) 12 V output power port (14) AI ports (15) DO ports (16) COM ports (17) 24 V input power port (18) 12 V input power port (19) Protective earthing point Issue 10 (2023-11-07) Copyright © Huawei Digital Power Technologies Co., Ltd. -
Page 49: I/O Expansion Board
The I/O expansion board controls and monitors the door status sensor, sensors, and air conditioners in the ESS, connects cables to the fire suppression system, and black starts the system. Issue 10 (2023-11-07) Copyright © Huawei Digital Power Technologies Co., Ltd. -
Page 50: Environment Control System
≤ 95% RH (non-condensing) Dimensions (H x W x D) 113.7 mm x 251 mm x 54.5 mm 2.4.3 Environment Control System Figure 2-13 Position of the environment control system Issue 10 (2023-11-07) Copyright © Huawei Digital Power Technologies Co., Ltd. -
Page 51: Air Conditioner
746 mm x 446 mm x 300 mm Weight 38.4 kg IP rating IP55 (between the internal air circulation and the external air circulation) Operating temperature –30°C to +55°C range Issue 10 (2023-11-07) Copyright © Huawei Digital Power Technologies Co., Ltd. -
Page 52: T/H Sensor
Operating temperature –20°C to +80°C Operating voltage 9–16 V DC Storage temperature –40°C to +80°C Signal output Two RJ45 ports, bidirectional cascading The T/H sensor uses an RJ45 connector. Issue 10 (2023-11-07) Copyright © Huawei Digital Power Technologies Co., Ltd. -
Page 53: Door Status Sensor
Pin 7 Reserved Pin 8 V– 2.4.3.3 Door Status Sensor Figure 2-17 Appearance (1) Switch (2) Magnet Technical Door Status Sensor Specifications Connection method Wiring terminals Rated current 500 mA Issue 10 (2023-11-07) Copyright © Huawei Digital Power Technologies Co., Ltd. -
Page 54: Electrode Water Sensor
When the electrodes detect water, they are short-circuited and the CMU reports an alarm. Figure 2-18 Appearance Technical Specifications Electrode Water Sensor Operating temperature –40°C to +80°C Storage temperature –40°C to +80°C Issue 10 (2023-11-07) Copyright © Huawei Digital Power Technologies Co., Ltd. -
Page 55: Fire Suppression System
● When a fire occurs, the thermo bulb can start the rack mounted fire extinguishing system even if the electric startup mode fails. This ensures that the rack mounted fire extinguishing system can be started reliably. Issue 10 (2023-11-07) Copyright © Huawei Digital Power Technologies Co., Ltd. - Page 56 –40°C to +60°C temperatur Storage –40°C to +60°C temperatur Relative ≤ 97% RH (40°C, non-condensing) humidity Dimensions ≤ 1 U (height) x 700 mm (depth) x 482 mm±1 mm (width) Issue 10 (2023-11-07) Copyright © Huawei Digital Power Technologies Co., Ltd.
-
Page 57: T/H Sensor
9–16 V DC Storage temperature –40°C to +80°C Signal output Two RJ45 ports, bidirectional cascading The T/H sensor uses an RJ45 connector. Figure 2-23 Pins of an RJ45 connector Issue 10 (2023-11-07) Copyright © Huawei Digital Power Technologies Co., Ltd. -
Page 58: Co Sensor
Output signal RS485 Operating temperature –25°C to +55°C Humidity 5%–95% RH (non-condensing) Resolution ≤ 30 ppm Response time ≤ 60s Cabling mode RJ45 network port Installation mode Gourd-shaped mounting hole/nut/magnet Issue 10 (2023-11-07) Copyright © Huawei Digital Power Technologies Co., Ltd. -
Page 59: Smoke Detector
The smoke detector can detect the smoke concentration in the environment. Figure 2-26 Appearance Table 2-18 Indicator description Name Color Status Description Indicator Steady on The detector enters the alarm state. Blinking The detector enters the monitoring state. Issue 10 (2023-11-07) Copyright © Huawei Digital Power Technologies Co., Ltd. -
Page 60: Exhaust System
3 A/120 V AC or 3 A/24 V AC Operating temperature –20°C to +60°C Ambient humidity < 95% RH (non-condensing) 2.4.5 Exhaust System Figure 2-27 Position of the exhaust system Issue 10 (2023-11-07) Copyright © Huawei Digital Power Technologies Co., Ltd. -
Page 61: Exhaust Module
36–72 V DC Rated rotating speed 9500 RPM±10% Operating temperature –25°C to +70°C 2.4.5.2 Exhaust Controller The exhaust controller TCUE receives commands from the CMU and adjusts the fan speed. Issue 10 (2023-11-07) Copyright © Huawei Digital Power Technologies Co., Ltd. -
Page 62: Working Principle
The system is not powered on. Steady on Power supply to the board is normal but no program is running. Blinking (0.5 An alarm is generated. No alarm is generated. 2.5 Working Principle Issue 10 (2023-11-07) Copyright © Huawei Digital Power Technologies Co., Ltd. -
Page 63: Circuit Diagram
The ESS is in progress of a self-check. Fault If a rack controller or battery pack is faulty, the system enters the fault state. Offline A rack controller is disconnected from the CMU. Issue 10 (2023-11-07) Copyright © Huawei Digital Power Technologies Co., Ltd. -
Page 64: Networking Application
Figure 2-31 Typical electrical connection diagram (components in the dotted box are optional) Table 2-22 1.0 MWh/500 kW standard solution configurations Name Recommended Model/ Quantity Source Specifications Smart String LUNA2000-200KWH-2H1 Purchased Energy Storage from the System (ESS) Company Issue 10 (2023-11-07) Copyright © Huawei Digital Power Technologies Co., Ltd. - Page 65 ● SUN2000-(20KTL, capacity 29.9KTL, 30KTL, requireme 36KTL, 40KTL)-M3 ● SUN2000-(50KTL- ZHM3, 50KTL-M3) ● SUN2000-(20KTL-M3, 33KTL-NH, 40KTL-NH) ● SUN2000-50KTL- NHM3 ● SUN2000-(75KTL, 100KTL, 110KTL, 125KTL) series ● SUN2000-111KTL- NHM0 Issue 10 (2023-11-07) Copyright © Huawei Digital Power Technologies Co., Ltd.
- Page 66 LUNA2000-(97KWH-1H1, 129KWH-2H1, 161KWH-2H1, 200KWH-2H1) Smart String ESS User Manual 2 Product Description Figure 2-32 Typical communication networking diagram (FE) Figure 2-33 Typical communication networking diagram (fiber ring network) Issue 10 (2023-11-07) Copyright © Huawei Digital Power Technologies Co., Ltd.
-
Page 67: Transportation Requirements
When transferring a heavy object, move your feet instead of turning your waist around. When lifting and transferring a heavy object, ensure that your feet point to the target direction of movement. Issue 10 (2023-11-07) Copyright © Huawei Digital Power Technologies Co., Ltd. - Page 68 2: Performance Test of the Rules for the Inspection of Packaging for Exporting Dangerous Goods). The batteries belong to class 9 dangerous goods. ● The transportation service provider must be qualified to transport dangerous goods. Open truck transportation is not allowed. Issue 10 (2023-11-07) Copyright © Huawei Digital Power Technologies Co., Ltd.
- Page 69 ● When transporting faulty batteries, avoid approaching flammable material storage areas, residential areas, or other densely populated places, such as mass transit facilities or elevators. Issue 10 (2023-11-07) Copyright © Huawei Digital Power Technologies Co., Ltd.
-
Page 70: Storage Requirements
Charge Material Delivery Check There must be a battery charge label on the packing case. The charge label must specify the latest charge time and the next charge time. Issue 10 (2023-11-07) Copyright © Huawei Digital Power Technologies Co., Ltd. - Page 71 It is recommended that batteries be used soon after being deployed onsite. Batteries that have been stored for an extended period shall be charged periodically. Otherwise, they may be damaged. ● Packaging label description Issue 10 (2023-11-07) Copyright © Huawei Digital Power Technologies Co., Ltd.
- Page 72 The following table lists the maximum charge intervals for batteries delivered separately. Charge the batteries promptly and calibrate the SOC to at least 50%. Otherwise, the battery performance and service life may be deteriorated. Issue 10 (2023-11-07) Copyright © Huawei Digital Power Technologies Co., Ltd.
- Page 73 If batteries have been stored for longer than allowed, promptly report the event to the person in charge. ● Ensure that batteries are delivered based on the "first in, first out" rule. Issue 10 (2023-11-07) Copyright © Huawei Digital Power Technologies Co., Ltd.
- Page 74 The battery is qualified if it is free from the following symptoms: – Deformation – Shell damage – Leakage Check that the accessories are complete based on the packing list delivered with the charger. Issue 10 (2023-11-07) Copyright © Huawei Digital Power Technologies Co., Ltd.
-
Page 75: Smart Rack Controller Storage
Do not remove the packaging. Check the packaging regularly (recommended: once every three months). Replace any packing materials that become damaged during storage. If the Smart Rack Controller is unpacked but will not Issue 10 (2023-11-07) Copyright © Huawei Digital Power Technologies Co., Ltd. - Page 76 Storage temperature: –40°C to +70°C; relative humidity: 5%–95% RH ● Stack Smart Rack Controllers with caution to prevent them from falling over, resulting in personal injury or equipment damage. Issue 10 (2023-11-07) Copyright © Huawei Digital Power Technologies Co., Ltd.
-
Page 77: Site Requirements
The site area must meet the requirements and there shall be space for capacity expansion. ● The ESS shall be installed more than 30 m away from the third-party wireless communication facilities. ● The site shall be in a well-ventilated place. Issue 10 (2023-11-07) Copyright © Huawei Digital Power Technologies Co., Ltd. - Page 78 When a large amount of catchment water flows into or passes through the site, it is recommended that side ditches or drainage ditches be built to drain water from the ground in an organized manner. Issue 10 (2023-11-07) Copyright © Huawei Digital Power Technologies Co., Ltd.
-
Page 79: Outdoor Requirements
– More than 500–1000 m away from light pollution sources such as packing houses, tanneries, boiler rooms, slaughterhouses, landfill sites, and sewage treatment plants Issue 10 (2023-11-07) Copyright © Huawei Digital Power Technologies Co., Ltd. -
Page 80: Indoor Requirements
25% of the lower flammability limit (LFL). The mechanical exhaust ventilation rate shall be greater than or equal to 1 ft /min/ft (5.1 L/sec/m Issue 10 (2023-11-07) Copyright © Huawei Digital Power Technologies Co., Ltd. - Page 81 The preceding installation requirements shall be in line with the requirements approved by the local fire department. On the premise that the fire department approval is obtained, the requirements on water Issue 10 (2023-11-07) Copyright © Huawei Digital Power Technologies Co., Ltd.
-
Page 82: Clearance Requirements
The following figure shows the minimum clearance requirements for installation and O&M. The equipment clearances must also meet the site selection requirements (see 5.1 Site Selection Requirements). Figure 5-1 Clearance requirements Issue 10 (2023-11-07) Copyright © Huawei Digital Power Technologies Co., Ltd. -
Page 83: Foundation Requirements
● The foundation diagram is for reference only and cannot be used as the final construction drawing. The design specifications of the ESS foundation shall be Issue 10 (2023-11-07) Copyright © Huawei Digital Power Technologies Co., Ltd. -
Page 84: Forklift Requirements
All doors of the equipment are closed and locked. Ensure that the steel hoisting ropes are securely connected. It is recommended that the equipment be hoisted from left to right or from right to left. Issue 10 (2023-11-07) Copyright © Huawei Digital Power Technologies Co., Ltd. - Page 85 Do not drag steel ropes or lifting appliances. Do not collide with the equipment. Secure the cabinet you have hoisted before hoisting another cabinet. Issue 10 (2023-11-07) Copyright © Huawei Digital Power Technologies Co., Ltd.
-
Page 86: Unpacking And Acceptance
● If the installation environment is poor, take dustproof and anti-condensation measures (for example, use a dust cover, plastic film, or fabric cloth) after unpacking batteries to prevent condensation and dust buildup, which may corrode the batteries. Issue 10 (2023-11-07) Copyright © Huawei Digital Power Technologies Co., Ltd. -
Page 87: Installation
● The tool pictures are for reference only. ● The tool tables may not list out some tools required onsite. Onsite installation personnel and the customer need to prepare the tools based on the site requirements. Issue 10 (2023-11-07) Copyright © Huawei Digital Power Technologies Co., Ltd. - Page 88 ● Torque range: 1.2–45 N·m Wire stripper Cable cutter Rubber mallet Utility knife Hydraulic pliers Multimeter Marker RJ45 crimping tool DC voltage measurement range ≥ 1500 V DC Issue 10 (2023-11-07) Copyright © Huawei Digital Power Technologies Co., Ltd.
- Page 89 Ф16 mm Insulated ladder Crane Lifting rope Electric forklift Rope length ≥ 1845 mm x 4 Pallet truck Personal Protective Equipment (PPE) Insulated gloves Protective gloves Goggles Dust mask Issue 10 (2023-11-07) Copyright © Huawei Digital Power Technologies Co., Ltd.
-
Page 90: Pre-Installation Check
For details about the number of accessories delivered with the equipment, see the List in the packing case. 7.2 Installing the ESS Step 1 Remove the baffle plate from the bottom of the ESS. Issue 10 (2023-11-07) Copyright © Huawei Digital Power Technologies Co., Ltd. - Page 91 7 Installation Figure 7-1 Removing the bottom baffle Step 2 Remove the pallets. Figure 7-2 Removing the pallets Step 3 Install the baffle plate to the bottom of the ESS. Issue 10 (2023-11-07) Copyright © Huawei Digital Power Technologies Co., Ltd.
- Page 92 User Manual 7 Installation Figure 7-3 Installing the baffle plate Step 4 Open the cabinet doors. NO TE Keep the keys properly after use. Figure 7-4 Opening the doors Issue 10 (2023-11-07) Copyright © Huawei Digital Power Technologies Co., Ltd.
- Page 93 Step 7 After closing the cabinet doors, move the ESS to the specified position. NO TE If a forklift cannot be used on the transport route (for example, there is a slope), use a crane to move the ESS. Issue 10 (2023-11-07) Copyright © Huawei Digital Power Technologies Co., Ltd.
- Page 94 Figure 7-7 Using a forklift NO TICE When a forklift is used, bind and secure the ESS based on the site requirements to ensure there is no risk of falling. Issue 10 (2023-11-07) Copyright © Huawei Digital Power Technologies Co., Ltd.
-
Page 95: Connecting A Ground Cable For The Ess
Figure 7-8 Securing the ESS ----End 7.3 Connecting a Ground Cable for the ESS NO TE Ensure that the grounding impedance of the equipment complies with GB 50054 and local electrical standards. Issue 10 (2023-11-07) Copyright © Huawei Digital Power Technologies Co., Ltd. -
Page 96: Inside The Cabinet
The hot-dip zinc-coated flat steel sheet needs to be prepared by the customer (recommended specification: ≥ –40 x 4). The specific dimensions depend on the onsite fault current and are subject to the design of the design institute. Issue 10 (2023-11-07) Copyright © Huawei Digital Power Technologies Co., Ltd. - Page 97 The specifications of the ground cable are subject to this table or calculated according to IEC 60364-5-54. Figure 7-11 Connecting a ground cable Issue 10 (2023-11-07) Copyright © Huawei Digital Power Technologies Co., Ltd.
-
Page 98: Installing Components
Power Sensor (DDSU666-H) Note [1]: ● Six dummy battery packs are preinstalled in the LUNA2000-97KWH-1H1 ESS, in which six battery packs are required. ● Four dummy battery packs are preinstalled in the LUNA2000-129KWH-2H1 ESS, in which eight battery packs are required. -
Page 99: Installing Battery Packs
The installation kit is not delivered with the product and needs to be purchased separately from the Company. ● The appearance of the battery pack installation kit in this document is for reference only. Issue 10 (2023-11-07) Copyright © Huawei Digital Power Technologies Co., Ltd. - Page 100 ● Do not install battery packs on rainy, snowy, or foggy days. Otherwise, the battery packs may be corroded by moisture or rain. Procedure Step 1 Remove the column in the middle. Issue 10 (2023-11-07) Copyright © Huawei Digital Power Technologies Co., Ltd.
- Page 101 Figure 7-13 Removing the column Step 2 Use a forklift to transport the installation kit to the vicinity of the ESS. Figure 7-14 Forklift space dimensions Step 3 Take out the installation kit. Issue 10 (2023-11-07) Copyright © Huawei Digital Power Technologies Co., Ltd.
- Page 102 ● If the stud of a lifting handle is bent, replace the lifting handle in time. ● When using the lifting handles delivered with the product, hold the end closer to the device. Issue 10 (2023-11-07) Copyright © Huawei Digital Power Technologies Co., Ltd.
- Page 103 Figure 7-18 Taking out the battery pack Step 6 Install the operating handle on the battery pack, place the battery pack on the installation kit, and secure the battery pack. Issue 10 (2023-11-07) Copyright © Huawei Digital Power Technologies Co., Ltd.
- Page 104 Dummy battery packs have been preinstalled in the 97 kWh, 129 kWh, and 161 kWh ESSs to separate air channels and must not be removed. Figure 7-20 Installing the battery pack in the ESS Step 8 Secure the battery pack. Issue 10 (2023-11-07) Copyright © Huawei Digital Power Technologies Co., Ltd.
- Page 105 Figure 7-21 Securing the battery pack Step 9 Install air channel plates between battery packs based on the label on the air channel plates. The air channel plates are delivered with the product. Issue 10 (2023-11-07) Copyright © Huawei Digital Power Technologies Co., Ltd.
- Page 106 Step 10 Install the column to the ESS. Figure 7-23 Installing the column ----End Follow-up Procedure After using the installation kit, pack it back to the iron box and place it in a dry indoor place. Issue 10 (2023-11-07) Copyright © Huawei Digital Power Technologies Co., Ltd.
-
Page 107: Installing The Smart Rack Controller
● Verify the torque of the installed nuts using a torque socket wrench set to 21 N·m. ● Mark the nuts whose torque has been verified using a marker. Figure 7-25 Installing short-circuiting copper bars (200 kWh model) Issue 10 (2023-11-07) Copyright © Huawei Digital Power Technologies Co., Ltd. - Page 108 Step 3 Install the maintenance compartment cover and the decorative cover to the rack controller. Figure 7-27 Installing covers Step 4 Remove cables bound on the outside of the ESS. Issue 10 (2023-11-07) Copyright © Huawei Digital Power Technologies Co., Ltd.
- Page 109 ● The screws for securing the rainproof canopy are preinstalled on the upper bracket. Remove the screws before installing the rainproof canopy. ● When using the lifting handles, hold the handle end closer to the device. Figure 7-29 Installing mounting kits Issue 10 (2023-11-07) Copyright © Huawei Digital Power Technologies Co., Ltd.
-
Page 110: Installing The Smart Pcs
Unpack and check the Smart PCS delivered to the site to ensure that the Smart PCS is complete and intact. Procedure Step 1 Install the mounting bracket. The mounting bracket is delivered with the Smart PCS. Issue 10 (2023-11-07) Copyright © Huawei Digital Power Technologies Co., Ltd. - Page 111 ● At least four persons are required to install the Smart PCS. ● When using the lifting handles, hold the handle end closer to the device. Figure 7-32 Installing mounting ears and lifting handles Step 3 Secure the Smart PCS. Issue 10 (2023-11-07) Copyright © Huawei Digital Power Technologies Co., Ltd.
-
Page 112: Optional) Installing A Maintenance Socket
This section describes only the installation method. Procedure Step 1 Remove the baffle plate in front of the power distribution area. Step 2 Install the maintenance socket. Figure 7-34 Installing the socket ----End Issue 10 (2023-11-07) Copyright © Huawei Digital Power Technologies Co., Ltd. -
Page 113: Optional) Installing A Ddsu666-H
The DDSU666-H meter is purchased from the Company. Procedure Step 1 Remove the baffle plate in front of the power distribution area. Step 2 Install the DDSU666-H. Figure 7-35 Installing the DDSU666-H ----End Issue 10 (2023-11-07) Copyright © Huawei Digital Power Technologies Co., Ltd. -
Page 114: Installing Cables
Loose screw connections will result in excessive voltage drops and batteries may catch fire when the current is high. Issue 10 (2023-11-07) Copyright © Huawei Digital Power Technologies Co., Ltd. -
Page 115: Preparing Cables
(with Three-core (L, N, terminal with by the external grid power PE) outdoor an insertion customer supply) copper/copper-clad depth of 12 aluminum/ mm, M8 aluminum alloy OT/DT cable terminal Issue 10 (2023-11-07) Copyright © Huawei Digital Power Technologies Co., Ltd. - Page 116 DDSU666- cable Curren Delivered with the transf product ormer cable power cable (Optional) Power Delivered Cable to cable with the product maintena groun nce socket cable Issue 10 (2023-11-07) Copyright © Huawei Digital Power Technologies Co., Ltd.
-
Page 117: Installing Cables For The Rack Mounted Fire Extinguishing System
Figure 8-1 Connecting cables ----End 8.3 Installing Battery Pack Cables Step 1 Install copper bars for battery packs, and connect the battery rack general output power cable and black start cable. Issue 10 (2023-11-07) Copyright © Huawei Digital Power Technologies Co., Ltd. - Page 118 ● Verify the torque of the installed nuts using a torque socket wrench set to 27 N·m. ● Mark the nuts whose torque has been verified using a marker. Issue 10 (2023-11-07) Copyright © Huawei Digital Power Technologies Co., Ltd.
- Page 119 Figure 8-2 Installing copper bars and cables (200 kWh model) Figure 8-3 Installing copper bars and cables (161 kWh model) NO TE Connect the black start cable to Pack1. Issue 10 (2023-11-07) Copyright © Huawei Digital Power Technologies Co., Ltd.
- Page 120 161KWH-2H1, 200KWH-2H1) Smart String ESS User Manual 8 Installing Cables Figure 8-4 Installing copper bars and cables (129 kWh model) NO TE Connect the black start cable to Pack2. Issue 10 (2023-11-07) Copyright © Huawei Digital Power Technologies Co., Ltd.
- Page 121 161KWH-2H1, 200KWH-2H1) Smart String ESS User Manual 8 Installing Cables Figure 8-5 Installing copper bars and cables (97 kWh model) NO TE Connect the black start cable to Pack3. Issue 10 (2023-11-07) Copyright © Huawei Digital Power Technologies Co., Ltd.
- Page 122 ● The cable between Pack10 and Pack11 is 04097837-10 or 04098675-10, and the other cables are 04097837-07 or 04098675-07. ● The cable sequence is as follows: 2FCB6-Pack1-2-3-4-5, 2FCB7-Pack12-11-10-9-8-7-6. ● Keep redundant cables properly for later use. Issue 10 (2023-11-07) Copyright © Huawei Digital Power Technologies Co., Ltd.
- Page 123 161KWH-2H1, 200KWH-2H1) Smart String ESS User Manual 8 Installing Cables Figure 8-6 Connecting 48 V cables to battery packs Step 3 Connect cables to the COM ports on the battery packs. Issue 10 (2023-11-07) Copyright © Huawei Digital Power Technologies Co., Ltd.
- Page 124 Pack10 and Pack11 is 04097837-09 or 04098675-09, and the other cables are 04097837-06 or 04098675-06. ● Keep redundant cables properly for later use. Figure 8-7 Connecting cables to the COM ports on the battery packs Issue 10 (2023-11-07) Copyright © Huawei Digital Power Technologies Co., Ltd.
-
Page 125: Installing Rack Controller Cables
● Do not remove the cover from an unused pagoda connector. Figure 8-9 Connecting cables (200 kWh model) Issue 10 (2023-11-07) Copyright © Huawei Digital Power Technologies Co., Ltd. - Page 126 Figure 8-10 Connecting cables (97 kWh/129 kWh/161 kWh model) Cable Label Wiring Terminal 110-1F2:2>TA1:1BAT+ 1BAT+ 107-1F1:2>TA1:2BAT+ 2BAT+ 108-1Q2:1>TA1:1BUS+ 1BUS+ 109-1Q1:4>TA1:2BAT- 2BAT- 111-1Q2:3>TA1:1BUS- 1BUS- Step 3 Connect the preinstalled cables to J1 (left), J2 (right), and FE1. Issue 10 (2023-11-07) Copyright © Huawei Digital Power Technologies Co., Ltd.
- Page 127 Figure 8-12 Installing covers Step 5 Install the protective covers delivered with the product, connect a ground cable to the protective cover on the left or right side, and bind the cable. Issue 10 (2023-11-07) Copyright © Huawei Digital Power Technologies Co., Ltd.
-
Page 128: Installing A Dc Power Cable
Step 1 Remove the baffle plate in front of the power distribution area. Step 2 Route the DC power cable through the cable hole at the bottom and connect it to the DC circuit breaker. Issue 10 (2023-11-07) Copyright © Huawei Digital Power Technologies Co., Ltd. -
Page 129: Installing Ac Power Cables For Auxiliary Power Supply
Obtain the AC auxiliary power from the mains or a reliable power supply. Do not directly obtain power from the AC side of renewable energy inverters such as PV inverters and wind power converters. Issue 10 (2023-11-07) Copyright © Huawei Digital Power Technologies Co., Ltd. -
Page 130: Installing Ac Input Power Cables For The Ups
Step 1 Remove the short-circuiting bar from 1–2 and insert it to 2–3 on the XU terminal block. Step 2 Remove the short-circuiting bar from 4–5 and insert it to 5–6 on the XU terminal block. Step 3 Connect the cable. Issue 10 (2023-11-07) Copyright © Huawei Digital Power Technologies Co., Ltd. -
Page 131: Installing Communications Cables
Step 1 Connect the FE communications cable to the WAN port on the CMU. NO TE Route the FE communications cable through the magnetic rings at the cable hole to improve signal quality. Issue 10 (2023-11-07) Copyright © Huawei Digital Power Technologies Co., Ltd. -
Page 132: Installing Fiber Ring Network Communications Cables
8.8.2 Installing Fiber Ring Network Communications Cables NO TICE Only professionals are allowed to connect optical fiber cables and splice fibers. NO TE In the optical fiber ring topology, two optical fiber cables are required. Issue 10 (2023-11-07) Copyright © Huawei Digital Power Technologies Co., Ltd. - Page 133 Step 1 Remove the external mechanical parts from the ATB. Figure 8-19 Removing external mechanical parts Step 2 Remove the optical fiber cable fastener. Issue 10 (2023-11-07) Copyright © Huawei Digital Power Technologies Co., Ltd.
- Page 134 Figure 8-21 Connecting optical fiber cables Step 6 Check that the cables are connected correctly and securely. Then reinstall the optical fiber cable fastener and external mechanical parts. ----End Issue 10 (2023-11-07) Copyright © Huawei Digital Power Technologies Co., Ltd.
-
Page 135: Optional) Installing Ddsu666-H Cables
If the ESS is connected to an external UPS, the connection method is the same. However, in this scenario, the DDSU666-H cannot measure the power consumption of the 12 V adapter and there is a maximum error of 0.024 kWh per hour. Issue 10 (2023-11-07) Copyright © Huawei Digital Power Technologies Co., Ltd. -
Page 136: Optional) Installing Maintenance Socket Cables
The actual appearance of the maintenance socket may vary. The figure shows only the installation method. Figure 8-23 Connecting cables 8.11 Sealing Cable Holes After cables are installed, seal the cable holes using the delivered sealing putty. Figure 8-24 Sealing putty Issue 10 (2023-11-07) Copyright © Huawei Digital Power Technologies Co., Ltd. -
Page 137: Powering On The Ess
● Cables are routed neatly without twists or crossovers in the cabinets. Battery pack The copper bar is not deformed, and the plastic dip copper bar coating is not damaged. Issue 10 (2023-11-07) Copyright © Huawei Digital Power Technologies Co., Ltd. -
Page 138: Ess Installation Check
Cable The bolts for installing the cables are tightened and the cables are not loose. Cable hole sealing Cable holes are sealed. Battery pack All battery packs are intact. Issue 10 (2023-11-07) Copyright © Huawei Digital Power Technologies Co., Ltd. -
Page 139: Installing A Psu
Step 3 Gently push the PSU into its slot along the guide rails. Step 4 Push the handle upwards. Step 5 Push the locking latch rightwards to lock the handle. Issue 10 (2023-11-07) Copyright © Huawei Digital Power Technologies Co., Ltd. -
Page 140: Power-On Operations
Batteries shall be recharged in a timely manner. NO TICE If the ESS has not been used for six months or longer after being installed, it must be checked and tested by professionals before operation. Issue 10 (2023-11-07) Copyright © Huawei Digital Power Technologies Co., Ltd. - Page 141 6 in Figure 9-2) On the embedded power subrack (SK1), turn on the DC/DC switch 2FCB1, DC light power switch 2FCB2, TCUE power switch 2FCB3, fan 1 switch 2FCB6, fan Issue 10 (2023-11-07) Copyright © Huawei Digital Power Technologies Co., Ltd.
- Page 142 Use a multimeter to check that the output voltage at position 1 in the preceding figure is 53 V±5 V. Step 7 Turn on the DC switch 1Q2. (As shown by 8 in Figure 9-2) ----End Issue 10 (2023-11-07) Copyright © Huawei Digital Power Technologies Co., Ltd.
-
Page 143: Commissioning The Ess (Smartlogger Webui)
Step 1 Connect the network cable between the network port of the PC and the WAN or LAN port of the SmartLogger. It is recommended that the PC be connected to the LAN port of the SmartLogger. Issue 10 (2023-11-07) Copyright © Huawei Digital Power Technologies Co., Ltd. - Page 144 LAN, do not cancel the proxy server configurations. Open Internet Explorer. Choose Tools > Internet Options. Click the Connections tab and then click LAN settings. Clear Use a proxy server for your LAN. Issue 10 (2023-11-07) Copyright © Huawei Digital Power Technologies Co., Ltd.
- Page 145 Check whether the browser proxy is abnormal. If yes, set the browser proxy according to step 3. ▪ Check whether the IP address of another device conflicts with that of the SmartLogger. If yes, assign a new IP address. Issue 10 (2023-11-07) Copyright © Huawei Digital Power Technologies Co., Ltd.
- Page 146 SmartLogger V300R023C00 and later versions support this function. Choose Monitoring > Logger(Local) > About to view the SmartLogger software version and check whether software upgrade is needed. Issue 10 (2023-11-07) Copyright © Huawei Digital Power Technologies Co., Ltd.
-
Page 147: Checking The Smartlogger Software Version
10.2 Checking the SmartLogger Software Version Choose Monitoring > Logger(Local) > About and check that the software version is the same as the latest version in FusionSolar Software Download. Figure 10-3 Checking the version Issue 10 (2023-11-07) Copyright © Huawei Digital Power Technologies Co., Ltd. -
Page 148: Upgrading The Smartlogger
Step 2 Choose Monitoring > ESR, click +, and check that all ESM status indicators under the ESR are green or yellow. NO TE The quantity of ESMs displayed must be the same as the actual quantity of installed battery packs. Issue 10 (2023-11-07) Copyright © Huawei Digital Power Technologies Co., Ltd. - Page 149 Quantity of Battery Packs LUNA2000-97KWH-1H1 LUNA2000-129KWH-2H1 LUNA2000-161KWH-2H1 LUNA2000-200KWH-2H1 Figure 10-6 Setting the quantity of battery packs Step 4 Choose Monitoring > ESM > About and check all ESM software versions. Issue 10 (2023-11-07) Copyright © Huawei Digital Power Technologies Co., Ltd.
-
Page 150: System Startup
----End 10.5 System Startup Context Start up the system when needed. Procedure Step 1 On the SmartLogger WebUI, choose Maintenance > Device Mgmt. > Connect Device. Issue 10 (2023-11-07) Copyright © Huawei Digital Power Technologies Co., Ltd. -
Page 151: Deployment Wizard
Figure 10-10 Setting basic parameters ● Select a communication mode based on site requirements. Step 3 Connect to Huawei devices. ● Click Search for Device to check the cable connections and allocate addresses. Issue 10 (2023-11-07) Copyright © Huawei Digital Power Technologies Co., Ltd. - Page 152 Set this parameter only for the PCS, state but not for the SUN2000. – In the on-grid scenario, set this parameter to On-grid(PQ). – In the off-grid scenario, set this parameter to Off-grid(VSG). Issue 10 (2023-11-07) Copyright © Huawei Digital Power Technologies Co., Ltd.
- Page 153 Apparent Power Baseline (kVA) Set the upper limit of the maximum under Parameter Configuration active power, which is also used as the baseline for reactive power scheduling. Issue 10 (2023-11-07) Copyright © Huawei Digital Power Technologies Co., Ltd.
- Page 154 Step 4 Connect to a power meter, and set Meter usage to Export+import meter. Figure 10-12 Setting meter parameters Step 5 Connect to EMIs. Figure 10-13 Setting EMI parameters Issue 10 (2023-11-07) Copyright © Huawei Digital Power Technologies Co., Ltd.
- Page 155 ESS. – The SmartLogger directly delivers the external scheduling power limit. NOTE If the CMU is connected, the Fully fed to grid working mode is not displayed. Issue 10 (2023-11-07) Copyright © Huawei Digital Power Technologies Co., Ltd.
- Page 156 – In some countries, the grid is not allowed to charge the ESS. In this case, this mode cannot be used. – The SmartLogger performs ESS scheduling based on the external scheduling power limit and the preceding policies. Issue 10 (2023-11-07) Copyright © Huawei Digital Power Technologies Co., Ltd.
- Page 157 PV inverters but not the ESS. Note [1]: You can set this parameter in SmartLogger V300R023C00SPC150 and later versions. Note [2]: You can set this parameter in SmartLogger V300R023C00SPC120 and later versions. Issue 10 (2023-11-07) Copyright © Huawei Digital Power Technologies Co., Ltd.
- Page 158 Disable. step You can set this parameter based on site requirements. In this case, the PV rise step for PV+ESS equalization is the preset value. Issue 10 (2023-11-07) Copyright © Huawei Digital Power Technologies Co., Ltd.
- Page 159 This parameter is displayed after Adaptive adjustment parameters is set to Disable. period You can set this parameter based on site requirements. In this case, battery control is performed based on the preset period. Issue 10 (2023-11-07) Copyright © Huawei Digital Power Technologies Co., Ltd.
- Page 160 Disable. step You can set this parameter based on site requirements. In this case, the PV rise step for PV+ESS equalization is the preset value. Issue 10 (2023-11-07) Copyright © Huawei Digital Power Technologies Co., Ltd.
- Page 161 PV+ESS equalization is the preset value. Note [1]: This parameter is added in SmartLogger V300R023C00SPC120 and later versions. This parameter is displayed and needs to be set only when the Smart PCS is connected. Issue 10 (2023-11-07) Copyright © Huawei Digital Power Technologies Co., Ltd.
- Page 162 XX:XX is displayed, you are time: advised to click Confirm and set Detection start time to the optimal time. Step 7 Connect to the Huawei NMS. Issue 10 (2023-11-07) Copyright © Huawei Digital Power Technologies Co., Ltd.
-
Page 163: Checking Alarms
Step 1 Check whether an alarm is generated on the SmartLogger WebUI or CMU WebUI. If an alarm is generated, handle the alarm by referring to the handling suggestions in the alarm reference section. Issue 10 (2023-11-07) Copyright © Huawei Digital Power Technologies Co., Ltd. -
Page 164: Setting The System Antitheft Function
10.8 Setting the System Antitheft Function Context The antitheft function is supported only in the LUNA2000B V100R023C00SPC120 and later versions and is used with SmartLogger V300R023C00SPC172 and later versions. Issue 10 (2023-11-07) Copyright © Huawei Digital Power Technologies Co., Ltd. -
Page 165: Setting Capacity Limit
ESS. Procedure Step 1 Choose Settings > Battery Control > Capacity Limit to set the capacity limit. Figure 10-18 Setting capacity limit Issue 10 (2023-11-07) Copyright © Huawei Digital Power Technologies Co., Ltd. - Page 166 Specifies the active power limit of the inverter when the export limit when +import meter communication is abnormal. You can manually electricity change the active power percentage of the inverter as required. meter fails Issue 10 (2023-11-07) Copyright © Huawei Digital Power Technologies Co., Ltd.
- Page 167 Specifies the active power limit of the PCS when the export limit when +import meter communication is abnormal. You can manually electricity change the active power percentage of the PCS as required. meter fails Issue 10 (2023-11-07) Copyright © Huawei Digital Power Technologies Co., Ltd.
-
Page 168: Closing The Cabinet Door
11 Closing the Cabinet Door Closing the Cabinet Door After the deployment commissioning is complete, close the cabinet door and secure the safety rope. Figure 11-1 Closing the cabinet door Issue 10 (2023-11-07) Copyright © Huawei Digital Power Technologies Co., Ltd. -
Page 169: Powering Off The Ess
Step 2 Choose Overview > Active Alarms to view system alarms generated after the shutdown. If any alarm is generated, handle the alarm according to the alarm handling suggestions. ----End Issue 10 (2023-11-07) Copyright © Huawei Digital Power Technologies Co., Ltd. -
Page 170: Power-Off Operations
Step 3 (Optional) Turn off the UPS cable inlet switch 5FCB. Step 4 Turn off the DC switch 1Q1. Step 5 Turn off the switch between the AC side of the ESS and the power grid. ----End Issue 10 (2023-11-07) Copyright © Huawei Digital Power Technologies Co., Ltd. -
Page 171: Alarm Reference
LUNA2000-(97KWH-1H1, 129KWH-2H1, 161KWH-2H1, 200KWH-2H1) Smart String ESS User Manual 13 Alarm Reference Alarm Reference For details about alarms, see the LUNA2000-(97KWH, 129KWH, 161KWH, 200KWH) Series Smart String ESS Alarm Reference. Issue 10 (2023-11-07) Copyright © Huawei Digital Power Technologies Co., Ltd. -
Page 172: Technical Specifications
Net weight (excluding ≤ 1070 kg ≤ 1090 kg ≤ 1110 kg ≤ 1130 kg actual battery packs) IP rating IP55 Operating –30°C to +55°C temperature range Issue 10 (2023-11-07) Copyright © Huawei Digital Power Technologies Co., Ltd. - Page 173 1 U fire suppression module (perfluorohexanone) system Auxiliary power 200–240 V AC, ≤ 4.2 kVA supply System Ethernet/Optical fiber communications port System Modbus TCP communications protocol Environmental RoHS 6 protection requirements Issue 10 (2023-11-07) Copyright © Huawei Digital Power Technologies Co., Ltd.
-
Page 174: A Crimping An Ot Or Dt Terminal
● Do not mix up the aluminum and copper sides of a copper-to-aluminum washer. Ensure that the aluminum side of the washer contacts the aluminum wiring terminal, and that the copper side contacts the terminal block. Issue 10 (2023-11-07) Copyright © Huawei Digital Power Technologies Co., Ltd. - Page 175 ● Wrap the wire crimping area with heat shrink tubing or insulation tape. The heat shrink tubing is used as an example. ● Use a heat gun carefully to avoid heat damage to the equipment. Issue 10 (2023-11-07) Copyright © Huawei Digital Power Technologies Co., Ltd.
- Page 176 (5) Hydraulic pliers (6) Heat gun Figure A-3 Crimping a DT terminal (1) Cable (2) Core wire (3) Heat shrink tubing (4) DT terminal (5) Hydraulic pliers (6) Heat gun Issue 10 (2023-11-07) Copyright © Huawei Digital Power Technologies Co., Ltd.
-
Page 177: B How Do I Repair Paint Damage
The equipment appearance should be intact. If paint has flaked off, repair paint damage immediately. NO TE Check the paint damage on the equipment and prepare appropriate tools and materials. The number of materials depends on site requirements. Issue 10 (2023-11-07) Copyright © Huawei Digital Power Technologies Co., Ltd. - Page 178 2. If a dent is greater than 100 mm further area or greater than 3 mm in operation. depth, ask the local supplier for an appropriate repainting solution. Issue 10 (2023-11-07) Copyright © Huawei Digital Power Technologies Co., Ltd.
- Page 179 Step 4 Apply paint evenly to the damaged area based on the damage degree of the paint using an aerosol spray, brush, or paint spray gun until all damage traces are invisible. Issue 10 (2023-11-07) Copyright © Huawei Digital Power Technologies Co., Ltd.
- Page 180 Table B-2 Paint requirements Item Requirement Primer thickness 60 μm Intermediate coat thickness 120 μm Top coat thickness 60 μm Primer type Epoxy zinc-rich paint Intermediate coat type Zinc-rich paint Issue 10 (2023-11-07) Copyright © Huawei Digital Power Technologies Co., Ltd.
- Page 181 NO TE The following is a paint model list provided by Huawei. The list may be updated from time to time and is for reference only. The cost of paint and technical services is subject to the local pricing standards.
-
Page 182: C Emergency Handling
If any part of the batteries is submerged in water, do not touch the batteries to avoid electric shock. ● Do not use batteries that have been soaked in water. Contact a battery recycling company for disposal. Issue 10 (2023-11-07) Copyright © Huawei Digital Power Technologies Co., Ltd. - Page 183 After the fire is extinguished, the site must be handled by professionals in accordance with local laws and regulations. Do not open the doors of the ESS without permission. Issue 10 (2023-11-07) Copyright © Huawei Digital Power Technologies Co., Ltd.
- Page 184 ESS capacity, battery pack location and distribution, and user manuals. Do not open the doors of the ESS before it is deemed safe by professionals. Follow local fire fighting regulations. Issue 10 (2023-11-07) Copyright © Huawei Digital Power Technologies Co., Ltd.
-
Page 185: D How Do I Recycle Used Batteries
NO TE You need to cover the related transportation expenses. Step 4 Recycling companies handle recycling. The recycled lithium batteries are at the disposal of the recycling companies. ----End Issue 10 (2023-11-07) Copyright © Huawei Digital Power Technologies Co., Ltd. -
Page 186: E Cmu Commissioning
The screenshots are for reference only. ● The parameter names, value ranges, and default values are subject to change. The actual display may vary. E.1.1.2 WebUI Layout Figure E-1 WebUI layout Issue 10 (2023-11-07) Copyright © Huawei Digital Power Technologies Co., Ltd. -
Page 187: Icon Description
Click the Reset icon to indicates that a reset the device. parameter is not selected. Click the icon to select a parameter. Display icon and Hide The CMU is in icon. Running state. Issue 10 (2023-11-07) Copyright © Huawei Digital Power Technologies Co., Ltd. -
Page 188: Webui Menus
Queries the version and communication information. Query Alarm History Queries historical alarms. Operation Log Queries operation logs. Export Data Exports historical alarms, energy yields, operation logs, and power grid scheduling data. Issue 10 (2023-11-07) Copyright © Huawei Digital Power Technologies Co., Ltd. - Page 189 ● Imports all configuration files. ● Clears cache. Device Log Export device logs. Onsite Test Performs a charge/discharge test on the battery rack. User Management Adds, modifies, or deletes a user. Issue 10 (2023-11-07) Copyright © Huawei Digital Power Technologies Co., Ltd.
-
Page 190: Maintenance Operations
255.255.255.0 Default gateway 192.168.8.1 192.168.8.1 WAN port IP address 192.168.0.10 192.168.0.11 Subnet mask 255.255.255.0 255.255.255.0 Default gateway 192.168.0.1 192.168.0.1 ● Scenario where the CMU is connected to the SACU Issue 10 (2023-11-07) Copyright © Huawei Digital Power Technologies Co., Ltd. - Page 191 Step 4 Log in to the CMU WebUI. XX.XX.XX.XX is In the address box of a browser, enter https://XX.XX.XX.XX ( the IP address of the CMU) and press Enter. The login page is displayed. Issue 10 (2023-11-07) Copyright © Huawei Digital Power Technologies Co., Ltd.
- Page 192 – The imported security certificate needs to be bound to the CMU IP address. Otherwise, the security risk warning will still be displayed during login. Figure E-3 Security risk warning Specify Language, User Name, and Password, and click Log In. Issue 10 (2023-11-07) Copyright © Huawei Digital Power Technologies Co., Ltd.
- Page 193 Updating to LUNA2000B V100R023C00 or later: – Method 1: Log in as admin using your new password. – Method 2: Select installer as the user name and set the login password as prompted. Issue 10 (2023-11-07) Copyright © Huawei Digital Power Technologies Co., Ltd.
- Page 194 Follow-up Procedure If any page is blank or a menu cannot be accessed after you log in to the WebUI, clear the cache, refresh the page, or log in again. Issue 10 (2023-11-07) Copyright © Huawei Digital Power Technologies Co., Ltd.
-
Page 195: Upgrading The Software Version
● If the system displays a message indicating that the loading is successful instead of the upgrade, the delayed upgrade function is triggered. The system automatically performs the upgrade when the conditions are met. ● If the upgrade fails, contact Huawei technical support. E.1.2.3 Exporting Device Logs Step 1 Access the device log page. -
Page 196: Checking Alarms
Step 1 Choose Overview > Active Alarms. Figure E-8 Checking alarms ----End E.1.2.5 Clearing Alarms You can clear all active and historical alarms for the selected device and collect alarm data again. Issue 10 (2023-11-07) Copyright © Huawei Digital Power Technologies Co., Ltd. -
Page 197: App Operations
E.2 App Operations E.2.1 Downloading and Installing the App SUN2000 app: Access Huawei AppGallery and search for SUN2000, or scan the following QR code (or directly visit https://appgallery.cloud.huawei.com/appdl/ C10279542) to download and install the app. QR code: Issue 10 (2023-11-07) Copyright ©... -
Page 198: Logging In To The App
SN of the Monitor-CMU, and the initial password is Changeme. – If Changeme cannot be used for the first login, obtain the initial password from the QR code on the CMU. Issue 10 (2023-11-07) Copyright © Huawei Digital Power Technologies Co., Ltd. - Page 199 ● For the same username, the password for logging in to the app is the same as that for logging in to the CMU WebUI. ● You will be locked out for 10 minutes after five consecutive failed password attempts in 5 minutes. Issue 10 (2023-11-07) Copyright © Huawei Digital Power Technologies Co., Ltd.
-
Page 200: Changing A Password
Changing the Login Password of a User After logging in to the app, tap in the upper right corner of the screen, and choose Change password to change the login password. Issue 10 (2023-11-07) Copyright © Huawei Digital Power Technologies Co., Ltd. -
Page 201: F Certificate Management And Maintenance
Preconfigured Huawei-issued certificates are used only in the deployment phase, for establishing initial security channels between devices and the customer's network. Huawei does not promise or guarantee the security of preconfigured certificates. The customer shall bear consequences of all security risks and security incidents arising from using preconfigured Huawei-issued certificates as service certificates. - Page 202 SACU through engineers to obtain the Modbus-TCP. corresponding security maintenance manual. /mnt/home/cert/web/ Authenticates the server.crt validity of the peer web module to be connected. Issue 10 (2023-11-07) Copyright © Huawei Digital Power Technologies Co., Ltd.
-
Page 203: G Contact Information
To ensure faster and better services, we kindly request your assistance in providing the following information: ● Model ● Serial number (SN) ● Software version ● Alarm ID or name ● Brief description of the fault symptom Issue 10 (2023-11-07) Copyright © Huawei Digital Power Technologies Co., Ltd. - Page 204 161KWH-2H1, 200KWH-2H1) Smart String ESS User Manual G Contact Information NO TE EU Representative Information: Huawei Technologies Hungary Kft. Add.: HU-1133 Budapest, Váci út 116-118., 1. Building, 6. floor. Email: hungary.reception@huawei.com Issue 10 (2023-11-07) Copyright © Huawei Digital Power Technologies Co., Ltd.
-
Page 205: H Digital Power Customer Service
LUNA2000-(97KWH-1H1, 129KWH-2H1, 161KWH-2H1, 200KWH-2H1) Smart String ESS User Manual H Digital Power Customer Service Digital Power Customer Service https://digitalpower.huawei.com/robotchat/ Issue 10 (2023-11-07) Copyright © Huawei Digital Power Technologies Co., Ltd. -
Page 206: I Acronyms And Abbreviations
I Acronyms and Abbreviations Acronyms and Abbreviations analog input application battery monitoring unit control area network central monitoring unit cluster communication port emergency power-off smart rack controller battery pack battery rack Issue 10 (2023-11-07) Copyright © Huawei Digital Power Technologies Co., Ltd. - Page 207 User Manual I Acronyms and Abbreviations energy storage unit direct current digital output fast Ethernet gigabit Ethernet input/output local area network light-emitting diode MBUS monitoring bus negative temperature coefficient Issue 10 (2023-11-07) Copyright © Huawei Digital Power Technologies Co., Ltd.
- Page 208 Issue 10 (2023-11-07) Copyright © Huawei Digital Power Technologies Co., Ltd.
- Page 209 LUNA2000-(97KWH-1H1, 129KWH-2H1, 161KWH-2H1, 200KWH-2H1) Smart String ESS User Manual I Acronyms and Abbreviations wide area network Issue 10 (2023-11-07) Copyright © Huawei Digital Power Technologies Co., Ltd.
Need help?
Do you have a question about the LUNA2000-97KWH-1H1 and is the answer not in the manual?
Questions and answers