
Subscribe to Our Youtube Channel
Related Manuals for SMART-AVI DVR-4x4


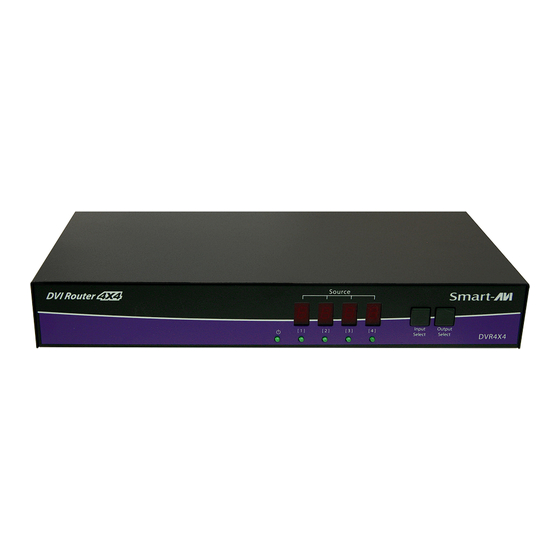
Summary of Contents for SMART-AVI DVR-4x4
- Page 1 DVR-4x4 4-port DVI-D Matrix Switch USER MANUAL DVR-4X4 DVI-D 4x4 Router 1-888-994-7427 www.smartavi.com...
-
Page 2: Table Of Contents
OVERVIEW TECHNICAL SPECIFICATIONS_________________________________________________________________ WHAT’S IN THE BOX?________________________________________________________________________ FRONT AND BACK___________________________________________________________________________ INSTALLATION_______________________________________________________________________________ DCC LEARNING______________________________________________________________________________ FRONT PANEL________________________________________________________________________________ ESTABLISHING AN RS-232 CONNECTION_____________________________________________________ RS-232 CONTROL WITH SMART CONTROL PRO______________________________________________ 8-10 TROUBLESHOOTING_________________________________________________________________________ TECHNICAL SUPPORT________________________________________________________________________ LIMITED WARRANTY STATEMENT____________________________________________________________ 4x4 DVI-D Matrix Switch... -
Page 3: Technical Specifications
Technical Specifications VIDEO Format DVI-D Single Line Input interface (4) DVI-D 29-pin (Female) Output interface (4) DVI-D 29-pin (Female) Resolution Up to 1920x1200 @ 60hz 5 volts p-p (TTL) Input Equalization Automatic Input Cable Length Up to 20 ft Output Cable Length Up to 20 ft CONTROL Front Panel... -
Page 4: What's In The Box
What’s in the box? PART NO. Q-TY DESCRIPTION DVR-4X4 DVI-D 4x4 Router PS5VD4A 5 V DC 4 A User Manual Front and back DVR-4X4 Front Panel DVR-4X4 Back Panel 4x4 DVI-D Matrix Switch... -
Page 5: Installation
1. Power off the computers and displays. 2. Connect the DVI video cables from the computers to the DVI-D inputs on the rear of the DVR-4X4. 3. Connect the DVI displays to the DVI-D outputs on the rear of the DVR-4X4. -
Page 6: Dcc Learning
DDC learning DDC provides plug-and-play capability to your displays. When you plug a display into your computer, the DDC table in the display tells the computer the optimal resolution to use. In order to preserve this plugand-play capability, we have integrated DDC learning into all of our DVI Solutions. DDC Learning Menu Connect 1 monitor only to Output 1. -
Page 7: Front Panel
Adapter to convert a straight through cable to a crossed cable or a crossed cable to a straight through cable. Examples of crossed and straight thorough cable pin-outs are shown below. The standard maximum length for an RS-232 cable is 50 feet. Call our Smart-AVI Support Engineer if you require more information. -
Page 8: Rs-232 Control With Smart Control Pro
COM port number in use. Figure 8-1 RS-232 CONTROL WITH Smart Control Pro Go to the Smart-AVI website, www.smartavi.com and click Support. On the Support page click on “HELPFUL LINKS TO SOFTWARE”. On the HELPFUL LINKS page click on SmartControlPro. - Page 9 RS-232 CONTROL WITH Smart Control Pro (continued) The “Router Count” drop down selection is for users with more than 1 SmartAVI device. Figure 9-1 Use the “Router Type” drop down to select your connected SmartAVI device from the list. Figure 9-2 Select the COM port your computer is connected to your SmartAVI device with from the “Com Port”...
- Page 10 RS-232 CONTROL WITH Smart Control Pro (continued) After clicking the “OK” button you will see the main page. Here by selecting the File Tab you can Create and save different configurations and load existing configurations. Figure 10-1 By clicking on a square to the right of an Input and under an output you can switch that source to that display.
-
Page 11: Troubleshooting
Troubleshooting No Power • Make sure that the power adapter is securely connected to the power connector of the unit. • Check the output voltage of the power supply and make sure that the voltage value is around 5VDC. • Replace the power supply. No Video •... -
Page 12: Limited Warranty Statement
Limited warranty statement A. Extent of limited warranty SmartAVI, Inc. warrants to the end-user customers that the SmartAVI product specified above will be free from defects in materials and workmanship for the duration of 1 year, which duration begins on the date of purchase by the customer. Customer is responsible for maintaining proof of date of purchase. - Page 13 NOTICE The information contained in this document is subject to change without notice. SmartAVI makes no warranty of any kind with regard to this material, including but not limited to, implied warranties of merchantability and fitness for particular purpose. SmartAVI will not be liable for errors contained herein or for incidental or consequential damages in connection with the furnishing, performance or use of this material.
Need help?
Do you have a question about the DVR-4x4 and is the answer not in the manual?
Questions and answers