Advertisement
Quick Links
Item:
Please visit our website for the most current instructions, assembly tips, to report damage
or request parts. www.walkeredison.com
Copyright © 2018, by Walker Edison Furniture Co., LLC, All rights reserved.
Copyright © 2018, by Walker Edison Furniture Co., LLC, All rights reserved.
BR1DATTNS
Assembly Instructions
Revised 05/2023-V2
P.1
Advertisement

Subscribe to Our Youtube Channel
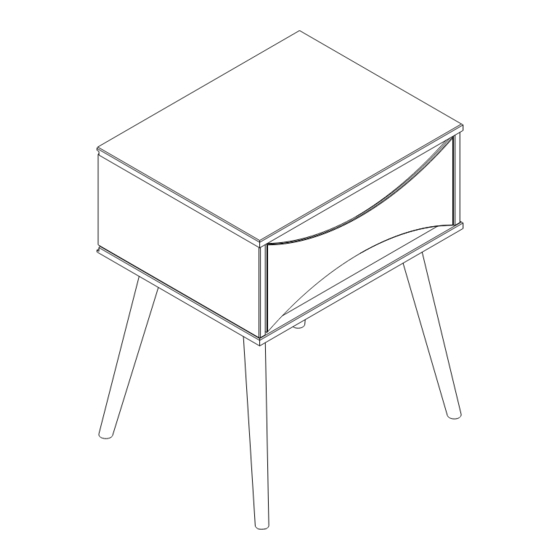
Summary of Contents for Walker Edison BR1DATTNS
- Page 1 Please visit our website for the most current instructions, assembly tips, to report damage or request parts. www.walkeredison.com Revised 05/2023-V2 Copyright © 2018, by Walker Edison Furniture Co., LLC, All rights reserved. Copyright © 2018, by Walker Edison Furniture Co., LLC, All rights reserved.
- Page 2 and hammmer...
- Page 3 Top panel 01 pc Drawer bottom 01 pc left side panel 01 pc 01 pc Drawer back Right side panel 01 pc Front / Back croosbeam 02 pcs Side croosbeam 02 pcs Bottom panel 01 pc Wooden angle bracket 04 pcs Back panel 01 pc Foot...
- Page 4 Wooden dowel Ø8*30mm Screw Ø4,0*25mm Ø3,5*30mm Screw Ø4,0*40mm Screw Ø10*10 Nail Ø10*20mm Wooden dowel Wooden dowel Ø6*30mm Screw Ø7*60mm Hex Key Wooden dowel Ø8*40mm Screw Ø4,0*16mm Wall anchor Washer Ø6*35mm Tape measureand hammer recommended for assembly (not included)
- Page 5 Step 1 Attention to the dowel lenght: ø10*20mm Insert wooden dowel (F) into part 27. Ø10*20mm Step 2 Insert wooden dowel (F) into part 8. Ø10*20mm Step 3 Ø8*30mm Insert Wooden dowel (A) into parts (2), (3), (32), and(41). Step 4 Ø3,5*30mm Secure parts (1) to part (2) and (3) with screw (C) and Phillips head screwdriver.
- Page 6 Step 5 Ø4,0*25mm Secure parts (27) to part (2) and (3) with screw (B) and Phillips head screwdriver. Step 6 Ø4,0*40mm Secure parts (4) to part (2) and (3) with screw (D) and Phillips head screwdriver. Step 7 Ø8*30mm Ø6*30mm Insert Wooden dowel (A) and (G) into parts (15), and(16).
- Page 7 Step 9 Secure the assembled part to the part (4). Step 10 Ø4,0*40mm Secure the assembled part to part (4) with screw (D) and Phillips head screwdriver. Step 11 Secure parts (15) to parts (6). Use a object like a book to support part (15). Step 12 Attach the assembled part to the parts (15) and hold this parts while someone help...
- Page 8 Step 13 Attach the assembled part to the part (4) without disassemble. Step 14 Ø4,0*40mm Secure the assembled part to part (4) with screw (D) and Phillips head screwdriver. Step 15 Ø7*60mm Attach the foot (6) to the base (4) using screw (H) and hex key (I).
- Page 9 Step 16 H H H Ø7*60mm Insert screw (H) into part (18) using a Hex Key (I). Step 17 Ø4,0*25mm Secure parts (18) to part (15) and (16) with screw (B) and Phillips head screwdriver. Step 18 Name and address of the supplier and date of production.
- Page 10 Step 19 Ø4,0*25mm Attach part (9) to part (8), with screws (B) and Philips head screwdriver. Step 20 Ø3,5*30mm Attach parts (41) and (32) to part (9) with screws (C) and Philips head screwdriver. Step 21 Insert part (13) between parts (41)and (32). Step 22 Attach part (14) to parts (41) and (32) with screws(C),and Phillips head screwdriver.
- Page 11 Step 23 Ø8*30mm Insert wooden dowel (A) into part (27). Step 24 Insert wood dowel (J) on the inside of the drawer, with the drawer inside the unit after having passed the wood dowel that is in the drawer slide. The dowel is not flush with the panel, it is a little inside the drawer to help when you need to...
- Page 12 Step 26 Wall anchor and hardware are included with this product. Please make sure hardware is suitable for your walls before installing, as different wall materials may require different types of anchors. With drilling machine make one hole in the wall, Insert part (N) in the hole.
- Page 13 Assembly Complete! P.13...


Need help?
Do you have a question about the BR1DATTNS and is the answer not in the manual?
Questions and answers