
Subscribe to Our Youtube Channel
Related Manuals for LAI Games SNAPSHOT 2 BOOTH


Summary of Contents for LAI Games SNAPSHOT 2 BOOTH
- Page 1 OPERATORS MANUAL Version 14 SNAPSHOT 2 BOOTH Software Version 3.3 PLEASE NOTE Read this manual before operating the machine. Page | 1 Visit www.laigames.com for support.
- Page 2 Authorization is hereby provided to you to copy this manual in its entirety provided such copies are used for non-commercial purposes and solely for use with LAI Games products. This authorization is specifically conditioned to include all legends, copyright, proprietary and other notices which appear herein are unaltered on any and all copies you make.
-
Page 3: Table Of Contents
Table of Contents SAFETY PRECAUTIONS ..........................6 MACHINE INSTALLATION AND INSPECTION ................... 7 INTRODUCTION ........................... 8 DESCRIPTION ............................8 SNAPSHOT 2 COMPANION APP ...................... 8 AUTOMATIC UPDATES ........................8 PACKAGING ............................. 8 CONTENTS ............................8 SPECIFICATIONS ..........................8 DIMENSIONS ........................... 8 ELECTRIC SUPPLY.......................... - Page 4 ERRORS.............................. 21 CURRENT ERRORS ......................... 24 ERROR HISTORY ..........................24 ERROR SETTINGS ........................... 24 PRINTER INFORMATION ........................24 SYSTEM SETTINGS ..........................25 PHOTO STORAGE .......................... 25 SCREEN CALIBRATION ........................25 CAMERA ALIGNMENT ........................25 TIME AND DATE SETTINGS ......................25 LANGUAGE ............................
- Page 5 VOLUME KNOB ..........................33 POWER INLET/MAINS SWITCH ...................... 33 POWER SUPPLY ..........................33 PRINTER TROUBLESHOOTING ......................34 PAPER JAMS ..........................34 LED STATUS INDICATOR ........................ 34 LAMPS ............................... 35 COIN DOOR LAMPS (LED) ......................35 BUTTON LAMPS (LED) ........................35 BOOTH LIGHTING (LED) .........................
-
Page 6: Safety Precautions
SAFETY PRECAUTIONS The following safety precautions and advisories are used throughout this manual and are defined as follows. * WARNING! * Disregarding this text could result in serious injury. * CAUTION! * Disregarding this text could result in damage to the machine. * NOTE! * Is an advisory text to hint or help understand. -
Page 7: Machine Installation And Inspection
Only qualified personnel should inspect or test the integrated circuit (IC) logic PC Boards. • If any integrated circuit (IC) logic PC Boards should need servicing, please contact the nearest LAI Games Distributor. (Refer to the back page of this manual) Page | 7... -
Page 8: Introduction
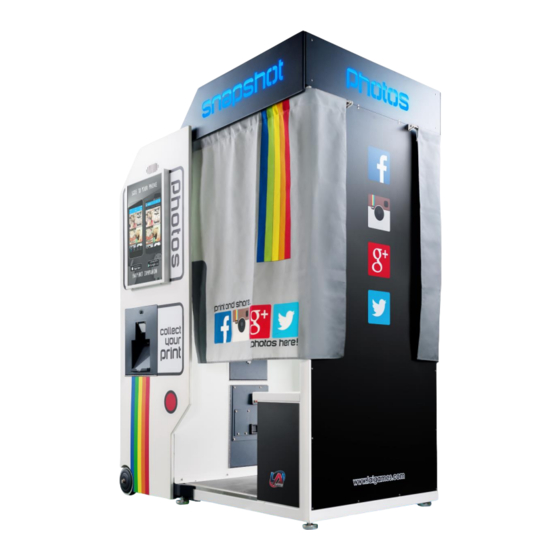
INTRODUCTION Congratulations on your purchase of Snapshot 2 by LAI Games. We hope you take the time to read this manual and learn about the many features and user-friendly adjustments that can be made to fine-tune the game for maximum earning potential. -
Page 9: Assembly
LOCATION REQUIREMENTS • Ambient temperature: 5C - 40C • Ambient humidity: • Ambient U.V. radiation: Very low • Vibrations level: ASSEMBLY EXTENDING THE CABINET BH L M5 X 20 mm (4x) Lock washer M5 (4x) Plate washer M5 (4x) • Remove two the bolts on the floor and two bolts on ceiling as pictured above. - Page 10 BH L M5 X 20 mm (4x) Lock washer M5 (4x) Plate washer M5 (4x) • • When the cabinet is fully extended, refasten the four bolts that were removed in the previous step. Page | 10...
-
Page 11: Gameplay And Modes
GAMEPLAY AND MODES HOW TO PLAY • Pay to play • Select a game mode • Take your photos (in masquerade mode, decorations are picked first) • Decorate your photos • Choose your print layout (upsell available here, if option enabled in Coin Settings) •... -
Page 12: Operation
OPERATION OPERATOR MENU GUIDE • MAIN MENU o GAME SETTINGS ▪ COIN SETTINGS ▪ BONUS CREDITS ▪ FREE PLAY ▪ SOUND SETTINGS ▪ EVENT MODE SETTINGS ▪ FOOTER LOGOS o AUDITS o INPUT AND OUTPUT TESTS ▪ LAMP TESTS ▪ INPUT TESTS ▪... -
Page 13: Initial Setup Procedure
You can expect to see your location in the Snapshot app 24-48 hours after your booth registration is completed. LAI Games will contact you when your location is live in the app. -
Page 14: Game Settings
GAME SETTINGS COIN SETTINGS • Coin 1 Number of Coins (Default: 1, Adjustable: 1-20) The number of coins that need to be inserted into coin mechanism one, for each credit. • Coin 1 Games per Credits (Default: 1, Adjustable: 1-20) The number of games for each credit inserted into coin mechanism one. -
Page 15: Bonus Credits
BONUS CREDITS • Level One (Default: Off, Adjustable: On/Off) Defines if the first level of bonus credits is active or not. o No. of Coins: This sets the number of coins that need to be inserted into coin mechanism 1 to reach the bonus credit level 1. o Bonus Credits: This sets the number of bonus credits that are given when credit level 1 is reached. -
Page 16: Event Settings
EVENT SETTINGS The Event Mode Settings menu displays important information on the right hand side. It displays if event mode is currently scheduled to begin at the event start time, as well as the event start and end time, and the total duration of the event in hours. It also shows how many prints have been printed during the current event time frame and in the previous event time frame. -
Page 17: Footer Logos
FOOTER LOGOS Manage the footer logos that appear at the bottom of each print. View, delete and activate existing footer logos, or import new footer logos. • Save Photos (Default: On, Adjustable: On/Off) Enable or disable printing the footer logo along the bottom of all photos. •... -
Page 18: Audits
AUDITS 1. Total Coins Mech 1 The total number of coin mech 1 pulses since the audits were last cleared 2. Total Coins Mech 2 The total number of coin mech 2 pulses since the audits were last cleared 3. Bonus Credits The total number of bonus credits issued 4. -
Page 19: Input And Output Tests
INPUT AND OUTPUT TESTS LAMP TESTS • PHOTO SLOT LIGHT Test the photo slot light, located at the top of the print chute. • TOP CAMERA LIGHT Test the arrow lamp that points to the top camera, located directly beneath the top camera. •... -
Page 20: Uploaded Photos
ACTION Select an upload and press the red SELECT button to use the action button of the selected upload. The Send Next action will move the selected upload to the next one in the queue. STATUS The status of the upload. Once a photo is successfully uploaded, it will appear in the Photos Uploaded menu. -
Page 21: Errors
ERRORS Error Name Cause Solution Release the coin sensor to clear the error. The coin sensor has been See Input Tests in the Input and Output Coin Jammed pressed for a long period of Tests section of the operator menu to time. - Page 22 Check that the printer is turned on and the Printer The printer has been cables are securely plugged in and restart Disconnected disconnected. the machine. The printer is busy, it may be Give the printer some time to finish Printer Busy trying to print documents in printing any backed up documents, then the printer queue...
- Page 23 Printer Press the "Feed and Cut" button on the Mechanical There is a mechanical error. front of the printer or perform a successful Error print to clear the error. Printer Turned The printer was turned off Please check that the printer is turned on Off While while printing.
-
Page 24: Current Errors
CURRENT ERRORS This menu lists information on all current/active errors. Further information on the error is provided in the information box on the left of the top screen. Use the UP and DOWN buttons to select an error, then press the red TEST button to attempt to clear it or be taken to the relevant menu for troubleshooting. -
Page 25: System Settings
SYSTEM SETTINGS • External Screen Side (Default: Left Side, Adjustable: Left Side/Right Side) Set which side of the booth the external screen and printer are located on. PHOTO STORAGE • Save Photos (Default: On, Adjustable: On/Off) Enable or disable saving a digital copy of all the photos taken. NOTE: If you are saving your customers photos, please let them know. -
Page 26: Setup Procedure
To take advantage of the full set of Snapshot 2 features, LAI Games strongly recommends that you connect your Snapshot 2 booth to the internet. This allows players to access a host of extra features available when using the free Snapshot 2 Companion app and highly incentivizes repeat plays. -
Page 27: Connect To A Network
CONNECT TO A NETWORK WIRED NETWORK 1. Plug an Ethernet cable into one of the two Ethernet ports on the Quixant. 2. Enter the operator menu and navigate to the Network Settings menu. 3. Select Connect to a Network. 4. Select the first option, “Wired Network.” 5. -
Page 28: Troubleshooting
UPLOAD A PHOTO TO A NEW ACCOUNT You don’t need the Snapshot Companion app to get a digital copy of your photos. Play any mode in Snapshot, and at the end of the game, when prompted, enter your email address (if the game never shows the registration screen, please return to the Network Settings menu and turn Internet Features on). -
Page 29: Creating A Bootable Usb
CREATING A BOOTABLE USB THINGS YOU WILL NEED • A completely empty USB that has a capacity of at least 4GB. • NOTE: Everything on this USB will be COMPLETELY ERASED. Ensure that there are no important files on it. •... -
Page 30: Updating A Cabinet Using A Bootable Usb
UPDATING A CABINET USING A BOOTABLE USB 1. Ensure that the cabinet is turned off. 2. Plug in the USB. Ensure that no other USB’s are plugged in. 3. Switch on the cabinet. 4. The operating system should boot straight into the USB, bringing up a black box that will display progress. -
Page 31: Section A: Service Instructions
SECTION A: SERVICE INSTRUCTIONS *NOTE* Be sure to read the following carefully before servicing the machine. LOCATING AND ACCESSING PARTS The following pictures identify the location of the main serviceable items. CABINET REAR Booth Lighting Bottom Camera Speakers Quixant Booth Lighting Monitor Controls Printer... -
Page 32: Operator Panel - Service Controls
OPERATOR PANEL – SERVICE CONTROLS Service / Back Utility Button Up button button USB Port Test / Enter button Counters 3x Volume knob Down button MONITOR CONTROLS Down button Select button Power button Up button Menu button Power LED Auto button Page | 32... -
Page 33: Parts Description
PARTS DESCRIPTION SPEAKERS 4 speakers are used for system sounds. Left audio channel is used for the 2 outside speakers and the right is used for the 2 inside speakers. COUNTERS Counters will increment for each coin input and each photo printed. All counters are under software control. -
Page 34: Printer Troubleshooting
PRINTER TROUBLESHOOTING PAPER JAMS 1. Ensure that the printer is turned on. a. Press the DOOR OPEN button on the front of the printer to open the door. b. If the door doesn’t open, restart the printer and try again. 2. -
Page 35: Lamps
LAMPS * WARNING * Always turn OFF mains power and unplug the game, before replacing any lamps. Always replace the lamps with the same or equivalent size, wattage and voltage. COIN DOOR LAMPS (LED) The coin door lamps all are 12V/DC T10 LED or equivalent and can be accessed via the coin door. BUTTON LAMPS (LED) The button lamps all are 12V/DC T10 LED or equivalent and can be accessed by removing the operator panel. -
Page 36: Printer
PRINTER * NOTE! * Thermal head maintenance should be done at least every two months to get the maximum lifetime possible about of the thermal head. YOU WILL NEED • Ethanol or Isopropyl Alcohol • Tissue Paper (folder in half about four times) BEFORE CLEANING •... -
Page 37: Section B: Technical Details
SECTION B: TECHNICAL DETAILS It is advised that anybody using SECTION B for repairing or modifying any of the components of the game should be a qualified technician, having at least a basic knowledge of digital components, integrated circuits and electricity. POWER SUPPLY The single universal AC input power supply generates 12VDC for the entire machine. -
Page 38: Coin Options Reference Guide
PIN7 = GND PIN8 = COIN2 input PIN9 = 12VDC Contact your nearest LAI Games distributor for harnessing to suit different coin comparators and bill acceptors. CARD SYSTEM REFERENCE GUIDE A 21 pin connector exists inside the coin door for connection to a card system. -
Page 39: Security Dongle
PIN14 = 12VDC POWER Output PIN15 = GND PIN16 = GND PIN17 = PRIZE METER Output PIN18 = MINOR METER Output PIN19 = TICKET METER Output Ticket mech connections allow a card system to intercept the ticket mech signals. If no card system is connected then ensure the loopback connector is installed (connects PIN5 to PIN6 and PIN9 to PIN10). -
Page 40: Usb Port Connections
USB PORT CONNECTIONS FB194 CONNECTOR WIRING FUSES FUSE 1 1A Fast J1 camera indicator (pin5) FUSE 2 3A Fast J11 fused power (pins 3,4) FUSE 3 3A Fast J8 counter power (pins 6,7) FUSE 4 3A Fast J11 high side switched power (pins 5,6) FUSE 5 1A Fast PCB logic supply... -
Page 41: Connectors
CONNECTORS J1 – Indicators Camera Indicator Lv1 Camera Indicator Lv2 Camera Indicator Lv3 +12VDC (fused) Harness connector shell: JST VHR-5N Harness connector pins: SVH-21T-P1.1 J2 – Quixant I/O DIN 1 – Service/Back Button DIN 0 – Test/Right Button DIN 3 – Down/Select Button DIN 2 –... -
Page 42: J9 - Power Input
Harness connector shell: JST VHR-7N Harness connector pins: SVH-21T-P1.1 Meters can be connected and powered by the fused pins 6 and 7. The PCB has on-board back-EMF diodes for use with inductive meters so no additional diodes are needed in the harness nor meters. Current per meter pin should be limited to 1.5A maximum. - Page 43 Page | 43...
- Page 44 Page | 44...
- Page 45 Page | 45...
- Page 46 Page | 46...
- Page 47 Page | 47...
- Page 48 Page | 48...
- Page 49 Page | 49...
- Page 50 By accepting delivery of and placing this hardware and licensed software into operation, the Operator represents and warrants that it will only operate the hardware and licensed LAI Games software provided by in compliance with the regulatory requirements of the...
- Page 51 WARRANTY LAI Games warrants its manufactured products for a period of 3 months inclusive of parts and labor from the date of sale. LAI Games exclusive obligation is to repair any item with any defects as a result of faulty...
- Page 52 Contact Us sales@laigames.com Sales and Enquiries: support@laigames.com Technical Support: www.laigames.com Website: For your nearest LAI Games Distributor, visit our web site at www.laigames.com Page | 52...
Need help?
Do you have a question about the SNAPSHOT 2 BOOTH and is the answer not in the manual?
Questions and answers