Advertisement
Quick Links
Advertisement

Related Manuals for NCR 7707-K261


Summary of Contents for NCR 7707-K261
- Page 1 Kit Instructions Handheld Scanner Holster 7707-K261 Issue A...
- Page 2 NCR, therefore, reserves the right to change specifications without prior notice. All features, functions, and operations described herein may not be marketed by NCR in all parts of the world. In some instances, photographs are of equipment prototypes. Therefore, before using this document, consult with your NCR representative or NCR office for information that is applicable and current.
-
Page 3: Revision Record
Revision Record Issue Date Remarks Apr 2022 First Issue... -
Page 5: Kit Contents
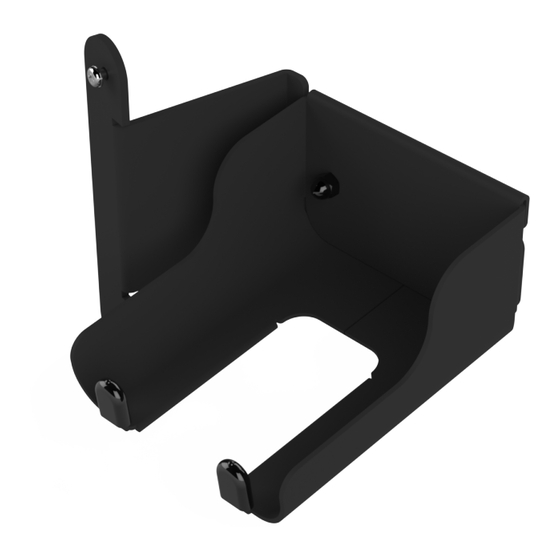
The Handheld Scanner Holster holds the Handheld Scanner. It is attached to a bracket, which can be installed on either side of the Terminal Display depending on the orientation of the NCR SelfServ™ Checkout (7707) unit. This publication provides procedures for installing a Handheld Scanner Holster on an NCR SelfServ™ Checkout (7707) unit. Kit Contents... -
Page 6: Installation Procedures
Removing the Wireless Antenna Module on page 8. Note: Both Semi-Self and Self-Checkout configurations of NCR SelfServ™ Checkout (7707) allows the 7702 Terminal Display to hold both the Wireless Card Antenna and the Handheld Scanner Bracket. Depending on the orientation of the unit, the two devices can be interchanged. - Page 7 Handheld Scanner Holster • For No-Handheld Scanner units, remove the Blanking Plate using a pry tool. Note: Remove all adhesive residues from the Blanking Plate. 4. Install the Handheld Scanner Bracket by doing the following: a. Install the Holster to the bracket using two acorn nuts.
- Page 8 Installing the Wireless Antenna Module page 12. 6. Install the Terminal Display Rear Cover. For more information, refer to Installing the Terminal Display Rear Cover on page 15. 7. Install the Terminal Display. For more information, refer to Installing the NCR Terminal Display on page 16.
- Page 9 Note: For the purpose of illustration only, this procedure shows images using a 7702 Terminal Display. 1. Shut down the NCR Terminal Display software and hardware systems. 2. Unlock the Tower frame from the back panels using a key. 3. Raise the Terminal Display.
- Page 10 Handheld Scanner Holster 4. Open the cable cover by pushing both ends as shown below. 5. Disconnect the cables from the terminal. 6. Remove six (6) screws to detach the Terminal Display from the Display Hinged Bracket, as shown in the image below. 7.
- Page 11 Handheld Scanner Holster Removing the Terminal Display Rear Cover To remove the Rear Cover of the Terminal Display, follow these steps: 1. Remove the cable cover. Note: Place the Terminal Display on a flat surface with the back facing up. 2.
- Page 12 Handheld Scanner Holster Removing the Wireless Antenna Module To remove the Wireless Antenna Module, follow these steps: Note: For more information about the wireless card and antenna, refer to the RealPOS XR7 (7702) POS User Documentation. 1. Remove the Terminal Display Rear Cover, if necessary. For more information, refer Removing the Terminal Display Rear Cover on the previous page.
- Page 13 Handheld Scanner Holster 4. At the back of the Display Collar, unhook the cable from the hook feature on the Display Collar, as shown in the image below. 5. Remove two (2) screws to detach the Wireless Antenna Module from the Display Collar, as shown in the image below.
- Page 14 Handheld Scanner Holster Removing the Handheld Scanner Bracket To remove the handheld scanner bracket, follow these steps: Note: The images in this procedure use the default orientation of the bracket. 1. Do the following: a. Remove the handheld scanner from the bracket. b.
- Page 15 Handheld Scanner Holster c. Remove the nine (9) screws to detach the Display Collar from the Terminal Display, as shown in the image below. 4. Remove two (2) screws to detach the scanner bracket from the Display Collar, as shown in the image below.
- Page 16 Handheld Scanner Holster Installing the Wireless Antenna Module To install the Wireless Antenna Module, follow these steps: Note: For more information about the wireless card and antenna, refer to the RealPOS XR7 (7702) POS User Documentation. 1. Secure the Wireless Antenna Module to the Display Collar using two (2) screws, as shown in the image below.
- Page 17 Handheld Scanner Holster 2. Route the cables through the cable management feature on the Display Collar, as shown in the image below. 3. Secure the Display Collar on the Terminal Display using nine (9) screws, as shown in the image below.
- Page 18 Handheld Scanner Holster 4. Connect the Ground and Wireless Antenna cables to the board, as shown in the image below. 5. Install the Terminal Display Rear Cover, if necessary. For more information, refer to Installing the Terminal Display Rear Cover on the facing page.
- Page 19 Handheld Scanner Holster Installing the Terminal Display Rear Cover To install the Rear Cover of the Terminal Display, follow these steps: 1. Attach and secure the rear cover on the back of the Terminal Display using two (2) screws, as shown in the image below. 2.
- Page 20 To install the NCR Terminal Display, follow these steps: Note: For the purpose of illustration only, this procedure shows images using a 7702 Terminal Display. 1. Remove the existing NCR Terminal Display, if necessary. For more information, refer to Removing the Terminal Display on page 5.
- Page 21 Handheld Scanner Holster 5. Close the the cable cover. 6. Turn on the NCR SelfServ Checkout hardware system. 7. Close the Terminal Display.
- Page 22 Handheld Scanner Holster Installing the Display Adaptor Plate To install the adaptor plate to the Terminal Display, follow these steps: 1. Do the following: a. Place the Adaptor Plate on a flat surface. b. Align the hinge to the Adaptor Plate and then secure using three (3) M4 machine screws.
- Page 23 Handheld Scanner Holster 2. Place the NCR Terminal Display on a flat surface with the back facing up. 3. Attach the Adaptor Plate to the Display, as shown in the image below. 4. Install the Anti-tilt Bracket using two (2) M4 machine screws, as shown in the image...
Need help?
Do you have a question about the 7707-K261 and is the answer not in the manual?
Questions and answers