Advertisement
Quick Links
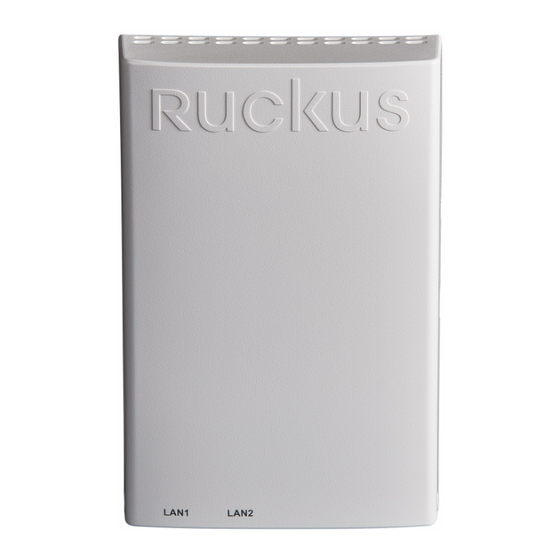
Unleashed H320 Access Point
Quick Setup Guide
This Quick Setup Guide provides step-by-step instructions on how
to set up your Ruckus Wireless Unleashed H320 Dual Band
802.11ac Wave 2 Wall Switch Access Point. After completing the
steps described in this guide, you will be able to access the
Access Point (AP) and begin providing wired and wireless network
access to users.
The Unleashed H320 has many options:
•
It can be mounted on a standard USA- or EU-style single-
gang wall outlet box.
•
Provides two stream, dual-band 11ac Wave 2 Wi-Fi (5 GHz -
2x2:2; 2.4 GHz - 1x1:1).
•
Includes one 10/100/1000 uplink port and two 10/100 access
ports.
•
It can be powered by a customer-supplied IEEE 802.3af- or
802.3at-compliant PoE switch or injector.
Note: The Unleashed H320 does NOT support Mesh.
T
G
O
L
HIS
UIDE IN
THER
ANGUAGES
请从以下网站获得该指南的简体中文版
•
https://support.ruckuswireless.com
•
Vous trouverez la version française de ce guide à l'adresse
suivante
https://support.ruckuswireless.com
こ の ガ イ ド の⽇本語版は
•
https://support.ruckuswireless.com
で ご 覧 く だ さ い
이 가이드의 한국어 버전은 웹 사이트
•
(https://support.ruckuswireless.com) 에서 확인하시기 바랍니
다
•
Veja a versão em português (Brasil) deste guia em
https://support.ruckuswireless.com
•
Puede ver la versión en español (América Latina) de esta guía
en
https://support.ruckuswireless.com
Copyright © 2017 Ruckus Wireless, Inc.
Published July 2017, Part Number 800-71475-001 Rev B
B
Y
B
EFORE
OU
EGIN
Before deploying Ruckus Wireless products, please check for the
latest software and the release documentation.
•
User Guides and Release Notes are available at
http://support.ruckuswireless.com/documents
•
Software Upgrades are available at
http://support.ruckuswireless.com/software
•
Open Source information is available at
http://opensource.ruckuswireless.com
•
Software License and Limited Warranty are available at
http://support.ruckuswireless.com/warranty
P
C
ACKAGE
ONTENTS
•
Unleashed H320 Wall Switch Access Point
•
Mounting bracket
•
Two 6mm M3x0.5 thread Torx flat head machine screws
•
Two 1" 6-32 thread Phillips pan head machine screws
•
Product warranty statement
•
Regulatory flyer
•
Declaration of Conformity, if required
•
This Quick Setup Guide
S
1: C
T
TEP
OLLECTING
OOLS AND
R
EQUIREMENTS
•
No. 2 Phillips screwdriver and T10 Torx driver for the mounting
bracket screws
•
A standard USA- or EU-style single-gang wall outlet box
•
One of the following:
•
Customer-supplied IEEE 802.3af/at-compliant PoE switch
•
Customer-supplied IEEE 802.3af/at-compliant PoE
injector
•
An Ethernet cable (Cat5e, or better) supplying PoE power and
network connectivity run through the wall from your LAN to the
wall outlet box
•
A computer with an Ethernet port and a Wi-Fi network adapter
S
2: C
TEP
P
OWER AND
Figure 1: Front view
1
After removing your Unleashed AP from its package, connect
it to your network switch or router using an Ethernet cable.
2
Using an AC adapter (sold separately), connect the AP 12VDC
port to a protected power source.
•
Alternatively, connect the PoE port to a PoE injector or
PoE switch for both power and network connections.
S
ETUP
Note: If you will be using PoE, then you will need a Cat5e (or
better) Ethernet cable to connect the AP to the PoE injector or
switch.
3
Verify that the PWR LED on the rear of the enclosure is a
steady green.
Figure 2: Rear and bottom view
U
H320
ONNECTING THE
NLEASHED
Y
N
OUR
ETWORK
Page 1 of 4
TO
Advertisement

Related Manuals for Ruckus Wireless Unleashed H320


Summary of Contents for Ruckus Wireless Unleashed H320
- Page 1 This Quick Setup Guide provides step-by-step instructions on how ACKAGE ONTENTS to set up your Ruckus Wireless Unleashed H320 Dual Band • Unleashed H320 Wall Switch Access Point 802.11ac Wave 2 Wall Switch Access Point. After completing the •...
- Page 2 H320 screw holes into the threaded inserts on the sides of the mounting bracket. Continue with Step 5: Log In and Run the Setup Wizard. Page 2 of 4 Copyright © 2017 Ruckus Wireless, Inc. Published July 2017, Part Number 800-71475-001 Rev B...
- Page 3 For more information on managing your Unleashed network, steps in the Setup Wizard and click Finish. refer to the Ruckus Wireless Unleashed Access Point Online Your Wireless LANs Figure 7. Complete the Setup Wizard to set up your Unleashed network...
- Page 4 Page 4 of 4 Copyright © 2017 Ruckus Wireless, Inc. Published July 2017, Part Number 800-71475-001 Rev B...
Need help?
Do you have a question about the Unleashed H320 and is the answer not in the manual?
Questions and answers