
Subscribe to Our Youtube Channel
Related Manuals for Ruckus Wireless MediaFlex 7811


Summary of Contents for Ruckus Wireless MediaFlex 7811
-
Page 1: User Guide
MediaFlex 7811 Access Point and MediaFlex 7111 Adapter User Guide Part number: 800-70163-001 June 2008... - Page 2 In the interest of improving internal design, operational function, and/or reliability, Ruckus Wireless, Inc. reserves the right to make changes to the products described in this document without notice. Ruckus Wireless, Inc. does not assume any liability that may occur due to the use or application of the product(s) or circuit layout(s) described herein.
-
Page 3: Table Of Contents
Ruckus Wireless MediaFlex 7811 Access Point ........ - Page 4 Manually Configuring an IP Address on Your Computer ......Connecting and Configuring Your Ruckus 7111 Adapter......
-
Page 5: Preface
Preface This Ruckus Wireless MediaFlex 7811 Access Point User Guide will help you understand the Ruckus Wireless MediaFlex 7811 Access Point — how to install it, and configure it using the Ruckus Wireless Web Interface. Who Should Use This Guide This User Guide assumes that the reader has basic to intermediate computer and Internet skills. -
Page 6: System Requirements
• Internet Explorer version 6.0 • Netscape version 8.1 • Firefox version 1.5.0.6 • Safari 1.0 Support and Warranty Information See the Warranty card for detailed information about contacting Technical Support, and the Warranty terms for your 7811. Ruckus Wireless MediaFlex 7811 Access Point... -
Page 7: Chapter 1: Introduction
Chapter 1: Introduction Congratulations on your purchase of the Ruckus Wireless MediaFlex 7811 Access Point (7811). The 7811 is a device that enables wireless multimedia networking for video, voice and data, without replacing existing routers, network adapters and media receivers. -
Page 8: Mediaflex
MediaFlex™ MediaFlex™ MediaFlex™ is Ruckus Wireless, Inc.’s family of purpose-built, multimedia WiFi devices that enable reliable wireless distribution of entertainment-quality, real-time media applications throughout the home. Media applications require consistent and uninterrupted bandwidth; however most wireless LANs (WLANs) cannot provide consistent service because of the variable nature of the wireless medium. - Page 9 • Attaches to installed routers or home gateways via Ethernet to optimize the WLAN without replacing existing router, firewall or media devices • Compatible with the emerging 802.11n WLAN standard • Virtual AP support of one BSSID • HTTPS management • SSH management • Device-specific certificates Ruckus Wireless MediaFlex 7811 Access Point...
- Page 10 Key Features (This page intentionally left blank.) Ruckus Wireless MediaFlex 7811 Access Point...
-
Page 11: Chapter 2: Installation And Setup
• Ruckus Wireless MediaFlex 7811 Access Point ........ -
Page 12: Packing List
1. Ruckus Wireless MediaFlex 7811 Access Point 2. AC power adapter (Output DC 5-18V 1-2A) 3. Category 5 (CAT5) Ethernet Cable 4. Ruckus Wireless MediaFlex 7811 Quick Setup Guide 5. Limited Warranty Statement and Software License Agreement 6. Federal Communications Commission Notices... -
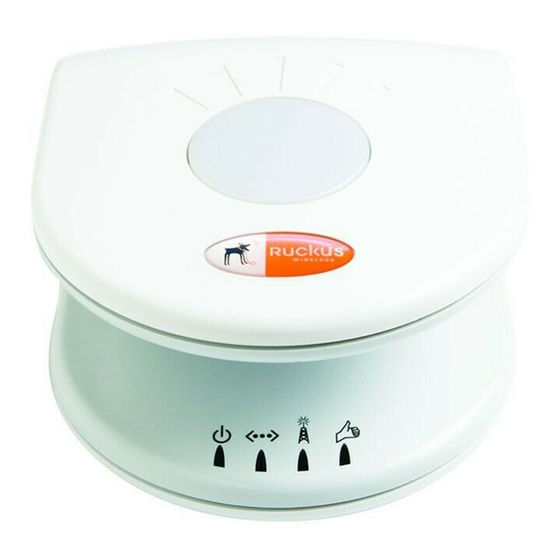
Page 13: Led Status Lights
WLAN is not up. Green Good signal quality at the service provider WLAN interface. Signal Quality Flashing Green Marginally acceptable signal quality at the service provider WLAN interface. No station associated with service provider WLAN. Ruckus Wireless MediaFlex 7811 Access Point... -
Page 14: Rear View
Reset button. Used only if you need to reset the 7811 to its factory default settings. Insert the end of a paper clip or pin into the hole and hold it in for at least 8 seconds. Ruckus Wireless MediaFlex 7811 Access Point... -
Page 15: Placement Guidelines
– This is not the same icon as your home wireless network. 3. In the Local Area Connection Properties window, select Internet Protocol (TCP/IP) and click Properties. The Internet Protocol (TCP/IP) Properties window (Figure 4) appears. Ruckus Wireless MediaFlex 7811 Access Point... -
Page 16: Connecting The 7811
The Power LED will turn green when you connect the power. 2. Connect the CAT5 Ethernet cable to the WAN port on the 7811 and the Ethernet port on your PC. The WAN Connectivity LED should turn steady green. Ruckus Wireless MediaFlex 7811 Access Point... - Page 17 – Depending on your Service Provider's configuration, the default values might be different from what is stated in this table. 4. The Security Alert window appears (Figure Figure 5—Security Alert window 5. Click Yes. Ruckus Wireless MediaFlex 7811 Access Point...
- Page 18 Connecting and Configuring the 7811 Figure 6—Login Window 6. The login screen appears, type the appropriate Username and Password shown in Table 7. Click Login. The Status > Device window appears (Figure Figure 7—Status > Device Window Ruckus Wireless MediaFlex 7811 Access Point...
-
Page 19: Configuring Wireless Settings
Figure 8—Configuration > Wireless Settings (Common) – The value for Wireless Mode is fixed to 5GHz (802.11a/n) and is not configurable. 2. For Channel, choose SmartSelect. 3. When you are finished, click Update Settings. 4. Click Update Settings. Ruckus Wireless MediaFlex 7811 Access Point... -
Page 20: Troubleshooting Setup
7. Check the LED status lights to verify correct operation. • Make sure you are using the correct power adapter supplied by Ruckus Wireless. • Make sure the Power LED is lit. If it is not lit, make sure that the power cord is properly connected to the 7811, and that the AC power adapter is properly connected to a functioning power outlet. -
Page 21: Chapter 3: Configuration
• Ruckus Wireless Web Interface Menus ........ -
Page 22: Wireless Settings Worksheet
The SSID for the service provider. This is typically used for streaming IPTV video 7811 SSID content. SSID___________________________________________________________ Encryption Method If using WPA-PSK, write down the passphrase. The WPA-PSK passphrase is case-sensitive. WPA Version:______________________________________ WPA Algorithm____________________________________ WPA Passphrase: ________________________________ Ruckus Wireless MediaFlex 7811 Access Point... -
Page 23: 7811 Settings Worksheet
DHCP response from the _______________________________ DHCP server) Subnet Mask 255.255.255.0 _______________________________ Service Provider SSID V54-xxxxxx where xxxxxx are the last six _______________________________ digits of the MAC address. Wireless Mode Not configurable 5GHz (802.11a/n) - Fixed Ruckus Wireless MediaFlex 7811 Access Point... -
Page 24: Ruckus Wireless Web Interface Menus
Ruckus Wireless Web Interface Menus Ruckus Wireless Web Interface Menus The Ruckus Wireless Web Interface menus are located on the left-hand navigation pane. To select a particular menu, simply click on the menu link. Common Buttons The Ruckus Wireless Web Interface screens contain the following menu buttons (Table Table 6—Wireless Web Interface Menu Buttons... - Page 25 Service Provider Username and Password. • Home Login Username and Password (plus Password Confirmation) • (Service Providers only) Service Provider Login Username and Password (plus Password Confirmation) 3. Click Update Settings to save your settings. Ruckus Wireless MediaFlex 7811 Access Point...
-
Page 26: Customizing The System Configuration
CAUTION:—You must click the Update Settings button to save your settings. The Ruckus WebUI will timeout after 5 minutes of inactivity. If you let the system time out before clicking the Update Settings button, any setting changes you made will be lost. - Page 27 Static IP, DHCP or PPPoE. Typically for cable modem access, DHCP is used. For DSL access, PPPoE is used. You must get the PPPoE username and password from your ISP. Ruckus Wireless MediaFlex 7811 Access Point...
-
Page 28: Configuring The Wireless Settings
Before changing any settings in the Wireless configuration menu, make sure you have recorded and verified the information in "7811 Default and User Settings Worksheet" on page To configure the Wireless settings, do the following: 1. Go to Configuration > Wireless. Figure 11—Configuration :: Wireless tab Ruckus Wireless MediaFlex 7811 Access Point... - Page 29 For 7811s shipped in the United States, the country code cannot be modified. The country code is pre-defined for United States only. 3. Click the Edit Common Settings button by Advanced Settings. The window of Figure 13 appears. The settings are described in Table Ruckus Wireless MediaFlex 7811 Access Point...
- Page 30 Incorrect settings can impact wireless performance. It is recommended that you keep the default settings for best performance. 4. Click Update Settings to save your settings. 5. Once back under the Configuration :: Wireless :: Common settings, click the Video WLAN tab. Ruckus Wireless MediaFlex 7811 Access Point...
- Page 31 In a noisy environment, the threshold should be adjusted to a smaller size to minimize retransmission and increase the reliability of the transmission. The default value is 2346. 6. Click Update Settings to save your settings. Ruckus Wireless MediaFlex 7811 Access Point...
-
Page 32: Configuring Wpa
WPA-PSK, and are configured with the same passphrase. Figure 15 shows the WPA-PSK window. Figure 15—WPA-PSK Wireless Settings 1. Go to Configuration > Wireless. 2. Click the Video WLAN tab. 3. Select WPA-PSK in the Encryption Method drop-down menu. Ruckus Wireless MediaFlex 7811 Access Point... - Page 33 Enter any combination of printable characters. The Passphrase must be between 8 and 32 characters long. 4. In the Configuration > Wireless menu, enter a passphrase. 5. Click Update Settings to save your settings. Ruckus Wireless MediaFlex 7811 Access Point...
-
Page 34: Viewing Status Information
32, and "Local Services Status" on page Device Status The Status page shows current status and configuration information about the Ruckus Wireless Router or Adapter. Figure 16 shows the Device Status window. You can bring up the window by choosing Status >... - Page 35 When enabled, a service provider will not be able to view the home user device user name, password, SSID, security mode and security keys. Only the home user can change this setting. It must be changed using the Configuration > Device Window. Ruckus Wireless MediaFlex 7811 Access Point...
-
Page 36: Internet Status
This is the secondary DNS server IP address. NTP Server IP address or hostname of the NTP server which synchronizes time on the 7811 and managed 7111 adapters. Connection Status This indicates the status of the Internet interface, Up or Down. Ruckus Wireless MediaFlex 7811 Access Point... - Page 37 – When Internet connection type is either DHCP or PPPoE, if the 7811 does not receive the dynamic IP address from DHCP server or PPPoE server, the default IP address for WAN port will be 192.168.2.1. Ruckus Wireless MediaFlex 7811 Access Point...
-
Page 38: Wireless Status
Wireless Status Window. You can bring up the window by choosing Status > Wireless. Note that the common settings are displayed. Figure 18—Status :: Wireless :: Common To view the wireless status of the Video WLAN, click the Video WLAN tab (Figure 19). Ruckus Wireless MediaFlex 7811 Access Point... - Page 39 Wireless Status Shows the status as either Up or Down. Broadcast SSID Shows the visibility status of your SSID as enabled (visible to anyone looking for wireless networks) or disabled (not visible). Ruckus Wireless MediaFlex 7811 Access Point...
-
Page 40: Local Services Status
7811’s wireless network. Each service is listed by name, and includes the IP address assigned to the service and the port over which the service operates. Figure 20—Local Services status window Ruckus Wireless MediaFlex 7811 Access Point... -
Page 41: Access Control
If you select “Allow only stations listed in the Access Control Table”, then stations entered into the access-controls table are allowed but all others are disallowed. To add MAC addresses, see "Configuring Access Control" on page Ruckus Wireless MediaFlex 7811 Access Point... -
Page 42: Configuring Access Control
"Access Control Options" on page 35.) The Access Control Table appears [with no entries] Figure 22—Access Control allow settings 3. Click the Add new entry button to add a MAC address to the table. Ruckus Wireless MediaFlex 7811 Access Point... -
Page 43: Access Control Table Columns
24 million of them (the table size is limited in the AP/Router to 128 entries). Some manufacturers produce devices using more than one OUI, in which case you may need to enter each applicable one. • Remove: Check the 'Remove' box for any row(s) you no longer want used. Ruckus Wireless MediaFlex 7811 Access Point... -
Page 44: Removing Mac Addresses From A List
MAC addresses”. By default, the “Remove” box is checked in each of these. Un-check it for those devices you want included in the table. When you click Update, only entries in the table whose “Remove” check box is un-checked will be included in the Access Control table. Ruckus Wireless MediaFlex 7811 Access Point... -
Page 45: Chapter 4: Maintenance
• Administration Information ............49 Ruckus Wireless MediaFlex 7811 Access Point... -
Page 46: Upgrading The Firmware
2. If you want to use TFTP to download the firmware image, select TFTP as the Upgrade Method. 3. Under TFTP Options, enter the IP Address or hostname of the TFTP Server, the listening port (69 by default), and the name of the image control file. Figure 24—Maintenance > Upgrade—TFTP Ruckus Wireless MediaFlex 7811 Access Point... - Page 47 • If you want to perform a manual upgrade, click Perform Upgrade. The window of Figure 25 appears. – When entering the server name for firmware upgrade, make sure the Fully Qualified Domain Name (FQDN) is entered (for example, fwupdate.ruckuswireless.com). Figure 25—Download Started Ruckus Wireless MediaFlex 7811 Access Point...
-
Page 48: Performing A Firmware Upgrade Using Ftp
• If you want to perform a manual upgrade, click Perform Upgrade. The window of Figure 25 appears. – When entering the server name for firmware upgrade, make sure the Fully Qualified Domain Name (FQDN) is entered (for example, fwupdate.ruckuswireless.com). Ruckus Wireless MediaFlex 7811 Access Point... -
Page 49: Performing A Firmware Upgrade Using Http
Before you perform a local firmware upgrade, take note of the current software version on the Status :: Device page. You need to know the current software version to verify that the upgrade process was successfully completed. To perform a local firmware upgrade Ruckus Wireless MediaFlex 7811 Access Point... - Page 50 Upgrading the Firmware 1. Visit the Ruckus Wireless Web site, and then download the latest firmware for 7811. You can find the 7811 firmware files at http://support.ruckuswireless.com/software/for_product/mf7811. Take note of the version number of the firmware that you are downloading.
- Page 51 9. Log back into the 7811 Web interface, and then check if the software version number on the Status :: Device page has been updated. If it reflects the version number of the firmware that you downloaded earlier, this indicates that the upgrade was completed successfully. Ruckus Wireless MediaFlex 7811 Access Point...
-
Page 52: Rebooting The System
Dome LED on the top of the 7811 will momentarily go out, then light up again. • Click the Reset Now link to reset the device to factory settings; thus, erasing any of your custom settings. Ruckus Wireless MediaFlex 7811 Access Point... - Page 53 Rebooting the System The reboot in progress window appears (Figure 31). Figure 31—Reboot in Progress Window The system notifies you when it is done (Figure 32). Figure 32—Reboot Done Ruckus Wireless MediaFlex 7811 Access Point...
-
Page 54: Taking A System Support Snapshot
• FTP: Specify the FTP server’s IP address, username and password, and then enter a filename for the snapshot. • Save to Local Computer: Right-click on the link that appears and save. Navigate to the folder where you want the file saved and click Save. Ruckus Wireless MediaFlex 7811 Access Point... -
Page 55: Administration Information
Predefined network configuration in the system. The 7811 can be preconfigured into a different network profile. Telnet Access Allows you to enable or disable Telnet access to the Ruckus Wireless device. By default, this option is disabled (inactive). Telnet Port Lists the default Telnet port of 23—only if Telnet is active. - Page 56 Table 15—Administration Management Window Parameters (Continued) Field Description SSH Access? Allows you to enable or disable SSH access to the Ruckus Wireless device. By default, this option is enabled (active). SSH Port Specifies the port number for Telnet access. The default port number is...
- Page 57 Administration Information Figure 35—TR069 Management Options and TR069 Status Ruckus Wireless MediaFlex 7811 Access Point...
-
Page 58: Administration Diagnostics
3. To use the traceroute command, enter the IP address you wish to trace and click Run test. The results appear in the Traceroute results window. – It may take some time before the results are displayed. Ruckus Wireless MediaFlex 7811 Access Point... -
Page 59: Administration Log
Administration Information Administration Log The current log screen shows the log messages kept by the Ruckus Wireless Router since it was last rebooted. The log has limited size: the oldest messages are replaced as new messages arrive. It also sends the messages to a server (the Syslog server) that you designate. To configure the administrator log: 1. - Page 60 Administration Information (This page intentionally left blank.) Ruckus Wireless MediaFlex 7811 Access Point...
-
Page 61: Chapter 5: 7111 Adapter Setup, Provisioning, And Management
• Connecting and Configuring Your Ruckus 7111 Adapter ....... . .57... -
Page 62: Packing List
8. If you still cannot connect, turn off all network devices. 9. Power on the router and the access point. 10. Turn on the 7111. 11. Turn on the set-top box. 12. Check the LED status lights to verify correct operation (Figure 38). Ruckus Wireless MediaFlex 7811 Access Point... -
Page 63: Verifying Proper Provisioning
1. Move the 7111 next to your computer. 2. Connect the AC power adapter to the Ruckus 7111 and plug the other end into either a power outlet or to a surge protector that is plugged into a power outlet. -
Page 64: What Is Auto Provisioning
7. Unplug the Ethernet cable from the 7111. The 7111 will reboot automatically. Be sure that the 7111 is rebooting by checking the three right most LEDs. 8. If the 7811 and the 7111 are correctly auto provisioned and associated, the right two LEDs of the 7111 should show constant green. Ruckus Wireless MediaFlex 7811 Access Point... -
Page 65: Resetting To Factory Defaults
The adapter will go back to the original parameters as provisioned from the factory. If you want to retain the parameters from the AP, you must repeat the auto provisioning process described above. Ruckus Wireless MediaFlex 7811 Access Point... -
Page 66: Adapter Management
1. Login to the wireless Web interface of the 7811. 2. Go to Status :: Wireless. 3. Click the Video WLAN tab. In the Connected Devices table, note the Ruckus Adapter Management column. This column has one of two values: •... -
Page 67: Disabling Adapter Management
2. Go to Status :: Wireless. 3. Click the Video WLAN tab. In the Connected Devices table, note the Ruckus Adapter Management column. 4. Click the STA WebServer link. A separate browser window opens to the 7111’s Web user interface login page. -
Page 68: Enabling Adapter Management
2. Go to Status :: Wireless. 3. Click the Video WLAN tab. In the Connected Devices table, note the Ruckus Adapter Management column. 4. Click the STA WebServer link. A separate browser window opens to the 7111’s Web user interface login page. -
Page 69: Appendix A: Technical Specifications
Performance and Supported Configurations Target UDP throughput 30Mbps-40Mbps sustainable throughout a typical 2500 ft (300 m ) home Number of simultaneous video streams The aggregated throughput of multiple video streams can reach up to 30Mbps-40Mbps Ruckus Wireless MediaFlex 7811 Access Point... -
Page 70: Traffic Management And Qos
Voice, Video, Best Effort and Background Number of hardware queues Number of software queues Management Configuration and monitoring interface Ruckus Wireless Web User Interface (WebUI), Telnet Login Service Provider Username: super Statistics Wireless and associated stations Accessible via Ruckus Wireless Web Interface... -
Page 71: Appendix B: Configuration Worksheets
The SSID for the service provider. This is typically used for streaming IPTV video VF7811 SSID content. SSID___________________________________________________________ Encryption Method If using WPA-PSK, write down the passphrase. The WPA-PSK passphrase is case-sensitive. WPA Version:______________________________________ WPA Algorithm____________________________________ WPA Passphrase: ________________________________ Ruckus Wireless MediaFlex 7811 Access Point... - Page 72 DHCP response from the _______________________________ DHCP server) Subnet Mask 255.255.255.0 _______________________________ Service Provider SSID V54-xxxxxx where xxxxxx are the last six _______________________________ digits of the MAC address. Wireless Mode Not configurable 5GHz (802.11a/n) - Fixed Ruckus Wireless MediaFlex 7811 Access Point...
Need help?
Do you have a question about the MediaFlex 7811 and is the answer not in the manual?
Questions and answers