Thermo Scientific 7451 Operating And Maintenance Manual
Cryomed controlled rate freezer
Hide thumbs
Also See for 7451:
- Operating and maintenance manual (120 pages) ,
- Manual (138 pages) ,
- Instruction sheet (5 pages)

Related Manuals for Thermo Scientific 7451


Summary of Contents for Thermo Scientific 7451
- Page 1 Model 7450 and 7470 Series CryoMed Controlled Rate Freezer Operating and Maintenance Manual 7017452 Rev. 3...
- Page 2 1. Installation of the National Instruments LabView Run Time Engine is required for proper operation of the PC Interface Software. 7450 7456 2. A PDF version of the Windows Help file for the PC Interface 7451 7457 Software is located on the CD-ROM. The file name is 7452 7458 “Help_PC_Interface.pdf ”.
- Page 3 Thermo Fisher Scientific makes no representations or warranties with respect to this manual. In no event shall Thermo be held liable for any damages, direct or incidental, arising out of or related to the use of this manual. ©2010 Thermo Fisher Scientific. All rights reserved. Controlled Rate Freezer Thermo Scientific...
- Page 4 Always use the proper protective equipment (clothing, gloves, goggles, etc.) 4 Always dissipate extreme cold or heat and wear protective clothing. 4 Always follow good hygiene practices. 4 Each individual is responsible for his or her own safety. Thermo Scientific Controlled Rate Freezer...
- Page 5 We can also provide you with a quotation on our Extended Warranty for your Thermo Scientific products. Whatever Thermo Scientific products you need or use, we will be happy to discuss your applications. If you are experiencing technical problems, working together, we will help you locate the problem and, chances are, correct it yourself...over the telephone without a service...
-
Page 6: Table Of Contents
Holder Adjustment ........2-21 Thermo Scientific... - Page 7 Saving Changes ........10-26 Sharing Host PC Resources ......10-26 Controlled Rate Freezer Thermo Scientific...
-
Page 8: Introduction
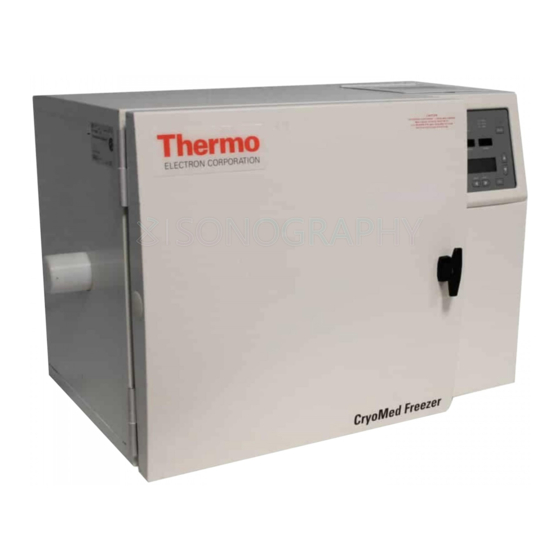
Introduction Section 1 Figure 1-1. Non-IVF Controlled Rate Freezer Figure 1-2. IVF Controlled Rate Freezer (FDA clearance for human research) Thermo Scientific Controlled Rate Freezer... -
Page 9: Standard Features
Displays There are three displays on the Controlled Rate Freezer control panel: Chamber and Sample temperature, ranging from +54° to -199°C, the LCD Display for profile status, messages, and freezing profile editing and viewing. Controlled Rate Freezer Thermo Scientific... -
Page 10: Indicators
Graphs and cycle data, as well as additional information, are printed out at the top of the unit on a thermal printer in real-time mode. A connector is also available on the back of the unit for an customer-provided strip chart temperature recorder. Thermo Scientific Controlled Rate Freezer... -
Page 11: Pre-Set Profiles
Step 4 ....... . .End Controlled Rate Freezer Thermo Scientific... - Page 12 Step 7 ....... . .End Thermo Scientific Controlled Rate Freezer...
- Page 13 Step 7 ....... . .End S = Sample Temperature C = Chamber Temperature C/m = degrees Centigrade per Minute Controlled Rate Freezer Thermo Scientific...
-
Page 14: Set-Up And Operation
When closing the freezer door, be sure to turn the handle 180° in rotation to fully seal the door. Figure 2-1. Connections on Unit Back Thermo Scientific Controlled Rate Freezer... - Page 15 Section 2 Set-Up and Operation Figure 2-2. Clearance for All Units Controlled Rate Freezer Thermo Scientific...
-
Page 16: Supplies
2 Pollution Degree describes the amount of conductive pollution present in the operating environment. Pollution Degree 2 assumes that normally only non-conductive pollution such as dust occurs with the exception of occasional conductivity caused by condensation. Thermo Scientific Controlled Rate Freezer... -
Page 17: Sample Thermocouple Connection
4. To choose a profile, scroll through the selections using the up/down arrow keys. The profiles are displayed in a loop. Pressing either of the arrow keys consecutively brings the list back to the starting point. Controlled Rate Freezer Thermo Scientific... -
Page 18: Access Code Security
5. Press the Run key. If the chosen profile begins with a Wait, the Run key must be pressed again to continue, after the appropriate temperature is reached. 6. The mode indicator is lit, showing the status of the profile. Thermo Scientific Controlled Rate Freezer... -
Page 19: Stop A Profile Run
However, Access Code protection is not required on an End step. If a power outage interrupts a run, the profile will restart from the point of interruption when power is restored. See Alarms in this section. Controlled Rate Freezer Thermo Scientific... -
Page 20: Manual Override
1. Locate the arrow to the left of the option that is on the top line of the display. Move the profile (USER 1 through USER 10) that you wish to view or edit to the top line by pressing the up or down arrow keys. Thermo Scientific Controlled Rate Freezer... - Page 21 Step 1 contains a command with a cursor blinking just to the right of a left pointing arrow (← __ ). With the cursor in this position, use the up or down arrow keys to scroll through the available commands. Controlled Rate Freezer Thermo Scientific...
- Page 22 For example, if the chamber set point is 30°C, the controller will ramp to 31°C until the setpoint is reached. Graph print-outs show this ramp Figure 2-4. Ramp Settings setting. Thermo Scientific Controlled Rate Freezer...
-
Page 23: Copy And Paste Pre-Set And User Profiles
When the desired User Profile is showing on the first line of the display, press the Enter key to complete the paste operation, or press Back to cancel. 2-10 Controlled Rate Freezer Thermo Scientific... -
Page 24: Recorder
Run start time and date Profile name 1234 cell culture media User information D.M.S.O. Time/Temp scale Chamber temp Sample temp Profile steps listed as they occur Temp tracking alarm Profile line Figure 2-4. Print-outs Thermo Scientific Controlled Rate Freezer 2-11... -
Page 25: Alarms
Chamber thermocouple is corrected. Once resolved, the second depression of the Silence key will turn off the alarm indicator, clear the alarm message from the fourth line of the LCD display, and enable all operating functions. 2-12 Controlled Rate Freezer Thermo Scientific... -
Page 26: Sample Thermocouple Open
Sample thermocouple is corrected. Once resolved, the second depression of the Silence key will turn off the alarm indicator, clear the alarm message from the fourth line of the LCD display, and enable the Run key. Thermo Scientific Controlled Rate Freezer 2-13... - Page 27 Once resolved, the second depression of the Silence key will turn off the alarm indicator, clear the alarm message from the fourth line of the LCD display, and enable the Run key. 2-14 Controlled Rate Freezer Thermo Scientific...
-
Page 28: Heater Malfunction
However, the alarm message remains on the fourth display line until the Silence key is depressed. If the temperature of either probe continuously exceeds the pre-set limit temperatures for more than 10 minutes, the unit will immediately switch to Idle Mode and disable all functions. Thermo Scientific Controlled Rate Freezer 2-15... - Page 29 Alarm LED will stop flashing and the audible alarm will silence (if the Silence key has not already been pressed). However, the alarm message will remain on the fourth display line until the Silence key is pressed a second time. 2-16 Controlled Rate Freezer Thermo Scientific...
-
Page 30: Power Failure
The controller will maintain the temperature of the final step in the profile run until the run is stopped by the operator pressing the Back key. Caution If performing successive runs, dry the gaskets and heat breaks between each run. Thermo Scientific Controlled Rate Freezer 2-17... -
Page 31: Warm Complete
Note: The printer continues to print current Run data even though the ‘Printer Buffer Full’ alarm has occurred. IVF Sample Holders Included with the IVF Controlled Rate Freezer are a straw holder, vial holder, cane holder and access port plugs. 2-18 Controlled Rate Freezer Thermo Scientific... -
Page 32: Using A Vial Holder
4. To install the straw probe, insert the probe down the center of the button indicated below. Slide the probe down through the holder until it feeds through the center straw. Thermo Scientific Controlled Rate Freezer 2-19... -
Page 33: Using The Cane Holder
If the cane holder is used with a sample probe, use the standard 1.2ml vial probe. Connect the probe to the internal sample probe connection. Caution Do not connect two sample probes at the same time. 2-20 Controlled Rate Freezer Thermo Scientific... -
Page 34: Holder Adjustment
3. Tighten the small hex socket set screws when the adjustment is complete, just until the screws lightly touch the rods to avoid damaging the rod threads. Figure 2-7. Vial Holder Adjustment Figure 2-8. Straw Holder Thermo Scientific Controlled Rate Freezer 2-21... -
Page 36: Configuration/Calibration
Enter and Back keys, and changing the digit using the up/down arrow keys. The default Access Code (security disabled) is 0 0 0 0. Each digit may be set over a range of 0 to 9. Exit this menu by using the Back key. Thermo Scientific Controlled Rate Freezer... - Page 37 Selects the thermal printer operating mode, printer scale, or initiates printing of the previous run chart. Select the desired item using the Enter and Back keys and change the selected parameter using the 5/6 keys. Exit the menu using the Back key. Controlled Rate Freezer Thermo Scientific...
- Page 38 The Chamber and Sample probe offset can be adjusted over a range of -9.9°C to +9.9°C in 0.1°C increments. Adjust the probe offset for a 0.0°C temperature display reading with the probe in a standard crushed ice bath. Thermo Scientific Controlled Rate Freezer...
- Page 39 7. Repeat Steps 3 through 6 as necessary until both temperature displays read 0.0°C and -196°C. There may be some interaction between the ‘Offset’ and the ‘Scaler’ adjustments. Controlled Rate Freezer Thermo Scientific...
- Page 40 Heater error • Check LN2 supply • RS-232 communication error C. Reset Error Logs This menu item is used to clear the Error Log entries. When the log is empty, this item reads “Error Log Empty”. Thermo Scientific Controlled Rate Freezer...
- Page 41 P.I.D. parameters for the heater vs. LN2 injection cooling. Exit this menu using the Back key. There is a separate set of parameters for each size of chamber available ([L] 1.7 cu ft, [M] 1.2 cu ft, and [S] 0.6 cu ft). Controlled Rate Freezer Thermo Scientific...
- Page 42 Simulation (Off; Cool: 1S, 10S, 90C/m; Heat: 1S, 45S, 9C/m) • Thermal Controller (Size M, 1000mS, P: 0.25, I: 0.075, D: 0.2, PR: 0.01, CP: 4, CM: 1.0, C) • Tracking Alarms (5C, 1m) Note User Profiles are not affected. Thermo Scientific Controlled Rate Freezer...
- Page 43 (Time - 1 minute increments) and temperature difference from setpoint (Delta - 1°C increments). The Time parameter can be adjusted over a range from a 1 to 99 minute range. Exit the menu using the Back key. Controlled Rate Freezer Thermo Scientific...
-
Page 44: Maintenance
After the cabinet has been rinsed, spray with 70% alcohol. 4. Allow the cabinet door to remain open for the alcohol to evaporate. 5. Plug the freezer in and turn the power switch on. Thermo Scientific Controlled Rate Freezer... -
Page 45: Clean A Major Spill In The Chamber
9. Connect the Sample probe to the connector, if applicable. 10. All chamber parts must be re-installed for consistent uniformity and airflow. Connect the unit to the power source and turn it on. 11. The freezer is ready to be returned to service. Controlled Rate Freezer Thermo Scientific... -
Page 46: Clean The Cabinet Exterior
Clean Gasket/Heat Dry any moisture from the door gasket and heat breaks between each run, using a soft cloth, to prevent ice build-up which could reduce the Break effectiveness of the door seal. Thermo Scientific Controlled Rate Freezer... -
Page 48: Printer Set-Up
4 inches (10cm) through the paper cutter. 5. Press the paper feed switch until the paper Insertion feeds in straight and smoothly. Slot The printing surface is the outside of the thermal paper roll. Thermo Scientific Controlled Rate Freezer... - Page 49 Odd (ON) 4: Busy control Hardware (ON) XON/XOFF (OFF) 5: Baud rate (a) 75bps (ON) 9600bps (OFF) 6: Baud rate (b) (ON) (ON) 7: Baud rate (c) (ON) (ON) 8: Baud rate (d) (ON) (ON) Controlled Rate Freezer Thermo Scientific...
-
Page 50: Specifications
Finally, a specific program sequence, listed below, must be run in order to collect the uniformity data. Rack and Holder Vial Placement for each size chamber 0.6 cu. ft. 1.2 cu. ft. 1.7 cu. ft. Models Models Models 7450/7451 7452/7453 7454/7455 7456/7457 7458/7459 7474 7472, 7475 7473, 7476 Thermo Scientific... - Page 51 Weight 1) Hold 10.0min @25C Model lbs. (kg) 2) 2.0C/min C to 0.0C 7450 140 (63.5 ) 3) 0.0C/min S to 3.0C 7451 140 (63.5) 4) Hold 10.0min @1.0C 7452 160 (72.6) 7453 160 (72.6) 5) 1.0C/min C to -5.0C 7454 180 (81.6)
- Page 52 External Connections Power entry Strip chart temperature recorder PC interface port LN2 connection 1/2” flare External thermocouple jack (IVF models only) Sample access (IVF models only) Thermo Scientific Controlled Rate Freezer...
-
Page 54: Parts List
PC Interface Software 4000385 1.2/2.0 ml Internal Sample Probe Kit* 270170 Split Ferrite for 430109 Cordset 4000386 4.0/5.0ml Internal Sample Probe 4000394 Chart Recorder Paper, 4 rolls per box * Field Replacement Kit for P/N 290200 Thermo Scientific Controlled Rate Freezer... - Page 55 Cane, 1.2 ml, 6 ampule 180254 Cane Holder Plug 4000402 External Straw Sample Probe 4000403 External Vial Sample Probe 4000712 Sample T/C Vial with hole, 1.2 ml 4000713 Sample T/C Vial with hole, 2.0 ml Controlled Rate Freezer Thermo Scientific...
- Page 56 Section 7 Parts List Thermo Scientific Controlled Rate Freezer...
- Page 57 Section 7 Parts List Controlled Rate Freezer Thermo Scientific...
- Page 58 Section 7 Parts List Thermo Scientific Controlled Rate Freezer...
- Page 59 Section 7 Parts List Controlled Rate Freezer Thermo Scientific...
- Page 60 Section 7 Parts List Thermo Scientific Controlled Rate Freezer...
- Page 61 Section 7 Parts List Controlled Rate Freezer Thermo Scientific...
- Page 62 Section 7 Parts List Thermo Scientific Controlled Rate Freezer...
- Page 63 Section 7 Parts List 7-10 Controlled Rate Freezer Thermo Scientific...
- Page 64 Section 7 Parts List Thermo Scientific Controlled Rate Freezer 7-11...
- Page 65 Section 7 Parts List 7-12 Controlled Rate Freezer Thermo Scientific...
- Page 66 Section 7 Parts List Thermo Scientific Controlled Rate Freezer 7-13...
- Page 67 Section 7 Parts List 7-14 Controlled Rate Freezer Thermo Scientific...
-
Page 68: Wiring Diagrams
Section 7 Parts List Wiring Diagram 100 and 120 volt Controlled Rate Freezers 7450-71-1-D Rev. 3 Page 1 of 2 Thermo Scientific Controlled Rate Freezer 7-15... - Page 69 Section 7 Parts List Wiring Diagram 100 and 120 volt Controlled Rate Freezers 7450-71-1-D Rev. 3 Page 2 of 2 7-16 Controlled Rate Freezer Thermo Scientific...
- Page 70 Section 7 Parts List Thermo Scientific Controlled Rate Freezer 7-17...
- Page 71 Section 7 Parts List 7-18 Controlled Rate Freezer Thermo Scientific...
- Page 72 Thermo Scientific Controlled Rate Freezer...
- Page 73 Controlled Rate Freezer Thermo Scientific...
- Page 74 Thermo Scientific Controlled Rate Freezer...
- Page 75 Controlled Rate Freezer Thermo Scientific...
- Page 76 Thermo Scientific Controlled Rate Freezer...
- Page 77 Controlled Rate Freezer Thermo Scientific...
- Page 78 Thermo Scientific Controlled Rate Freezer...
- Page 79 Controlled Rate Freezer Thermo Scientific...
- Page 80 Thermo Scientific Controlled Rate Freezer...
- Page 81 Controlled Rate Freezer Thermo Scientific...
- Page 82 Thermo Scientific Controlled Rate Freezer...
-
Page 84: Pc Interface Software
9-pin RS232 ports (1 communication port for each freezer) • Support baud rates up to 9600K baud minimum • 16550 UARTS (suggested) • 128 byte transmit and receive buffers (FIFOs, suggested) • Automatic assignment of ports (suggested) Thermo Scientific Controlled Rate Freezer 10-1... -
Page 85: Installation And Set-Up
Mission statement. Click anywhere on this screen to close it. • The Exit button closes the PC interface application software. All other windows must be closed before exiting to avoid error messages. 10-2 Controlled Rate Freezer Thermo Scientific... -
Page 86: Edit Screen
"Program waiting for user -- Click here to continue" button on the Run screen. The temperature can be set over a range of -180°C to +50°C with a setting resolution of 0.1ºC. Thermo Scientific Controlled Rate Freezer 10-3... - Page 87 This step can only be used when the starting Sample temp is greater than the specified Sample temp (the Sample is cooling). Note The sample temp must be greater than the chamber temp. 10-4 Controlled Rate Freezer Thermo Scientific...
- Page 88 Note The slope of the temperature ramp is determined automatically, based on the temperature entered and the chamber temperature at the beginning of the step. Entry of a sign for the rate term is not required/allowed. Thermo Scientific Controlled Rate Freezer 10-5...
- Page 89 X is the step number Automatic advance to a subsequent step or return to a previous step in a freezing profile. The Jump function can be programmed over a range of Step 1 to Step 20. 10-6 Controlled Rate Freezer Thermo Scientific...
- Page 90 3. END is the mandatory last step. It alerts the freezer that the profile steps are completed. This step is automatically added during the profile creation. It cannot be deleted or replaced. Thermo Scientific Controlled Rate Freezer 10-7...
-
Page 91: Create A New Freezer Profile
To choose a different default printer, first exit the interface software. Choose the printer, then restart the PC interface software. The printer selection will not be changed if the software application is still open at the time of the change. 10-8 Controlled Rate Freezer Thermo Scientific... -
Page 92: Display Profile Temp Graph
When saving a profile which has the same name as one already existing, a file overwrite error message will appear. Choose YES to overwrite (replace) or NO to enter a new file name. Thermo Scientific Controlled Rate Freezer 10-9... -
Page 93: Run Screen
Chamber temperature, Profile, etc). If 'Color' is selected with a monochrome printer, colors are represented by shades of gray so some colors may not be clearly visible. c. Selecting 'Single page report' prints the current Run screen. 10-10 Controlled Rate Freezer Thermo Scientific... - Page 94 This button is only available during a profile Run. a. The override Heat button turns the heater on. b. The override Cool button turns the Cool solenoid on. c. The override Cool+ button turns the Cool and Cool+ solenoids Thermo Scientific Controlled Rate Freezer 10-11...
- Page 95 Scroll the Graph from side-to-side, using the right/left arrow buttons. Use the up/down arrow buttons to scroll the graph top-to-bottom. Turn Auto-Scroll off to view a portion of the graph off-screen from the current plot position. 10-12 Controlled Rate Freezer Thermo Scientific...
-
Page 96: Status Indicators
Alarm messages may also appear before or during a run. These messages alert the user to the alarm status of the freezer. The user must clear the message on the screen even though the alarm condition may have already corrected itself. Thermo Scientific Controlled Rate Freezer 10-13... - Page 97 Back button at the freezer while the profile is in the End step. Click on the message to acknowledge that the run was stopped. This action has the same effect as clicking the Stop button. 10-14 Controlled Rate Freezer Thermo Scientific...
-
Page 98: Typical Run Procedure
End step. The Run may be stopped by clicking on the Stop button or pressing the Back key on the freezer keypad. 10. Enter any additional comments when the text entry window opens again. This window appears regardless of the Run stop method. Thermo Scientific Controlled Rate Freezer 10-15... -
Page 99: Power Failure Recovery
The graph on the Run screen will show a temperature occurrence of zero to indicate a freezer power failure, rather than a PC-only power failure. A communication error message will display on the Run screen during the freezer power failure. 10-16 Controlled Rate Freezer Thermo Scientific... -
Page 100: Error Messages
In this case, the PC cannot take control. Select the ‘Terminate Session’ button to close the Run window. Thermo Scientific Controlled Rate Freezer 10-17... -
Page 101: Remote Mode
The message 'Under Remote Control' displays on the freezer as well as the current profile step being executed. Alarm messages alternate with the current step information if an alarm condition occurs. 10-18 Controlled Rate Freezer Thermo Scientific... -
Page 102: Stand Alone Mode
Review step select pull-down menu: Displays the steps of the profile in the open ‘Review’ Run file • Compare step select pull-down menu: Displays the steps of the profile in the open ‘Compare’ Run file Thermo Scientific Controlled Rate Freezer 10-19... -
Page 103: User Controls
‘monochrome’. If color, select either. Monochrome uses marker/line patterns to identify specific lines on the graph. If ‘Color’ is selected with a monochrome printer, colors are represented by shades of grey (some colors may not be clearly visible). 10-20 Controlled Rate Freezer Thermo Scientific... - Page 104 1) Compare file Profile name and path 2) Compare Run data file and path 3) User name 4) Date/time 5) User Information Field name/contents 6) Run start/stop "comments" 7) Profile listing 8) Alarm listing with time of occurrence Thermo Scientific Controlled Rate Freezer 10-21...
- Page 105 • Graph Scroll Buttons The left/right scroll arrow buttons move the graph right or left in the display window. The up/down scroll arrow buttons move the graph up or down in the display window. 10-22 Controlled Rate Freezer Thermo Scientific...
-
Page 106: Options
Click the palette button to create custom colors. When the cursor is over the desired color, click the left mouse button. Click Save to keep changes. Click Restore to return to previously saved colors. Click Exit to exit Options menu. Thermo Scientific Controlled Rate Freezer 10-23... -
Page 107: Information Field Set-Up
Enter the desired path in the window for the default program directory and run data directory. A Windows directory browse button may also be selected. Click Save to keep changes. Click Restore to return to previously saved changes. Click Exit to exit Options screen. 10-24 Controlled Rate Freezer Thermo Scientific... -
Page 108: User Name And Password Maintenance
If no user names are defined, all menus can be accessed without password protection. Anonymous is listed as the user name if no users are set up. If password protection is no longer desired, simply delete all user names. Thermo Scientific Controlled Rate Freezer 10-25... -
Page 109: Saving Changes
Run. Run data will be lost during the time of the communication interruption. Experiment with test runs, or if in doubt, don't run other applications during a critical profile run. 10-26 Controlled Rate Freezer Thermo Scientific... - Page 110 Thermo Scientific Controlled Rate Freezer 11-1...
- Page 111 11-2 Controlled Rate Freezer Thermo Scientific...
- Page 112 Thermo Scientific Controlled Rate Freezer 11-3...
- Page 113 11-4 Controlled Rate Freezer Thermo Scientific...
- Page 114 Note Because argon is an inert gas whose physical properties are very similar to those of nitrogen, the precautions and safe practices for handling and use of liquid argon are the same as those for liquid nitrogen. s Thermo Scientific Controlled Rate Freezer AA-1...
- Page 115 Rapid warming of the affected part is best achieved by using water at 108°F. Under no circumstance should the water be over 112°F, nor should the frozen part be rubbed either before or after rewarming. The patient should neither smoke nor drink alcohol. AA-2 Controlled Rate Freezer Thermo Scientific...
- Page 116 Thermo Fisher Scientific 401 Millcreek Road Marietta, Ohio 45750 United States www.thermofisher.com...
Need help?
Do you have a question about the 7451 and is the answer not in the manual?
Questions and answers