
Related Manuals for envea M-Sens NIR


Summary of Contents for envea M-Sens NIR
- Page 1 MANUAL M-Sens NIR This guide applies to the following versions: Hardware: MCU-0 00, MCU-0 01, MCU-1 00, MCU-1 01 ENVEA Process GmbH...
-
Page 2: Table Of Contents
TABLE OF CONTENTS Warnings ............................. 8 OVERVIEW ............................10 Features ..............................10 Hardware Components ........................11 Display ..............................11 Processor ..............................11 Motherboard ............................12 Battery Backup ............................12 Analog Outputs ............................13 Power Supply ............................13 Opto22 (Optional Accessory) ......................... 13 Factory Floor Module (Optional Accessory) ................... - Page 3 Power Source ............................27 Ethernet ..............................27 Setup Network IP ..........................28 Specifications ............................. 29 OVERVIEW ............................30 Features ..............................30 Installation Types ..........................31 Belt Conveyor ............................31 Sensor Height ............................. 32 Product Height Variation ........................33 Screw Conveyor ............................34 Pneumatic/Gravity Feed .........................
- Page 4 Section E – Recent Value ........................47 Section F – Statistics ........................... 47 Section G – Samples ........................... 47 Reports ..............................47 Section A – Histogram Chart ......................48 Section B – Table Data ........................48 Section C – Reports Available ......................48 Section D –...
- Page 5 Section H – Raw Data ......................... 60 Section I – Save ........................... 60 Firmware ..............................60 Sensor Health ............................62 Section A – General ..........................63 Section B – Health ..........................63 Section C – Signals ..........................63 IO Check ..............................63 Section A –...
- Page 6 TABLE OF FIGURES Figure 1 - Ethernet and microSD locations ..................11 Figure 2 - Ethernet Connection ......................11 Figure 3 - Battery Location ........................13 Figure 4 - Mounting Dimensions ......................15 Figure 5- Opening the Terminal Block ....................19 Figure 6 - Inserting the Conductor ......................
- Page 7 Figure 38 - Logs ............................65 Figure 39 - Alarm Notification ......................66 Figure 40 - Alarm Screen ........................67 Figure 41 - Application Settings ......................68 Figure 42- Connection Screen ......................69 Figure 43 - Database Setup ........................70 Page 7 of 71 Rev.
-
Page 8: Warnings
Until the ENVEA device is fixed, do not connect hazardous voltages to the devices. The following operations should only be carried out on a disconnected device by service personnel: General mounting, connection, and disconnection of wires. - Page 9 Safety Instructions Environment Avoid high temperatures, mechanical vibrations, shock, as well as moisture and heavy moisture. Indoor usage only UL Installation Requirements Maximum supply voltage fluctuations +-10%. For use in only pollution degree 2 or better. Over-voltage category II. Max. wire size……AWG 20-8 Use Copper Conductors Only Mounting Only technicians who are familiar with the technical terms, warnings, and instructions in the manual...
-
Page 10: Overview
OVERVIEW The ENVEA controller is a real-time processing unit that is the ‘brain’ of the ENVEA NIR system. It stores the configuration of the system, communicates to the sensors, performs all calculations, and shares information to compatible devices via Ethernet. In addition, any field wiring for IO alarms, analog outputs, and factory floor integrations are terminated in this cabinet. -
Page 11: Hardware Components
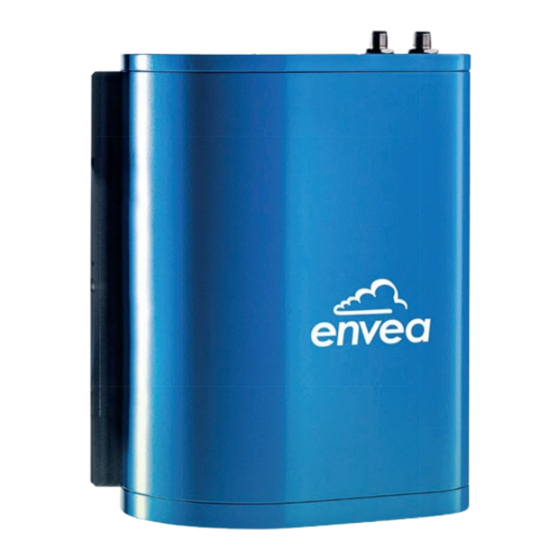
Hardware Components This section describes the primary components in the ENVEA controller. Display The 4-line LCD display mounted to the enclosure is used to set the IP address of the controller and view the current readings. Press the Mode and Select buttons to navigate through the display configuration. -
Page 12: Motherboard
See ENVEA software manual on how to perform a backup and restore of the system in the case of catastrophic failure. -
Page 13: Analog Outputs
Figure 3 - Battery Location Exercise care if the battery is replaced with external power applied Analog Outputs The system has two 4-20mA analog outputs available to transmit measurement results. The analog outputs are self-powered and cannot be powered via an external power source. The customer can connect to the analog outputs via the terminal blocks shown on the wiring schematic (see Wiring... -
Page 14: Factory Floor Module (Optional Accessory)
Description Low-Low Alarm Low Alarm High Alarm High-High Alarm Loss of Product Alarm Dirty Lens Alarm OptoPort Output. Used when an OptoPort accessory is used to catch powders in a chute application. External Trigger. When user sets the input high, the system does not take any readings. -
Page 15: Mounting
Mounting The unit should be mounted in an area that is accessible, but does not exceed the environmental specifications (see SPECIFICATIONS for more information). The recommended solution is to use the brackets included with the controller (see Figure 4 - Mounting Dimensions) Figure 4 - Mounting Dimensions in. -
Page 16: Electrical Connections
Schematic). The supply voltage is 90-264 VAC (47 to 63 Hz) with a maximum current of 2.0A. ENVEA recommends a dedicated circuit be supplied to the controller and the power wires are provided mechanical protection, e.g. wires are contained in conduit. A qualified electrician should be contracted to install conduit, wiring, and terminate all connections per local electrical code. -
Page 17: Connection Ports
On the bottom of the controller are three circular bulkhead ports. The 4-pin female port is used to supply power to sensors and displays. All ENVEA peripheral equipment is supplied power using the same circular ports with this pin configuration:... -
Page 18: Wiring Schematic
Wiring Schematic Page 18 of 71 Rev. 07.13.2020... -
Page 19: Terminal Blocks
Terminal Blocks The controller uses spring loaded terminals which users may not be familiar with, the following instructions show how to insert/remove wires. Figure 5- Opening the Terminal Block Figure 6 - Inserting the Conductor Figure 7 - Securing Conductor Page 19 of 71 Rev. -
Page 20: Setup Network Ip
Setup Network IP After connecting the Ethernet cable to the processor, the controller IP needs to be changed to a valid address. Using the LCD display on the front of the panel perform the following: 1. Press the Select button to view the Net Info 2. -
Page 21: Specifications
Specifications Feature Power 90-264 VAC, 47-63Hz, 120 Watt max. Temperature 0 to 50C Humidity 5-90% non-condensing Weight 9 lbs. (4.0 kg) Altitude (max.) 2000m (6562 ft) Usage Indoor usage only Rating NEMA 12 Battery CR2032 24VDC fuse 2A 5x20mm 5VDC fuse 10A 5x20mm Figure 9 –... - Page 22 Page 22 of 71 Rev. 07.13.2020...
-
Page 23: Features
The display does not allow users to make configuration changes to the system, however they are able to change to any available product stored in the controller. The ENVEA system is designed to support up to 4 displays communicating to the controller via an Ethernet connection. -
Page 24: Hardware Components
Hardware Components This section describes the primary components in the ENVEA controller. Display The high-resolution 7” TFT touchscreen is mounted to the front of the enclosure. Cleaning the display with harsh chemicals or abrasives may scratch and/or damage the display... -
Page 25: M12 Bulkhead Connectors
M12 Bulkhead Connectors There are two connectors on the bottom of the enclosure. One for power and a second for Ethernet connection. The connectors are keyed to ensure the wrong cable cannot be plugged into the wrong port. Mounting The unit should be mounted in an area that is accessible and easily visible to operators, but does not exceed the environmental specifications (see Page 25 of 71 Rev. -
Page 26: Figure 11 - Mounting Dimensions
Specifications for more information). The recommended solution is to use a standard VESA mount in order to easily position the monitor as desired. Mount display in an area accessible and visible to users Figure 11 - Mounting Dimensions Page 26 of 71 Rev. -
Page 27: Electrical Connections
Electrical Connections Power Source Typically input power is supplied to the M12 bulkhead from the controller, however an external source can be used if necessary. The 4-pin male power port on the bottom of the display and should be wired using the following pin configuration: Description +24 VDC... -
Page 28: Setup Network Ip
Setup Network IP After connecting the power and Ethernet cables to the display, the display needs to be assigned an IP address and connected to a controller. Press the on the bottom to set the IP address and Subnet mask of the display. Enter the IP address of the controller. -
Page 29: Specifications
Specifications Feature Power 24 VDC, 6 Watt max. Temperature -20 to +70 C Humidity 5-90% non-condensing Weight 7 lbs. (3.2 kg) Figure 13 – Physical Dimensions Page 29 of 71 Rev. 07.13.2020... -
Page 30: Overview
(up to 80° C) environments (see Specifications). This guide contains information about how to mount, install, and setup the ENVEA sensor for three primary installation types: (1) belt conveyor, (2) screw conveyor, or (3) pneumatic and/or gravity feed. -
Page 31: Installation Types
In this installation the sensor is mounted above a belt conveyor with material passing below the sensor. The sensor shines a light on the passing material and calculates the moisture content. With over 3000 measurements per second, the ENVEA sensor is capable of reporting accurate results regardless of belt speed... -
Page 32: Sensor Height
Sensor Height The sensor is designed to be placed approximately 225mm away from the material being measured, mounted on a 22mm diameter pipe with lens towards the material. Figure 14 - Distance between sensor and material Although 225mm distance is optimal, each installation is unique, and the distance may be changed to anywhere between 175-350mm Page 32 of 71 Rev. -
Page 33: Product Height Variation
Product Height Variation In the case of intermittent product flow or in situations where the product level changes drastically, it may be necessary to install a plow to obtain a more uniform product height (see Figure 15 - Plow to even height). Figure 15 - Plow to even height For maximum accuracy, the product height should not vary by more than ±25mm Page 33 of 71... -
Page 34: Screw Conveyor
In this type of installation, a 100-125mm diameter hole is cut in the screw conveyor cover half-way between the center shaft and side wall. The light from the ENVEA shines through the hole illuminating the material as it is transported. -
Page 35: Figure 17 - Screw Conveyor Measurement Location
If the auger is visible to the ENVEA system, this may negatively impact the results of the measurement. If this is the case, it is recommended to cut out a section of the auger where the ENVEA is measuring product (see Figure 17 - Screw conveyor measurement location). -
Page 36: Pneumatic/Gravity Feed
The last type of installation is known as a gravity feed or pneumatic conveyance. Typically a powder or fine particulate is conveyed in a tube using gravity and/or air. The ENVEA system can measure this material using an OptoPort accessory to collect samples, measure the results, and blow off the collection window. -
Page 37: Mounting
Mounting The sensor should be mounted in an area that is accessible and over the product, but does not exceed the environmental specifications (see SPECIFICATIONS for more information). The recommended solution is to install the sensor on a 22mm diameter pipe, then tighten the two clamp collars using a 3/16”... -
Page 38: Figure 19 - Pivot Locking Bolt
Figure 19 - Pivot locking bolt Page 38 of 71 Rev. 07.13.2020... -
Page 39: Electrical Connections
Electrical Connections Supply Power The sensor input power is typically supplied from the ENVEA controller cabinet; however, it may be supplied from an alternate power supply. The minimum voltage required by the sensor is 23.5VDC and 4.8VDC. Care must be taken to ensure the voltage drop does not exceed these limits. -
Page 40: Figure 20 - Physical Dimensions
Rating IP69 Distance to product 7-14” Measurement area 1 in Figure 20 – Physical Dimensions Page 40 of 71 Rev. 07.13.2020... -
Page 41: Overview
OVERVIEW ENVEA software is a Windows based application that allows users to connect to the ENVEA system via a local Ethernet connection. The minimum suggested hardware to run the application is: Win 7 (32 or 64 bit) or greater •... -
Page 42: Main Screen
Main Screen The primary screen (Figure 21 - Main screen) displayed shows the five areas a user may view, they are: 1. Home. These are the primary screens users can view and monitor the process information from the sensors. This includes both current values and historical information. -
Page 43: Home Screen
Figure 211 - Home Screen Histogram The histogram screen displays a summary of all data collected by ENVEA over a user specified time range. The screen is divided into seven areas labeled A through G (see Figure 212 - Histogram Data). -
Page 44: Section A - Information
If the type of product being measured changes, the user manually selects the new product (and any optional data entries) and clicks Change to inform the ENVEA system. ENVEA will reset the Histogram data and apply the newly selected product parameters. -
Page 45: Section D - Chart
Section D – Chart This is a histogram chart of the data measured by the ENVEA system. A histogram chart displays data grouped into bins, which are displayed as columns. When a value falls within the bin range, the column height is increased by one. The result is a chart that shows the distribution of all data collected since the Start Time. -
Page 46: Section A - Information
Section C – Change Product If the type of product being measured changes, the user manually selects the new product (and any optional data entries) and clicks Change to inform the ENVEA system. ENVEA will reset the Histogram data and apply the product parameters. -
Page 47: Section D - Chart
Section D – Chart This is a point chart representation of the data measured by the ENVEA system. Each value is added as a dot to the chart, with the most recent added on the right side. If product’s minimum and/or maximum process limits are configured, red dashed lines can be used to determine when an out of process condition occurs. -
Page 48: Section A - Histogram Chart
Section D – Upload Data If a report is available to save to the database, the Upload Data button is visible. Clicking this option will read the reports from the ENVEA system and save them to the database. Page 48 of 71... -
Page 49: Configuration Screens
Configuration Screens The configuration tab allows the user to set and store parameters directly to the ENVEA system, care should be taken whenever making a process change (see Figure 215 - Configuration Screen). Each change to the system is logged for audit purposes (see LOGS) The primary functions available are: System: Global parameter changes to the ENVEA system are made in this tab. -
Page 50: System
Figure 215 - Configuration Screen System The system screen has three sections (see Figure 216 - System Setup): Section A: general settings for the controller • Section B: user defined optional values • Section C: save settings to the controller •... -
Page 51: Section A - Global System Settings
Figure 216 - System Setup Section A – Global System Settings This section has three setting values: Name: the user may provide a user-friendly name for the controller. This is • useful when multiple controllers are on-site and it is necessary to distinguish between systems. -
Page 52: Section C - Save Button
Once the changes are made, users can apply the changes to the controller by clicking the Save button. Products The product screen allows the user sets the ‘rules’ for how the ENVEA responds for a product. Some information users can change include (see Figure 217 - Product Configuration): Section A: list of products available to configure in the system •... -
Page 53: Section A - Available Products
Section A – Available Products This is a list of products the user may configure on the system. The number of products displayed is defined on the System Configuration screen (see Section A – GLOBAL SETTINGS) Section B – General The items available to configure are: Name: name of the product •... -
Page 54: Section D - Opto Port
The Save button downloads the information to the controller. The changes are applied immediately. Backup The ENVEA system has full backup and restoration functionality for disaster recovery. The screen has two sections: (a) record of all backups, and (b) functions to backup/restore. All backups are saved to the SQL server database. -
Page 55: Section A - Log
Figure 218 - Backup Screen Section A – Log The log section shows all system backups along with the following information: Timestamp: this is the date and time when the backup was performed • App Version: the version of the application when the backup was performed •... -
Page 56: Setup Shifts
If shifts are setup in the ENVEA system, it will automatically summarize and record the ENVEA results per shift. There are up to three shifts available per day, up to 7 days per week (see Figure 19 - Shift Setup). -
Page 57: Optimize
Figure 20 - Controller IP Optimize This screen provides functionality to make parameter changes to the currently running, view the simulated results, and then either accept or discard the changes. The primary sections are: Section A: calibration table for the product •... -
Page 58: Section A - Calibration Table
Any change made on this screen are simulated and shown, however this is a simulated result only. The change is not applied until the Save button is pressed. Any change is highlighted to indicate it varies from the controller value; hovering over the change triangle in the upper left corner shows the user the original value stored in the controller. -
Page 59: Section C - Spc Chart
Section C – SPC Chart This chart displays the most recent values measured by the system. If a change to the Calibration Table is made, a second series of triangles is shown to indicate the impact of this change (See Figure 22 - Change to calibration shown on SPC). Figure 22 - Change to calibration shown on SPC Section D –... -
Page 60: Section G - Alarm Counts
Section G – Alarm Counts These are out of process alarms that have occurred. See Section B – ALARM COUNTS for more information. Section H – Raw Data Raw data can be useful to determine what values to set the LOP alarms and calibration table entries. -
Page 61: Figure 34 - Upgrade Firmware
Figure 23 - Upgrade Firmware Page 61 of 71 Rev. 07.13.2020... -
Page 62: Sensor Health
Diagnostics Screens The Diagnostic screen (Figure 24 - Diagnostic Menu) has three options: Sensor Health: user may monitor detailed information about a sensor’s health. • This includes all health sensors, general status information, and NIR results. IO Check: this screen provides functionality to check hardware discrete IO and •... -
Page 63: Section A - General
Figure 25 - Sensor Health Section A – General The area shows information such as when the sensor was last calibrated, how long the unit has been in service, and the firmware version. There are two controls that allow a user to select which sensor to view data (i.e. Address) and how quickly to read the information from the sensor (i.e. -
Page 64: Section A - Discrete Io
This screen will automatically refresh the data once per second, so ensure any IO check waits at least that long. The user must confirm the ENVEA system will not take any readings during IO checkout Figure 26 - IO Check Section A –... -
Page 65: Logs
Logs The log screen displays general information about the software and any errors that may have occurred. In addition, there is a record of any system changes performed. This audit trail can be of assistance when the system does not respond as it had previously and a user is looking to verify if a change was made in order to explain the new behavior. -
Page 66: Section B - Navigation
Category: type of alarm • Message: A description of the alarm condition. • Section B – Navigation The user can page forward/backward in the logs, change the number of logs shown per page, or filter the logs. Alarms When an alarm condition is detected by the system, an alarm notification icon is shown along with the number of new alarms detected (see Figure 28 - Alarm Notification... -
Page 67: Section A - Alarms
Clicking the Alarms button displays the screen in Figure 40 - Alarm Screen. Figure 40 - Alarm Screen The alarm summary includes two sections. Section A – Alarms Contains the following information: Sensor ID: Unique ID number identifying the source of the alarm. •... -
Page 68: App Settings
The software communicates to the ENVEA system via standard Ethernet network protocol. After determining the static IP of the ENVEA system, enter the IP address in the field (see Figure 42 - Connection Screen). Test the communication is successful by clicking the Test Connection button. -
Page 69: Database
Figure 42 - Connection Screen Database The ENVEA system stores log information, backups, and other data in a SQL server. The server is typically on the same PC as the application, however it can also be located on any networked PC. When the SQL server is networked, the data can be shared on multiple PCs and IT can ensure the information is backed up for disaster planning purposes. -
Page 70: Section A - Server Name
Figure 30 - Database Setup Section A – Server Name Click the pull-down button to search for available SQL servers, then select the SQL Server instance (Note: if SQL server is on the PC the default setting is .\SQLexpress). In the event the server is not found, the user can also manually type in the address of the server. -
Page 71: Section C - Database
Section C – Database To choose an existing database, click the pull-down to search for available databases on the selected SQL server. If a database exists on the SQL server but is not available to select, the user does not have sufficient Authentication rights. The IT department should provide alternative Authentication credentials or ensure the existing credentials have rights.
Need help?
Do you have a question about the M-Sens NIR and is the answer not in the manual?
Questions and answers