Table of Contents
Advertisement
Quick Links
Advertisement
Table of Contents

Subscribe to Our Youtube Channel
Related Manuals for LawnMaster LB4010002


Summary of Contents for LawnMaster LB4010002
- Page 1 40V Lithium 18" Mower Instruction Manual LB4010002 Important! It is essential that you read the instructions in this manual before operating this machine. All notes and images are subject to technical modification. Distributed by Steelfort Engineering Ltd...
- Page 2 READ FIRST BEFORE USE! LawnMaster Lithium Battery Instructions Battery must be fully charged before initial use. Never let the battery discharge below two bars on the battery indicator light-discharging below two bars may cause damage to the battery. Do not continue use if machine stops-fully recharge battery first if below two bar indicator.
-
Page 3: Table Of Contents
INDEX INTRODUCTION SAFETY RULES AND PRECAUTIONS CHILD SAFETY BATTERY AND CHARGER SAFETY RULES SERVICE WARNING SYMBOLS PRODUCT DESCRIPTION DETAILED DESCRIPTION OF THE PRODUCT TECHNICAL DATA ASSEMBLY UNPACKING UNFOLDING AND ADJUSTING LOWER HANDLE INSTALLING THE GRASS CATCHER BAG INSTALLING/REMOVING THE MULCHING PLUG INSTALLING SIDE DISCHARGE CHUTE TO INSTALL BATTERY PACK TO REMOVE BATTERY PACK... -
Page 4: Introduction
INTRODUCTION LawnMaster Thank you for choosing this product. We are sure you shall appreciate the quality and performance of this machine, which will facilitate your task for a long period of time. Remember that you can contact our Technical Support for any queries regarding assembly o maintenance, as well as for the resolution to any problems that may arise, and for the purchase of spare parts and/or accessories. - Page 5 WARNING SYMBOLS KNOW YOUR LAWN MOWER Read this manual carefully, observing the recommended safety instructions before, during and after using your lawn mower. Following these simple instructions will also maintain your lawn mower in good working order. Familiarize yourself with the controls on your mower before attempting to operate it, but above all, be sure you know how to stop your mower in an emergency.
-
Page 6: Battery And Charger Safety Rules
CE Marking The product meets demands and regulations set by the European Community. CAUTION! Unusable power tools do not belong with domestic waste. They must be taken to a communal collecting point for environmentally friendly disposal in accordance with local regulations . Disposing of the packaging: The packaging is made of cardboard please recycle. - Page 7 WARNING: The operation of any tool can result in foreign objects being thrown into your eyes, which can result in eyes severely damaged. Before beginning power tool operation, always wears safety goggles or safety glasses with side shields and a full face shield when needed. We recommend Wide Vision Safety Mask for use over eyeglasses or standard safety glasses with side shield.
-
Page 8: Service
- inspect for damage; - replace or repair any damage parts. - check for and tighten any loose parts. 25) Stop the mower: - whenever you leave the lawnmower; 26) keep all nuts, blots and screws tight to be sure the equipment is in safe working condition; 27) check the grass catcher frequently for wear or deterioration;... -
Page 9: Child Safety
When it is not in use or before cleaning and servicing, disconnect the battery charger from the power supply. Take special care of the battery. Avoid dropping it onto any hard surface or any other form of mechanical stress. Keep the battery away from extreme heat and cold. Do not open or attempt to repair the battery or the battery charger. -
Page 10: Product Description
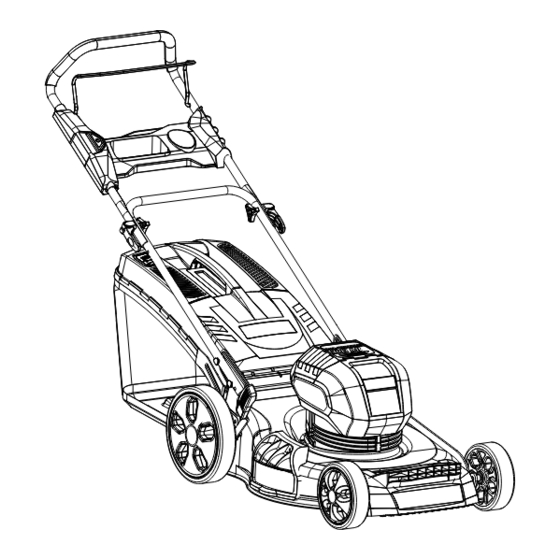
PRODUCT DESCRIPTION The safe use of this product requires an understanding of the information on the product and in this operator’s manual as well as a knowledge of the project you are attempting. Before use of this product, familiarize yourself with all operating features and safety rules. DETAILED DESCRIPTION OF THE PRODUCT Bail lever Safety... -
Page 11: Technical Data
TECHNICAL DATA CORDLESS LAWNMOWER LB4010002 Model Battery type V DC Lithium-ion Charge time 3 hours ( 0 Ah battery) No-load speed 2800-3300 rpm Cutting width 457 mm; Cather capacity 60 L Height adjustments 2.5 - 7.5 cm (6 positions) Functions 3-in-1: Mulch, side discharge or rear bag weight (with 5.0Ah battery) -
Page 12: Assembly
ASSEMBLY UNPACKING Before beginning assembly of product, make sure all parts are present. Compare parts with package contents list and hardware contents list. If any part is missing or damaged, do not attempt to assemble the product. • Carefully remove the product and any accessories from the box. Make sure that all items listed in the packing list are included. - Page 13 PACKING LIST PART NAME FIGURE PART NO. Lawn Mower Mulching Plug Side Discharge Chute Grass Catcher Bag Handle Knob Handle Bolt V Battery V Charger Owner’s Manual...
-
Page 14: Unfolding And Adjusting Lower Handle
UNFOLDING AND ADJUSTING LOWER HANDLE WARNING Folding or unfolding the handle improperly can damage the cables, causing an unsafe operating condition. • Do not damage the cables when folding or unfolding the handle. • If a cable is damaged, contact an Authorized Service Dealer. UNFOLDING AND ADJUSTING HANDLE ASSEMBLY a. -
Page 15: Installing/Removing The Mulching Plug
INSTALLING/REMOVING THE MULCHING PLUG • To remove the mulching plug, lift the rear discharge door (1). • Grasp the handle (2) of the mulching plug. Lift and pull the mulching plug out using the handle. • The mulching plug (3) is in serted at an angle, so it requ ires some force to remove it. -
Page 16: To Install Battery Pack
TO INSTALL BATTERY PACK • Lift and hold up the battery door (1). • Align the battery (2) with the mower’s battery port. • Make sure the battery release button (3) snaps in place and that battery is fully seated and secure in the mower before beginning operation. -
Page 17: Using The Product
USING THE PRODUCT STARTING/STOPPING THE MOWER TO START THE MOTOR: • Open the battery door. • Insert the battery. Press and hold the safety lock-out button (1). • Pull the bail lever (2) upward to the handle to • start the mower and release the button. TO STOP THE MOTOR: •... -
Page 18: Cutting Height Adjustment
CUTTING HEIGHT ADJUSTMENT When shipped, the wheels on the mower are set to a low-cutting position. Before using the mower for the fir s t time, raise the cutting position to the height best suited for your lawn. The average lawn should be between 2.5 to 5cm during cool months and between 5 to 7.5 cm during hot months. -
Page 19: Mowing Tips
MOWING TIPS NOTE: A sharp blade will greatly enhance the performance of the mower, especially when cutting high grass. Be sure to check the blade and to sharpen it at least once per year. • Verify that the lawn is free of stones, sticks, wires, and other objects that could damage the blades or the motor. -
Page 20: Emptying The Grass Catcher Bag
EMPTYING THE GRASS CATCHER BAG • Stop mower, allow blades to completely stop, and remove the battery. • Lift the rear discharge cover. • Lift the grass catcher bag by its handle to remove from mower. • Empty grass clippings. •... -
Page 21: Care And Maintenance
CARE AND MAINTENANCE REPLACING THE CUTTING BLADE WARNING Always protect your hands by wearing heavy gloves and/or wrapping the cutting edges with rags or other materials when performing any maintenance on the blades. ALWAYS remove the battery when servicing or transporting the mower. -
Page 22: Cleaning The Mower
CLEANING THE MOWER WARNING In order to reduce the risk of electric shock, do not expose the mower to water. The underside of the mower deck should be cleaned after each use, because grass clippings, leaves, dirt, and other debris will accumulate, which will cause rust and corrosion. - Page 23 PROBLEM POSSIBLE CAUSE SOLUTION The battery is not charged. Charge the battery. The switch is defective. Replace the switch Grass jammed between the deck and Remove battery; check under deck blade. for jams. The mower does not start. The battery is not fully inserted in the Check the connection between the mower.
-
Page 24: Transporting Lithium Batteries
TRANSPORTING LITHIUM BATTERIES Transport the battery in accordance with local and national provisions and regulations. Follow all special requirements on packaging and labelling when transporting batteries by a third party. Ensure that no batteries can come in contact with other batteries or conductive materials while in transport by protecting exposed connectors with insulating, non-conductive caps or tape. -
Page 25: Recycling And Disposing
RECYCLING AND DISPOSING When you decide to get rid of the machine, make sure to follow the local regulation. The batteries used in this mower’s battery pack contain the following toxic and corrosive material: LITHIUM-ION. WARNING Toxic materials must be disposed of in a specified manner in order to prevent contamination of the environment. -
Page 26: Guarantee
GUARANTEE This product has a 2 year guarantee. This guarantee is only valid if the product has not been used correctly and all the instructions have been followed. In order to prove guarantee a receipt must be presented. The product has to be complete and have all its parts.
Need help?
Do you have a question about the LB4010002 and is the answer not in the manual?
Questions and answers