Advertisement
SPECIFICATIONS
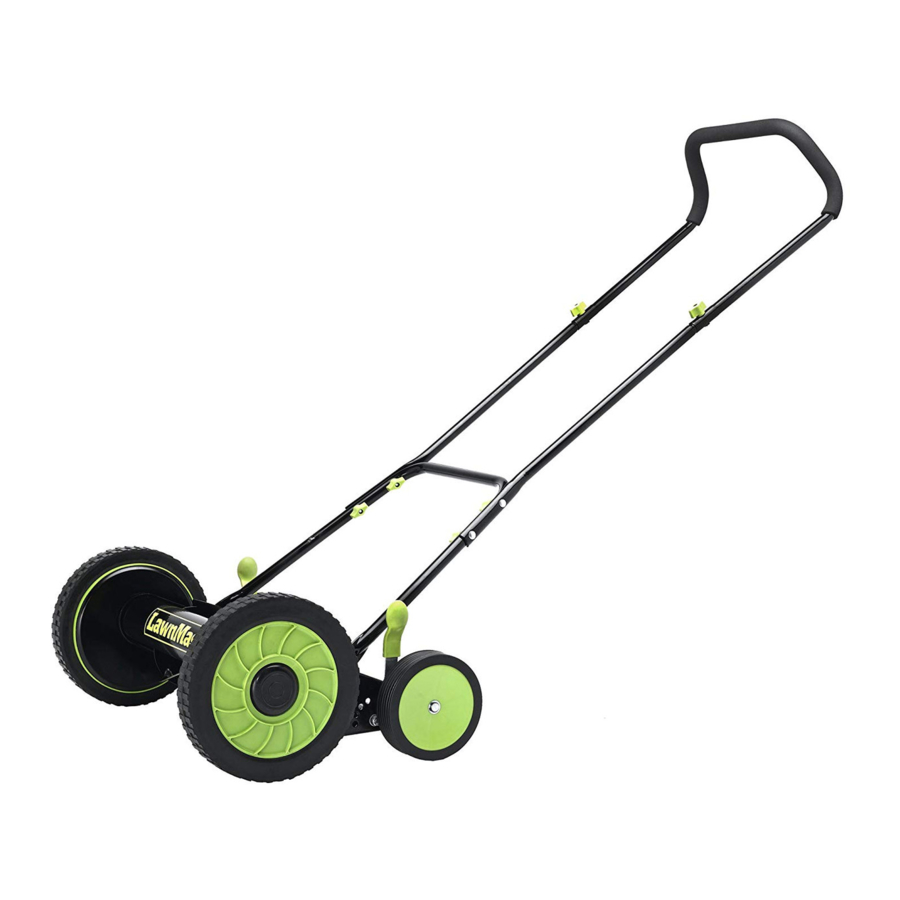
| Reel Mower LMRM1601 | |
| Number of Blades | 5 Hardened Steel |
| Cutting Width | 16" (400mm) |
| Cutting Height Adjustment | 1.2-2.4" (31-61mm); 9 Positions |
| Wheel Size | 10" (254mm) Front / 6" (152mm) Rear Wheels |
| Weight | 31lbs (14kg) |
GENERAL SAFETY RULES


READ AND UNDERSTAND ALL INSTRUCTIONS.
Failure to follow all instructions listed below and on the machine may result in electric shock, fire, and/or serious personal injury.
READ ALL INSTRUCTIONS
- Read this Operator's Manual carefully in its entirety before attempting to assemble this machine.
Read, understand, and follow all instructions on the machine and in the manual before operation.
Keep this manual in a safe place for future and regular reference and for ordering replacement parts. - Be completely familiar with the proper use of this machine before operating it.
- This machine is a precision piece of power equipment and requires the operator to exercise extreme caution at all times. This machine has been designed to perform one job: to mow grass.
Do not use it for any other purpose. - Never allow children under 10 years of age to operate this machine. Children of 10 years and above should read and understand the instructions and safe operation practices in this manual, and on the machine, and should be trained and supervised by an adult.
- Only responsible individuals who are familiar with the rules of safe operation should be allowed to use this machine.
- Thoroughly inspect the area where the equipment is to be used. Remove all stones, sticks, wire, bones, toys and other foreign objects.
- To help avoid blade contact, stay in the operator zone behind handles and keep children, bystanders, helpers and pets away from mower while it is in operation. Stop the machine if anyone enters area.
- Wear sturdy, rough-soled work shoes and close-fitting slacks and shirts. Shirts and pants that cover the arms and legs and steel-toed shoes are recommended. Never operate this machine in bare feet, sandals, slippery or light-weight (e.g. canvas) shoes.
- Do not put hands or feet near the rotating blades. Contact with blades can amputate fingers and toes.
- Many injuries occur as a result of the mower being pulled over the foot during a fall caused by slipping or tripping. Do not hold on to the mower if you are falling; release the handle immediately.
- Be careful when pulling the machine backward. Look down and behind to avoid tripping. Be sure you are well balanced with sure footing.
- Do not operate the mower while under the influence of alcohol or drugs.
- Never operate the mower on wet grass. Always be sure of your footing. A slip and fall can cause serious personal injury.
- Mow only in daylight or good artificial light.
- Walk, never run when using the mower.
- The cutting blade may continue to rotate for a few seconds after the mower has stopped moving.
Never place any part of the body in the blade area until you are sure the blade has stopped rotating. - Use safe lifting practices when moving mower.
- Only use parts and accessories made for this machine by the manufacturer. Failure to do so can result in personal injury.
- If situations occur which are not covered in this manual, use care and good judgement. Contact Customer Service (Toll-free Helpline 1-866-384-8432) for assistance or the nearest service dealer.
SPECIFIC SAFETY RULES
OPERATING THE UNIT ON A SLOPE
Slopes are a major factor related to slip and fall accidents, which can result in severe injury.
Operation on slopes requires extra caution. If you feel uneasy on a slope, do not mow it.
- Mow across the face of slopes; never up and down. Exercise caution when changing direction on slopes.
- Watch for holes, ruts, rocks, hidden objects, or bumps which can cause you to slip or trip. Tall grass can hide obstacles.
- Always be sure of your footing. A slip and fall can cause serious personal injury.
- Do not mow near drop-offs, ditches or embankments; you could lose your footing or balance.
- Do not mow slopes with a gradient greater than 15 degrees.
- Do not mow wet grass. Unstable footing could cause slipping.
CHILDREN
Tragic accidents can occur if the operator is not alert to the presence of small children. Children are often attracted to the mower and the mowing activity. Children younger than 10 years old do not understand the dangers. Never assume that children will remain where you last saw them.
- Keep children younger than 10 years old out of the mowing area and under watchful care of a responsible adult other than the operator.
- Be alert and stop mowing if a child or others, including pets, enter the area.
- Use extreme care when approaching blind corners, doorways, shrubs, trees, or other objects that may obscure your vision of a child who may run into the mower.
- Never allow children under 10 years of age to operate this machine. Children of 10 years and above should read and understand the instructions and safe operation practices in this manual and on the machine and be trained and supervised by an adult.
SYMBOLS
| Some of the following symbols may be used on this product. Please study them and learn their meaning. Proper interpretation of these symbols will allow you to operate the product better and safer. | ||
| SYMBOL | NAME | DESIGNATION/EXPLANATION |
 | Safety Alert | Precaution that involves your safety. |
 |  Rotating Blades | To reduce the risk of injury, keep hands and feet away. |
 | Bystanders | Do not mow when children or others are around. |
| The following signal words and meanings are intended to explain the levels of risk associated with this product. | ||
| SYMBOL | SIGNAL | MEANING |
 | | Indicates an imminently hazardous situation, which, if not avoided, will result in death or serious injury. |
|  | Indicates a potentially hazardous situation, which, if not avoided, could result in death or serious injury. |
 |  | Indicates a potentially hazardous situation, which, if not avoided, may result in minor or moderate injury. |
| NOTICE | (Without Safety Alert Symbol) Indicates a situation that may result in property damage. | |
SAFETY
Mower blades are sharp and can cut. Wear gloves, and use extra caution when servicing them.
Keep all nuts, bolts, and screws tight to be sure the equipment is in safe working condition.
Never tamper with safety devices. Check their proper operation regularly.
To avoid serious personal injury, do not attempt to use this product until you read thoroughly and understand completely the Operator's Manual. If you do not understand the warnings and instructions in the Operator's Manual, do not use this product. Call Customer Service (Toll-free Helpline 1-866-384-8432) for assistance.
SERVICE
Servicing requires extreme care and knowledge and should be performed only by a qualified service technician. Return the product to your nearest AUTHORIZED SERVICE CENTER for repair.
When servicing, use only identical replacement parts.
SAVE THESE INSTRUCTIONS
Refer to them frequently and use them to instruct other who may use this product. If you loan someone this product, loan them these instructions also.
FEATURES
The safe use of this product requires an understanding of the information on the product and in this Operator's Manual as well as a knowledge of the project you are attempting.
Before use of this product, familiarize yourself with all operating features and safety rules.

- Upper Handle
- Twist Knob
- Middle Handle
- Lower Handle
- Rear Wheel
- Front Wheel
- Height Adjustment Lever
ASSEMBLY
This product requires assembly.
- Carefully remove the product and any accessories from the box. Make sure that all items listed in the packing list are included.
- Inspect the product carefully to make sure no breakage or damage occurred during shipping.
- Do not discard the packing material until you have carefully inspected and satisfactorily operated the product.
- If any parts are damaged or missing, please call serice center.
PACKING LIST
(1) Upper Handle
(2) Middle Handles
(1) Lower Handle
(6) Carriage Bolts
(6) Twist Knobs
(1) Reel Carriage (with blades, wheels and height adjustment levers installed)
(1) Operator's Manual
If any parts are damaged or missing do not operate this product until the parts are replaced. Failure to heed this warning so could result in serious personal injury.
Do not attempt to modify this product or create accessories not recommended for use with this product. Any such alteration or modification is misuse and could result in a hazardous condition leading to possible serious personal injury.
Never operate the mower without the proper working safety devices in place. Never operate the mower with damaged safety devices. Failure to heed this warning can result in serious personal injury.
HANDLE ASSEMBLY
- Secure the upper handle to the middle handles with two carriage bolts and two twist knobs (Fig. 1).
![]()
- Secure the handle assembled in step 1 to the lower handle with four carriage bolts and four twist knobs (Fig. 2).
![]()
- Place one of the round openings, at the bottom of the handle, over one of the steel studs on the mower frame paying particular attention to handle position. Then slowly apply lateral pressure to the other lower handle until it can be slid into and over the second steel stud, while keeping hands free of blades (Fig. 3).
![]()


Always keep hands clear of blades when attaching the handle to the frame. Not doing so can result in serious injury!
ADJUSTING THE CUTTING HEIGHT
The cutting height can be adjusted between approximately 1.2" (31mm) and 2.4" (61mm).
- Move the right-hand height adjustment lever outward and then position it forward (to lower the cutting height) or backward (to raise the cutting height) before releasing it into the notch to set the desired cutting height (Fig. 4).

- Repeat step 1 on the left-hand side making sure to release the height adjustment lever into the corresponding notch.

NOTE: Never mow your lawn at the mower's lowest setting as this can cause lawn to turn brown or die.
OPERATION
USING YOUR DEVICE
Please observe the following when operating your reel mower.
- Your mower is not power-operated and requires continuous hand pushing during mowing. Use this mower only on lawn that has been grown on a smoothly graded ground surface. This mower is most effective on flat, even lawns. Mowing lawns with tall weeds may affect the overall mowing result.
- Be sure the lawn is clear of stones, sticks, wire, or other objects which could damage lawn mower or engine.
- Mow the lawn when the grass is relatively dry. Attempting to mow wet grass can result in an uneven cut.
- Maintain a consistent walking pace while pushing the mower in straight passes.
- Slightly overlap each pass to even the cut and avoid leaving uncut strips.
- Mow the lawn regularly, during its growing season. Mow more frequently than you would with a conventional rotary lawn mower.
- Always mow with the blade height adjusted to cut no more than 1/3 the total height of grass.
- If the lawn height exceeds four inches, adjust the blade height to its highest position before mowing. After mowing, readjust the blade to your preferred cutting height and mow the lawn a second time within the next one or two days.
The operation of any lawn mower can result in debris being thrown into the eyes, which can damage your eyes severely. Always wear safety glasses while operating the mower, or while performing any adjustments or repairs on it.
TRANSPORTING THE UNIT
- During normal operation, the blade reel will turn anytime the mower's front wheels are turning. To safely move the mower from one location to another without the blade reel turning, simply pivot the handle over the reel and push the mower from the opposite side (Fig. 5).
Pushing the mower in this manner (transport mode) prohibits the blade reel from turning.


MAINTENANCE
GENERAL MAINTENANCE
- Always observe safety rules when performing any maintenance.
- The warranty on this lawn mower does not cover items that have been subjected to operator abuse or negligence. To receive full value from warranty, operator must maintain the lawn mower as instructed here.
- All adjustments should be checked at least once each season.
- Periodically check all fasteners to ensure they are tight.
- Regularly apply lubricant to mower's cutting surfaces, cutting reel axle shaft and wheels.
CLEANING THE PRODUT
To prevent the build-up of grass clippings or other debris, clean the mower by wiping it down with a damp cloth after each use.
- Scrape and clean the mower with a suitable tool (e.g. a plastic scraper or brush).
- Do not use a pressure washer or garden hose to clean the mower.
- Remove deposits from the wheel tread.
BLADE CARE
Mower blades are sharp and can cut. Wear gloves, and use extra caution when servicing them.
Wheel rotation can cause the blade reel to rotate.
Periodically sharpen the blades as follows:
- Spread a thin layer of lapping compound (100 - 240 grit) on the front edge of the reel blades.
- Adjust the cutter bar so that the blade has light but firm contact across the full width of the cutter bar. Refer to the Mower Blade Adjustment section in this manual.
- Operate the mower on a paved surface until the front edge of the cutter bar blade is polished.
- Clean any grinding compound or debris from the cutter bar blade, reel blade, pinions, and pawls.
NOTE: To prevent surface rust to mower blades, dry blades after use and apply a thin coat of penetrating oil spray.
NOTE: Reel mower sharpening kits are available for purchase at your local home center, hardware store or online.
BLADE ADJUSTMENT
The blade reel is adjusted for proper clearance from the cutting bar at the factory. However, after extended periods of mowing or as part of annual maintenance, it is recommended that the blade clearance be readjusted. Use a 6mm hex key for adjusting (not included).
- If the blade clearance is too wide, the cutting pattern will be rough and uneven.
- If the blade clearance is too narrow, the machine will be noisy and difficult to push while operating.
To adjust the blade clearance, proceed as follows:
- Locate the adjustment bolts found on the underside of the cutting bar on the rear of the mower.
- Using a hex key, tighten the adjustment bolts (one on each end) 1/4 turn (Fig. 6).


Do not over-tighten the adjusting screws, as this could damage the cutter bar. Tighten both screws during final adjustment.
Αdjusting the screws for blade adjustments is a very sensitive procedure. A sixteenth of a turn is considered a major adjustment. Βefore tightening one adjustment screw, make sure to loosen the opposite screw an equal amount.
- To test for proper adjustment:
- Lean the mower all the way back so that it is resting on the handle.
- Use one hand to slowly rotate the wheel of the mower, causing the blade reel to slowly turn.
If the wheel is too difficult to turn, slightly loosen each adjustment screw. - While the blade reel is turning, insert a sheet of paper between the blade reel and the cutting bar. The paper should shear evenly along the entire length of the cutter bar, as if being cut by scissors. If the paper does not shear, slightly tighten each adjustment screw and repeat the test.
WARRANTY
For product service call Customer Service at 1-866-384-8432.
EXPLODED VIEW / PARTS LIST

PARTS LIST


Replacement parts highlighted in grey are available for after sales purchase.
OPTIONAL COLLECTION BAG available, please call 866-384-8432 to order! Model # 10010336401

Distributed By Cleva North America 601 Regent Park Court Greenville, SC 29607 1-866-384-8432
Documents / ResourcesDownload manual
Here you can download full pdf version of manual, it may contain additional safety instructions, warranty information, FCC rules, etc.
Advertisement


Need help?
Do you have a question about the LMRM1601 and is the answer not in the manual?
Questions and answers