Advertisement
Instruction Manual
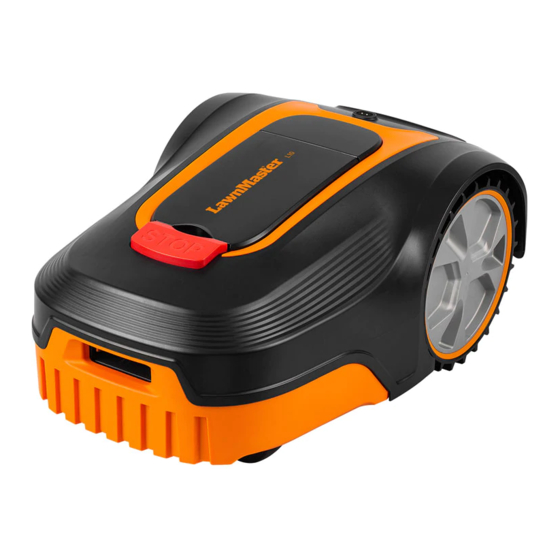
18cm 20V MAX* Lithium-Ion Cordless Robotic Lawnmower L10
Original Instructions
WARNING:
Read all safety instructions carefully before assembling and operating
this machine. Ensure the machine has been assembled correctly and safely. Keep the
instructions safe and pass them on to any subsequent user so that the information is always
available.
Advertisement

Related Manuals for LawnMaster L10


Summary of Contents for LawnMaster L10
- Page 1 Instruction Manual 18cm 20V MAX* Lithium-Ion Cordless Robotic Lawnmower L10 Original Instructions WARNING: Read all safety instructions carefully before assembling and operating this machine. Ensure the machine has been assembled correctly and safely. Keep the instructions safe and pass them on to any subsequent user so that the information is always...
- Page 3 Fig.1 Fig.2 Fig.3 Fig.4 Fig.5 Fig.6 >1 90° Fig.7 Fig.8 Fig.9 Fig.10 <1cm 30cm Max. 35% slope Fig.11 Fig.12 Fig.13...
-
Page 4: Table Of Contents
® Thank you for choosing the LawnMaster L10 robotic lawnmower. This product independently mows the lawn in a random pattern before returning to the base station to charge the battery by station and enables the mower to understand where to mow in the garden. The mower will alternately mow and charge for the working time selected, before returning to the base station to standby until the next day. -
Page 5: Symbols
SYMBOLS The following warning symbols appear throughout this manual and indicate the appropriate safety measures you should take when operating and maintaining the appliance. SYMBOL DESIGNATION/EXPLANATION WARNING - The robotic lawnmower can be dangerous if used incorrectly. Read instruction manual. Keep bystanders away. - Page 6 SYMBOLS SYMBOL DESIGNATION/EXPLANATION Do not subject the battery to direct sunlight over long periods and do not leave it on or near a heat source (max. 60°C). Recycle electrical waste products in an environmentally safe way where facilities exist. WARNING To avoid serious personal injury, do not attempt to use this product until you read thoroughly and understand completely the instruction manual.
-
Page 7: Safety Information
SAFETY INFORMATION IMPORTANT ! READ CAREFULLY BEFORE USE. KEEP FOR FUTURE REFERENCE Training and the proper use of the machine. children to use the machine. Local regulations may restrict the age of the operator. occurring to other people or their property. neighbours about the risks. - Page 8 SAFETY INFORMATION WARNING Never use the robotic lawnmower when people, especially children or pets, are in the cutting area. Preparation instructed. used and remove all stones, sticks, wires, pet toys, and other foreign objects. bolts and cutter assembly are not worn or damaged. Replace worn or damaged blades and bolts in sets to preserve balance.
- Page 9 SAFETY INFORMATION - Before clearing a blockage; - Before checking, cleaning or working on the machine. supply or touch a damaged cord before it is disconnected from the supply as this can lead to contact with live parts. to avoid damage to the cords which can lead to contact with live parts.
- Page 10 SAFETY INFORMATION which then can lead to a stoppage. charged in temperatures below 0 °C or above 50 °C. This might cause damage to the product. open sandals. Always wear substantial footwear and long trousers. feet well away from the blade(s). Maintenance and storage machine is in safe working condition.
- Page 11 SAFETY INFORMATION permitted to modify the original design of the mower. All WARNING Do not lift the mower when it is parked in the base station. It button and pull the mower out of the base station before lifting WARNING Disconnect all connections to the base station (power supply and boundary wire) if there is a risk of a thunderstorm.
- Page 12 SAFETY INFORMATION Battery to the battery. leakage may occur. If liquid comes in contact with your skin, wash immediately with soap and water. If liquid gets minutes, then seek immediate medical attention. recommended by the manufacturer. Incorrect use may result in electric shock, overheating or leakage of corrosive liquid from the battery.
-
Page 13: In The Box
IN THE BOX (Refer to Page 2) 1. Rain Sensor 14. Blade Turning Disc 2. Hatch to Control Panel 15. Blade 3. Rear Wheel 4. Charging Strips 17. Wire Peg (x250) 5. STOP Button 18. Boundary Wire 6. LED on the Base Station 19. -
Page 14: Assembly
ASSEMBLY Preparation includes suitable personal protective equipment. and pliers (not included in the box). Know Your Lawn (See Figs. 1-2) Understanding your lawn will reduce unnecessary mistakes and make the whole installation process easier and smoother. excluded from the working area (Fig. 1). pools of water on the lawn and to prevent mower from becoming stuck. - Page 15 ASSEMBLY NOTE: If desired, to save initial set-up time the robotic mower can be charged in the unsecured base station while the boundary wire is laid. Make sure the contact strip on the base station and the charging strips on the mower are connected properly. The robotic mower will be ready to mow immediately after connecting the boundary wire to the base station.
- Page 16 ASSEMBLY the boundary wire and the boundary (Fig. 6). boundary wire can be laid along the edge of the path or driveway, so that the mower can cut right over the edges. Make sure the width of the path or driveway must be more than 1m (Fig. 7). WARNING The mower must not run over gravel or similar material which can damage the blades.
- Page 17 ASSEMBLY In the case that two islands are too close, the width between two islands no more than 1m, it is recommended to lay out the boundary wire as illustrated (Fig. 15). How to wire a sub zone 16). Connect and Install the Base Station (See Figs. 18-22) NOTE: Start at the base station’s location to lay the boundary wire anti-clockwise around the lawn.
- Page 18 ASSEMBLY NOTE: Make sure the boundary wire is straight and tight between the hook (C) and terminal (A). Extra boundary wire should be cut off to avoid disrupting the robotic lawnmower (Fig. 20). NOTE: The boundary wire should not be crossed when connecting to the base station. The starting end of the boundary wire must be connected to the OUT-wire terminal (red) and the end of the boundary wire to the IN-wire terminal (black).
- Page 19 ASSEMBLY Check the LED status as below to make sure the connection between the base station and boundary wire is OK. LED on the Base Status Action Station Boundary wire and base station are connected Green, continuous successfully; the robotic mower is fully charged. The robotic mower is charging.
-
Page 20: Operation
OPERATION Switching On/Off Position Status Control Panel (See Fig. 28) Signal Indicator Signal Indicator Status Signal of boundary wire is normal. Red, Flashing Signal lost. Battery Indicator Battery Indicator Status Green, Continuous Green, Flashing Charging; battery capacity is more than 40%. Yellow, Flashing Charging;... - Page 21 OPERATION Time Setting Button Daily Working Schedule 4 hours of working time (mowing and charging included), and 20 hours on standby on the base station. 6 hours of working time (mowing and charging included), and 18 hours on standby on the base station. 8 hours of working time (mowing and charging included), and 16 hours on standby on the base station.
- Page 22 OPERATION WARNING Read the safety instructions carefully before you start your robotic lawnmower. WARNING Keep your hands and feet away from the rotating blades. Never put your hands or feet close to or under the mower when the motor is running. WARNING Never use the robotic lawnmower when people, especially children, or pets, are in the cutting area.
- Page 23 OPERATION robotic mower will follow the boundary wire to return to the base station. Allow the machine to cool down to reach a normal temperature. Then restart the mower, it will work again. Working Time The mower’s default daily working schedule includes 8 hours of working time (mowing and charging included), and 16 hours on standby on the base station.
- Page 24 OPERATION For manually mowing the edge: Press the STOP button to stop the mower. Put the mower on the base station with its front facing towards to the base station (Fig. 30). Then unlock the mower and press the Start button to start it. The robotic lawnmower will move backwards, turn around and begin to follow the boundary wire to mow the edge (Fig.
- Page 25 OPERATION - Turn clockwise to raise the cutting height. - Turn anti-clockwise to lower the cutting height.. USING A CUTTING HEIGHT THAT IS TOO LOW IN LONGER GRASS WILL USE MORE POWER AND REDUCE BATTERY RUN TIME. Rain Sensor (See Fig. 33) The robotic mower is equipped with a rain sensor (Fig.
-
Page 26: Maintenance
MAINTENANCE WARNING Always switch the product off before performing inspection, maintenance and cleaning work! WARNING If a part becomes worn or damaged, use recommended manufacture replacement parts. Use of WARNING Always wear safety goggles or glasses with side shields during operation. If operation is dusty, it is advised to also wear a dust mask. - Page 27 MAINTENANCE the blades to avoid personal injury. Cleaning the Underside It is recommended to check and clean the underside of the mower regularly. NOTE: has been interrupted and must be re-set according to instructions in the Working Time section. dirty. IMPORTANT: Do not wash the mower with a high-pressure washer! thoroughly with a soft brush or damp cloth.
- Page 28 MAINTENANCE Updating the Software (See Fig. 36) The software of the mower can be updated if necessary. NOTE: position during updating. NOTE: the software. NOTE: has been interrupted and must be re-set according to instructions in the Working Time section. screwdriver.
-
Page 29: Troubleshooting
TROUBLESHOOTING WARNING Only perform the steps described within these instructions! All further inspection, maintenance and Gloves and appropriate protective clothing must be worn when performing these instructions. Always turn off the mower before making any adjustment. Parts can be purchased from www.cleva-europe.com. - Page 30 TROUBLESHOOTING Check the boundary wire for proper The boundary wire is not connection to the base station. Refer connected to the base station. to the Connect and Install the Base Station section on page 17. Repair the damaged boundary wire section with spare wire.
- Page 31 TROUBLESHOOTING The signal is affected by metal objects (fences, reinforcement steel) or buried cables close by. There are obstacles too close to Adjust the boundary wire according to the edge of the boundary wire. instructions. The robotic lawnmower is affected by the signal from another robotic lawnmower installation close by.
- Page 32 TROUBLESHOOTING Replace the blades. Refer to Replacing the Mower Blade section Cutting blades are damaged. on page 26-27. Blades are available from www.cleva-europe.com. Too many blades in the same The robotic position lead to imbalance in the each screw. lawnmower vibrates. cutting system.
- Page 33 TROUBLESHOOTING Check the mains voltage and fuse, Socket outlet, fuse, mains cable if necessary have the base station or base station is defective. Height of cut is too low, or the Increase the height of cut. grass is too high. Area of cut (battery duration) is not large The grass is wet or damp.
- Page 34 TROUBLESHOOTING Loss of traction for over 7 Unlock the mower and press the Start minutes. button to start it. The mower is tilted more than 70 º. Free the mower. Then unlock the The mower is tilted more than Error indicator is mower and press the Start button to 30 º...
- Page 35 SPECIFICATIONS DIMENSIONS Length 55.6 cm Width 34.6 cm Height 23.4 cm Weight (With Battery) 8.1 kg ELECTRICAL SYSTEM Battery Type Power Supply Charger Current 1.5 A Power Cable Length 10 m Charging Period (Battery Fully Discharged) 40~45 min Boundary Wire Length 150 m NOISE EMISSIONS MEASURED IN THE ENVIRONMENT AS SOUND POWER...
-
Page 36: Recycling And Disposal
SPECIFICATIONS MOWING No Load Speed Cutting System 3 Pivoted Cutting Blades Blade Motor Speed 3500 rpm Cutting Width 18 cm Cutting Height Adjustment 20-60mm (5 Positions) Narrowest Possible Passage Power Consumption during Cutting 25 W±20 % Maximum Slope for Boundary Wire Maximum Slope for Cutting Area <... - Page 38 Main Zone >1m >1m 30cm Narrow Fig.14 Passage <5m 30cm 30cm >1m Sub Zone 30cm 30cm ≤1m >1m Fig.16 Fig.15 Main Zone <1m Sub Zone 20cm 20cm Fig.17 Fig.18 Fig.19 Fig.20...
- Page 39 Fig.22 Fig.23 Fig.21 Fig.24 Fig.25 Fig.26 Fig.27 Fig.28 Fig.29 Fig.30 Fig.31 Fig.32 Fig.33 Fig.34 Fig.35 Fig.36...
- Page 40 www.cleva-europe.com...
Need help?
Do you have a question about the L10 and is the answer not in the manual?
Questions and answers
Specification Page - No load speed. 3400-3500/min Can this be explained?
The no load speed specification for the LawnMaster L10 is 2900 ± 200 rpm.
This answer is automatically generated