Table of Contents
Advertisement
Quick Links
Advertisement
Table of Contents
Troubleshooting

Related Manuals for IBM 8237


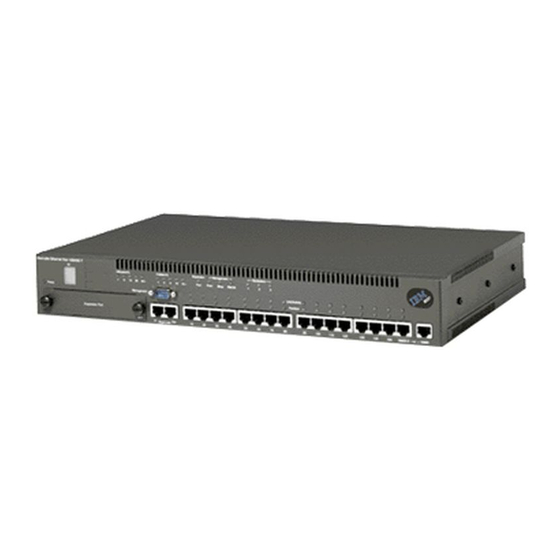
Summary of Contents for IBM 8237
- Page 3 PO Box 12195 RESEARCH TRIANGLE PARK NC 27709 When you send information to IBM, you grant IBM a nonexclusive right to use or distribute the information in any way it believes appropriate without incurring any obligation to you. © Copyright International Business Machines Corporation 1997. All rights reserved.
-
Page 4: Table Of Contents
Fast Expansion Modules (FEMs) ..............1-6 Back-Pressure Flow Control ................1-7 Understanding Managed Stacks ............... 1-7 Inter-8237 Communications In Managed Stacks ........... 1-7 Why Segment 8237s within a Stack? ............1-8 Segmenting 8237s within a Stack ..............1-8 Linking Segmented 8237s ................1-8 Assigning Backup Ports .................. - Page 5 Chapter 3. 8237 Administration ..............3-1 The 8237 User Interface Program ..............3-1 Management Using Terminal Emulation Software ........3-1 Establishing a Session with the 8237 ............3-2 Model 001 Management Options ............... 3-4 Set FEM Status ..................... 3-5 Model 002 and Model 003 Management Options ..........3-6 Exit .........................
- Page 6 Crossover 10BASE-T/100BASE-TX Cables ............. A-2 Crossover 10BASE-T/100BASE-TX Cables for STP ........A-3 Null-Modem Cable .................... A-3 Appendix B. The IBM 8237 Management Information Base ....... B-1 Appendix C. Product Warranty and Notices ..........C-1 Notices ......................C-2 Electronic Emission Notices ................C-3 Federal Communications Commission (FCC) Statement ......
- Page 7 8237 Hub Installation and Planning Guide...
- Page 8 3-32. Expansion Port Statistics - MEP Panel ..........3-40 3-33. Expansion Port Statistics - FEM Panel ..........3-41 3-34. Front View of the 8237 Model 002 or Model 003 Showing the LEDs .. 3-43 3-35. Front View of the 8237 Model 001 Showing the LEDs ......3-43 3-36.
- Page 9 A-1. Straight-Through UTP Cable (RJ-45 to RJ-45), T568-A ....... A-1 A-2. Straight-Through UTP Cable (RJ-45 to RJ-45), T568-B ....... A-1 A-3. Straight-Through STP Cable (RJ-45 to IBM Data Connector) ....A-2 A-4. Crossover UTP Cable (RJ-45 to RJ-45), T568-A ......... A-2 A-5.
-
Page 10: Safety Information
Information - Read This First , SD21-0030. In dit boekje vindt u veilige procedures voor het aansluiten van elektrische appratuur. Vorsicht: Bevor mit der Installation des Produktes begonnen wird, die Sicherheitshinweise in Achtung:Sicherheitsinformationen—Bitte zuerst lesen , IBM Form SD21-0030. Diese Veröeffentlichung beschreibt die Sicherheitsvorkehrungen für das Verkabeln und AnschlieBen elektrischer Geräte Danger : Avant d’installer le présent produit, consultez le livret Attention:... - Page 11 Vigyázat: Mielôtt megkezdi a berendezés üezembe helyezését, olvassa el a Caution: Safety Information— Read This First , SD21-0030 könyvecskében leírt biztonsági információkat. Ez a könyv leírja, milyen biztonsági intézkedéseket kell megtenni az elektromos berendezés huzalozasakor illetve csatlakoztatásakor. 8237 Hub Installation and Planning Guide...
- Page 12 Caution: The ac power outlet must be located near the unit and easily accessible. Waarschuwing: Het stopcontact moet zich in de nabijheid van de eenheid bevinden en gemakkelijk toegankelijk zijn. Cuidado: A tomada de corrente alternada deve estar próxima da unidade e ser facilmente acessível.
- Page 13 A tomada eléctrica deve estar localizada perto da unidade e ser de fácil acesso. Precaución: La toma de alimentación CA debe colocarse cerca de la unidad y ser de fácil acceso. VARNING: Eluttaget måste vara lättåtkomligt och placerat nära enheten. 8237 Hub Installation and Planning Guide...
-
Page 14: Lithium Battery
At the end of the life of this machine, return the IBM 8237 Stackable Ethernet Hub 10BASE-T to IBM or dispose of it according to local regulations. - Page 15 8237 Hub Installation and Planning Guide...
-
Page 16: About This Manual
About This Manual This manual describes the features of the IBM 8237 Stackable Ethernet Hub 10BASE-T (8237) and explains how to plan for 8237s in your new or existing network, how to install 8237s, and how to administer 8237s. Who Should Read This Manual If you are a network planner, a hardware installer, a network administrator, or a service engineer, this manual will help you in your work with 8237s. -
Page 17: Technical And Planning References
If you intend to use STP cabling, refer to: • IBM Cabling System Planning and Installation Guide , GA27-3361. If you intend to use optical fiber cabling, refer to: • IBM Cabling System Optical Fiber Planning and Installation Guide , GA27-3943. 8237 Hub Installation and Planning Guide... -
Page 18: Chapter 1. Introduction And Planning
Chapter 1. Introduction and Planning This chapter describes the features of the IBM 8237 Stackable Ethernet Hub 10BASE-T (8237) and provides information you will need to integrate 8237s into your new or existing network. The 8237 The 8237 is a stackable Ethernet hub that comes in three models: •... -
Page 19: Features
• LEDs that indicate link status, activity, and partition status at the port level. • Storage of vital configuration data in nonvolatile memory. • Intrusion prevention: The 8237 can be configured to issue warnings or disable a port automatically when frames are received at that port from any MAC address other than the one authorized to send to that port. - Page 20 - SNMP manageability over a Serial Line Internet Protocol (SLIP) link to the management port - Support for BootP for configuring and upgrading the microcode of any 8237 Model 002 or Model 003 - Support for TFTP for upgrading the microcode of any Model 002 or Model 003 - Telnet support.
-
Page 21: Stacks
For more information on managed stacks, see "Understanding Managed Stacks” on page 1-6. An unmanaged stack is made up exclusively of Model 001s. There are four ways to manage the 8237: Using a local VT100 terminal emulator out-of-band Using SNMP over SLIP out-of-band... -
Page 22: Interconnecting 8237S
Stack Link port. The total hub Stack Link cable length from the first to the last 8237 can be up to 75 m (246 ft). When the Stack Link cable is used, management information can be passed between hubs, enabling management of an entire stack. -
Page 23: Understanding Expansion Ports
FEMs can be connected to a subnetwork, directly to a server, bridge, or router, or to another 8237 in the stack that has been configured to be in a different segment. Two 10BASE-T/100BASE-TX FEMs in an 8237 stack can serve as bridges, joining three segments. -
Page 24: Back-Pressure Flow Control
Using any of the management methods mentioned in the previous section, you can perform any of the following actions on any 8237 in a stack while attached to the Model 002 or Model 003 that is currently the primary management hub as indicated by the Prim LED: •... -
Page 25: Why Segment 8237S Within A Stack
8237 to any of the three backplanes, or to isolate it from the stack. When this is done, the 8237 is said to have been segmented . Even though one or more hubs have been logically removed from the Ethernet bus, the management bus permits the management information, described in "Inter-8237 Communications... -
Page 26: Ethernet Planning
In order to manage a stack of 8237s: • The 8237 you want to manage must be a Model 002 or Model 003, or it must be connected in a stack that includes at least one Model 002 or Model 003, and •... -
Page 27: Maximum Segment Lengths
UTP and STP cable pinouts can be found in Appendix A, "Cable Pinout Diagrams." Cabling Requirements for 10BASE-T Ports This section describes the cables required to connect the 8237’s 10BASE-T ports to network devices such as workstations and servers. Problems with LANs are frequently due to incorrect cable selection or poor cabling practices. -
Page 28: Cabling Requirements For The Expansion Ports
It is good practice to use only those components that have been certified by an independent testing laboratory as meeting one or more of the standards. In the case of IBM Cabling System types 1, 6, and 9 cable, certification should be either to the IBM specification or to the applicable standard. -
Page 29: Cabling Requirements For The Management Port
Cabling Requirements for Stack Link The 8237 Stack Link ports provide an RJ-45 connection for the Stack Link cable. A 0.5 m (1.6 ft) length cable is provided with each unit. If a longer cable is needed use only straight-through 100-ohm category 5 STP cable with RJ-45 plugs on both ends. - Page 30 • SNMP group SNMP group authentication traps flag • RPTR group Hub MIB port administration status • Community group Community name of IBM 8237 MIB Community access mode Community status • IP trap manager group IP trap manager community IP address of the IP trap manager IP trap manager status •...
-
Page 31: Power Requirements And Characteristics
Console lockout delay Power Requirements and Characteristics The connector for the power cord is on the rear panel of the 8237. Note: For safety reasons, it is recommended that the connection be made first to the 8237, and then to the ac outlet. -
Page 32: Operating Environment
Allow at least 76 mm (3 in.) at the back and 50 mm (2 in.) at the sides of the 8237 to ensure proper cooling. Leave 200 mm (8 in.) in front for viewing the LEDs, installing Expansion Ports, connecting cables, and for air circulation. -
Page 33: Documenting Your Installation
Record the identifier for the port to which the installer should connect the cable from the 8237’s port. If the 8237 is to be installed in a wiring closet, indicate that the installer should connect a patch cable from a port in the 8237 to a port in a patch panel. -
Page 34: Chapter 2. Installing The 8237
Rack-Mounting the 8237 Using a screwdriver, remove the four screws (two on each side) that attach the mounting brackets to the sides of the 8237, as shown in Figure 2-1 on page 2-2. Rotate the brackets and reattach them as shown in Figure 2-1 on page 2-2. - Page 35 Gather the rack-mounting screws (not provided) and the cable management bracket and place them within reach. Hold the 8237 in position in the rack and start the lower of the two screws that will secure the left bracket. On the right side, align the lower screw holes in the mounting bracket and the cable management bracket with the correct hole of the rack and then start the screw as shown in Figure 2-2 on page 2-3.
-
Page 36: Surface-Mounting The 8237
2-4. Surface-Mounting the 8237 Place the 8237 on a flat, horizontal surface where it is to be used. The 8237 is not designed for vertical mounting. If you are connecting multiple 8237s in a stack, go to "Interconnecting 8237s"... -
Page 37: Installing An Expansion Port
"Installing and Routing Cables." Note: The Expansion Port is not hot-pluggable. The Expansion Port slot is located at the lower left of the front of the 8237. See Figure 1-1 on page 1-1 for its location. -
Page 38: Connecting Hubs With Stack Link Cables
8237, Ethernet traffic to all backplane buses will be disrupted. In Figure 2-4 on page 2-6, the topmost 8237 is a Model 002 and the two lower units are Model 001s. Note the Stack Link cable connections. In this example, the Model 002 would be identified as occupying position 1, the Model 001 in the middle would occupy position 2, and the Model 001 on the bottom would occupy position 3. -
Page 39: Connecting A Modem Or A Null-Modem Cable To The Management Port
Connect one end of the serial cable (modem connection) or one end of the null-modem cable (direct connection) to the 8237 port labeled Management . Figure 2-5. Location of the Management Port •... -
Page 40: Powering On The 8237
This section describes how you should expect the LEDs to function when you power the 8237 ON. Connect the power cord to the connector at the rear of the 8237, as shown in Figure 2-6. Figure 2-6. Connecting the Power Cord Insert the other end of the power cord into the electric outlet. - Page 41 8237 Hub Installation and Planning Guide...
-
Page 42: Chapter 3. 8237 Administration
The default is 9600 bits per second, which is the only speed at which the Model 001 can communicate. The Model 002 and Model 003 can communicate at all three speeds. To communicate with the 8237 for the first time, configure the terminal emulation application as follows: •... -
Page 43: Establishing A Session With The 8237
Communicating Using a Modem If you will be communicating with the 8237 by means of a modem connection, you will need to install a second modem and connect it to your computer. - Page 44 After you have established a connection with the 8237, you will be presented with one of two situations: • If the 8237 was already powered on, you will see a blank screen. • If you power on the 8237 after establishing the connection, you will see a series of diagnostic messages.
-
Page 45: Model 001 Management Options
Set hub ID Type h and press Enter to display a window in which you can enter a hub identification number (between 1 and 10) for this 8237. In a managed stack, the hub ID is assigned automatically by the primary management agent. -
Page 46: Set Fem Status
Type w and press Enter to cause all changes you have made to the Model 001’s configuration to be written to nonvolatile memory. If you do not do this, changes will be lost the next time the 8237 is restarted. Xmodem Download Type x and press Enter to initiate an Xmodem download of new microcode. -
Page 47: Model 002 And Model 003 Management Options
<Ctrl+E> to exit this program Figure 3-3. Model 002 and Model 003 Main Menu Panel To navigate any 8237 user interface panel, use the four cursor movement keys. The Up and Down arrow keys cause selections to be highlighted while moving vertically. -
Page 48: Exit
Selecting this item causes you to exit from the user interface program. Note that this has the same effect as pressing Ctrl+E. Restart System Selecting this item results in the 8237 management agent being restarted. You are prompted before this action takes place. System Information Selecting System Information on the Main Menu causes the panel illustrated in Figure 3-4 to be displayed. -
Page 49: Snmp Configuration
SNMP Configuration Note: If you will be using an SNMP-based network management program to manage your 8237 installation, you need to provide the appropriate information on this panel and its lower level panels. If you will not be using an SNMP-based network management application, you can ignore this section. -
Page 50: Snmp Communities Panel
This is a selection field. Possible values are READ/WRITE (the community can read and update system information) and READ ONLY (the community can only read system information). Status This is a selection field. Possible values are ENABLED and DISABLED. Chapter 3. 8237 Administration... -
Page 51: Ip Trap Managers Panel
Community Name This field is where you enter the community name of the IP trap manager. Status This is a selection field. Possible values are ENABLED and DISABLED. 3-10 8237 Hub Installation and Planning Guide... -
Page 52: Ipx Trap Managers Panel
This field is where you enter the dotted-decimal IPX address to which trap messages are to be sent. Community Name This field is where you enter the community name of the IPX trap manager. Status This is a selection field. Possible values are ENABLED and DISABLED. 3-11 Chapter 3. 8237 Administration... -
Page 53: Auto-Discovery Configuration Panel
This field allows you to enter a time limit for monitoring loss of contact with the management station. The maximum value that can be entered is 99 hours. When this time limit has expired the SNMP agent will start re- sending auto-discovery traps. 3-12 8237 Hub Installation and Planning Guide... -
Page 54: Segment Configuration
This field saves the IP addresses to nonvolatile memory and immediately enables them. Press Enter when this field is highlighted, and then respond Y (Yes) or N (No) to the prompt that is displayed on the message line near the bottom of the panel. 3-13 Chapter 3. 8237 Administration... - Page 55 This is a selection field. Possible values are ENABLED and DISABLED. SNMP over Ethernet This is a selection field. Possible values are ENABLED and DISABLED. When enabled, this allows SNMP to run directly on an Ethernet network using Ethernet MAC frames (RFC 1098). 3-14 8237 Hub Installation and Planning Guide...
-
Page 56: Hub Configuration
Return to the Main Menu panel. Hub ID Configuration Change the Hub ID setting of 8237s. When you select the hub you want to configure, the panel illustrated in Figure 3-12 on page 3-16 is displayed. 3-15 Chapter 3. 8237 Administration... -
Page 57: Hub Configuration Panel
This field displays the level of the downloadable flash code in this 8237. Segment This field allows you to enter values that assign the 8237 to a backplane segment (1, 2, or 3) or to isolate it from the stack (0). - Page 58 • TFTP DOWNLOAD (download microcode using TFTP before bootup). • BOOTP GET IP, (obtain the 8237’s IP information from the BootP server and then start the microcode in flash ROM). • BOOTP DOWNLOAD (obtain the 8237’s IP information from the BootP server and then load microcode from the TFTP server).
-
Page 59: Hub Id Configuration Panel
Return to Previous Panel Return to the Hub Configuration: Hub Selection panel. Position The position in the stack, in top-down order, of the 8237 whose ID is to be set. Hub ID This is a selection field. Possible values range from 1 through 10. -
Page 60: Port Configuration
Selecting 1-8 on the Port Configuration: Port Selection panel causes the panel illustrated in Figure 3-15 on page 3-20 to be displayed. Selecting 9-16 causes the panel illustrated in Figure 3-16 on page 3-20 to be displayed. 3-19 Chapter 3. 8237 Administration... - Page 61 Return to the Port Configuration: Port Selection panel. Hub ID This field displays the hub ID number. Position This field displays the 8237’s position in the stack in top-down order. Port ID This field displays the port number. Port Name This field is where you can assign a meaningful name to each port on the 8237.
- Page 62 Link This field displays the port’s current status. The two values are UP and DOWN. Auto Part This field displays the auto-partition status of the port. The two values are PART and NOT PART. 3-21 Chapter 3. 8237 Administration...
-
Page 63: Expansion Port Configuration - Mep Panel
Hub ID This field displays the hub ID number. Position This field displays the 8237’s position in the stack in top-down order. Port ID This field displays the type of port. This value is always EP for the Expansion Port. -
Page 64: Expansion Port Configuration - Fem Panel
Hub ID This field displays the hub ID number. Position This field displays the 8237’s position in the stack in top-down order. Port ID This field displays the type of port. This value is always EP for the Expansion Port. - Page 65 This is a selection field. Possible values are STORE AND FORWARD and ADAPTIVE CUT-THROUGH. Forwarding In Use This field displays the forwarding mode status. Possible values are STORE AND FORWARD and ADAPTIVE CUT-THROUGH. 3-24 8237 Hub Installation and Planning Guide...
-
Page 66: Port Backups
Possible values are 1 through 16 and EP. Action This is a selection field. Possible values are ACTIVE and INACTIVE. Status This field displays the status of the backup port pair. Possible values are STAND-BY and BACKUP. 3-25 Chapter 3. 8237 Administration... - Page 67 This means that a port configured as the secondary that has been disabled as the result of an intrusion violation will not be available should the primary port with which it is paired fail. 3-26 8237 Hub Installation and Planning Guide...
-
Page 68: Port Security Control
Selecting 1-8 on the Port Security Control: Hub Selection panel causes the panel illustrated in Figure 3-21 on page 3-28 to be displayed. Selecting 9-16 causes the panel illustrated in Figure 3-22 on page 3-28 to be displayed. 3-27 Chapter 3. 8237 Administration... - Page 69 Return to the Port Security Control: Hub Selection panel. Hub ID This field displays the hub ID number. Position This field displays the 8237’s position in the stack in top-down order. Port The port number on the selected hub for which intrusion control is to be configured.
- Page 70 (a pattern of alternating ones and zeroes). Broadcast packets are always repeated on all ports unchanged. Last Source Address This field displays the source address of the last incoming frame on the port. 3-29 Chapter 3. 8237 Administration...
-
Page 71: Tftp Download
TFTP Download For more information on obtaining the most current version of the 8237 microcode, see "Getting New Microcode" on page 3-46. When connected to a primary management unit, selecting TFTP Download on the Main Menu causes the panel illustrated in Figure 3-23 to be displayed. -
Page 72: Xmodem Download
Xmodem Download For more information on obtaining the most current version of the 8237 microcode, see "Getting New Microcode" on page 3-46. Selecting Xmodem Download on the Main Menu causes the panel illustrated in Figure 3-24 to be displayed. XMODEM Download... -
Page 73: User Passwords
User Name The user name that is to be entered when connecting to the 8237. The default user name for Admin is admin, and the default for Guest is guest. Password The password that is to be entered when connecting to the 8237. -
Page 74: Management Port Configuration
Management Port to be disabled after no user input is received for the time set in Lockout Delay Time. Lockout Delay Time The length of time, in minutes, that the 8237’s user interface will remain active without user input following a login. The maximum value that can be entered is 99 minutes. -
Page 75: Segment Statistics
CRC Errors The total number of CRC error frames detected on the segment during the current operation cycle. Total Errors The total number of errors detected on the segment during the current operation cycle. 3-34 8237 Hub Installation and Planning Guide... -
Page 76: Hub Statistics
Figure 3-28. Hub Statistics: Hub Selection Menu Panel Return to Previous Panel Return to the Main Menu panel. When you select the hub whose statistics you want to display, the panel illustrated in Figure 3-29 on page 3-36 is displayed. 3-35 Chapter 3. 8237 Administration... - Page 77 Selecting this item causes all fields to be updated. Hub ID This field displays the hub ID number. Position This field displays the 8237’s position in the stack in top-down order. Frames The total number of frames received by the hub during the current operation cycle.
-
Page 78: Port Statistics
Port Statistics: Port Selection panel, the panel illustrated in Figure 3-31 on page 3-38 is displayed. When EP is selected the statistics panel for MEP or FEM is displayed, depending on which Expansion Port is installed. 3-37 Chapter 3. 8237 Administration... -
Page 79: Port Statistics Panel
This field displays the hub ID number. Port ID This field displays the port ID number. Position This field displays the 8237’s position in the stack in top-down order. Readable Frames Total number of readable frames received by the port during the current operation cycle. - Page 80 Total errors detected by the port during the current operation cycle. LSA Changes Total number of last source address (LSA) changes detected by the port during the current operation cycle. Last Source Address Source address of the last frame received by the port. 3-39 Chapter 3. 8237 Administration...
-
Page 81: Expansion Port Statistics - Mep Panel
This field displays the port ID number. This will always be EP for an Expansion Port. Position This field displays the 8237’s position in the stack in top-down order. Readable Frames Total number of readable frames received by the port during the current operation cycle. -
Page 82: Expansion Port Statistics - Fem Panel
Frames Too Long In Discards Runts Out Frames Collisions Out Bytes Out Discards Use arrow keys to move. <Enter> to confirm <Ctrl+T> to return to Main Menu Figure 3-33. Expansion Port Statistics - FEM Panel 3-41 Chapter 3. 8237 Administration... - Page 83 This field displays the port ID number. This will always be EP for an Expansion Port. Position This field displays the 8237’s position in the stack in top-down order. In Frames Number of frames received by the FEM during the current operation cycle.
-
Page 84: Understanding The Leds
Table 3-1 on page 3-44 and Table 3-2 on page 3-45 give the meanings associated with the 8237 status and port LEDs. Figure 3-34. Front View of the 8237 Model 002 or Model 003 Showing the LEDs Figure 3-35. Front View of the 8237 Model 001 Showing the LEDs 3-43 Chapter 3. - Page 85 RMON The unit has the RMON management agent installed and the agent is functioning normally. (Green) There is no RMON management agent installed, or an installed RMON agent has failed. 3-44 8237 Hub Installation and Planning Guide...
- Page 86 Explanation Backplane 1 The 8237 is attached to the indicated backplane. Backplane 2 If all three LEDs are off, the 8237 has been isolated from all backplanes. Backplane 3 (Green) In a stack, each repeater has a unique ID. The...
-
Page 87: Getting New Microcode
Getting New Microcode The latest version of 8237 microcode is made available on the IBM PC Company Bulletin Board System (BBS), as well as the IBM Networking Environment Support WWW and anonymous FTP sites on the Internet. The latest IBM 8237 private MIB is also available from these sites under the file name 8237MIB.EXE . -
Page 88: Management Using Telnet
Another requirement is that the SLIP client/host (the PC or device that is connected to the 8237 by a serial link) must use the same IP address and subnet mask as the 8237 Serial Line IP. Using the above example, the address and subnet mask for the SLIP client/host must be 9.123.1.10 and 255.255.255.0, respectively. -
Page 89: Preparing For Snmp Management
SNMP management requires that you have a managed stack: that is, that your stack contain at least one 8237 Model 002 or Model 003. Model 002 incorporates an SNMP agent and Model 003 incorporates an RMON agent that implements the SNMP protocol. - Page 90 "IP" is its IP address, "SM" is its IP subnet mask, and "GW" is its default gateway, or default router, address. 3-49 Chapter 3. 8237 Administration...
- Page 91 3-50 8237 Hub Installation and Planning Guide...
-
Page 92: Chapter 4. Troubleshooting, Installation, And Replacement Procedures
Chapter 4. Troubleshooting, Installation, and Replacement Procedures This chapter provides diagnostic techniques and replacement procedures for the IBM 8237 Stackable Ethernet Hub 10BASE-T, including a parts catalog. Problem Determination There are three methods of problem determination for the 8237: 1. Observe the LEDs. See "LED Symptom and Fix Listing" for a list of symptoms and fixes. - Page 93 The Power LED is OFF. Verify ac power. Replace the power supply. An 8237 Model 002 or Model 003 does not Verify that the hub is correctly connected to have either the Prim or the Bkup LED ON. the other hubs in the stack and that it has power.
-
Page 94: Hot-Swapping 8237S
Problem Determination through the Management Port When power is applied to an 8237, a set of self-tests is performed. To review the results of these tests, you can connect a computer that has a terminal emulation program to the management port, remove power from the 8237 to be tested, and then reconnect power. -
Page 95: Sample 1
Replacement procedures are detailed in “Installation, Removal, and Replacement Procedures” on page 4-8. Boot FLASHROM test Replace 8237 microcode. Next, replace the 8237. EEPROM test Replace the 8237. System SRAM test Replace the 8237. -
Page 96: Sample 2
EPROM test Replace the 8237. NIC test Replace the 8237. REPEATER test Replace the 8237. FLASHROM test Replace 8237 microcode. Next, replace the 8237. FEM test Replace the Fast Expansion Module. Chapter 4. Troubleshooting, Installation, and Replacement Procedures... -
Page 97: Sample 3
The following example is typical of the display when you power ON a Model 003 advanced management hub. You can scroll up and down in this display. IBM 8237 Agent EPROM V1.00 1997/06/30 Copyright(C) 1997, IBM Corp. Current hub segment is 1 Console speed is 9600 Performing self-test, please wait.. - Page 98 IBM 8237 Agent EPROM V1.00 1997/06/30 Copyright(C) 1997, IBM Corp. Current hub segment is 1 Console speed is 9600 Performing self-test, please wait..<Press Ctrl+L to enter Download menu> DRAM test....PASS. EPROM test....PASS. NIC test....PASS. REPEATER test....PASS. FLASHROM test....FAIL. FEM test....Not Detected.
-
Page 99: Installation, Removal, And Replacement Procedures
Installation, Removal, and Replacement Procedures Following is the list of replaceable parts in the 8237. If any other part of the 8237 is damaged or defective, then the 8237 must be replaced. • AC power cable • Cable management bracket •... - Page 100 Figure 4-6. Four Expansion Port Types Verify Expansion Port operation as follows: • Observe the indicators on the front panel of the 8237. The Expansion Port LED should be ON. The Power LED should be ON. • Observe the LEDs on the Expansion Port. The port’s LEDs should display the current activity.
-
Page 101: Rmon Daughter Board Installation And Replacement
Attention: If you remove an Expansion Port without replacing it with another, then you must replace the blank cover over the empty slot for proper cooling of the 8237. RMON Daughter Board Installation and Replacement This procedure is applicable to 8237 Models 002 and 003 only. -
Page 102: Back View: Removing The Fan-Guard Screws
Figure 4-8. Back View: Removing the Fan-Guard Screws c. Grasp the top cover of the 8237 at the rear of the machine and lift it approximately 25 mm (1 in.) at the back. Then, slide the cover up and to the rear to remove it. -
Page 103: Simm Removal
Replace the cover by reversing the actions in step 2. Note that both sides of the top cover fit inside the edges of the bottom cover. Connect ac power by attaching the power cord to the 8237 and then to the ac outlet. -
Page 104: Simm Memory Installation And Replacement
Figure 4-13. Back View: Removing the Fan-Guard Screws c. Grasp the top cover of the 8237 at the rear of the machine and lift it approximately 25 mm (1 in.) at the back. Then, slide the cover up and to the rear to remove it. -
Page 105: Simm Removal
Figure 4-15. SIMM Removal Install the new SIMM by sliding it into the slot, and rotating the top to the back, as shown in Figure 4-16. Make sure the clips snap into place. 4-14 8237 Hub Installation and Planning Guide... -
Page 106: Fan Replacement
Replace the cover by reversing the steps in step 2 on page 4-9. Note that both sides of the top cover fit inside the edges of the bottom cover. Connect ac power by attaching the power cord to the 8237 and then to the ac outlet. -
Page 107: Fan Replacement
These are indicated in Figure 4-19. Retain the fan guard. Figure 4-19. Fan Replacement Set the new fan in the 8237. The arrows on the fan go as shown in Figure 4-19. Replace the fan guard and the two fan-mounting screws removed in step 4. -
Page 108: 8237 Parts Catalog
Stack Link Cable 86H0021 Cable Management Bracket 13H8966 RMON Daughter Board 85H8869 Fan Assembly 85H8870 Power Supply 85H8877 Note: A label on the left front of the 8237 indicates the model number. 4-17 Chapter 4. Troubleshooting, Installation, and Replacement Procedures... - Page 109 Figure 4-20. 8237 Field-Replaceable Parts 4-18 8237 Hub Installation and Planning Guide...
-
Page 110: Available Features For Your 8237
Namibia, Pakistan, South Africa, Swaziland, Zimbabwe 14F0014 Liberia, Saudi Arabia 6952301 China 14F0033 RMON Memory SIMM The 8237 RMON Daughter Board supports the following types of industry-standard SIMM. • 4, 8, 16, or 32 MB • 72 pin • 60 nanosecond •... -
Page 111: Help And Warranty Service Information
Use one of the following numbers: In the United States, call the IBM PC HelpCenter at 1-800-772-2227. If you want a copy of the latest 8237 microcode or an updated IBM MIB, see “Getting New Microcode” on page 3-46. In Canada, call HelpPC at 1-800-565-3344. - Page 112 Outside the United States and Canada, contact your place of purchase or your local IBM branch office. 4-21 Chapter 4. Troubleshooting, Installation, and Replacement Procedures...
- Page 113 4-22 8237 Hub Installation and Planning Guide...
-
Page 114: Appendix A. Cable Pinout Diagrams
Two standards are shown for wiring UTP connectors, T568-A and T568-B. The only difference between them is in the color of the insulation around the wires. Figure A-1. Straight-Through UTP Cable (RJ-45 to RJ-45), T568-A Figure A-2. Straight-Through UTP Cable (RJ-45 to RJ-45), T568-B © Copyright IBM Corp. 1997... -
Page 115: Straight-Through 10Base-T/100Base-Tx Cables For Stp
Crossover 10BASE-T/100BASE-TX Cables Crossover cables are typically required when making 10BASE-T/100BASE-TX connections to other hubs. The 8237 does not require crossover cables, but if you need them, Figure A-4 and Figure A-5 show you how to wire the connectors. Two standards are shown for wiring UTP connectors, T568-A and T568-B. The only difference between them is in the color of the insulation around the wires. -
Page 116: Crossover 10Base-T/100Base-Tx Cables For Stp
Crossover 10BASE-T/100BASE-TX Cables for STP Figure A-6. Crossover STP Cable (RJ-45 to IBM Data Connector) Null-Modem Cable A null-modem cable should be used for a direct connection from a PC serial port to the 8237 Management Port. Hub’s 9-Pin PC’s 9-Pin... - Page 117 8237 Hub Installation and Planning Guide...
-
Page 118: Appendix B. The Ibm 8237 Management Information Base
Appendix B. The IBM 8237 Management Information Base Note: A copy of the latest IBM 8237 MIB can be obtained through the IBM Personal Computer Company BBS. Follow the steps in "Getting New Microcode" on page 3-46. The IBM 8237 product supports the following standard MIBs: 1. - Page 119 ::= { communityEntry 1 } communityString OBJECT-TYPE SYNTAX DisplayString ACCESS read-write STATUS mandatory DESCRIPTION "Community string; the length is limited by communityStringSize." ::= { communityEntry 2 } communityAccessMode OBJECT-TYPE SYNTAX INTEGER { read-only(1), read-write(2) ACCESS read-write 8237 Hub Installation and Planning Guide...
- Page 120 "IP trap manager table." ::= { ipTrapManagerMgt 2 } ipTrapManagerEntry OBJECT-TYPE SYNTAX IpTrapManagerEntry ACCESS not-accessible STATUS mandatory INDEX { ipTrapManagerIndex } ::= { ipTrapManagerTable 1 } IpTrapManagerEntry ::= SEQUENCE ipTrapManagerIndex INTEGER, ipTrapManagerCommunityIndex INTEGER, Appendix B. The IBM 8237 Management Information Base...
- Page 121 STATUS mandatory DESCRIPTION "IPX trap manager table." ::= { ipxTrapManagerMgt 2 } ipxTrapManagerEntry OBJECT-TYPE SYNTAX IpxTrapManagerEntry ACCESS not-accessible STATUS mandatory INDEX { ipxTrapManagerIndex } ::= { ipxTrapManagerTable 1 } IpxTrapManagerEntry ::= SEQUENCE ipxTrapManagerIndex INTEGER, 8237 Hub Installation and Planning Guide...
- Page 122 IpAddress ACCESS read-write STATUS mandatory DESCRIPTION "IP address of the file server of the download file." ::= { downloadMgt 1 } downloadFilename OBJECT-TYPE SYNTAX OCTET STRING (SIZE (0..127)) ACCESS read-write STATUS mandatory Appendix B. The IBM 8237 Management Information Base...
- Page 123 OBJECT IDENTIFIER ::= { autodiscovery 2 } ipAutoDiscoveryStatus OBJECT-TYPE SYNTAX INTEGER { enabled(1), disabled(2) ACCESS read-write STATUS mandatory DESCRIPTION "Setting this object to enabled(1) enables the IP auto-discovery feature." ::= { ipAutoDiscovery 1 } 8237 Hub Installation and Planning Guide...
- Page 124 OBJECT IDENTIFIER ::= { stackInfo 2 } backupPortInfo OBJECT IDENTIFIER ::= { stackInfo 3 } securityInfo OBJECT IDENTIFIER ::= { stackInfo 4 } -- Basic Stack Object basicStack OBJECT IDENTIFIER ::= { basicInfo 1 } Appendix B. The IBM 8237 Management Information Base...
- Page 125 DESCRIPTION " < FOR IBM 8237 DEFINITION : > Total of 10 hubs can be stacked in a single 8237 system, each uses 24 bytes to indicate its status. 240 bytes = 10 hub * (17 + 7) bytes byte240 byte239....byte2 byte1...
- Page 126 0 - 1: reserved 00 - SNMP Agent not present (8237-001) 01 - SNMP Agent only (8237-002) 10 - SNMP agent with RMON 1 probe (8237-003) 11 - SNMP agent with RMON 2 probe (8237-003) bit 2 : master status 0 - subordinate;...
- Page 127 ::= { basicInfo 2 } basicSegmentEntry OBJECT-TYPE SYNTAX BasicSegmentEntry ACCESS not-accessible STATUS mandatory INDEX { basicSegmentIndex } ::= { basicSegmentTable 1 } BasicSegmentEntry ::= SEQUENCE basicSegmentIndex INTEGER, basicSegmentProtocol INTEGER, B-10 8237 Hub Installation and Planning Guide...
- Page 128 Because the IBM 8237 is a multi-home host (A device has multiple interfaces without routing capability), each segment of the 8237 system has its own interface parameters, such as the IP address. When the agent switches to another segment, the interface parameters are changed.
- Page 129 OCTET STRING (SIZE (4)) ACCESS read-write STATUS mandatory DESCRIPTION "Internal IPX network number of the segment. Internal network number identifies a server in IPX network. It must be unique within an IPX network." B-12 8237 Hub Installation and Planning Guide...
- Page 130 BasicHubEntry ::= SEQUENCE basicHubIndex INTEGER, basicHubType INTEGER, basicHubPosition INTEGER, basicHubSegment INTEGER, basicHubName DisplayString, basicHubHwVer INTEGER, basicHubFwMajorVer INTEGER, basicHubFwMinorVer INTEGER, basicHubFanStatus INTEGER, basicHubBootupCodeMajorVer INTEGER, basicHubBootupCodeMinorVer INTEGER, basicHubAgentStatus INTEGER, basicHubAgentPhysAddr PhysAddress, basicHubAgentBootupOption INTEGER, basicHubAgentBaudrate INTEGER B-13 Appendix B. The IBM 8237 Management Information Base...
- Page 131 "Microcode major version of this hub." ::= { basicHubEntry 7 } basicHubFwMinorVer OBJECT-TYPE SYNTAX INTEGER ACCESS read-only STATUS mandatory DESCRIPTION "Microcode minor version of this hub." ::= { basicHubEntry 8 } basicHubFanStatus OBJECT-TYPE SYNTAX INTEGER { good(1), fail(2) B-14 8237 Hub Installation and Planning Guide...
- Page 132 RAM and start it. bootp-get-ip(3): Get the IP information from the BootP server, and then start up the microcode in flash ROM. bootp-download(4): Get the IP information from the BootP server, and then download B-15 Appendix B. The IBM 8237 Management Information Base...
- Page 133 STATUS mandatory INDEX { basicFemHubIndex } ::= { basicFemTable 1 } BasicFemEntry ::= SEQUENCE basicFemHubIndex INTEGER, basicFemType INTEGER, basicFemLinkStatus INTEGER, basicFemDuplexStatus INTEGER, basicFemBackPressureStatus INTEGER, basicFemForwardingMode INTEGER, basicFemSpeed INTEGER, basicFemName DisplayString basicFemHubIndex OBJECT-TYPE B-16 8237 Hub Installation and Planning Guide...
- Page 134 Setting this object to disabled(1) lets the FEM port discard the input frames of the source network when the output queue is full." ::= { basicFemEntry 5 } basicFemForwardingMode OBJECT-TYPE B-17 Appendix B. The IBM 8237 Management Information Base...
- Page 135 ::= { basicGroup 3 } basicProbeEntry OBJECT-TYPE SYNTAX BasicProbeEntry ACCESS not-accessible STATUS mandatory INDEX { basicProbeHubIndex } ::= { basicProbeTable 1 } BasicProbeEntry ::= SEQUENCE basicProbeHubIndex INTEGER, basicProbeType INTEGER, basicProbeHwVer B-18 8237 Hub Installation and Planning Guide...
- Page 136 "Boot ROM microcode minor version of the RMON probe." ::= { basicProbeEntry 5 } basicProbeFwMajorVer OBJECT-TYPE SYNTAX INTEGER ACCESS read-only STATUS mandatory DESCRIPTION "Microcode major version of the RMON probe." ::= { basicProbeEntry 6 } basicProbeFwMinorVer OBJECT-TYPE B-19 Appendix B. The IBM 8237 Management Information Base...
- Page 137 ::= { basicPort 1 } basicPortEntry OBJECT-TYPE SYNTAX BasicPortEntry ACCESS not-accessible STATUS mandatory INDEX { basicPortHubIndex, basicPortIndex } ::= { basicPortTable 1 } BasicPortEntry ::= SEQUENCE basicPortHubIndex INTEGER, basicPortIndex INTEGER, basicPortType INTEGER, basicPortLinkStatus INTEGER, basicPortName DisplayString B-20 8237 Hub Installation and Planning Guide...
- Page 138 SEQUENCE OF MonitorSegmentEntry ACCESS not-accessible STATUS mandatory ::= { monitorInfo 1 } monitorSegmentEntry OBJECT-TYPE SYNTAX MonitorSegmentEntry ACCESS not-accessible STATUS mandatory INDEX { monitorSegmentIndex } ::= { monitorSegmentTable 1 } MonitorSegmentEntry ::= SEQUENCE B-21 Appendix B. The IBM 8237 Management Information Base...
- Page 139 DESCRIPTION "Total frame-alignment errors received by a segment." ::= { monitorSegmentEntry 6 } monitorSegmentTotalErrors OBJECT-TYPE SYNTAX Counter ACCESS read-only STATUS mandatory DESCRIPTION "Total errors received by a segment." ::= { monitorSegmentEntry 7 } B-22 8237 Hub Installation and Planning Guide...
- Page 140 OBJECT-TYPE SYNTAX Counter ACCESS read-only STATUS mandatory DESCRIPTION "Total frame-alignment errors received by a hub." ::= { monitorHubEntry 4 } -- FEM port statistics monitorFemTable OBJECT-TYPE SYNTAX SEQUENCE OF MonitorFemEntry B-23 Appendix B. The IBM 8237 Management Information Base...
- Page 141 DESCRIPTION "Number of frames received and filtered by the FEM port." ::= { monitorFemEntry 3 } monitorFemInOctets OBJECT-TYPE SYNTAX Counter ACCESS read-only STATUS mandatory DESCRIPTION "Number of octets received by the FEM port." ::= { monitorFemEntry 4 } monitorFemOutFrames OBJECT-TYPE B-24 8237 Hub Installation and Planning Guide...
- Page 142 -- MEP port statistics -- There is no need to implement MEP statistics. The MEP port -- can be accessed as repeater port 17. -- backup port group backupPortTableSize OBJECT-TYPE SYNTAX INTEGER ACCESS read-only B-25 Appendix B. The IBM 8237 Management Information Base...
- Page 143 DESCRIPTION "Hub ID of the secondary port." ::= { backupPortEntry 4 } backupSecPortPort OBJECT-TYPE SYNTAX INTEGER (1..17) ACCESS read-write STATUS mandatory DESCRIPTION "Port number of the secondary port." ::= { backupPortEntry 5 } B-26 8237 Hub Installation and Planning Guide...
- Page 144 SecurityPortEntry ACCESS not-accessible STATUS mandatory INDEX { securityPortGroupIndex, securityPortIndex } { securityPortTable SecurityPortEntry ::= SEQUENCE securityPortGroupIndex INTEGER, securityPortIndex INTEGER, securityAuthorizedAddr PhysAddress, securityAutoLearnAction INTEGER, securityIntrusionAction INTEGER, securityEavesdroppingAction INTEGER securityPortGroupIndex OBJECT-TYPE SYNTAX INTEGER B-27 Appendix B. The IBM 8237 Management Information Base...
- Page 145 When set to notify(2), enables the intrusion protection of the port. If the port receives a frame with a source address different from the securityAuthiruzedAddr, the agent sends a trap message to the trap managers. B-28 8237 Hub Installation and Planning Guide...
- Page 146 ENTERPRISE ibm8237 VARIABLES { basicHubIndex } DESCRIPTION "A hub fan has failed." ::= 4 ipAutoDiscoveryTrap TRAP-TYPE ENTERPRISE ibm8237 DESCRIPTION "The trap announces the presence of an SNMP- managed device." ::= 5 B-29 Appendix B. The IBM 8237 Management Information Base...
- Page 147 B-30 8237 Hub Installation and Planning Guide...
-
Page 148: Appendix C. Product Warranty And Notices
The replacement may not be new, but will be in good working order. If IBM or your reseller is unable to repair or replace the Machine, you may return it to your place of purchase and your money will be refunded. -
Page 149: Notices
IBM or your reseller of changes in a Machine’s location. IBM is responsible for loss of, or damage to, your Machine while it is 1) in IBM’s possession or 2) in transit in those cases where IBM is responsible for the transportation charges. -
Page 150: Electronic Emission Notices
IBM may have patents or pending patent applications covering subject matter in this document. The furnishing of this document does not give you any license to these patents. You can send license inquiries, in writing, to the IBM Director of Licensing, IBM Corporation, 500 Columbus Avenue, THORNWOOD NY 10594 USA. -
Page 151: Japanese Voluntary Control Council For Interference (Vcci) Statement
If you find this is not suitable for your use, you may exchange it for a non-business purpose one. Trademarks The following terms are trademarks of the IBM Corporation in the United States or other countries or both: NetView... -
Page 152: Glossary Of Terms And Abbreviations
This glossary defines terms and abbreviations used in Numerics this manual. It includes terms and definitions from the 10BASE2. An IEEE 802.3 standard for baseband IBM Dictionary of Computing (New York; McGraw-Hill, Ethernet data transmission at 10 Mbps over coaxial Inc., 1994). cable. - Page 153 (A) in a train of signals each of which can assume one of eight different states. (A) (2) In asynchronous Note: IBM has defined an extension to ASCII code transmission, the unit of modulation rate corresponding (characters 123-255).
- Page 154 (1) Any part of a network other than an data is transferred to all destinations, but from which attaching device, such as an IBM 8228 Multistation only addressed destinations may read in accordance Access Unit. (2) Hardware or software that is part of a with appropriate conventions.
- Page 155 Synonymous with data set ready (DSR) . default. Pertaining to an attribute, value, or option that is assumed when none is explicitly specified. feature. A part of an IBM product that may be ordered delimiter. (1) A character used to indicate the separately by the customer.
- Page 156 SDLC procedures. Each frame begins and ends with a Hz. Hertz. flag. ft. (1) Foot. (2) Feet. FTP. (1) File Transfer Protocol. (2) Foiled twisted pair. IEC. International Electrotechnical Commission. FRU. Field replaceable unit. IEEE. Institute of Electrical and Electronics Engineers. fully qualified path name.
- Page 157 In a local area network, an adapter address that the user can assign NetView. A host-based IBM licensed program that to override the universally administered address. provides communication network management (CNM) Contrast with universally administered address.
- Page 158 (T) (2) The route traversed by the information exchanged between two attaching devices in a Open Systems Interconnection (OSI). (1) The network. (3) A command in IBM Personal Computer interconnection of open systems in accordance with Disk Operating System (PC DOS) and IBM Operating specific ISO standards.
- Page 159 IP servers of all types, all servers of a specific type, addresses. or the nearest server of a specific type. RFC. Request for comments. X- 8 8237 Hub Installation and Planning Guide...
- Page 160 Software stored in the device being managed and diskette drives. (2) In an IBM personal computer, that exchanges Simple Network Management Protocol the unit that contains the processor circuitry, ROM, information with a network management station.
- Page 161 (2) A quantity that can assume any of a given set of values. (A) version. A separate IBM-licensed program, based on an existing IBM-licensed program, that usually has significant new code or new function.
-
Page 162: Index
1-12 configuring 3-25 contents of package 2-1 how activated 1-9 crossover cables, pinout diagrams for A-2 resetting 3-26 BBS, IBM PC Company, telephone number of 3-47 BootP (Bootstrap Protocol) configuring 3-17 default gateway, setting requests 3-48 using BootP 3-49... - Page 163 3-15 using Xmodem 3-31 models, differences between in configuration retention 1-12 in manageability 1-1, 1-2 IBM PC Company BBS, telephone number of 3-47 modem impedance matching device, when to use 1-11 forcing DSR signals 2-6 installation procedures using to get MIB 3-47...
- Page 164 See IPX address, setting using user interface RMON (remote monitoring agent) Simple Network Management Protocol differences between models and 1-1 See SNMP inter-8237 communications and 1-7 SLIP (Serial Line Internet Protocol) configuration 3-47 use in problem determination 4-3 SNMP (Simple Network Management Protocol)
- Page 165 See cables, unshielded twisted pair VT100 use in management 3-1 use in problem determination 4-3 use with modem 3-2 use with null-modem cable 3-1 warranty C-1 warranty service information 4-20 Xmodem, upgrading microcode using 3-31 X- 14 8237 Hub Installation and Planning Guide...
Need help?
Do you have a question about the 8237 and is the answer not in the manual?
Questions and answers