
Related Manuals for Bertazzoni MAST304INMXE


Summary of Contents for Bertazzoni MAST304INMXE
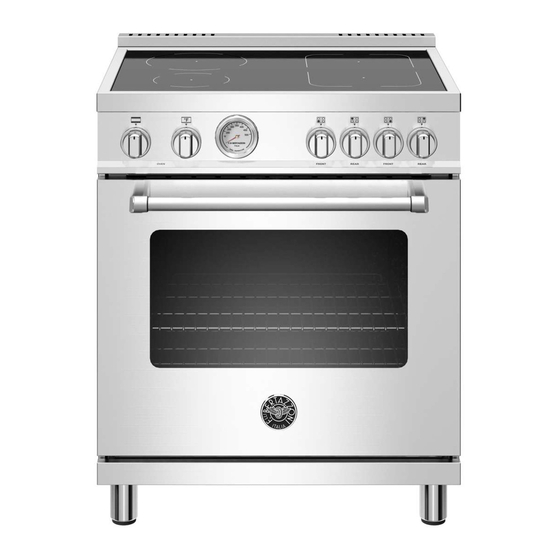
- Page 1 BERTAZZONI INSTALLATION MANUAL FREESTANDING ELECTRIC RANGES 3100295 WWW.BERTAZZONI.COM...
-
Page 2: Table Of Contents
Removing the oven door _______________________________________________________ Installing the legs _____________________________________________________________ Installing the worktop frontguard ________________________________________________ Installing the island trim _______________________________________________________ Installing backguard (optional) __________________________________________________ INSTALLING THE ANTI-TIP DEVICES ______________________________________________ Anti-tip brackets ______________________________________________________________ Anti-tilt chain ________________________________________________________________ INSTALLATION CHECKLIST ______________________________________________________ FINAL PREPARATION ___________________________________________________________ BERTAZZONI SERVICE _________________________________________________________... - Page 3 / Models Models Models MAST365INMXE PROF304INMXE MAST365INSXT PROF304INMXT PROF304INSART PROF304INSBIT PROF304INSGIT PROF304INSNET PROF304INSROT PROF304INSXT PROF365INSART PROF365INSBIT PROF365INSGIT PROF365INSNET PROF365INSROT PROF365INSXT...
-
Page 4: Warnings
/ Warnings WARNINGS To ensure proper and safe operation, the applian- ce must be properly installed and grounded by a qualifi ed technician. DO NOT attempt to adjust, repair, service, or replace any part of your applian- ce unless it is specifi cally recommended in this manual. -
Page 5: Data Rating Label
/Data rating label DATA RATING LABEL The data rating label shows the model and serial number of the range. It is located under the con- trol panel and in the last page of this manual... -
Page 6: Before Installation
/ Before installation BEFORE INSTALLATION • This appliance shall only be installed by an au- thorized professional. • This appliance shall be installed in accordance with the manufacturer’s installation instructions. • This appliance must be installed in accordance with the norms & standards of the country whe- re it will be installed. -
Page 7: Ventilation Preparation
For best removal of smoke and odors, the been designed to work in conjunction with the lower edge of the hood should be installed Bertazzoni range and have the same fi nish for a between 25 1/2” (65 cm) and 31 1/2” (80 cm) perfect look. -
Page 8: Clearence Dimensions
/ Clearence dimensions CLEARENCE DIMENSIONS Installation adjacent to kitchen cabinets Metal hood This range may be installed directly adjacent to 30’’ (76,2 cm) existing countertop high cabinets (36” or 91.5 cm 25 1/2’’(65 cm) and 31 1/2’’ (80 cm) from the fl oor). For the best look, the worktop should be level with 13’’... -
Page 9: Installation Requirements
/ Installation requirements / Electrical connection INSTALLATION REQUIREMENTS ELECTRICAL CONNECTION Warning! ELECTRICAL ELECTRICAL SHOCK HAZARD A properly-grounded horizontally- mounted electri- Disconnect electrical power at the circuit bre- cal receptacle should be installed no higher than aker box or fuse box before installing the ap- 3”... -
Page 10: Electrical Connection
/ Electrical connection The appliance is equipped at the factory with an electric supply cord set 4 wires type with ring terminals (L1, L2, N, Ground) suitable for range FOUR-WIRE CONN.RECEPTACLE NEMA 14-50R use UL/CSA listed type SRDT/DRT 2x6AWG (L1, L2)+2x8AWG (N, G) rated 300V, 40 or 50A with fused plug type NEMA 14-50P;... -
Page 11: Wiring Diagram
/ Wiring diagram WIRING DIAGRAM The electric wiring diagrams and schematics are attached behind the range, and should not be removed except by a service technician, then replaced after service. - Page 12 / Wiring diagram to CN23 - 3 to CN1 - 1 to CN23 - 2 to CN1 - 2 to CN23 - 1 to CN1 - 3 to CN1 - 4 to CN23 - 3 to CN1 - 5 to CN23 - 2 to CN1 - 6 to CN23 - 1 1..4...
-
Page 13: Installation
/ Installation INSTALLATION APPLIANCE INSTALLATION REMOVING THE OVEN DOOR Unpacking the range Prepare the door for removal. Flip up the locking • clamps on each door hinge. Slowly shut the door Remove all packing materials from the ship- until the protruding clamps stop the movement. ping pallet but leave the adhesive-backed foam layer over brushed-metal surfaces to protect it Pull oven door upwards and remove. -
Page 14: Installing The Legs
/ Installation INSTALLING THE LEGS INSTALLING THE WORKTOP FRONTGUARD Bertazzoni ranges must be used only with the legs To increase the clearance between the front edge properly installed. of the worktop and the burners, it is possible to Four height-adjustable legs are supplied with the install a front guard for the worktop. -
Page 15: Installing The Island Trim
/ Installation INSTALLING THE ISLAND TRIM INSTALLING BACKGUARD (OPTIONAL) The island trim must be installed prior to operation The backguard must be installed prior to opera- of the appliance for appropriate ventilation of the tion of the appliance for appropriate ventilation of oven compartment. -
Page 16: Installing The Anti-Tip Devices
/ Installing the anti/tip devices INSTALLING THE ANTI/TIP DEVICES ANTI-TIP BRACKETS ANTI/TILT CHAIN The anti-tip bracket shipped with the range must The anti-tilt chain shall be installed on right or left be properly secured to the rear wall as shown in side alternatively according below instructions. -
Page 17: Installation Checklist
/ Installation checklist / fi nal preparation INSTALLATION CHECKLIST FINAL PREPARATION • A qualifi ed installer should carry out the following Before using the oven, remove any protective checks: wrap from the stainless steel. • All stainless steel body parts should be wiped Range mounted on its legs with hot, soapy water and with a liquid stainless Island trim or Backguard attached accor-... -
Page 18: Bertazzoni Service
We have a dedicated team of trained professionals to answer your ne- eds. If you own a Bertazzoni appliance and need ser- vice in the US or Canada please use the following contact information: e-mail: aftersaleservice@bertazzoni.com Telephone - Monday through Friday, 7.30am to 7.30pm EST (except US public holidays).
Need help?
Do you have a question about the MAST304INMXE and is the answer not in the manual?
Questions and answers