Advertisement
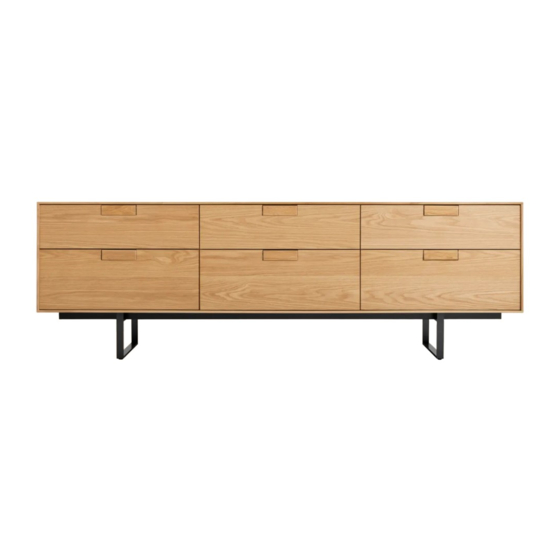
Series 11 2 Door / 2 Drawer Console
DESI GNED IN 20 05
AS SEM BLY N OT ES | R E V 00
F O R Y O U R H I - F I , L O - F I , W I - F I O R N O - F I .
An elegant and refined approach with thin edges and thoughtful
proportions. Series Eleven. When ten just isn't quite enough.
N E E D A H A N D ?
Contact us at service@bludot.com or
844.425.8368 for assistance.
Advertisement
Table of Contents

Related Manuals for BluDot 11 Series


Summary of Contents for BluDot 11 Series
- Page 1 F O R Y O U R H I - F I , L O - F I , W I - F I O R N O - F I . N E E D A H A N D ? Contact us at service@bludot.com or An elegant and refined approach with thin edges and thoughtful 844.425.8368 for assistance.
- Page 2 Parts & Hardware Pt. 1052 Pt. 1053 Pt. 3002 Pt. 9001 Pt. 9004 Legs Base Case 1 | 8 4 4 . 4 2 5 . 8 3 6 8 S E R I E S 1 1 2 D O O R 2 D R A W E R C O N S O L E...
- Page 3 Step 01 AT TA C H T H E L E G S . Attach legs to base using provided hardware as shown. Pt . 1 05 3 x 4 Pt . 3002 x 4 P t . 9 00 1 x 1 A S S E M B L Y N O T E S S E R V I C E @ B L U D O T .
- Page 4 Step 02 AT TA C H T H E B A S E . After the base has been attached, have a second person help lift and bring the case upright in order to prevent leg damage. P T. 1 0 5 2 X 1 0 PT.
- Page 5 Step 03 R E M O V I N G T H E D R A W E R . Extend the drawer completely. Squeeze both locks on the underside of the drawer while pulling the drawer out. A S S E M B L Y N O T E S S E R V I C E @ B L U D O T .
- Page 6 Step 04 R E I N S TA L L I N G T H E D R A W E R . Pull both sides Forward. Engage rear slide catches. Lower drawer front into place and push closed. 5 | 8 4 4 . 4 2 5 . 8 3 6 8 S E R I E S 1 1 2 D O O R 2 D R A W E R C O N S O L E...
- Page 7 Step 05 D O O R A D J U S T M E N T. Hinges work in pairs. If you adjust one hinge, chances are you will have to adjust all the hinges. If door needs adjustment from TOP TO BOTTOM, Use Screw #1.
- Page 8 Additional Information C LEAN Clean with a slightly damp, soft cloth. To remove dirt and fingerprints, use a quality cleaner formulate for wood furniture. Wipe completely dry with a soft cloth in the direction of the wood grain. B L U D O T D E S I G N & M A N U F A C T U R I N G , I N C . D E S I G N E D I N M I N N E A P O L I S , M N...
Need help?
Do you have a question about the 11 Series and is the answer not in the manual?
Questions and answers