Advertisement
Quick Links
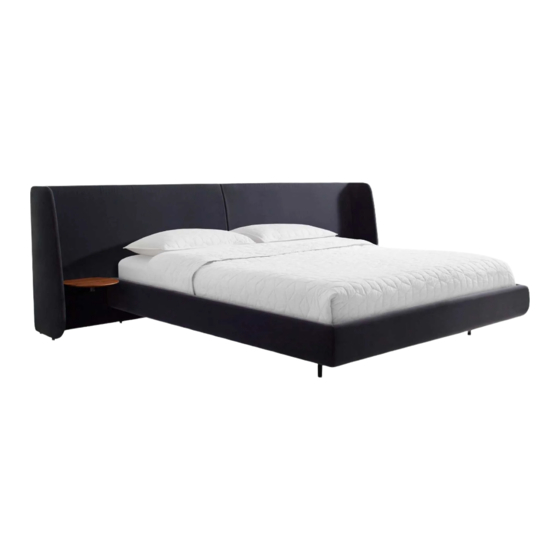
Hunker Bed
D E S I G N E D I N 2 0 1 6
A S S E M B LY N O T E S | R E V 0 2
H U N K A H U N K O F B U R N I N G L O V E .
Surround yourself with serenity with Hunker. Integrated nightstands team up with
an enveloping headboard providing a safe space for all your nocturnal endeavors.
N E E D A H A N D ?
Contact us at service@bludot.com or
844.425.8368 for assistance.
Advertisement

Subscribe to Our Youtube Channel
Related Manuals for BluDot Hunker Bed HU1-KINGBD-GY


Summary of Contents for BluDot Hunker Bed HU1-KINGBD-GY
- Page 1 H U N K A H U N K O F B U R N I N G L O V E . N E E D A H A N D ? Contact us at service@bludot.com or Surround yourself with serenity with Hunker. Integrated nightstands team up with 844.425.8368 for assistance.
-
Page 2: Parts & Hardware
Parts & Hardware Pt. 1679 Pt. 3005 Pt. 3007 Pt. 1678 Pt. 3001 Pt. 3002 Pt. 1603 Pt. 9016 Pt. 9017 Footboard Rail 1 | 8 4 4 . 4 2 5 . 8 3 6 8 H U N K E R B E D... - Page 3 Parts & Hardware Headboard - Left Headboard - Right Ledger Board Center Rail Side Rail - Left Side Rail - Right Footboard Slats Nightstand Bracket Nightstand Panel Center Foot Slipcover A S S E M B LY N O T E S S E R V I C E @ B L U D O T.
- Page 4 Step 01 A S S E M B L E H E A D B O A R D. Place headboard sections on their back. With 2 people assemble the headboard as shown using the pre-attached lock tabs. Step 02 AT TA C H L E D G E R B O A R D.
- Page 5 Step 03 A S S E M B L E C E N T E R S U P P O R T. Assemble the center support as shown using the provided hardware. NOTE: The called out attachment points provide adjustability during step 05. adjustable PT.
- Page 6 Step 04 AT TA C H C E N T E R S U P P O R T. With 2 people, place the headboard upright. Attach center support to headboard using the pre-attached drop-in connector. NOTE: Move the side rails into position as shown on the floor to aid in step05 assembly.
- Page 7 Step 05 AT TA C H S I D E R A I L S . Attach the side rails as shown using the provided hardware. PT. 16 79 x 4 PT. 3 00 5 x 4 PT. 3 0 07 x 4 PT.
- Page 8 Step 06 AT TA C H F O O T B O A R D. Attach footboard as shown using the pre-attached connectors. 7 | 8 4 4 . 4 2 5 . 8 3 6 8 H U N K E R B E D...
- Page 9 Step 07 AT TA C H S L I P C O V E R . Starting at the footboard, align the slipcover corner seams. Continue attaching the slipcover as shown. Start here. Step 08 I N S TA L L S L AT S . Start here.
- Page 10 Step 09 AT TA C H N I G H T S TA N D B R A C K E T S . Attach nightstand brackets as shown using the provided hardware. PT. 16 78 x 6 PT. 3001 x 6 P T.
- Page 11 Step 10 AT TA C H N I G H T S TA N D PA N E L S . Attach nightstand panels to brackets as shown using the provided hardware. PT. 16 03 x 6 PT. 3001 x 6 P T.
-
Page 12: Additional Information
Additional Information P O W E R C O R D M A N A G E M E N T. The headboard and nightstand brackets have integrated power cord management cutouts. Thread the power cord through the bracket cutout as shown. Once threaded push the power cord out through the back of the headboard.
Need help?
Do you have a question about the Hunker Bed HU1-KINGBD-GY and is the answer not in the manual?
Questions and answers