
Related Manuals for NSB FAN Jaya Deluxe


Summary of Contents for NSB FAN Jaya Deluxe
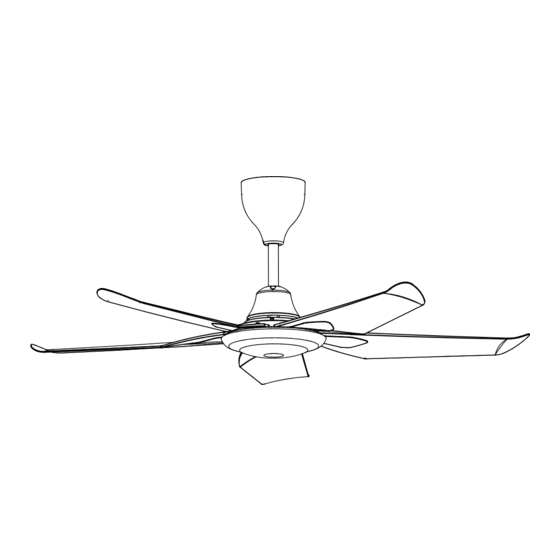
- Page 1 INSTRUCTION MANUAL CEILING FAN Jaya Deluxe The official website : https://www.nsb.com.my...
- Page 2 SAFETY PRECAUTION IMPORTAN: PLEASE READ BEFORE INSTALLATION 1. Installation must be carried out by a qualified wiring installer 2. Turn off the electrical mains at the circuit breaker fuse box 3. Use power supply 220-240V/50Hz. 4. The ceiling mounting must be able to with hold a min of 16kg. 5.
- Page 3 PARTS & ACCESSORIES Fig.1 Canopy × 1 Flat washer × 11 Blade screws × 11 Coupiling cover × 1 Balancing kits × 1set Downrod × 1 10 Remote × 1 Motor × 1 Blades × 5 Receiver × 1 × 3...
- Page 4 FAN INSTALLATION INSTRUCTION IMPORTANT: SWITCH OFF THE ELECTRICAL MAINS THE CIRCUIT BREAKER FUSE BOX. Follow the steps below to hang your fan properly. down rod 2. Assemble the plastic plug into the motor shaft, Carefully feed the fan wires up through the plastic plug.(Fig.2) 3.
- Page 5 FAN MOUNTING 5. “J” Hook mounted ,When mounting the fan, ensure that the safety cable is loop across the “J” hook. 6. “U” Hook mounted Remove the bolt, stop pin, nut, washer and rubber pulley from the downrod. Place the rubber pulley onto “U” hook and fix back the bolt, stop pin, nut and washer. R-pin Bolt Spring Washer...
- Page 6 ELECTRICAL CONNECTION Warning : To avoid possible electric shock, turn off the electricity at the main fuse box or circuit panel before the fan electrical connection. For safety and best installation result please consult a qualified electrician. 7. Connect wires: As shown in the below (Fig.8) 1) Connect the Black wire from motor to the Black "For Light L"...
- Page 7 BLADE INSTALLTION 8. Insert the screws and flat washer through the motor blade holder then secure the blade to the motor by tightening the 2 screws. 9. Repeat this process to install the other blades to the motor. Screw Flat Washer Blade...
- Page 8 MAINTENANCE Due to fan’s natural movement, connections may get loose after a period of usage. To ensure a proper and safety usage, We are highly recommended to inspect and tighten all connections every 6 months. CLEANING Clean your fan periodically to prolong its new appearance. Basic cleaning procedures are as follows: 1.
Need help?
Do you have a question about the Jaya Deluxe and is the answer not in the manual?
Questions and answers