Akuvox R29C-L Quick Manual
Hide thumbs
Also See for R29C-L:
- Installation manual (17 pages) ,
- Installation tips (5 pages) ,
- Administrator's manual (187 pages)
Table of Contents
Advertisement
Quick Links
R29C-L
Unpacking
Before you start using the device, please check the version you have received and ensure that the following items are included in
the shipped box:
R29C-L x1
Rope x 1
Diode x 2
LTE wrench x 1
Quick Guide
Wiring cover x 1
Allen wrench x 1
M3x6 hex socket screw x 3
Tweezers x 1
Rubber plug (small,medium, large) x3
M3x5 crosshead screw x 4
ST 1.7x4 crosshead screw x 2
Sealing pressing plate x 1
Advertisement
Table of Contents

Related Manuals for Akuvox R29C-L


Summary of Contents for Akuvox R29C-L
- Page 1 Unpacking Before you start using the device, please check the version you have received and ensure that the following items are included in the shipped box: R29C-L x1 Wiring cover x 1 Rubber plug (small,medium, large) x3 Allen wrench x 1...
- Page 2 R29C-L Wall-mounting Accessories (Please find in On-Wall Installation Kit box): Wall-mounting box x 1 ST4 x 20 crosshead screw x 6 Plastic wall anchor x 6 M4 x 30 crosshead screw x 2 LTE Module Accessories: LTE module x 1...
-
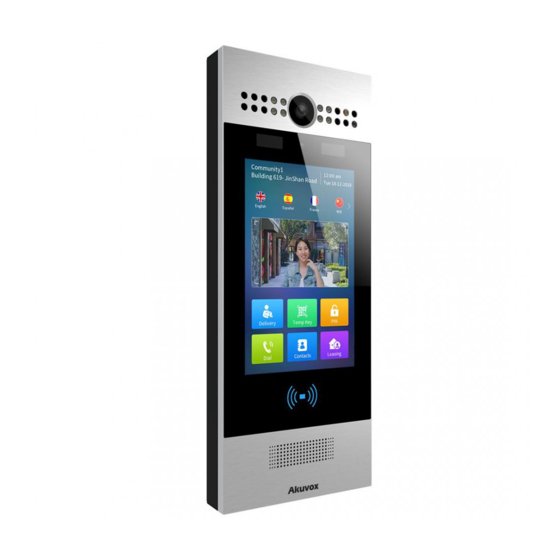
Page 3: Product Overview
R29C-L Product Overview Main Camera Photosensitive Sensor Infrared Sensor White Light LED Face-liveness Detection Camera Infrared LED Touch Screen Card Reader Loudspeaker... -
Page 4: Installation Environment
R29C-L Installation Environment Please do not place device under direct sunlight. If installing the device indoors, please keep device at least 2 meters away from light, and at least 3 meters away from window and door. Direct sunlight Indirect sunlight... -
Page 5: Device Installation
R29C-L Device Installation Step1: Wall-mounting Bracket Installation 1.Wall Mounting 1.1. With 86x86 mm embedded junction box in the wall Mark the four holes of Take down two M4x30 crosshead Fix the wall-mounting box on to the wall-mounting box screws and wall-mounting box. - Page 6 R29C-L 1.2. Without 86 embedded box in the wall Mark the six holes of the wall-mounting box Use a hand drill with 6mm diameter bit to make the hole in marked positions. on the wall. *Please note the relative position in the left figure and the maximum error should less than 5mm.
- Page 7 R29C-L Step2: LTE Module Installation Remove the device's back cover. Remove the six M3x8 crosshead screws on the device's rear cover using cross screwdriver and keep the Warning: Do not open the back cover screws. when the SIM card is installed otherwise it might cause the damage to the device.
- Page 8 R29C-L Put the back cover to the device and tighten the Connect the main RF cable and the div RF cable cover using the six M3x8 crosshead screws that to the module as indicated in the dotted green are removed before.
- Page 9 R29C-L Step3: LTE SIM Card Installation Insert the SIM card to the card slot at Plug the SIM card slot using the silicone the bottom and push the card all the plug attached. way in using the back end of the tweezers attached with the module until you hear a clattering sound.
- Page 10 R29C-L Step4: Wiring Cover Installation Use four M3x5 crosshead screws to fix the Make cables go through the wiring cover, For convenient wiring, hang device on the wiring cover. connecting to the corresponding interfaces of wall-mounting box with rope. Then insert the the main board.
- Page 11 R29C-L Step5: Device Mounting 1. Place the device into the wall-mounting box until Installation is completed, and the edges of which align to the wall. Then pull the please remove the protective device downward and ensure the groove of it hooks to film.
-
Page 12: Device Wiring
R29C-L Device Wiring... - Page 13 R29C-L Wire Length & AWG Table Please follow the properly measured wire gauge/length to install device: 20 AWG 22 AWG 24 AWG 26 AWG 12V 1.5A Adapter ≤20m ≤20m...
- Page 14 R29C-L Application Network Topology (third party) SIP Video Phone Indoor Monitor Network Video Recorder (third party) RJ45 RJ45 Power Adapter R29C-L R29C-L...
-
Page 15: Operation
Enter the IP or SIP number and press Dial tab to make a call. Receive a call: R29C-L supports Auto Answer by default. Incoming call from indoor device will be answered automatically. Unlock by PIN: Click PIN tab to enter PIN code for the door access. - Page 16 Notice Information Information contained in this document is believed to be accurate and reliable at the time of printing. This document is subject to change without notice, any update to this document can be viewed on Akuvox’ s website: http://www.akuvox.com ©...
Need help?
Do you have a question about the R29C-L and is the answer not in the manual?
Questions and answers