Table of Contents
Advertisement
Quick Links
Advertisement
Table of Contents

Related Manuals for ADJ Vizi Beam Hybrid 2R


Summary of Contents for ADJ Vizi Beam Hybrid 2R
- Page 1 VIZI BEAM HYBRID 2R User Manual 08/07/2023...
- Page 2 ©2023 ADJ Products, LLC all rights reserved. Information, specifications, diagrams, images, and instructions herein are subject to change without notice. ADJ Products, LLC logo and identifying product names and numbers herein are trademarks of ADJ Products, LLC. Copyright protection claimed includes all forms and matters of copyrightable materials and information now allowed by statutory or judicial law or hereinafter granted.
-
Page 3: Table Of Contents
C O N T E N T S General Information Limited Warranty (USA Only) Safety Guidelines Discharge Lamp Warning Overview Gobo Wheel | Color Wheel Lamp Replacement Installation Guidelines System Menu Primary/Secondary DMX Setup DMX Traits Error Codes Maintenance Guidelines Specifications FCC Statement... -
Page 4: General Information
BOX CONTENTS Omega Brackets 1.83M locking power cable CUSTOMER SUPPORT Contact ADJ Service for any product related service and support needs. Also visit forums.adj.com with questions, comments or suggestions. ADJ SERVICE USA - Monday - Friday 8:00am to 4:30pm PST 323-582-2650 | Fax: 323-832-2941 | support@adj.com... -
Page 5: Limited Warranty (Usa Only)
All shipping charges must be pre-paid. If the requested repairs or service (including parts replacement) are within the terms of this warranty, ADJ Products, LLC will pay return shipping charges only to a designated point within the United States. If the entire instrument is sent, it must be shipped in its original package. No accessories should be shipped with the product. -
Page 6: Safety Guidelines
This device is a sophisticated piece of electronic equipment. To guarantee a smooth operation, it is important to follow all instructions and guidelines in this manual. ADJ PRODUCTS, LLC. is not responsible for injury and/or damages resulting from the misuse of this device due to the disregard of the information printed in this manual. - Page 7 S A F E T Y G U I D E L I N E S RISK GROUP 3 - RISK OF EXPOSURE TO ULTRAVIOLET UV RADIATION! FIXTURE EMITS HIGH INTENSITY WAVELENGTH OF ULTRAVIOLET UV LIGHT FROM THE UV COLOR FILTER. WEAR PROPER EYE AND SKIN PROTECTION.
-
Page 8: Discharge Lamp Warning
D I S C H A R G E L A M P WA R N I N G This fixture is fitted with a DISCHARGE LAMP, which is highly susceptible to damage if improperly handled. NEVER touch the lamp with your bare hands, as the oil from your hands will shorten the life of the lamp. -
Page 9: Overview
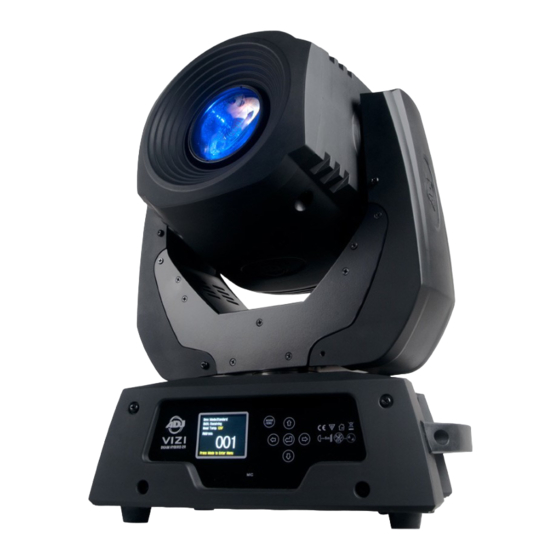
O V E R V I E W L L e e n n s s A A s s s s e e m m b b l l y y M M o o d d e e / / E E s s c c B B u u t t t t o o n n D D i i g g i i t t a a l l D D i i s s p p l l a a y y U U p p B B u u t t t t o o n n E E n n t t e e r r B B u u t t t t o o n n... -
Page 10: Gobo Wheel | Color Wheel
G O B O W H E E L 1 1 0 0 1 1 1 1 1 1 2 2 1 1 3 3 1 1 4 4 C O L O R W H E E L A A Q Q U U A A Y Y E E L L L L O O W W B B L L U U E E M M A A G G E E N N T T A A... -
Page 11: Lamp Replacement
L A M P R E P L A C E M E N T Caution: Always replace with the exact same type lamp and fuse, unless otherwise specified by an authorized ADJ service technician. Replacing with anything other than the specified part can damage your unit and will void your manufactures warranty. -
Page 12: Installation Guidelines
I N S TA L L AT I O N G U I D E L I N E S FLAMMABLE MATERIAL WARNING Keep fixture minimum 0.7 feet (0.2m) away from flammable materials and/or pyrotechnics. ELECTRICAL CONNECTIONS A qualified electrician should be used for all electrical connections and/or installations. USE CAUTION WHEN POWER LINKING OTHER MODEL FIXTURES AS THE POWER CONSUMPTION OF OTHER MODEL FIXTURES MAY EXCEED THE MAX POWER OUTPUT ON THIS FIXTURE. - Page 13 I N S TA L L AT I O N G U I D E L I N E S OMEGA BRACKETS INSTALLATION Insert the Omega Brackets into the matching holes on the bottom of the fixture. Secure the Omega Brackets to the fixture by turning each quick-lock fastener ¼...
- Page 14 I N S TA L L AT I O N G U I D E L I N E S RIGGING Overhead rigging requires extensive experience, including among others, calculating working load limits, installation material being used, and periodic safety inspection of all installation material and the fixture.
-
Page 15: System Menu
S Y S T E M M E N U Set DMX Address A001~AXXX DMX address setting DMX Value PAN..DMX value display Secondary Mode Secondary1, Secondary2, Secondary3 Secondary setting Auto Program Primary/Alone Auto program Sound Control Primary/Alone Sound Control Current Time XXXX(Hours) Power on running time... - Page 16 S Y S T E M M E N U The main menu is accessed by pressing the MODE/ESC button. Browse through the menu by using the UP, DOWN, RIGHT, & LEFT buttons. Press the ENTER button to access the desired menu. You can scroll through the submenus using the UP, DOWN, RIGHT, &...
- Page 17 S Y S T E M M E N U INFORMATION - Time Information (Time information is always represented in hours) Current Running Time - This will allow you to check units current running time. 1. Press the MODE/ESC button to access the main menu. Press the UP or DOWN buttons so that “Information”...
- Page 18 S Y S T E M M E N U Clean Last Run - This will allow you to clear the last run time of the unit. You need to put in the Last Run Password before doing this. Please see the section before this. 1.
- Page 19 S Y S T E M M E N U LAMP CONTROL - Lamp On/Off - With this function you can switch the lamp on or off via the control board. 1. Press the MODE/ESC button to access the main menu. Press the UP or DOWN buttons so that “Lamp Control”...
- Page 20 S Y S T E M M E N U PERSONALITY - Time Information Address via DMX - With this function you can adjust the DMX address via external controller. 1. Press the MODE/ESC button to access the main menu. Press the UP or DOWN buttons so that “Personality”...
- Page 21 S Y S T E M M E N U Feedback - With this function you can feedback switch the pan movement or tilt movement. 1. Press the MODE/ESC button to access the main menu. Press the UP or DOWN buttons so that “Personality”...
- Page 22 S Y S T E M M E N U Fans Control Auto Fan Speed - With this function you can adjust the speed of the running fans. 1. Press the MODE/ESC button to access the main menu. Press the UP or DOWN buttons so that “Personality”...
- Page 23 S Y S T E M M E N U RESET FUNCTION Reset All - With this function you can all the motors. 1. Press the MODE/ESC button to access the main menu. Press the UP or DOWN buttons so that “Reset Function”...
- Page 24 Rec Controller - The Vizi Beam Hybrid 2R features an integrated DMX recorder. Preprogrammed scenes can be transmitted to the fixture via any DMX compliant controller. This function allows those scenes to be stored in to the fixture’s built-in memory and then subsequently used to create the user-...
-
Page 25: Primary/Secondary
P R I M A R Y / S E C O N D A R Y M O D E This function allows you to link units together to run in a Primary-Secondary set-up, in which one unit will act as the controlling unit and the others will react to the controlling unit’s built-in programs. Any unit can be configured to act as a Primary or as a Secondary, but only one unit in a given system can be programmed to act as the Primary. -
Page 26: Dmx Setup
D M X S E T U P Power Supply: The ADJ Vizi Beam Hybrid 2R incorporates an electronic ballast, which automatically senses the voltage when it is plugged into the power source. With the electronic ballast, this unit can be plugged in anywhere. - Page 27 2 and 3 of a male XLR connector (DATA + and DATA -). Insert this unit into the female XLR connector of the last unit in one’s daisy chain to terminate the line. Using a cable terminator (ADJ part number Z-DMX/T) will decrease the possibilities of erratic behavior.
-
Page 28: Dmx Traits
D M X T R A I T S CHANNEL DMX VALUE FUNCTION 10CH 12CH 16CH 0-255 PAN MOVEMENT 8bit PAN FINE 16bit 0-255 TILT MOVEMENT 8bit 0-255 0-255 TILT IFNE 16bit COLOR WHEEL OPEN 9-17 COLOR 1 18-26 COLOR 2 27-35 COLOR 3 36-44... - Page 29 D M X T R A I T S CHANNEL DMX VALUE FUNCTION 10CH 12CH 16CH FIXED GOBO FINE INDEXING 0-255 PRISM/GOBO MACROS 0-31 OPEN 32-79 FROST 80-127 8 FACET PRISM 128-135 MACRO 1 136-143 MACRO 2 144-151 MACRO 3 152-159 MACRO 4 160-167...
-
Page 30: Error Codes
E R R O R C O D E S When power is applied, the unit will automatically enter a “reset/test” mode. This mode brings all the internal motors to home position. If there is an internal problem with one or more of the motors, an error code will flash in the display in the form of “XXer”, where “XX”... -
Page 31: Maintenance Guidelines
Regular inspections are recommended to ensure proper function and extended life. There are no user serviceable parts inside this fixture, please refer all other service issues to an authorized ADJ service technician. Should you need any spare parts, please order genuine parts from your local ADJ dealer. -
Page 32: Specifications
S P E C I F I C AT I O N S • Compact high output moving head powered with a bright Philips® Platinum 2R MSD source • 3 Operational modes: DMX controller, Primary/Secondary & Sound Active • 3 DMX Channel modes (12, 10 or 16 Ch.) •... -
Page 33: Fcc Statement
FCC STATEMENT This device complies with Part 15 of the FCC Rules. Operation is subject to the following two conditions: (1) this device may not cause harmful interference, and (2) this device must accept any interference received, including interference that may cause undesired operation. FCC RADIO FREQUENCY INTERFERENCE WARNINGS &...
Need help?
Do you have a question about the Vizi Beam Hybrid 2R and is the answer not in the manual?
Questions and answers