Table of Contents
Advertisement
© Copyright 2004 - 2009
EVERTZ MICROSYSTEMS LTD.
5288 John Lucas Drive,
Burlington, Ontario,
Canada L7L 5Z9
Phone:
905-335-3700
Sales:
sales@evertz.com
Tech Support: service@evertz.com
Web Page:
http://www.evertz.com
Version 1.3, October 2009
The material contained in this manual consists of information that is the property of Evertz Microsystems and is
intended solely for the use of purchasers of the 5600ACO2 Automatic Changeover.
expressly prohibits the use of this manual for any purpose other than the operation of the 5600ACO2.
All rights reserved. No part of this publication may be reproduced without the express written permission of
Evertz Microsystems Ltd.
Microsystems.
Model 5600ACO2
Automatic Changeover
Instruction Manual
Fax: 905-335-3573
Fax: 905-335-7571
Copies of this manual can be ordered from your Evertz dealer or from Evertz
Evertz Microsystems
Advertisement
Table of Contents

Related Manuals for evertz 5600ACO2


Summary of Contents for evertz 5600ACO2
- Page 1 Web Page: http://www.evertz.com Version 1.3, October 2009 The material contained in this manual consists of information that is the property of Evertz Microsystems and is intended solely for the use of purchasers of the 5600ACO2 Automatic Changeover. Evertz Microsystems expressly prohibits the use of this manual for any purpose other than the operation of the 5600ACO2.
- Page 3 IMPORTANT SAFETY INSTRUCTIONS The lightning flash with arrowhead symbol within an equilateral triangle is intended to alert the user to the presence of uninsulated “Dangerous voltage” within the product’s enclosure that may be of sufficient magnitude to constitute a risk of electric shock to persons. The exclamation point within an equilateral triangle is intended to alert the user to the presence of important operating and maintenance (Servicing) instructions in the literature accompanying the product.
- Page 4 WARNING Changes or modifications not expressly approved by Evertz Microsystems Ltd. could void the user’s authority to operate the equipment. Use of unshielded plugs or cables may cause radiation interference. Properly shielded interface cables...
- Page 5 Evertz products are for informational use only and are not warranties of future performance, either express or implied. The only warranty offered by Evertz in relation to this product is the Evertz standard limited warranty, stated in the sales contract or order confirmation form.
- Page 6 Model 5600ACO2 Automatic Changeover Unit This page left intentionally blank Revision 1.3...
-
Page 7: Table Of Contents
Model 5600ACO2 Automatic Changeover Unit TABLE OF CONTENTS OVERVIEW ..........................1-1 1.1. HOW TO USE THIS MANUAL.................... 1-5 INSTALLATION ........................... 2-1 2.1. REAR PANEL ........................2-1 2.1.1. Coaxial Connections ....................2-1 2.1.2. Balanced AES, DARS and Analog Audio Connections ........... 2-2 2.1.3. - Page 8 ....................5-1 ® 5.1.3. Using VistaLINK to Configure the 5600ACO2 ............5-2 ® 5.1.4. Using VistaLINK to Monitor the 5600ACO2............5-4 ® 5.1.5. Using VistaLINK to Enable the Fault Reporting Traps of the 5600ACO2....5-6 ® Page ii CONTENTS Revision 1.3...
- Page 9 Figure 2-1: 5600ACO2 Rear Panel ....................... 2-1 Figure 2-2: Typical GPI Circuitry ........................2-8 Figure 2-3: GPO1 Output Circuitry ........................ 2-8 Figure 2-4: GPO2 Output Circuitry ........................ 2-8 Figure 3-1: Model 5600ACO2 Front Panel Layout..................3-1 Figure 5-1: VistaLINK Configuration - Voting Control................. 5-3 ®...
- Page 10 Model 5600ACO2 Automatic Changeover Unit This page left intentionally blank Page iv CONTENTS Revision 1.3...
-
Page 11: Overview
Each 5600MSC is equipped with 2 GPI inputs and 2 GPO outputs. To facilitate installation, these connections are connected through to a 2 x 6 pin terminal block on the 5600ACO2. The outputs from the 5600MSCs are passed straight through the 5600ACO2. The inputs to the 5600MSCs are internally split by a 'Y' connector, to ensure that both 5600MSCs receive the same GPI contact closures. - Page 12 • Redundant power supply standard • VistaLINK capable offering remote monitoring and configuration capabilities via SNMP using the ® model 9000NCP Network Control Panel or Evertz VistaLINK PRO or other third party SNMP ® manager software. Signal Type Inputs Outputs...
-
Page 13: Figure 1-1: 5600Aco2 Block Diagram
Model 5600ACO2 Automatic Changeover Unit Latching Internal Relays Termination Latching HD/SD EQ, Video Sync Relays HD/SD SDI (8) HD/SD SDI (8 Slicer, 10MHz/ Wordclock SYNC (6) Slicer SYNC (6) 10MHz/Wordclock HD/SD EQ, Video Sync 10MHz/Wordclock Unbalanced AES (2) Slicer, 10MHz/ Wordclock... -
Page 14: Figure 1-2: Redundant Master Clock/Spg With Auto-Changeover System Diagram
Model 5600ACO2 Automatic Changeover Unit 5600MSC GPIO Word Clock/ 10 MHz Ref DARS/AES/ Analog Audio 1 Analog TG 2 LTC Dual Power 5600ACO2 Supply 6 Sync /Black 4 SDI Test Signals 4 HD SDI Test Signals 5600MSC Figure 1-2: Redundant Master Clock/SPG with Auto-Changeover System Diagram... -
Page 15: How To Use This Manual
Model 5600ACO2 Automatic Changeover Unit 1.1. HOW TO USE THIS MANUAL This manual is organized into 4 chapters: Overview, Installation, Operation, and Technical Information. There are individual tables of contents at the beginning of each chapter as well as an overall table of contents at the beginning of the manual to aid in finding the information you want. - Page 16 Model 5600ACO2 Automatic Changeover Unit This page left intentionally blank Page 1-6 OVERVIEW Revision 1.3...
-
Page 17: Installation
2.5 give more detail on connecting the system. 2.1.1. Coaxial Connections There are 18 groups of 3 BNC connectors on the 5600ACO2 rear panel. In each group there is one labelled A, another labelled B for connection of the indicated signal from the respective 5600MSC Master Clock/SPG. -
Page 18: Balanced Aes, Dars And Analog Audio Connections
ACO CTRL/STATUS: The top row of the 12 pin terminal strip has two GPI inputs to control the 5600ACO2 and two GPI Outputs that provide tallies to indicate the status of the 5600ACO2. MSC:... -
Page 19: Ethernet Connections
RJ-45 connector at each end. Make the network connection by plugging one end of the cable into the RJ-45 receptacle of the 5600ACO2 and the other end into a port of the supporting hub. The straight-through RJ-45 cable can be purchased or can be constructed using the pinout information in Table 2-4. -
Page 20: Power Connections
2.2. MOUNTING The 5600ACO2 is equipped with rack mounting angles and fits into a standard 19 inch by 1 3/4 inch (483 mm x 45 mm) rack space. The mounting angles may be removed if rack mounting is not desired. -
Page 21: 10 Mhz Output
2.4.3. Word Clock Output If your 5600MSC units are fitted with the WC option you will need to make sure that the 5600ACO2 is fitted with firmware version 1.2 build 1 in order to properly monitor the Word Clock signal. Connect the Word Clock output of the Master A 5600MSC unit to the A Word Clock/10 MHz input of the 5600ACO2. -
Page 22: Video Test Signal Generator Outputs
5600MSC unit to the A SD SDI TG input of the 5600ACO2. Connect the SD SDI TG output of the Master B 5600MSC unit to the B SD SDI TG input of the 5600ACO2. Connect the SD SDI TG output of the 5600ACO2 to your plant SDI video distribution amplifier system. -
Page 23: Synchronizing The Menu Settings Of The Two 5600Msc Units
Auto-changeover, as well as the GPI inputs and outputs from the two 5600MSC units. The signals on the top row of the connector are for the 5600ACO2 only and do not connect to the 5600MSC units. (See section 3.3) The signals on the bottom row of the connector are connected directly to the 5600MSC units (see section 2.4.5). -
Page 24: Figure 2-2: Typical Gpi Circuitry
Model 5600ACO2 Automatic Changeover Unit + 5 VDC 1 K ohm internal circuit 10 Ohm GPI Input Figure 2-2: Typical GPI Circuitry The outputs are internally pulled up to 5 volts. Care must be taken to limit the load to 0.5W so there is no affect on the power supply source in the frame. -
Page 25: How To Operate The Automatic Changeover
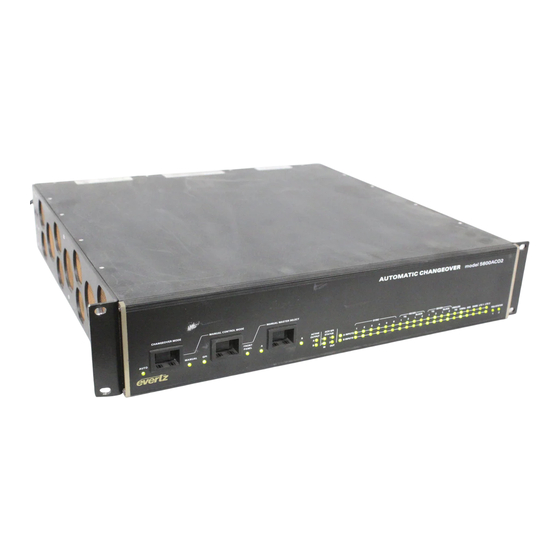
The front panel controls consist of three recessed rocker switches to select the operating mode of the changeover and 56 LED status indicators. 3.1. AN OVERVIEW OF THE STATUS INDICATORS There are 48 status indicators located on the front panel that show operational status of the 5600ACO2 at a glance. 3.1.1. Operating Mode Indicators AUTO This green LED will be On when the unit is operating in the Automatic control mode. -
Page 26: Input Indicators
The 5600ACO2 changeover uses latching relays that retain their state when there is no power applied. When there is no power applied to the 5600ACO2, GPO2 will be connected to ground indicating a fault condition. Page 3-2 OPERATION Revision 1.3... -
Page 27: Automatic Changeover Mode
MANUAL CONTROL MODE switch to the GPI position. The Manual and GPI LEDs will come on. The 5600ACO2 will decide whether to select the A or B inputs based on the ACO GPI inputs on the top row of the terminal strip on the rear panel. There are two GPI changeover modes described in sections 3.3.1. -
Page 28: Table 3-4: Dual Gpi Mode Operation
Table 3-3: Single GPI Mode Operation In single GPI mode the 5600ACO2 is controlled by the ACO GPI1 input on the top row of the terminal strip on the rear panel. GPI2 is not used in this mode. When GPI1 is low Master A will be selected. -
Page 29: Gpi Changeover Rate
ON position, the ACO will decide to change in approximately 100 msec, providing less protection from false changeovers but quicker response to input faults. The 5600ACO2 firmware must be version 1.0 build 13 or higher to operate in 100mS mode. -
Page 30: Aes Valid Condition
This functionality is provided to use with the 5600MSC. By enabling the GPI monitoring mode, and configuring the 5600MSC GPO outputs as failure tallies, the 5600ACO2 can be instructed to change over on various failure modes in the 5600MSC. (i.e. power supply failure, or fan failure, or unlocked etc.) See the 5600MSC manual for information on configuring the 5600MSC GPO’s. -
Page 31: Hdsdi/Sdi Monitoring
Moving any of the 3 switches or changing ACO GPI1 or ACO GPI2 will re-enable the 5600ACO2. This is provided to prevent back and forth toggling if an output is shorted out, or if one of the HD-SDI outputs is unterminated. -
Page 32: Gpo Tally Outputs
The default condition of the 5600ACO2 outputs when there is no power applied is that the Master that was last active will be selected, and will be indicated by the GPO1 relay. -
Page 33: Technical Description
GPI2: Low: Selects Master B Outputs: GPO1: Low: Master A is selected (default when the 5600ACO2 has no power) High: Master B is selected GPO2: Low: Master A & Master B differ or PSU failure High: Master A and B have equivalent signals... -
Page 34: Msc General Purpose Inputs And Outputs
Model 5600ACO2 Automatic Changeover Unit 4.1.5. MSC General Purpose Inputs and Outputs Inputs: 2 GPI inputs connected to both Master A and Master B Outputs: 2 GPI outputs connected from Master A through AUXI/O A 2 GPI outputs connected from Master B through AUXI/O B... -
Page 35: Upgrading The Firmware
4.2.3. Initiating Firmware Upgrade Mode From The Terminal Program 7. Power up the 5600ACO2. After the unit powers up, a banner with the boot code version information should appear in the terminal window. The cursor to the right of the word “BOOT>” should be spinning. -
Page 36: Uploading The New Firmware
10 minutes the unit’s Boot code will time out. You can restart the upgrade process by power cycling the unit. The 5600ACO2 application firmware in the bin file will have a name similar to: 5600ACO2.bin 15. - Page 37 Model 5600ACO2 Automatic Changeover Unit Connect a straight through serial cable (supplied with the 5600ACO2) between the COM serial port on the rear panel and a PC’s serial port. Start HyperTerminal (or an equivalent terminal program) on the PC and configure the port settings of the terminal program as follows:...
-
Page 38: Network Configuration
(4) Set Broadcast Address (5) Use DHCP (S) Save and exit (X) Exit without saving 4.3.2. SNMP Configuration 2) SNMP Configuration – set the TRAP destination IP address which originate at this 5600ACO2 (if enabled) --------------------------------------------------- Trap Destination 1: 192.168.1.88 ---------------------------------------------------... -
Page 39: Voting Control
Model 5600ACO2 Automatic Changeover Unit 4.3.3. Voting Control 3) Voting Control – set which input channel pair is included in the voting pool. Note that item 25 is the global enable for items 1 through 24. If 25 is set to Yes, then voting will be determined by the settings of items 1 through 24, and the settings of DIP switches 4, 5 and 7 are ignored. -
Page 40: Show Status
Model 5600ACO2 Automatic Changeover Unit 4.3.4. Show Status 4) Show Status – shows a synopsis of all of the above 3 items, and also shows the status of all input channels. There are no settable controls under this menu item. -
Page 41: Servicing Instructions
Model 5600ACO2 Automatic Changeover Unit 4.4. SERVICING INSTRUCTIONS CAUTION – These servicing instructions are for use by qualified service personnel only. To reduce risk of electric shock do not perform any servicing instructions in this section of the manual unless you are qualified to do so. - Page 42 Model 5600ACO2 Automatic Changeover Unit This page left intentionally blank Page 4-10 TECHNICAL DESCRIPTION Revision 1.3...
-
Page 43: Vistalink Configuration And Control
5.1.1. Connecting the 5600ACO2 to VistaLINK ® Follow the instructions in section 2.1.4 to connect the 5600ACO2 to the Ethernet network. Once you have established a physical connection you will need to set up the IP address, subnet, and SNMP TRAP destination addresses of the 5600ACO2 using the procedure in section 4.3.1. -
Page 44: Using Vistalink To Configure The 5600Aco2
To view the other screens, click on the appropriate tab of the configuration screen. Figure 5-1 shows the Voting control screen that is used to configure how the 5600ACO2 makes its decision about valid signals and when to switch to the backup signals. -
Page 45: Figure 5-1: Vistalink Configuration - Voting Control
Model 5600ACO2 Automatic Changeover Unit Figure 5-1: VistaLINK Configuration - Voting Control ® VistaLINK CONFIGURATION Page 5-3 Revision 1.3 ®... -
Page 46: Using Vistalink To Monitor The 5600Aco2
® Figure 5-2 and Figure 5-3 shows the two tabs used to monitor various status conditions from the 5600ACO2. These status conditions will not be updated live unless the auto refresh is enabled. Figure 5-2: VistaLINK Monitoring – General Status ®... -
Page 47: Figure 5-3: Vistalink Monitoring - Gpio Status
Model 5600ACO2 Automatic Changeover Unit Figure 5-3: VistaLINK Monitoring – GPIO Status ® VistaLINK CONFIGURATION Page 5-5 Revision 1.3 ®... -
Page 48: To Enable The Fault Reporting Traps Of The 5600Aco2
Model 5600ACO2 Automatic Changeover Unit 5.1.5. Using VistaLINK to Enable the Fault Reporting Traps of the 5600ACO2 ® Figure 5-4 to Figure 5-8 show the five tabs used to determine which trap messages will be sent by the 5600ACO2. Figure 5-4: VistaLINK Monitoring –... -
Page 49: Figure 5-5: Vistalink Monitoring - Ltc Faults
Model 5600ACO2 Automatic Changeover Unit Figure 5-5: VistaLINK Monitoring – LTC Faults ® VistaLINK CONFIGURATION Page 5-7 Revision 1.3 ®... -
Page 50: Figure 5-6: Vistalink Monitoring Gpio Faults
Model 5600ACO2 Automatic Changeover Unit Figure 5-6: VistaLINK Monitoring GPIO Faults ® Page 5-8 VistaLINK CONFIGURATION Revision 1.3 ®... -
Page 51: Figure 5-7: Vistalink Monitoring - Sdi And Hdsdi Test Generator Faults
Model 5600ACO2 Automatic Changeover Unit Figure 5-7: VistaLINK Monitoring – SDI and HDSDI Test Generator Faults ® VistaLINK CONFIGURATION Page 5-9 Revision 1.3 ®... -
Page 52: Figure 5-8: Vistalink Monitoring - Aes, Dars And Miscellaneous Faults
Model 5600ACO2 Automatic Changeover Unit Figure 5-8: VistaLINK Monitoring – AES, DARS and Miscellaneous Faults ® Page 5-10 VistaLINK CONFIGURATION Revision 1.3 ®...
Need help?
Do you have a question about the 5600ACO2 and is the answer not in the manual?
Questions and answers