
Related Manuals for J-Tech Digital JTD-2887


Summary of Contents for J-Tech Digital JTD-2887
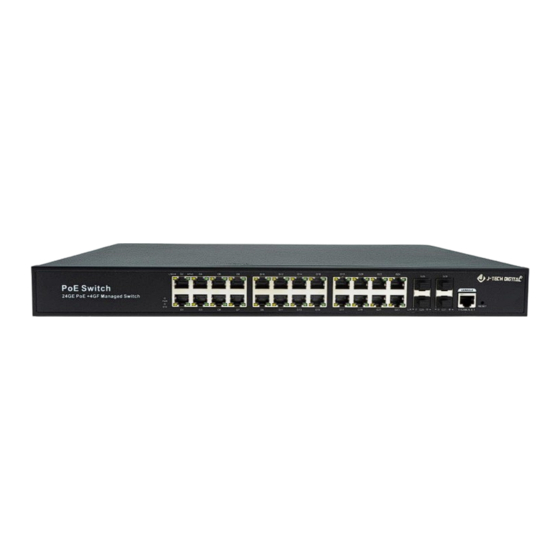
- Page 1 USER MANUAL 24 PORT POE SWITCH JTD-2886 | JTECH-NSP24 48 PORT POE SWITCH JTD-2887 | JTECH-NSP48 J-TECH DIGITAL INC. 9807 EMILY LANE STAFFORD, TX 77477 TEL: 1-888-610-2818 E-MAIL: SUPPORT@JTECHDIGITAL.COM...
-
Page 2: Table Of Contents
Table of Contents 1. Introduction ..................5 1.1 Product Information ................5 1.2 Features ....................5 2. Web Configuration ................. 6 2.1 Device Menu Information ..............7 2.1.1 Device > Basic .................. 7 2.1.2 Device > Maintenance ..............8 2.1.3 Device > Syslog ................9 2.1.4 Device >... - Page 3 2.2.5 Network > MAC Filter ..............36 2.2.6 Network > Link Aggregation ............41 2.2.7 Network > LACP ................43 2.2.8 Network > LLDP ................44 2.2.9 Network > IGMP Snooping ............. 47 2.2.10 Network > Multicast VLAN ............48 2.2.11 Network >...
- Page 4 2.5.5 QoS > Ports Rate Limit ..............71 2.5.6 QoS > QoS ..................72 3. Appendix ..................74 4. Maintenance ................74 5. Warranty ..................74 6. Mail-In Service ................75 7. Limited Warranty Limits and Exclusions ........75 P a g e...
-
Page 5: Introduction
1. Introduction 1.1 Product Introduction This series supports IPv4 / IPv6 double stack platform, and supports a variety of senior management functions, including POE management, MAC Table, VLANs, Port Isolation, Loop Protection, IGMP Snooping, MLD Snooping, ERPS, DHCP client, DHCP Snooping, STP/RSTP/MSTP, 802.1 x, QoS, port mirror, LLDP, static routing and NTP etc., 128 static routing and basic QINQ, to provide users with the perfect solution;... -
Page 6: Web Configuration
• IEEE802.1Q VLAN, IEEE802.1ad QINQ • 802.1x authentication to port and MAC • Static routing L3 switching technology • Operation temperature range: -40℃~75℃ • Storage temperature range: -40℃~85℃ 2. Web Configuration Open installed web browser on your PC, input the switch’s IP address like http://xxx.xxx.xxx.xxx, then open that URL to login web management. -
Page 7: Device Menu Information
2.1 Device Menu Information 2.1.1 Device > Basic After successfully logging in to the page, the web page directly jumps to the system information page, and you can also select the "Device Overview" or "Device → Basic Information" path to view the switch system information. -
Page 8: Device > Maintenance
MAC Address Aging Time Configure the aging time of the dynamic MAC address entries. The default is 300 seconds. 2.1.2 Device > Maintenance Equipment maintenance includes equipment software update, reboot, and fault maintenance. Software Update: Page wizard: Device → Maintenance → Software Update, the page is as shown in the figure below. Upgrade the switch software to the latest version, which will make your device more stable and more functional (click the <Browse...>... -
Page 9: Device > Syslog
Before restarting the device, please save the current configuration. Otherwise, after restarting, unsaved configuration information will be lost. Fault Maintenance: Page Wizard: Device → Equipment Maintenance → Fault Maintenance, the page is shown below. Select the <Fault Collecting> button, and all fault maintenance information will be backed up to your 2.1.3 Device >... - Page 10 The meaning of the key items on the page is shown in the table below. Operation Explanation Refresh Rate Control the refresh rate of the page through the selection of “Refresh Rate” drop down box Query Item Query the log information you need to follow through the selection of the “Query Item”...
-
Page 11: Device > Configuration
The meaning of the key items on the page is shown in the table below. Operation Explanation Log Enables Open / close the information center. By default, the information center is turned on Send Log Level Only log information no higher than the specified level can be sent to the log host Log Host IP Set the IP address of the log host... -
Page 12: Device > Port Management
device is automatically restarted, the configuration takes effect) After you have configured all items on the configuration page, be sure to save the configuration, otherwise, the unsaved configuration information will be lost due to restarting and other operations. Restore Default Configuration: During the process of restoring the factory default configuration, please do not perform other operations on the device, otherwise, the device may not work properly The meaning of the key items on the page is shown in the table below. - Page 13 Configure the properties of the specified ports in batches (click the <Batch Configuration> button on the main page to enter the corresponding configuration page). Configure the properties of a single port (click the entry corresponding to the port on the main page to enter the corresponding configuration page).
- Page 14 The meaning of the key items on the page is shown in the table below. Operation Explanation Link status The actual working speed and mode of the port, if not connected, it will display as "--". Rate Configure port rate. There are three situations in the duplex mode of the port: •...
-
Page 15: Device > Port Mirroring
temporarily stop sending packets or slow down the rate of sending packets, thereby avoiding the occurrence of packet loss and ensuring. The normal operation of the network business. By default, port flow control is disabled. Through the port isolation feature, you can add the ports that need to be controlled to an isolation group ("open"... -
Page 16: Device > Poe
The meaning of the key items on the page is shown in the table below. Operation Explanation Monitoring port Select the monitoring port, "no mirror" indicates that the port mirroring function of the switch is disabled Select the mirrored port, "no mirror" indicates that the port is not mirrored The meaning of the mirroring direction is as follows:... -
Page 17: Device > Users
PoE Setup: Page Wizard: Device → PoE → PoE Setup. Allows you to set the PoE status and priority of single or multiple ports. 2.1.8 Device > Users Page Wizard: Device → Users. On this page, you can configure the user timeout time, turn on/off the WEB authentication function, and turn on/off the WEB verification code function. - Page 18 Steps to add a local user: Click the <New> button on the main page, set the new user-related information on the "Add Local User" page, and click the <OK> button to take effect. Steps to modify local users: Click on the local user entry to be modified on the main page to enter the "Modify Local User" page for modification.
-
Page 19: Device > Vct
when logging in Turn on/off the WEB login verification code function. After opening, you need to enter the WEB login verification code verification code when logging in to WEB Username Set the local username to be added Confirm password Set local user password State Set the status of local users Rank... -
Page 20: Device > Flow Interval
have a short circuit. • When the cable status is "normal", the length of the connecting cable is not reflected in the displayed information. • When the cable status is "short circuit or open circuit", the length in the Length displayed information refers to the length from the port to the abnormal position. - Page 21 The meaning of the key items on the page is shown in the table below. Operation Explanation You can select the refresh rate to automatically Refresh rate update the statistics of the current page regularly. Statistics reset You can click this button to clear the statistics of the current page.
- Page 22 frame length less than 64 bytes. Giants error package Number of packets with correct CRC and data frame length greater than 1518 bytes. Number of packets with CRC error and data CRC error packet frame length between 64 and 1518 bytes. The length of the data frame is between 64 and 1518 bytes, and the number of FCS (Frame Frame error packet...
- Page 23 Aborts error package The total number of packets that failed to send, that is, the packets have been sent, but due to various reasons (such as conflict). Number of packets delayed by the first Deferred error packet transmission request due to a busy network. Number of conflicting packets generated by the Collisions error package port during packet transmission.
- Page 24 The flow monitoring histogram page can realize the following functions: • Monitoring port traffic through rate histogram. • Select the upper limit of the histogram in the drop-down box of “Traffic Upper Limit”, you can observe the proportion of each port's receive/send rate relative to the upper limit. When the proportion exceeds 95%, the histogram border will have a red warning.
-
Page 25: Device > Ntp
The flow monitoring line chart page can realize the following functions: • Monitor port traffic through rate line chart. • Click the port number in the histogram or select the specified port in the "Port Number" drop- down box, you can observe the rate change of the port in real-time. •... -
Page 26: Device > Snmp
2.1.12 Device > SNMP Setup: Page Wizard: Device → SNMP → Setup. On this page you can configure SNMP agent enable, SNMP version, local engine ID, physical location information, contact information. Community: Page Wizard: Device → SNMP → Community. On this page you can display or create a new SNMP community. - Page 27 Group: Page Wizard: Device → SNMP → Group. On this page you can display or create a new SNMP group. Click "New" to enter the new SNMP group page, the user can configure the group name, security level and view permissions of the newly created group. User: Page Wizard: Device →...
-
Page 28: Network Menu Information
Trap: Page Wizard: Device → SNMP → Trap. On this page you can configure to turn on/off the SNMP trap function, display trap host information, and create a new trap host. Click "New" to enter the new Trap host page, the user can configure the IP address, security name, UDP port, security model, the security level of the new Trap host. - Page 29 to take effect), and create a new Access port (Click on the main page Select the port to be added to the VLAN, and click the <OK> button to take effect). Trunk: Page Wizard: Network → VLAN → Trunk. Displays the current port information. Steps to create a new trunk port: Click the <New>...
- Page 30 Steps to create a new Hybrid port: Click the <New> button on the main page to enter the corresponding page. Specify the Hybrid port, and configure the PVID and port to pass through the VLAN. Click the <OK> button to take effect. Steps to modify Hybrid port: Click the entry corresponding to the port on the main page to enter the corresponding page.
-
Page 31: Network > Vlan Interface
• PVID: number, the value range is 1-4094. • Tagged VLAN: number, the value range is 1-4094, you can enter multiple values, separated by commas. A short line can be used to indicate a range. • Untagged VLAN: number, the value range is 1-4094, you can enter multiple values, separated by commas. -
Page 32: Network > Protocol Vlan
Modify: Page Wizard: Network → VLAN Interface → Modify. The user can modify the three-layer VLAN interface through this page and can modify the IP address of the interface. If it is a static IP acquisition method, the interface address information can also be modified. Remove: Page Wizard: Network →... - Page 33 Click the <New> button on the protocol VLAN display page to create a protocol VLAN: The meaning of the key items on the page is shown in the table below. Operation Explanation VLAN ID VLAN ID of the newly created protocol VLAN Template ID Template ID of the protocol VLAN Protocol type...
-
Page 34: Network > Dhcp Snooping
2.2.4 Network > DHCP Snooping DHCP Snooping technology is a DHCP security feature. Untrusted DHCP information is filtered by establishing and maintaining a DHCP Snooping binding table. This information refers to DHCP information from untrusted areas. The DHCP Snooping binding table contains information such as the MAC address, IP address, lease period, and VLAN-ID interface of users in the untrusted zone. - Page 35 DHCP Snooping Port: Page Wizard: Network → DHCP Snooping Port. 1. Configure a single port: Click the corresponding entry in the port trust status bar on the page. Enter the corresponding configuration page and select the trust status of the port. 2.
-
Page 36: Network > Mac Filter
In the Select Port column, you can select ports in batches. DHCP Snooping User: Page Wizard: Network → DHCP Snooping User. On this page, you can view the user MAC address, IP address, VLAN-ID interface, and other information of the untrusted zone in the DHCP Snooping binding table. - Page 37 Steps to add a new MAC address entry: Click the <Add> button on the main page, configure the relevant parameters of the MAC address entry on the page that is jumped to, and click the <OK> button to take effect. Modify static or blackhole MAC address entries (click the corresponding MAC address entry on the main page to modify the entry), dynamic MAC address entries cannot be modified.
- Page 38 The meaning of the key items on the page is shown in the table below. Operation Explanation MAC address query You can enter MAC and VLAN ID for query and display, in which MAC address must be entered. Display the MAC address and its corresponding VLAN in the switch.
- Page 39 • Bind the unbound MAC address entries under the port (select the corresponding port number, and select the unbound MAC address entries under the port, click the <Binding> button to take effect). Port MAC Filtering: Page Wizard: Network → MAC Filter → Port MAC Filtering. Displays the status of the MAC address filter function of each port.
- Page 40 2. Add the static MAC address entry of the specified port, click the entry corresponding to the port on the main page, enter the corresponding parameters in the "MAC address" and "VLAN" text boxes, and click the <Add> button to take effect. MAC Attack Prevention: Page Wizard: Network →...
-
Page 41: Network > Link Aggregation
Batch configure the number of MAC addresses that can be learned by the specified port. Click the <Batch Configuration> button on the main page to enter the corresponding page. 2.2.6 Network > Link Aggregation Page Wizard: Network → Link Aggregation. You can view the current link aggregation status and configure the aggregation algorithm on this page. - Page 42 The meaning of the key items on the page is shown in the table below. Operation Explanation Select the aggregation algorithm of the switch: Based on source MAC address: indicates that each member port in the aggregation group performs load sharing based on the source MAC address Based on destination MAC address: indicates that each member port in the aggregation group...
-
Page 43: Network > Lacp
• Ports configured with MAC address learning limit 2.2.7 Network > LACP Link Aggregation Control Protocol (LACP) provides a standardized means for exchanging information between Partner Systems that require high-speed redundant links. Link aggregation lets you group up to eight consecutive ports into a single dedicated connection. This feature can expand bandwidth to a device on the network. -
Page 44: Network > Lldp
2.2.8 Network > LLDP Global Summary: Page Wizard: Network → LLDP → Global Summary. On this page, you can view added neighbor devices, deleted neighbor devices, dropped LLDP packets, and aged neighbor devices. Port Summary: Page Wizard: Network → LLDP → Port Summary. On this page, you can select a port such as port 2 and the LLDP packet statistics of port 2 will be displayed in the Summary column. - Page 45 The meaning of the key items on the page is shown in the table below. Operation Explanation Select disabled in the drop-down box to turn off LLDP the LLDP function, select enabled even if the LLDP function is enabled. Transmit LLDP packet transmission interval.
- Page 46 The meaning of the key items on the page is shown in the table below. Operation Explanation LLDP Select disabled in the drop-down box to turn off the LLDP function, select enabled even if the LLDP function is enabled. Port LLDP working mode: •...
-
Page 47: Network > Igmp Snooping
and status control. All LLDP-MED Check to select all options under LLDP MED, including performance, network strategy, power over Ethernet, and equipment MED asset information. After configuring the above information, select the <Apply> button to apply. 2.2.9 Network > IGMP Snooping The Layer 2 device running IGMP Snooping analyzes the received IGMP messages to establish a mapping relationship between the port and the MAC multicast address, and forwards the multicast data based on this mapping relationship. -
Page 48: Network > Multicast Vlan
Advanced: Page Wizard: Network → IGMP Snooping → Advanced. Single port configuration: click the entry corresponding to the port on the main page to enter the corresponding page, open/close the port and leave quickly, and configure the maximum number of multicast groups (the maximum number of multicast groups is 256). -
Page 49: Network > Ipv4 Routing
multicast VLAN containing the aggregation interface list to the list of optional aggregation interfaces. Remove from multicast VLAN. • The specified VLAN must exist, otherwise the multicast VLAN cannot be created. • Only the aggregated interfaces that have been created can become optional aggregation interfaces. -
Page 50: Network > Mstp
Create: Page Wizard: Network → IPv4 Routing → Create. Users can create static routes via this page. After inputting the information, click on apply to save the settings. Remove: Page Wizard: Network → IPv4 Routing → Remove. Users can remove configured static route information via this page. - Page 51 Global: Page Wizard: Network → MSTP → Global. This page can be set to turn on/off the MSTP function and related parameters. Port Setup: Page Wizard: Network → MSTP → Port Setup. this page can be configured to open/close the port MSTP function and related attributes of MSTP under the port, as shown in the following figure: 51 | P a g e...
- Page 52 Instance Info: Page Wizard: Network → MSTP → Instance Info. This page can display MSTP instance information. Domain: Page Wizard: Network → MSTP → Domain. this page can display MSTP domain configuration effective information. Click the <Modify> button to modify the domain configuration information, and the modified domain configuration information will take effect immediately.
-
Page 53: Network > Dhcp
2.2.13 Network > DHCP DHCP Settings: Page Wizard: Network → DHCP → DHCP Settings. This page can globally turn on/off the DHCP server function, and display address pool information. Click the <New> button on the page to create a new DHCP server address pool. Click the corresponding address pool entry on the DHCP setting page to enter the corresponding address pool modification page. -
Page 54: Network > Telnet
DHCP Static Table: Page Wizard: Network → DHCP → DHCP Static Table. This page can display the currently configured DHCP client static table entries, or click the <New> button to add a DHCP client static list. DHCP Customer List: Page Wizard: Network → DHCP → DHCP Customer List. This page can display the list of currently online DHCP clients. - Page 55 Page Wizard: Network → Telnet → VTY configuration. In the VTY configuration page, you can select Telnet authentication mode, which is none, password, and scheme. You can set and change the password when you select a password or scheme mode. •...
-
Page 56: Authentication Menu Information
2.3 Authentication Menu Information 2.3.1 Authen > 802.1x 802.1x Port Setting: Page Wizard: Authen → 802.1x → Port Setting. This page shows the global on/off status of 802.1x and the configuration information of 802.1x under the port. Click the corresponding port entry to configure the 802.1x function of a single port, and click the <Batch Configuration>... -
Page 57: Authen > Aaa
802.1x Global Setting: Page Wizard: Authen → 802.1x → Global Setting. This page can configure 802.1x global function. 2.3.2 Authen > AAA AAA is short for Authentication, Authorization, and Accounting (authentication, authorization, and accounting). It is a management mechanism for network security and provides three security functions: authentication, authorization, and accounting. -
Page 58: Authen > Radius
Local User Settings: Page Wizard: Authen → AAA → Local User Settings. This page is mainly used to configure local users (Lan-access users or login users) when using the local authentication scheme. After clicking <Local User Settings>, they actually jump to the "Device -> User Management" page for configuration. For details, please refer to the "Device ->... -
Page 59: Security Menu Information
Domain Configuration: Page Wizard: Authen → Radius → Domain Configuration. This page is mainly used to configure the domain in the Radius scheme. Click the <New> button on the page to create a new domain. 2.4 Security Menu Information Enable the IP filter function on the port connected to the user side of the device, which can filter the packets received on the port to prevent illegal packets from passing through the port, thereby limiting the illegal use of network resources (such as illegal hosts spoofing legitimate users IP access network), which improves port security. - Page 60 The meaning of the key items in the TLV setting page is shown in the table below. Operation Explanation Available types are • Source IP address: just enter the IP address and port number. • Source MAC address: just enter the MAC address and port number.
-
Page 61: Security > Arp Attack Defense
Port Filter: Page Wizard: Security → IP Filter → Port Filter. On this page, you can choose to turn on/off the port IP filtering function and select off/on in the drop-down box of IP filtering. You can select <All On> or <All Off>... - Page 62 Port Setup: Page Wizard: Security → ARP Defense → Port Setup. On this page, you can configure whether the port is a trusted port for ARP packets. User Rules: Page Wizard: Security → ARP Defense → User Rules. On this page, you can view and add ARP inspection user rules.
-
Page 63: Security > Loopback Detection
The meaning of the key items in the TLV setting page is shown in the table below. Operation Explanation User rule ID, value range 0~255 Behavior Rule behavior, the action to be performed when the rule is matched Source IP address Source IP address of ARP protocol Source MAC address Source MAC address of ARP protocol... - Page 64 Port Detection: Page Wizard: Security → Loopback Detection → Port Detection. This page is used to configure the port open/close loop detection function in batches. VLAN Detection: Page Wizard: Security → Loopback Detection → VLAN Detection. This page can configure the port opening/closing by VLAN detection function in batches.
-
Page 65: Qos Menu Information
has a loop and the current status of the port through the port with the loop. 2.5 QoS Menu Information 2.5.1 QoS > ACL IPv4 ACL (Access Control List, access control list) is a collection of one or more rules used to identify the packet flow. - Page 66 creating it. Once the ACL is created, users are not allowed to set names, modify or delete their original names. After the ACL is created, the user can specify the ACL by specifying the number or name in order to operate it. Advanced Configuration: Page Wizard: QoS →...
- Page 67 does not have any By default, there are no rule [ rule-id ] { deny | permit }{gre| rules in the IPv4 icmp| igmp| ip| ipinip| ospf| tcp| advanced ACL udp} { {destination { dest-addr dest wildcard }|dscpdscp|precedencepr Create a rule ecedence|sourcesour-addr sour- wildcard | source-portoperator port1 [ port2 ] | destination-portoperator...
-
Page 68: Qos > Acl Ipv6
2.5.2 QoS > ACL IPv6 ACL Display: Page Wizard: QoS → ACL IPV6 → ACL Display. On this page, users are able to select the access control list to view their details. Create ACL: Page Wizard: QoS → ACL IPV6 → Create ACL. When creating an ACL, the user must assign a number to it. - Page 69 codes, etc.) to formulate rules to match IPv6 packets. Users can use IPv6 advanced ACL to formulate more accurate, rich, and flexible rules than IPv6 basic ACL. Operation Command Explanation Enter superuser view super ----- Create an IPv6 advanced Aclipv6 number num-adv-v6 [match- Required, by default, no ACL and enter IPv6 order {auto | config}]...
-
Page 70: Qos > Acl Policy
selecting the desired one through the drop-down menu. 2.5.3 QoS > ACL Policy Display Port ACL Binding: Page Wizard: QoS → ACL Policy → Display Port ACL Binding. View the ACL IPv4 and IPv6 policies for each port in detail. Create Port ACL Binding: Page Wizard: QoS →... -
Page 71: Qos > Acl Resource
Page Wizard: QoS → ACL Policy → Delete Port ACL Binding. Select individual or multiple bind ports, and delete the ACL binding via this page. 2.5.4 QoS > ACL Resource Page Wizard: QoS → ACL Resources. View the type, total, reserved, used, and remaining ACL resources via this page. -
Page 72: Qos > Qos
token bucket. When a token is stored in the token bucket, the packet can be sent according to the token; otherwise, the packet will enter the port cache for congestion management. In this way, you can control the packet flow through the port. Configure the inbound/outbound port speed limit of a single port: click the entry corresponding to the port on the main page to enter the corresponding page. - Page 73 The meaning of the key items on the page is shown in the table below. Operation Explanation Choose the priority mode you want to trust: • COS: Put the packet into the port output queue of the corresponding priority according to the 802.1p priority. •...
-
Page 74: Appendix
implement WRR scheduling for the remaining 3 queues. Weights Configure the priority weight of each queue. 3. Appendix 1. Why can’t the bandwidth be increased after trunking is configured? A: Please check if the information of trunking set port is as same, including rate, duplex mode, and VLAN etc. -
Page 75: Mail-In Service
and Labor (1) Year”, which starts with the date of original purchase (“Limited Warranty period”), at its option either (a) repair your product with new or refurbished parts, or (b) replace it with a new or a refurbished product. The decision to repair or replace will be made by the warrantor. During the “Labor”... - Page 76 The items listed are not exclusive, but are for illustration only.) PARTS AND SERVICE, WHICH ARE NOT COVERED BY THIS LIMITED WARRANTY, ARE YOUR RESPONSIBILITY. 76 | P a g e...
- Page 77 WWW.JTECHDIGITAL.COM PUBLISHED BY J-TECH DIGITAL INC. 9807 EMILY LANE STAFFORD, TX 77477 TEL: 1-888-610-2818 E-MAIL: SUPPORT@JTECHDIGITAL.COM 77 | P a g e...
Need help?
Do you have a question about the JTD-2887 and is the answer not in the manual?
Questions and answers