
Related Manuals for Grunbeck clearliQ safe+


Summary of Contents for Grunbeck clearliQ safe+
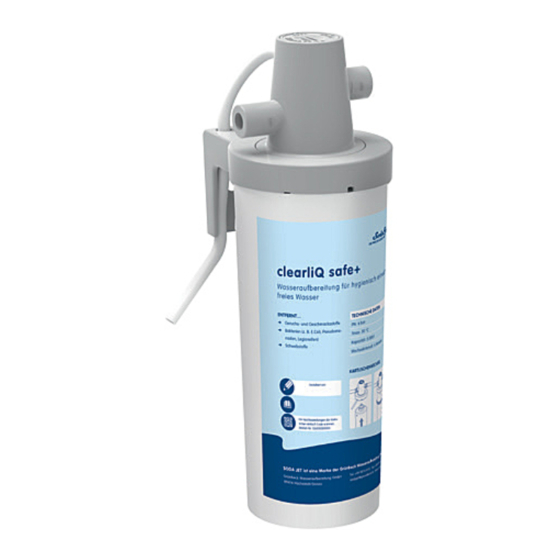
- Page 1 We understand water. Hygiene filter | clearliQ safe+ Filter module | clearliQ safe Operation manual...
- Page 2 General Contact Germany International Sales +49 9074 41-145 Service +49 9074 41-333 service@gruenbeck.de Availability Monday to Thursday 7:00 am - 6:00 pm Friday 7:00 am - 4:00 pm We reserve the right to technical modifications. © by Grünbeck Wasseraufbereitung GmbH Original operation manual Edition: April 2023 Order no.: 100130620000_en_025...
-
Page 3: Table Of Contents
Table of contents Table of contents Starting up the product ....21 Introduction ........4 Handing over the product to the owner/operating company ..... 24 Validity of the manual ...... 4 Other applicable documents .... 4 Product identification ....... 5 Operation/Handling ....... -
Page 4: Introduction
Introduction Introduction This manual is intended for owners/operating companies, operators/users as well as qualified specialists and ensures the safe and efficient handling of the product. The manual is an integral part of the product. ► Carefully read this manual and the included manuals on the components before you operate your product. -
Page 5: Product Identification
Introduction 1.3 Product identification You can identify your product based on the product designation and the order no. indicated on the type plate. ► Check whether the products indicated in chapter 1.1 correspond to your product. The type plate is located on the mounting bracket at the filter head. Designation Designation Obey the operation manual... -
Page 6: Symbols Used
Introduction 1.4 Symbols used Symbol Meaning Danger and risk Important information or requirement Useful information or tip Written documentation required Reference to further documents Work that must be carried out by qualified specialists only Work that must be carried out by qualified electricians only Work that must be carried out by technical service personnel only 1.5 Depiction of warnings This manual contains information and instructions that you must... -
Page 7: Demands On Personnel
Introduction Warning symbol and Consequences if the information/instructions are signal word ignored DANGER Death or serious injuries Personal WARNING Possible death or serious injuries injury CAUTION Possible moderate or minor injuries Possible damage to components, the Damage to NOTE product and/or its functions, or an property object in its vicinity 1.6 Demands on personnel... - Page 8 Introduction Personnel Requirements • Extended product-specific expertise Technical service (Grünbeck's technical • Trained by Grünbeck service/authorised service company) 1.6.2 Authorisations of personnel The table below describes which tasks may be carried out by whom. Operator/ Owner/ Qualified Technical user operating specialist service company...
-
Page 9: Safety
Safety Safety 2.1 Safety measures ● Only operate your product if all components are installed properly. ● Obey the local regulations on drinking water protection, accident prevention and occupational safety. ● Do not make any changes or alterations on your product. ●... -
Page 10: Product-Specific Safety Instructions
Safety 2.1.3 Groups of persons requiring protection ● Children must not play with the product. ● This product is not designed to be used by persons (including children) with reduced capabilities, lack of experience or lack of knowledge. Unless they are supervised, have been instructed on the safe use of the product and understand the resulting hazards. -
Page 11: Product Description
Product description Product description 3.1 Intended use ● The water filters clearliQ safe(+) are designed for the filtration of cold drinking water. ● The water filters are used directly on an angle valve at the withdrawal point (point-of-use) for e.g. drinking water dispensers. -
Page 12: Product Components
Product description 3.2 Product components Designation Designation Connection hose (3/8") with seals Hole for flushing hose Water inlet (3/8") Fastening holes Water outlet (3/8") Fastening material for wall Filter head with mounting Fastening material for wood bracket Filter cartridge Flushing/pressure relief valve End position marking Flushing hose 12 | 40... -
Page 13: Functional Description
Product description 3.3 Functional description The water flows through the filter cartridge of the water filter and removes chlorine, discolourations, unpleasant odours, micro- organisms and residues of pharmaceuticals located in the water. In addition for hygiene filter clearliQ safe+ Bacteria such as Legionella pneumophila, Escherichia coli and Pseudomonas aeruginosa are fixed on the hygiene element by means of electrostatic adsorption. -
Page 14: Transport And Storage
Transport and storage Transport and storage 4.1 Transport ► Transport the product in its original packaging only. 4.2 Storage ► Protect the product from the impacts below when storing it: • Dampness, moisture • Environmental impacts such as wind, rain, snow, etc. •... -
Page 15: Installation
Installation Installation The installation of the product represents a major intervention into the drinking water system and must be carried out by a qualified specialist only. Installation example Designation Designation Drinking water dispenser Filter head SODA JET Office Connection hose 3/8", DN 8, cylinder 0.5 m in length Filter cartridge... -
Page 16: Requirements For The Installation Site
Installation 5.1 Requirements for the installation site ● The installation site must be frost-proof and protect the product from direct sunlight, chemicals, dyes, solvents and their vapours. ● The installation site must be easily accessible for maintenance work (replacement of filter cartridge). ●... -
Page 17: Installing The Product
Installation 5.3 Installing the product The filter head features an integrated shut-off valve. No additional shut-off valves need to be installed in the inlet and outlet. The filter cartridge must always be installed. Impurities can cause leaks. ► Pay attention to cleanliness and hygiene when installing the product. - Page 18 Installation 5.3.1.1 Fastening the filter head Designation Designation Fastening material for wall Fastening material for mounting mounting. on wood. 1. Determine the position of the filter head according to the installation conditions. 2. Comply with the flow direction – marking on the filter head. 3.
- Page 19 Installation 5.3.1.2 Inserting the filter cartridge 6. Plug in the filter cartridge – comply with the markings. 7. Screw in the filter cartridge clockwise as far as it will go. » The marking can be seen on the front side. 8.
- Page 20 Installation 5.3.1.3 Connecting the water lines Designation Designation Connection hose to the angle Connection hose from the valve (water inlet) drinking water dispenser Seal 9. Screw the connection hose with inserted seal to the water inlet of the filter head. 10.
-
Page 21: Start-Up/Commissioning
Start-up/Commissioning Start-up/Commissioning The owner/operating company of the drinking water dispenser may carry out the start-up of the water filter. 6.1 Starting up the product 6.1.1 Venting the system When inserting and replacing the filter cartridge, a small amount of water may escape from the filter head once. ►... - Page 22 Start-up/Commissioning 1. Open the flushing/pressure relief valve (flush valve) on the filter head – Position open. a Route the flushing hose into a container. 2. Draw water from the drinking water dispenser. a Let about 5 litres of water flow through. b Check the connections and the filter cartridge for leaks.
- Page 23 Start-up/Commissioning a Let about 5 litres of water flow through. b Check the connections and the filter cartridge for leaks. » The filter cartridge and the filter head are flushed via the drinking water dispenser and the system is vented. 6.1.3 Flushing the system 1.
-
Page 24: Handing Over The Product To The Owner/Operating Company
Start-up/Commissioning 6.2 Handing over the product to the owner/operating company ► Explain to the owner/operating company/end user how the product works. ► Use the manual to brief the owner/operating company/end user and answer any questions. ► Inform the owner/operating company/end user about the need for inspections and maintenance. -
Page 25: Operation/Handling
Operation/Handling Operation/Handling The water filter is operated automatically and does not require any manual operation. Without the filter cartridge being installed, no water can flow through the filter head. ► Inspect the water filter for function and leaks at regular intervals (refer to chapter 8.3). -
Page 26: Maintenance And Repair
Maintenance and repair Maintenance and repair Maintenance and repair includes cleaning, inspection and maintenance of the product. Contaminated drinking water if the work is not WARNING carried out properly. ● Infectious diseases due to bacterial growth ► Pay attention to hygiene when working on the product. Regular maintenance ensures trouble-free and hygienic operation. -
Page 27: Intervals
Maintenance and repair 8.2 Intervals By way of regular inspections and maintenance, malfunctions can be detected in time and product failures might be prevented. ► (As owner/operating company) Determine which components must be inspected and maintained at which intervals (load- dependent). -
Page 28: Inspection
Maintenance and repair 8.3 Inspection You as operator/user can carry out the regular inspections yourself. ► Carry out an inspection at least every 2 months: 1. Draw water from the drinking water dispenser. 2. Check the installation for leaks. 3. Check that the water pressure is not reduced. a In case the water pressure visibly drops, the filter cartridge may be exhausted. -
Page 29: Maintenance
Maintenance and repair 8.4 Maintenance Some regular work is necessary to ensure the proper functioning of the product in the long term. ► In addition to the inspection work, carry out the tasks below: 1. Check the connections of the water hoses for a tight fit. 2. - Page 30 Maintenance and repair ► Make sure that no water is drawn at the drinking water dispenser. 1. Release water pressure – set the flush valve to open and, using the flushing hose, catch the water (max. 100 ml) in a container.
- Page 31 Maintenance and repair 5. Plug the new filter cartridge into the filter head – comply with the markings. 6. Screw in the filter cartridge clockwise as far as it will go. » The filter cartridge has snapped into place. 7. Vent the filter cartridge (refer to chapter 6.1.1). 8.
-
Page 32: Consumables
Maintenance and repair 8.5 Consumables Product Quantity Order no. Replacement cartridge for hygiene filter clearliQ safe+ 1 piece 156000080000 Replacement cartridge for filter module clearliQ safe 1 piece 156000090000 8.6 Spare parts For an overview of the spare parts, refer to our spare parts catalogue at www.gruenbeck.com. -
Page 33: Troubleshooting
Troubleshooting Troubleshooting Contaminated drinking water due to stagnation WARNING ● Infectious diseases due to bacterial growth ► Have malfunctions eliminated immediately. Observation Explanation Remedy ► Replace filter Water pressure at the The filter cartridge is dirty withdrawal point too low cartridge (pressure loss too high) ►... -
Page 34: Decommissioning
Decommissioning 10 Decommissioning It is not necessary to put your product out of operation. ► Proceed as follows if you nevertheless want to temporarily shut down the water filter: 1. Close the water supply. 2. Remove the filter cartridge. Restart/recommissioning 1. -
Page 35: Dismantling And Disposal
Dismantling and disposal 11 Dismantling and disposal 11.1 Dismantling 1. Drain the entire system. 2. Remove the filter cartridge. 3. Loosen the connections and remove the water lines. 4. Loosen the screw connections of the filter head. 5. Remove the filter head. 11.2 Disposal ►... -
Page 36: Technical Specifications
Technical specifications 12 Technical specifications Dimensions and weights clearliQ safe+ clearliQ safe Width Height Depth Height of filter cartridge Operating weight (incl. water) ~ 1.8 ~ 2.6 Shipping weight ~ 0.8 ~ 1.3 Connection data clearliQ safe+ clearliQ safe Connection thread 3/8"... - Page 37 Technical specifications Performance data clearliQ safe+ clearliQ safe Nominal flow ≤ 6.0 Operating pressure Pressure loss Refer to pressure loss curves Replacement interval of filter cartridge (recommended) after max. months up to 5000 2500 General data clearliQ safe+ clearliQ safe 4 –...
-
Page 38: Operation Log
Operation log 13 Operation log ► Document the initial start-up/commissioning and all maintenance activities. Hygiene filter | clearliQ safe+ Filter module | clearliQ safe Serial no.: ______________________ 13.1 Start-up/Commissioning log Customer Name Address Installation/Accessories Installation site of the water filter Material of water supply line Operating values Water pressure at the water inlet... -
Page 39: Maintenance
Operation log 13.2 Maintenance Date Work Name/signature 39 | 40... - Page 40 Grünbeck Wasseraufbereitung GmbH Josef-Grünbeck-Str. 1 89420 Hoechstaedt/Germany +49 9074 41-0 +49 9074 41-100 For more information info@gruenbeck.com go to www.gruenbeck.com www.gruenbeck.com...
Need help?
Do you have a question about the clearliQ safe+ and is the answer not in the manual?
Questions and answers