Copeland E3 Quick Setup Manual
Supervisory control
Hide thumbs
Also See for E3:
- Reference card (2 pages) ,
- Quick start manual (12 pages) ,
- Installation and operation user manual (241 pages)

Related Manuals for Copeland E3


Summary of Contents for Copeland E3
- Page 1 E3 Supervisory Control (Contrôle du superviseur E3) Quick Setup Guide Guide d’installation rapide)
-
Page 3: Table Of Contents
Technical Specifications ..................6 Wiring ..........................7 Ethernet Connections ....................7 E3 RS485 Wiring Guide Example ................8 Direct Connect Instructions - Connect your Laptop to E3’s Ethernet Port ETH1: ........................9 Logging Into the E3 Controller ................10 How to Change the IP Address ................. 11 Setup Wizard ...................... -
Page 5: Technical Specifications
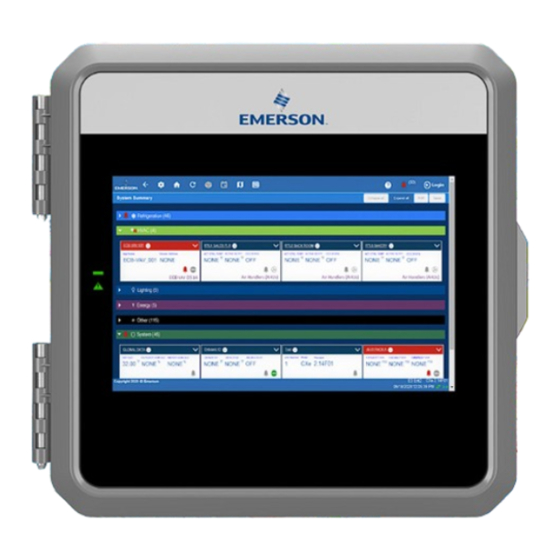
E3 Supervisory Control Quick Setup Guide The E3 is a system that combines energy management with the ability to monitor various facility systems and provide alerts when there are issues that need attention. This system provides HVAC control, Refrigeration System Monitoring and Control, as well as Lighting Control. -
Page 6: Wiring
Wiring Connect the RS485 Communication wire to the terminal block headers as shown. The Cables are numbered 1 through 4. Connect the 2-pin 7.5mm power connector and Ground wire as shown in PIB Board Layout illustration. Connect the other end of the power cable to one of the 50VA P/N 640-0040 transformers. Plug the 50VA P/N 640-0040 Transformers into a 120VAC outlet. -
Page 7: E3 Rs485 Wiring Guide Example
E3 RS485 Wiring Guide Example • For E3 Serial IO Net connections, connect the white wire to the positive terminal and the black wire to the negative terminal. • For 8RO and MultiFlex RS485 IO Net connections, connect the white wire to the positive terminal and the black wire to the negative terminal. -
Page 8: Direct Connect Instructions - Connect Your Laptop To E3'S Ethernet Port Eth1
Direct Connect Instructions - Connect your Laptop to E3’s Ethernet Port ETH1: All configuration can be accomplished through the E3’s built-in display or through a laptop, PC, or tablet. On your PC: Under Control Panel - Network and Sharing Center, select Change adapter settings. -
Page 9: Logging Into The E3 Controller
Logging Into the E3 Controller Launch a preferred Web browser: Google Chrome 105.0.5195 and later, Firefox 105.0 and later, MAC Safari 14.1.2 and later, iOS Safari 14.7 and later, Microsoft Edge 84.0.522 and later, and Chrome/ WebView 105.0.5195 and later are the supported browsers. -
Page 10: How To Change The Ip Address
Create a “network.txt” with your desired settings (Enter IP Address in the ETH 0 IP Address Field): Network.txt Notepad Save to the root folder of a thumb drive. Insert the thumb drive into the USB port of E3. Power cycle the E3. The new IP Address will be saved. -
Page 11: Setup Wizard
(internal language code). The default language is used when no user is currently logged into the E3 or when the currently active preferred language does not have a translation for a given label, prompt, or display text. - Page 12 SMS setting and use the SMTP address (see your IT Administrator). Click the arrow > to save and finish the Setup Wizard. Network Settings For Technical Support: Call: 833-409-7505 Email: ColdChain.TechnicalServices@copeland.com For more product information, scan the QR Code:...
-
Page 13: Spécifications Techniques
Contrôle du superviseur E3 Guide d’installation rapide L’E3 est un système qui combine la gestion de l’énergie avec la capacité de surveiller divers systèmes de l’installation et de fournir des alertes en cas de problèmes nécessitant une attention particulière. Ce système fournit le contrôle CVCR, la surveillance et... -
Page 14: Câblage
Câblage Connectez tle fil de communication RS485 aux connecteurs à bornes comme indiqué. Les câbles sont numérotés de 1 à 4. Connectez le connecteur d’alimentation à 2 broches de 7,5 mm et le fil de terre comme indiqué dans l’illustration Disposition de la carte PIB. Connectez l’autre extrémité... -
Page 15: Exemple De Guide De Câblage E3 Rs485
Exemple de guide de câblage E3 RS485 • Pour les connexions E3 Serial IO Net, connectez le fil blanc à la borne positive et le fil noir à la borne négative. • Pour les connexions 8RO et MultiFlex RS485 IO Net, connectez le fil blanc à la borne positive et le fil noir à... -
Page 16: Instructions De Connexion Directe - Connectez Votre Ordinateur Portable Au Port Ethernet Eth1 De L'e3
Instructions de connexion directe - Connectez votre ordinateur portable au port Ethernet ETH1 de l’E3 : Toute la configuration peut être effectuée via l’écran intégré de l’E3 ou via un ordinateur portable, un PC ou une tablette. Sur votre PC : Sous le Panneau de configuration - Centre Réseau et Partage, sélectionnez Modifier les... -
Page 17: Connexion Au Contrôleur E3
Connexion au contrôleur E3 Lancez un navigateur Internet de préférence : Google Chrome 105.0.5195 et versions ultérieures, Firefox 105.0 et versions ultérieures, MAC Safari 14.1.2 et versions ultérieures, iOS Safari 14.7 et versions ultérieures, Microsoft Edge 84.0.522 et versions ultérieures et Chrome/WebView 105.0.5195 et versions ultérieures sont les navigateurs pris en charge. -
Page 18: Comment Changer L'adresse Ip
Créez un « network.txt » avec les paramètres souhaités (entrez l’adresse IP dans le champ d’adresse IP ETH 0) : Bloc-notes réseau.txt Enregistrez dans le dossier racine d’une clé USB. Insérez la clé USB dans le port USB du E3. Redémarrez l’E3. La nouvelle adresse IP sera enregistrée. -
Page 19: Assistant De Configuration
à travers les écrans de configuration suivants Écran de localisation Écran de localisation Définissez les données de localisation de l’E3 telles que la langue, les formats de date et d’heure et les unités d’ingénierie à partir de l’écran Localisation. Langue : La langue par défaut pour la sélection est l’anglais américain (États-Unis). - Page 20 SMS et utilisez l’adresse SMTP (consultez votre administrateur informatique). Cliquez sur la flèche > pour enregistrer et terminer l’assistant de configuration. Paramètres réseau Pour le support technique: appelez: 833-409-7505 courriel: ColdChain.TechnicalServices@copeland.com Pour plus d’informations sur le produit, scannez le code QR :...
- Page 21 NOTES...
- Page 22 NOTES...
- Page 23 NOTES...
- Page 24 Copeland reserves the right to modify the designs or specifications of such products at any time without notice. Responsibility for proper selection, use and maintenance of any product remains solely with the purchaser and end-user.
Need help?
Do you have a question about the E3 and is the answer not in the manual?
Questions and answers