Table of Contents
Advertisement
Quick Links
INSTALLATION MANUAL
SERVICE ENTRY WHOLE HOUSE
AUTOMATIC TRANSFER SWITCH (ATS)
All aXis Controller
Models
®
REGISTER YOUR PRODUCT ONLINE
at championpowerequipment.com
or visit championpowerequipment.com
READ AND SAVE THIS MANUAL. This manual contains important safety precautions which should be read and understood before operating the product. Failure to
do so could result in serious injury. This manual should remain with the product.
Specifications, descriptions and illustrations in this manual are as accurate as known at the time of publication, but are subject to change without notice.
REV 20231227
Champion Power Equipment, Inc.
Advertisement
Table of Contents

Related Manuals for Champion 102006


Summary of Contents for Champion 102006
- Page 1 This manual should remain with the product. Specifications, descriptions and illustrations in this manual are as accurate as known at the time of publication, but are subject to change without notice. REV 20231227 Champion Power Equipment, Inc.
-
Page 2: Table Of Contents
Important Safety Instructions ....... Full System Check ..........Instructions for Champion Automatic Transfer Switch with aXis Specifications Controller Module .......... -
Page 3: Introduction
® INTRODUCTION SAFETY DEFINITIONS Congratulations on your purchase of a Champion Power Equipment The purpose of safety symbols is to attract your attention to (CPE) product. CPE designs, builds, and supports all of our possible dangers. The safety symbols, and their explanations, products to strict specifications and guidelines. -
Page 4: Important Safety Instructions
Instructions for Champion Automatic installation, service or maintenance activities. Transfer Switch with aXis Controller Module ® THE CHAMPION AUTOMATIC TRANSFER SWITCH WITH aXis DANGER CONTROLLER MODULE IS NOT FOR “DO-IT-YOURSELF” ®... -
Page 5: Safety Labels
Este interruptor no se transferira si el dispositivo PRECAUCIÓN This artwork belongs to Champion Power Equipment. The contents are confidential and privileged and shall not be disclosed to or used by or for outside parties without the explicit consent of Champion Power Equipment. -
Page 6: Safety Symbols
IMpORTANT SAFETY INSTRUCTIONS WHOLE HOUSE AUTOMATIC TRANSFER SWITCH - ALL aXis CONTROLLER MODELS ® Safety Symbols Some of the following symbols may be used on this product. Please study them and learn their meaning. Proper interpretation of these symbols will allow you to more safely operate the product. SYMBOL MEANING Read Installation Manual. -
Page 7: Controls And Features
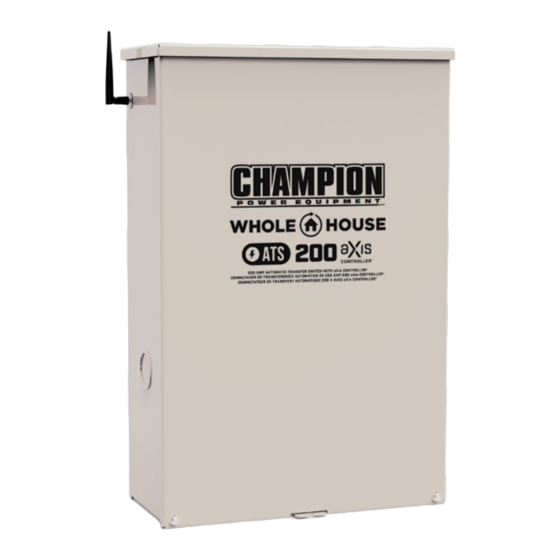
CONTROLS AND FEATURES Read this installation manual before installing your transfer switch. Familiarize yourself with the location and function of the controls and features. Save this manual for future reference. Champion Automatic Transfer Switch with aXis Controller Module ® Models 102006/102008/102009 Models 102007/102010 1. -
Page 8: Unpacking
UNpACkING WHOLE HOUSE AUTOMATIC TRANSFER SWITCH - ALL aXis CONTROLLER MODELS ® UNpACkING Electrical Grommet(s) Grommets can be used in any enclosure knockout for NEMA 1 1. Use care when unpacking to avoid damaging transfer switch installations. Grommets can only be used in the bottom enclosure components. -
Page 9: Installation
INSTALLATION WHOLE HOUSE AUTOMATIC TRANSFER SWITCH - ALL aXis CONTROLLER MODELS ® INSTALLATION 6. Connect Generator L1-L2 to Generator side breaker. Torque to 45-50 in-lbs. 7. Connect Generator Neutral to neutral bar. Torque to Wiring the ATS 275 in-lbs. NOTICE ... -
Page 10: Battery Charger Wiring
HSB contains a 24V battery charger that is The utility sensing fuse block is not used in a typical installation. ® The fuse block is only used when connecting the Champion aXis powered by 120V AC. The battery charger receives 120V AC power from the aXis Controller... -
Page 11: Settings On The Axis Controller ® Module
INSTALLATION WHOLE HOUSE AUTOMATIC TRANSFER SWITCH - ALL aXis CONTROLLER MODELS ® Settings on the aXis Controller Module ® 1. On the aXis control board, set the two circular pots that – Off= All managed loads will be turned off when if the HSB are located to the right of the DIP switches to match the frequency drops below 57 Hz. -
Page 12: 400A Installation
To return the generator to service, follow these steps in order: – 100515- 14-kW aXis Home Standby Generator 1. Connect the POSITIVE, POS or (+) battery cable first, and – 102006 - 200A ATS then connect the NEGATIVE, NEG or (-) battery cable. – 102007 - 200A ATS 2. - Page 13 INSTALLATION WHOLE HOUSE AUTOMATIC TRANSFER SWITCH - ALL aXis CONTROLLER MODELS ®...
-
Page 14: Primary Ats Leds
INSTALLATION WHOLE HOUSE AUTOMATIC TRANSFER SWITCH - ALL aXis CONTROLLER MODELS ® primary ATS LEDs The LEDs shown pertain only to aXis Controller Load ® Management Modules (LMM). 1 ~ 8, 10 & 11 DIP switches in “ON” position. Both LMM 1 through 4 (LMM1-4) and Gen stop/start (GSTOP/ 9 and 12 DIP switches in the “OFF”... -
Page 15: Wi-Fi Setup Method
3. After connecting Wi-Fi, open your device’s web browser. In the browser address change the address to 192.168.0.90 and 1. Use a Wi-Fi enabled device (laptop, smart phone, tablet, etc.) begin search. This will direct your browser to the Champion in near proximity to the ATS. aXis Controller Home Standby Generator Settings page ®... - Page 16 Home Standby INSTALLATION WHOLE HOUSE AUTOMATIC TRANSFER SWITCH - ALL aXis CONTROLLER MODELS ® Generator Settings 7. Set the HSB exercise frequency and schedule. 5. Confirm and apply the settings before continuing. If you do not apply immediately, the clock will be later than actual. Generator Exercise Unsaved changes are highlighted.
-
Page 17: Ats And Hsb Status Using Wi-Fi
5. Installation configuration is now held in memory and will not be affected by power outage. 1. Using a WIFI enabled device, connect to the “Champion HSB” WIFI network following steps 1, 2, and 3 from WIFI Setup 6. Return UTILITY circuit breaker to the ON position. ATS will Method. -
Page 18: Full System Check
INSTALLATION WHOLE HOUSE AUTOMATIC TRANSFER SWITCH - ALL aXis CONTROLLER MODELS ® Full System Check 1. Open Utility breaker for full system test, close breaker after confirming all systems working. 2. After Utility breaker opens engine will start automatically. 3. aXis ATS control panel will reboot on Generator power and control switching of latching relays. -
Page 19: Specifications
SpECIFICATIONS WHOLE HOUSE AUTOMATIC TRANSFER SWITCH - ALL aXis CONTROLLER MODELS ® SpECIFICATIONS Model 102006 102007 102008 102009 102010 Service Rating Service Entry Rating Enclosure Style NEMA 3R Outdoor Maximum Amps Nominal Volts 120/240 CSA STD C22.2 No. CSA STD C22.2 No. -
Page 20: 102010 Ats Wiring Diagram
SpECIFICATIONS WHOLE HOUSE AUTOMATIC TRANSFER SWITCH - ALL aXis CONTROLLER MODELS ® 102006, 102007, 102008, 102009, 102010 ATS Wiring Diagram... -
Page 21: Warranty
WARRANTY Each Champion transfer switch or accessory is guaranteed against mechanical or electrical failure due to manufacturing defects for a period of 24 months following shipment from the factory. The manufacturer’s responsibility during this warranty period is limited to repair or replacement, free of charge, of products proving defective under normal use or service when returned to the factory, transportation charges prepaid. - Page 22 – Problems caused by parts that are not original Champion To complete registration you will need to include a copy of the Power Equipment parts. purchase receipt as proof of original purchase. Proof of purchase is required for warranty service.
Need help?
Do you have a question about the 102006 and is the answer not in the manual?
Questions and answers