
Related Manuals for Epiq Solutions Sidekiq Z2


Summary of Contents for Epiq Solutions Sidekiq Z2
- Page 1 Sidekiq™ Z2 RF Transceiver • Low SWaP HARDWARE USER MANUAL V1.7 - SEPTEMBER 02, 2021...
- Page 2 Sidekiq™ Z2 | Hardware User Manual CHANGELOG Revision Date Description Author 2018-04-02 Initial version Barry L Added additional details for GPIO usage, re-flashing Z2 over DFU, power 2018-05-16 Barry L consumption specs, and general usage Added additional details for USB networking options, simple carrier card usage, 2018-07-12 Barry L memory partition info, and I/O expansion card info.
- Page 3 Epiq Solutions is disclosing this document (“Documentation”) as a general guideline for development. Epiq Solutions expressly disclaims any liability arising out of your use of the Documentation. Epiq Solutions reserves the right, at its sole discretion, to change the Documentation without notice at any time. Epiq Solutions assumes no obligation to correct any errors contained in the Documentation, or to advise you of any corrections or updates.
-
Page 4: Table Of Contents
..................26 Overview of Sidekiq Z2 & Simple Carrier Card (SCC) . - Page 5 Internal/External Reference Clock Options Installing Sidekiq Z2 in an Alternate Host System ..................47 Overview .
-
Page 6: Introduction
Epiq Solutions' private web-based support forum available at [2]. Please note that it is necessary to register prior to accessing the relevant information for the PDK. Additional details comparing the EVK and PDK options can be found in Sidekiq Z2 EVK vs Sidekiq Z2 PDK section of this manual. -
Page 7: Legal Considerations
Legal Considerations LEGAL CONSIDERATIONS Sidekiq Z2 is distributed all over the world. Each country has its own laws governing reception and transmission of radio frequencies. The user of Sidekiq Z2 and associated software is solely responsible for insuring that it is used in a manner consistent with the laws of the jurisdiction in which it is used. -
Page 8: Proper Care And Handling
Proper Care and Handling PROPER CARE AND HANDLING Each Sidekiq Z2 unit is fully tested by Epiq Solutions before shipment, and is guaranteed functional at the time it is received by the customer, and ONLY AT THAT TIME. Improper use of Sidekiq can cause it to become non-functional. -
Page 9: References
2. Epiq Solutions Support Portal https://support.epiqsolutions.com 3. Analog Devices' Support Portal https://ez.analog.com/ 4. Analog Devices' IIO Reference Design & Board Support Package for Sidekiq Z2 https://github.com/epiqsolutions/plutosdr-fw 5. GPIO Sysfs Interface for Userspace https://www.kernel.org/doc/Documentation/gpio/sysfs.txt 6. Zynq-7000 Technical Reference Manual https://www.xilinx.com/support/documentation/user_guides/ug585-Zynq-7000-TRM.pdf 7. -
Page 10: Terms And Definitions
On The Go, a variant of the USB protocol supporting both host and device operation Platform Development Kit Programmable Logic Pulse Per Second Processing System Radio Frequency Receive Simple Card Carrier Software Development Kit Software Defined Radio Secure SHell TCVCXO Temperature Compensated Voltage Controlled Crystal Oscillator Transmit Epiq Solutions Proprietary Page 10... - Page 11 Sidekiq™ Z2 | Hardware User Manual Terms and Definitions UART Universal Asynchronous Receiver Transmitter U.FL Miniature RF connector manufactured by Hirose Universal Serial Bus W.FL Micro-Miniature RF connector manufactured by Hirose Table 1: Terms and Definitions Epiq Solutions Proprietary Page 11...
-
Page 12: System Overview
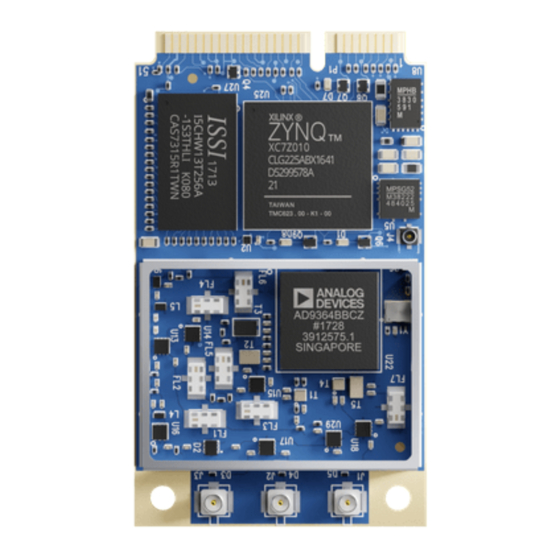
Simple carrier cards can be developed for Sidekiq Z2 to customize the I/O available in the system. Alternately, Sidekiq Z2 can be integrated in to any host system with a full size MiniPCIe slot, where supplemental processing could take place on the host system if needed. - Page 13 Sidekiq™ Z2 | Hardware User Manual System Overview Figure 1: Block diagram of the Sidekiq Z2 card Epiq Solutions Proprietary Page 13...
-
Page 14: Hardware Specification
Manual or Automatic A/D Converter 233 Ksamples/sec to 61.44 Msamples/sec Sample Rate A/D Converter 12 bits Sample Width Typical I/Q balance > 50 dB On-board Reference 40 MHz, +/- 1PPM accuracy (shared with Tx) Clock Epiq Solutions Proprietary Page 14... -
Page 15: Rf Transmitter Specification
-5.0 dBm at 6 GHz D/A Converter Sample 233 Ksamples/sec to 61.44 Msamples/sec Rate D/A Converter Sample 12 bits Width Typical I/Q balance > 50 dB On-board Reference 40 MHz, +/- 1PPM accuracy (shared with Rx) Clock Epiq Solutions Proprietary Page 15... -
Page 16: Digital Specification
Accelerometer noise: 100 μg/√Hz -30 deg C to + 85 deg C Operation down to -40 deg C is supported, though the Component Temperature Rating TCVCXO may operate outside of the +/- 1PPM accuracy specification. Epiq Solutions Proprietary Page 16... -
Page 17: Sidekiq Z2 Revision Changelog
Sidekiq™ Z2 | Hardware User Manual Sidekiq Z2 Revision Changelog SIDEKIQ Z2 REVISION CHANGELOG Sidekiq Z2 Rev C changes include: PCB updates were made to remove some unused circuitry Added IMU sensor - ICM-20602. Minor changes to RX signal path to improve performance above 4 GHz Added "JTAG BOOT"... -
Page 18: Hardware Interfaces
Sidekiq™ Z2 | Hardware User Manual Hardware Interfaces HARDWARE INTERFACES Sidekiq Z2 provides a variety of different hardware interfaces for use by an end user. Each of these hardware interfaces is shown and defined below. Figure 2: Annotated diagram of Sidekiq Z2 hardware I/O interfaces... -
Page 19: Antenna Port #1 (Rx)
The Antenna Port #3 TRx interface is a U.FL jack connector that provides an antenna access path that can be switched to route to either the RF receiver or the RF transmitter in Sidekiq Z2, allowing a user-specified antenna to interface to the RF receiver or transmitter. This port supports RF frequencies between 50 MHz and 6 GHz. -
Page 20: External Reference Clock Input
If no air flow is available in the host system where Sidekiq Z2 is being integrated, it is highly recommended that the user provide a thermal dissipation path from this shield to a thermally conductive surface in the host system, such as a metal back plate or other metal housing. -
Page 21: Minipcie Edge Connector
TDK / InvenSense High Performance 6-Axis MEMS MotionTracking Device ICM-20602 Please refer to the Annotated diagram of Sidekiq Z2 hardware I/O interfaces above for the IMU axis orientation & temperature sensor location. The libsidekiq software API provides access to these peripherals and test applications such as read_temp (included with the libsidekiq software bundle) demonstrate how to read the sensor’s... - Page 22 JTAG boot 40 MHz external clock input, 1.3V p-p max, designed as 50 ohm W_DISABLE2_ load. +3.3Vaux 3.3V supply Contact Epiq Solutions for additional usage details. Table 6: Sidekiq Z2 MiniPCIe edge connector signal descriptions Epiq Solutions Proprietary Page 22...
-
Page 23: Linux Board Support Package Options For Sidekiq Z2
The following section outlines some of the noteworthy differences between the two BSP options. SIDEKIQ Z2 EVK VS SIDEKIQ Z2 PDK The Sidekiq Z2 EVK includes two Z2 cards pre-loaded with Analog Devices' BSP supporting their IIO framework and FPGA reference design, whereas the Sidekiq Z2 PDK upgrade loads Epiq Solutions' BSP supporting libsidekiq and the standard Sidekiq FPGA reference design on the two Z2 cards. -
Page 24: Bsp Build Process
Linux Board Support Package Options for Sidekiq Z2 BSP BUILD PROCESS Analog Devices' BSP can be built for Sidekiq Z2 by following the instructions outlined in [4]. Epiq Solutions' BSP follows a similar procedure, with additional steps to integrate and build the Sidekiq FPGA reference design source code. -
Page 25: Fpga Feature Set And Customization
Pulse Per Second (PPS) integration: This allows an externally generated PPS signal to be utilized by Sidekiq Z2 for the purpose of keeping track of time. This also provides a means to synchronize the time between physically separated Sidekiq Z2 units, where each Z2 unit receives a PPS signal. -
Page 26: Basic Sidekiq Z2 Usage In A Carrier Card
Evaluation Kit (EVK) and Platform Development Kit (PDK). The same hardware consisting of the Sidekiq Z2 plus simple carrier card is used for both the EVK as well as the PDK, with the primary difference being the board support package of software/FPGA components utilized on Z2 as outlined in below. -
Page 27: Dc Power Input
DC Power Input barrel jack. DC POWER INPUT The DC Power Input barrel jack is an optional connector used to provide power to the Sidekiq Z2 and simple carrier card for use cases where an external power supply is desired or required (such as when using the USB-C port as an OTG host). -
Page 28: Tri-Color Status Led
The pushbutton provides a normally open momentary switch that can be used to close a general purpose input pin routed to the Zynq PS. If the pushbutton is held during the Sidekiq Z2 power up sequence, the device will enter into Device Firmware Update (DFU) mode and enumerate with a DFU profile. -
Page 29: Jtag/Linux Serial Console Connector
The JTAG/Linux Serial Console Connector provides access to the Zynq JTAG signals exposed on the Sidekiq Z2 MiniPCIe edge connector, as well as the Linux serial console exposed on the Sidekiq Z2 MiniPCIe edge connector. The serial console uses 1.8V digital logic coming off the simple carrier card. -
Page 30: Gpio Connector - 3.3V
Sidekiq Z2 via a U.FL-to-U.FL cable. The U.FL port connected to SMA #1 can be cabled in to any of the three U.FL ports available on Sidekiq Z2, depending on the customer's use case. -
Page 31: Interfacing To Sidekiq Z2 Over Usb
Basic Sidekiq Z2 Usage in a Carrier Card To initially power up Sidekiq Z2 in the simple carrier card, a host PC can be used to provide both power and USB connectivity to the device through a standard USB-C cable. In the examples that follow, it is assumed that a Linux PC is being used as the host (running Ubuntu 18.04, though other... - Page 32 = 0 calibrate = 0 At this point, the user can login to Sidekiq Z2 over ssh using a standard terminal application on the host Linux PC. The default username is and the default password is dependent on which BSP root is loaded on to Sidekiq Z2.
-
Page 33: Accessing Gpio, Jtag, And The Linux Console Serial Port
(typically at /dev/ttyUSB0 or similar on the host Linux system). The default Linux serial console on Sidekiq Z2 runs at a baud rate of 115.2 kbps, with 8 data bits, one stop bit, and no parity bits. The default username/password of root/epiq can be used to log in to the system for the Epiq BSP, and root/analog can be used for the Analog Devices' BSP. -
Page 34: Gpio - 3.3V
Sidekiq™ Z2 | Hardware User Manual Basic Sidekiq Z2 Usage in a Carrier Card When using this configuration, the three included interface cables connect the simple carrier card to the I/O expansion card, as shown below. These interface cables must be connected prior to powering up the system. -
Page 35: Gpio - 1.8V
Sidekiq™ Z2 | Hardware User Manual Basic Sidekiq Z2 Usage in a Carrier Card GPIO - 1.8V The 1.8V GPIO signals are accessible on the I/O expansion card via a 2x5 shrouded Amphenol connector (part number 72454-101LF). IO Expansion Rev-A and Rev-B... -
Page 36: Controlling Gpio
Details on interfacing with the GPIO via sysfs is described in detail in [5]. All GPIO definitions for the Sidekiq Z2 begin at an offset of 906. The MIO GPIO are under direct control of the PS, whose mapping is outlined below. PL_GPIO are controllable via the FPGA and control via the sysfs can be enabled. - Page 37 Sidekiq™ Z2 | Hardware User Manual Basic Sidekiq Z2 Usage in a Carrier Card Configure the GPIO as a logical 1 # echo 1 > /sys/class/gpio/gpio920/value 6. Verify the GPIO value is set to 1 # cat /sys/class/gpio/gpio920/value Epiq Solutions Proprietary...
-
Page 38: Default Memory Partition And Filesystem Configuration
Basic Sidekiq Z2 Usage in a Carrier Card DEFAULT MEMORY PARTITION AND FILESYSTEM CONFIGURATION The Sidekiq Z2 contains either a 32 MB or 128 MB QSPI flash memory device which is used to hold the bootloader, Linux kernel, root filesystem, and additional non-volatile storage for user applications. -
Page 39: Using Buildroot To Update Uboot, Linux Kernel, And Root Filesystem
Sidekiq Z2 PDK refers to the Sidekiq Z2 Software Developers Manual [2]. UPDATING The Sidekiq Z2 must be placed into DFU mode and then dfu-util [7] can be utilized to program the build artifacts from a host Linux computer. Entering DFU The Sidekiq Z2 can be placed into DFU mode from Linux, u-boot, or via the DFU button. -
Page 40: Updating
Updating The dfu-util application can be used to update the various components of the Sidekiq Z2. NOTE: it is possible that USB permissions for the Sidekiq Z2 DFU may not have been configured. As a result, may need to be executed with the... -
Page 41: Sidekiq Z2 Bootstrap Recovery
If the bootloader (u-boot) is accidently overwritten, the Sidekiq Z2 will no longer have the ability to boot or be programmed via dfu-util. These are the steps used to bootstrap a blank or bricked Sidekiq Z2 and then load the original firmware back into flash. - Page 42 Sidekiq™ Z2 | Hardware User Manual Basic Sidekiq Z2 Usage in a Carrier Card XMD is a legacy command line debugger for Xilinx processors and it is nolonger released, starting from Xilinx SDK 2018.1, it has been replacedby XSDB/XSCT. If you are using the Xilinx® System Debugger (XSDB), you will need to create a .tcl script with...
- Page 43 Sidekiq™ Z2 | Hardware User Manual Basic Sidekiq Z2 Usage in a Carrier Card 8. Monitoring the Z2 serial console, you should see: Entering DFU SF mode ... SF: Detected N25Q256A with page size 256 Bytes, erase size 4 KiB,...
-
Page 44: Power Consumption
The power consumption of Sidekiq Z2 varies depending on the configuration and application of the card. The following power measurements are provided for Sidekiq Z2 (as a standalone card) as well as the total system power consumption when installed in the simple carrier card. For these power consumption measurements, libsidekiq is utilized, along with the optimized FPGA reference design available with the Sidekiq Z2 PDK. -
Page 45: Thermal Dissipation
Effective use of Sidekiq Z2 in a system also requires consideration of an appropriate thermal dissipation solution. Since Sidekiq Z2 can be integrated into a variety of different host systems with different thermal profiles (i.e., forced air, natural convection, etc), the end user is required to perform their own system analysis to determine what level of thermal dissipation is appropriate for their use- case. -
Page 46: Internal/External Reference Clock Options
Basic Sidekiq Z2 Usage in a Carrier Card INTERNAL/EXTERNAL REFERENCE CLOCK OPTIONS Sidekiq Z2 supports options to use either an internal (i.e. on-board) 40 MHz TCVCXO as a reference clock, or an external 40 MHz reference clock. Regardless of which clock source is selected, this clock serves as the reference for both the RF front end as well as the digital processing blocks in the FPGA. -
Page 47: Installing Sidekiq Z2 In An Alternate Host System
Sidekiq Z2, so it is imperative that the host system provides this interface. Sidekiq Z2 does not use PCIe due to the fact that the package variant of the Zynq SoC used in Sidekiq Z2 does not support the required high-speed transceivers necessary to support PCIe. -
Page 48: Sidekiq Z2 Mechanical Outline
Sidekiq Z2 Mechanical Outline SIDEKIQ Z2 MECHANICAL OUTLINE A dimensioned mechanical drawing of Sidekiq Z2 is shown below. In addition, a 3D model (in STP format) is also available. Please contact Epiq Solutions for this model. Figure 7: Sidekiq Z2 Customer Drawing... -
Page 49: Matchstiq Z2
Rx and Tx functionality. The Matchstiq Z2 combines the Sidekiq Z2 mPCIe card and a custom designed Z2 carrier (with optimized power supply for low noise operation) enclosed in a custom machined housing with magnetic mounts. - Page 50 Figure 8: Matchstiq Z2 mag-mounted to iPad Figure 9: Matchstiq Z2 iPad ERA display The Matchstiq Z2 has been tested with the following tablets: iPad Pro (3 generation or later with USB-C interface) Samsung Galaxy Tab S3 Epiq Solutions Proprietary Page 50...
- Page 51 Sidekiq™ Z2 | Hardware User Manual Matchstiq Z2 Figure 9: Matchstiq Z2 Front & Rear I/O Epiq Solutions Proprietary Page 51...
- Page 52 6V and 17V DC. If the DC Power Input jack is provided with a voltage ≥ 6V DC, the unit will automatically begin drawing power on this connector instead of over USB. Epiq Solutions Proprietary Page 52...
-
Page 53: Matchstiq Z2 Mounting And Cabling To Tablet
Sidekiq™ Z2 | Hardware User Manual Matchstiq Z2 MATCHSTIQ Z2 MOUNTING AND CABLING TO TABLET Epiq Solutions Proprietary Page 53... - Page 54 Sidekiq™ Z2 | Hardware User Manual Matchstiq Z2 Epiq Solutions Proprietary Page 54...
- Page 55 3. Remove the adhesive liner from the metallic pad / Matchstiq Z2. 4. Align the metallic pad / Matchstiq Z2 and attach to tablet. 5. Attach antenna to RF1 SMA connector. 6. Attach USB-C cable from Matchstiq Z2 USB port to USB-C port on tablet. Epiq Solutions Proprietary Page 55...
-
Page 56: Matchstiq Z2 Era And Skylight Apps
USB ethernet gadget interface is accessible on this mass storage device. This configuration file is used to set the default IP address of the USB ethernet gadget interface on Sidekiq Z2, annotated as , with a default value of... - Page 57 Sidekiq™ Z2 | Hardware User Manual Matchstiq Z2 Figure 12: ERA WebUI Figure 13: Skylight WebUI ERA, if installed, is accessible by entering the Z2’s IP address into Safari: http://192.168.3.1:3030 Epiq Solutions Proprietary Page 57...
- Page 58 Sidekiq™ Z2 | Hardware User Manual Matchstiq Z2 Skylight, if installed, is accessible by entering the Z2’s IP address into Safari: http://192.168.3.1:2020 All support-related Matchstiq Z2 questions are managed through Epiq Solutions' private web-based support forum available at [2]. Epiq Solutions Proprietary Page 58...
-
Page 59: Matchstiq Z2 Mechanical Outline
Sidekiq™ Z2 | Hardware User Manual Matchstiq Z2 MATCHSTIQ Z2 MECHANICAL OUTLINE A dimensioned mechanical drawing of Matchstiq Z2 is shown below. In addition, a 3D model (in STP format) is also available. Please contact Epiq Solutions for this model. Epiq Solutions Proprietary Page 59... - Page 60 Sidekiq™ Z2 | Hardware User Manual Matchstiq Z2 Figure 14: Matchstiq Z2 dimensioned mechanical drawing Epiq Solutions Proprietary Page 60...
-
Page 61: Matchstiq Z2 Thermal
Matchstiq Z2 MATCHSTIQ Z2 THERMAL The Matchstiq Z2 was suspended on 3mm diameter sticks to eliminate conduction cooling into desk and was allowed to reach steady-state over a time period of about 6 hours. Sidekiq Z2 Power Draw Ambient Temperature... -
Page 62: Appendix A -Statement Of Volatility
Application usage Power-off On-Chip FPGA BRAM (PS) 256 KB Application usage Power-off On-chip FPGA BRAM (PL) 36 Kb Application usage Power-off Table 22: Sidekiq Z2 / Matchstiq Z2 Volatile Memory Memory Memory User Removable Purpose Process to Clear Type Size Modifiable... -
Page 63: Appendix B - Predicted Failure Rate And Mtbf
3601154.49 Calculation Model Telcordia Issue 4 Operating Environment Fixed/Ground/Controlled Ambient Temperature 25°C Table 25: Sidekiq Z2 Simple Card Carrier (SCC) Failure Rate and MTBF Part Number ES023-105 Description Sidekiq Z2 with Simple Card Carrier Failure Rate (fpmh) 4.560501 MTBF (hours) 219274.15... - Page 64 Part Number ES023-236-A Description Matchstiq-Z2 Final Assembly with ES023-235 Carrier Failure Rate (fpmh) 4.615265 MTBF (hours) 216672.30 Calculation Model Telcordia Issue 4 Operating Environment Fixed/Ground/Controlled Ambient Temperature 25°C Table 27: Matchstiq Z2 Failure Rate and MTBF Epiq Solutions Proprietary Page 64...
Need help?
Do you have a question about the Sidekiq Z2 and is the answer not in the manual?
Questions and answers