
Related Manuals for Sunbeam EMM7300


Summary of Contents for Sunbeam EMM7300
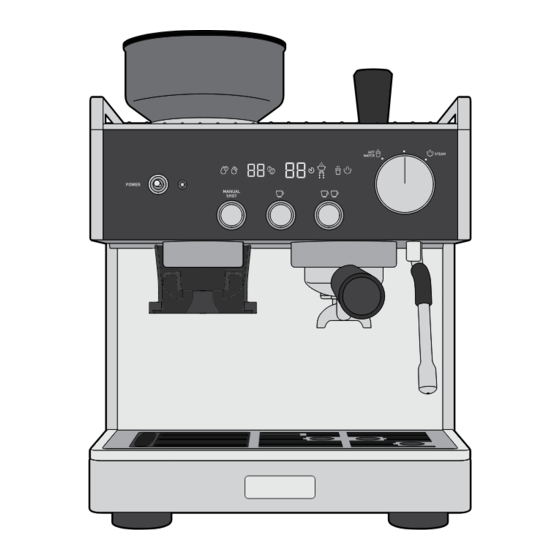
- Page 1 Origins Espresso Machine User Guide EMM7300 SCAN HERE For your hands-on interactive guide.
-
Page 2: Table Of Contents
Contents 2 - 3 Sunbeam’s safety precautions 4 - 9 Features of your Origins Espresso Machine Before first use 11 - 12 Quick coffee making guide Espresso Extraction guide 14 - 19 Troubleshooting guide Tips for grinding, tamping & brewing... -
Page 3: Sunbeam's Safety Precautions
Sunbeam is very safety conscious when designing and manufacturing consumer products, but it is essential that the product user also exercise care when using an electrical appliance. Listed below are precautions which are essential for the safe use of an electrical appliance •... -
Page 4: Features Of Your Origins Espresso Machine
Features of your Origins Espresso Machine... - Page 5 Features of your Origins Espresso Machine...
- Page 6 Features of your Origins Espresso Machine...
- Page 7 Features of your Origins Espresso Machine A. Removable Bean Hopper R. Filter Holder B. Illuminated Grind Area S. Milk Jug C. Tap & Go™ Grinds Cradle T. Single Wall Filter D. Removable 2.8L Water Reservoir Note: Single Wall Filters are best used with freshly ground coffee.
- Page 8 Features of your Origins Espresso Machine...
- Page 9 Features of your Origins Espresso Machine LED Display Power on Toggle Switch (Icons displayed left to right). Push down to turn espresso machine on and off. 1A. Low Water Alert Power on Indicator Illuminates when the water in the reservoir needs topping up Illuminates whenever the unit and flashes when the unit has is turned on, illumination will...
-
Page 10: Before First Use
Before First Use Use below information to help with the first time set up. 1. Wash & Dry Parts 2. Insert Top Burr 3. Drip Tray & Accessories Storage Tray 4. Start Up Wash the Milk Jug, Filter Baskets, Group Plug in at socket. -
Page 11: Quick Coffee Making Guide
SCAN HERE For your hands-on interactive guide. Quick Co ee Making Guide Use below guide to help you make your first cup of coffee. 1. Select the Filter 2. Insert Group Handle FRESHLY GROUND PRE-GROUND COFFEE COFFEE ONE CUP ONE CUP SLIDE IN FROM ABOVE TWO CUP... - Page 12 Quick Co ee Making Guide Note: Dual Thermoblock Heating System means you can pour espresso at the same time as steaming milk. 8. Remove Co ee Cake 9. Prep Milk Jug 10. Before Texturing Milk 4°C FILL BANG Turn Group Handle and Remove spent (used) coffee remove from Group Head.
-
Page 13: Espresso Extraction Guide
Espresso Extraction Guide This guide will help to improve espresso extraction, to achieve grat tasting coffee, every time. THERMOBLOCK THERMOBLOCK THERMOBLOCK 58MM CAFÉ GROUP HEAD 58MM CAFÉ GROUP HEAD 58MM CAFÉ GROUP HEAD INSERT INSERT INSERT Under Extraction Optimum Extraction Over Extraction Extraction too fast Steady-flow extraction... -
Page 14: Troubleshooting Guide
Clean the parts with the Cleaning Brush or Shower Head is dirty. and damp cloth. Group Head Silicone Seal is damaged Contact Sunbeam Customer Care. or worn. Espresso Coffee beans being stored in the Store coffee beans in a dry, airtight is too cold fridge or freezer. - Page 15 Troubleshooting guide PROBLEM Possible cause What to do No espresso No water in the Water Reservoir. Fill reservoir with water. Prime water through the Group Head, press the pours or ONE CUP BUTTON. Allow water to run pours out in through.
- Page 16 Troubleshooting guide PROBLEM Possible cause What to do Espresso Uneven tamping. Ensure coffee grinds are tamped evenly. pours into cup unevenly Obstruction in the Group Head or Check there is nothing obstructing the Handle. Group Head or Handle & clean. Pump makes No water in the reservoir, and the Fill reservoir with water, then press the...
- Page 17 Troubleshooting guide PROBLEM Possible cause What to do Not enough Steam wand tip is wrongly Ensure the Steam Wand Tip is positioned in milk jug. positioned correctly (just below milk foam when surface) when texturing. texturing See Tip for Milk Texturing. Milk is not fresh.
- Page 18 Troubleshooting guide PROBLEM Possible cause What to do Coffee grinds Grind Setting not correct. Adjust the Grind Settings by turning the are coarse Bean Hopper. See Tips for Grinding, & when on a fine Extraction. Grind Setting Top Burr not seated correctly. Coffee Top burr needs removing and the areas beans or grinds are caught around &...
- Page 19 Troubleshooting guide PROBLEM Possible cause What to do Espresso Your Espresso machine will go into Flick on/off power switch downwards to Machine turns Standby mode after 20 minutes to reactivate your machine. itself off conserve power. Grinder will Your grinder has overheated. Wait for 6 minutes, once the auto-cool down cycle has finished your machine not operate...
-
Page 20: Tips For Grinding, Tamping & Brewing
Tips for grinding, tamping & brewing ‘Dialling In’ If the extraction takes longer the grind is too fine. If the extraction is shorter then Setting up your Origins Espresso Machine the grind is too coarse. Adjust the grind to make perfect Espresso is something size up or down as needed. -
Page 21: Tips For Brewing
- Replacement cartridges are available Low Water level alert – your from Sunbeam Customer Services, Origins Espresso Machine will details on final pages. beep once and the low water alert will be illuminated. -
Page 22: Tips For Milk Texturing
Tips for milk texturing 2. Position the Jug Note: Due to the twin heaters in your Place the Steam Wand Arm in the Jug Origins Espresso Machine, frothing the spout at the 12 o’clock position, with milk can be performed at the same the Steam Wand Tip in the milk at the time as brewing your espresso, or at the 3 o’clock position, a finger width away... - Page 23 Tips for milk texturing Barista Tip: Milk Temperature Under - If not heated long enough, it will be warm with little texture. Optimum - See below table. Over - If heated for too long it will start to boil around 72°C and will have Note: Some adjustments to technique a burnt taste with all texture lost.
- Page 24 Tips for milk texturing 10. Tap & Swirl the Jug Gently tapping the Jug on the benchtop helps to release larger trapped air bubbles. Swirling helps the milk & froth to combine for an even consistency and a silky appearance. 11.
-
Page 25: Fine Tuning Your Espresso
Fine tuning your espresso Customisable - Shot Volumes - Insert Group Handle into the Group Head. The Origins Espresso Machine features - Press & hold the Auto Shot Volumetric Control. Double shot BUTTON It extracts just the right amount of for 3 seconds. - Page 26 Fine tuning your espresso Customisable - Extraction Temperature Customisable - Extraction Pre-Infusion Profile You can adjust the water temperature used for espresso extraction, in 2°C increments, You can select from three Pre-infusion to cater for different types of roasted coffee Profiles to cater for personal preferences.
- Page 27 Fine tuning your espresso Customisable – Grinder Time Adjustments - The current pre-infusion profile will displayed. Due to a number of reasons, such as a - The preprogrammed settings can be changing your type of coffee bean, it may scrolled through by pressing the single be that you want to adjust the factory shot button.
- Page 28 Fine tuning your espresso Customisable – Grinder Recalibration - The machine will beep and the grind icon will pulse, and one of the following As the burrs on your grinder wear, the gap options will be displayed: between the burrs will increase slightly, a.
- Page 29 Fine tuning your espresso Restore – factory grind settings - The grind setting can then be adjusted. Use the double shot button to increase - Press and hold all 3 EXTRACTION the Grind setting, or the single shot BUTTONS, simultaneously pushing button to decrease.
-
Page 30: Care And Cleaning - Espresso Machine
Care and cleaning – Espresso machine Cleaning Warming Plate & Exterior The espresso making process involves extracting oils out of coffee grinds. • When Required Deposits of grinds & oils build up over time, affecting the taste of the coffee & - Wipe over the machine with a soft damp operation of the Espresso Machine. - Page 31 • Start the Cleaning Cycle Cleaning tablets are perfect for removing coffee oil build up to prolong the life of - Simultaneously press & hold your coffee machine. Sunbeam Espresso the MANUAL and DOUBLE Machine Cleaning Tablets can be SHOT BREW BUTTONS purchased online.
- Page 32 Unscrew the Steam Wand Tip and soak - After texturing milk purge the Steam overnight in the Milk Jug with warm water Wand by turning the DIAL to HOT WATER & one Sunbeam Cleaning Tablet. for just 1-2 seconds. • 2-3 Months UNSCREW - Soak the Steam Wand overnight in the Milk Jug with warm water &...
- Page 33 Care and cleaning – Espresso machine - Run Steam through the Steam Wand for - Place Filter Basket into Group Handle 40 seconds. (without coffee grinds) and insert into Group Head. Cleaning the Filters - Press the ONE CUP BUTTON. •...
-
Page 34: Care And Cleaning - Grinder
Care and cleaning – Grinder Conical Burrs are used to grind coffee beans Remove the Bean Hopper from the Grinder to a suitable size for espresso extraction. Collar and store any remaining beans Deposits of grinds & oils build up over time, in an airtight container to preserve their affecting the taste of the espresso and freshness. - Page 35 Care and cleaning – Grinder - Reset to the Grind Setting noted prior to - Turn Bean Hopper fully anti-clockwise to cleaning. close the Hopper Gates and unlock the Bean Hopper. The Bean Hopper will pop Cleaning & Unblocking Grinder Burrs, up slightly.
- Page 36 Care and cleaning – Grinder • Cleaning & Unblocking Bottom Burr and - Rotate the Top Bur approximately 30 Grind Chamber degrees clockwise to lock, the burr should click into position. - Use the Cleaning Brush or a Vacuum Cleaner to thoroughly clear the parts and - When correctly seated, the Top Burr will surfaces in the Grind Chamber of fine be flush with the surface of the Grinder...
-
Page 37: Descaling Cycle - Espresso Machine
- Place a 1 Litre container under the Descaling Solution Group Head and the hot water tap. You have 2 options: A. Sunbeam Espresso Machine Descaling Tablets. B. White vinegar & warm water. Descaling Cycle • Check Power The Descaling Cycle takes approximately 10 minutes to complete. - Page 38 Descaling cycle – Espresso machine - When hot water has stopped being Important: The Descaling Cycle released from the Hot water tap, this step can be exited at any point by is finished. pressing the MANUAL BREW - To indicate the machine has finished BUTTON.
- Page 39 Descaling cycle – Espresso machine - The STEAM LIGHT will now be fully illuminated. - The Pump will start and hot water will run from the Group Head & Steam Wand. - After 2 minutes water will stop pumping and the steam light will flash. - Return the dial to the vertical position.
- Page 40 EM69102 EM5300104 Group Handle Milk Jug Premium Tamper 2199000 2203055 2198996 ACCESSORIES Mini Bang Bang Descaling Sachets Cleaning Tablets Coffee grinds disposal bin EMA0900 EMA0015CL EMA0025CL Visit Sunbeam website to see full Espresso Machine range & accessories available. www.sunbeam.com.au www.sunbeam.co.nz...
- Page 41 To assist us in managing warranty claims, we recommend you register your product as soon as practicable after purchase, on our Sunbeam website and uploading a copy of your original receipt. View the Support section of the Sunbeam website. Australia www.sunbeam.com.au...
- Page 42 Notes...
- Page 43 Notes...
- Page 44 0800 786 232 Newell Australia Pty Ltd. ABN 68 075 071 233 Sunbeam is a registered trade mark. Made in China to Sunbeam’s specification. Due to minor changes in design or otherwise, the product you buy may differ slightly from the one shown here.
Need help?
Do you have a question about the EMM7300 and is the answer not in the manual?
Questions and answers