Table of Contents
Advertisement
Quick Links
Advertisement
Table of Contents

Subscribe to Our Youtube Channel
Related Manuals for IFM PN7191


Summary of Contents for IFM PN7191
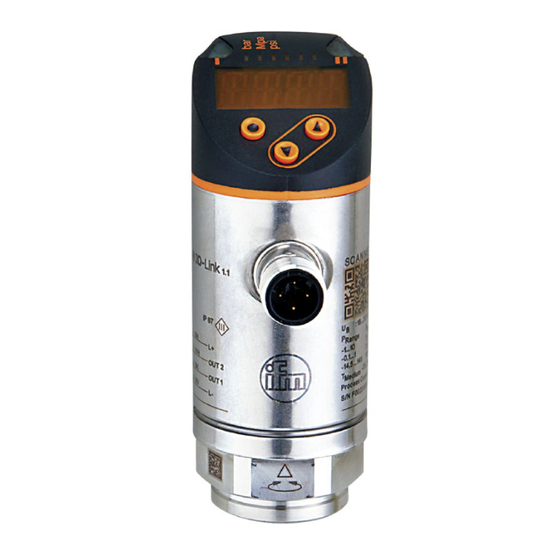
- Page 1 Operating instructions Electronic pressure sensor PN7191...
-
Page 2: Table Of Contents
Contents 1 Preliminary note ���������������������������������������������������������������������������������������������������3 1�1 Symbols used ������������������������������������������������������������������������������������������������3 2 Safety instructions �����������������������������������������������������������������������������������������������4 3 Functions and features ����������������������������������������������������������������������������������������5 3�1 Applications ���������������������������������������������������������������������������������������������������5 4 Function ���������������������������������������������������������������������������������������������������������������5 4�1 Operating modes �������������������������������������������������������������������������������������������6 4�2 Communication, parameter setting, evaluation ���������������������������������������������7 4�3 Switching function ������������������������������������������������������������������������������������������7 4�4 IO-Link �����������������������������������������������������������������������������������������������������������8 4�4�1 General information ������������������������������������������������������������������������������8 4�4�2 Functions only available via IO-Link communication ����������������������������8 5 Installation������������������������������������������������������������������������������������������������������������9... -
Page 3: Preliminary Note
9�5�4 Reset all parameters to factory setting �����������������������������������������������19 9�5�5 Set colour change of the display �������������������������������������������������������20 9�5�6 Graphical depiction of the colour change of the display ���������������������21 9�6 Diagnostic functions ������������������������������������������������������������������������������������24 9�6�1 Read min/max values for the system pressure ����������������������������������24 9�6�2 Read overload processes ������������������������������������������������������������������24 10 Operation ���������������������������������������������������������������������������������������������������������24 10�1 Read the set parameters ���������������������������������������������������������������������������24... -
Page 4: Safety Instructions
2 Safety instructions • The device described is a subcomponent for integration into a system� - The manufacturer is responsible for the safety of the system� - The system manufacturer undertakes to perform a risk assessment and to create documentation in accordance with legal and normative requirements to be provided to the operator and user of the system�... -
Page 5: Functions And Features
3 Functions and features The device monitors the system pressure of machines and installations� 3.1 Applications Type of pressure: relative pressure Information on pressure rating and bursting pressure → data sheet. Avoid static and dynamic overpressure exceeding the specified overload pressure by taking appropriate measures�... -
Page 6: 4�1 Operating Modes
Application Standard applications� IODD designation E�g� PN7191 Factory setting / (CMPT = 2): At www�ifm�com in the download area of the corresponding article� Operating mode 3 Description High IO-Link process value and parameter resolution (device-specific: see IODD suitable for the operating mode)�... -
Page 7: 4�2 Communication, Parameter Setting, Evaluation
4.2 Communication, parameter setting, evaluation • Switching signal for system pressure limit OUT1 (pin 4) • Communication via IO-Link OUT2 (pin 2) • Switching signal for system pressure limit 4.3 Switching function OUTx changes its switching status if it is above or below the set switching limits (SPx, rPx)�... -
Page 8: 4�4 Io-Link
The IODDs necessary for the configuration of the unit, detailed information about process data structure, diagnostic information, parameter addresses and the necessary information about the required IO-Link hardware and software can be found at www�ifm�com� 4.4.2 Functions only available via IO-Link communication • HIPC: number of overload processes (→ 9.6.2)�... -
Page 9: Installation
5 Installation Before installing and removing the unit: Make sure that no pressure is applied to the system� ► Insert the unit in a G¼ process connection� ► Tighten firmly� Recommended tightening torque: 25���35 Nm� Depends on the sealing type, the pressure load and the lubrication! The sensor housing can be rotated by 345°... -
Page 10: Operating And Display Elements
7 Operating and display elements 1 to 8: Indicator LEDs LED 1 Switching status OUT1 (on if output 1 is switched)� LED 8 Switching status OUT2 (on if output 2 is switched)� LEDs System pressure in the indicated unit of measurement� 2 - 7 9: Enter button [●] - Selection of the parameters and acknowledgement of the parameter values�... -
Page 11: Menu
8 Menu 8.1 Menu structure: main menu Menu items highlighted in grey, e�g� [ FH1 ] are only active when assigned parameters have been selected�... -
Page 12: 8�2 Explanation Of The Menu
8.2 Explanation of the menu 8.2.1 Explanation of menu level 1 SPx/rPx Upper / lower limit for system pressure at which OUTx switches with hysteresis setting� SPx/rPx is displayed if the parameter [Hno] or [Hnc] was set for OUTx in the menu Extended Functions "EF"� FHx/FLx Upper / lower limit for system pressure at which OUTx switches with window setting�... -
Page 13: Parameter Setting
9 Parameter setting During parameter setting the unit remains in the operating mode� It continues its monitoring functions with the existing parameters until the parameter setting has been completed� 9.1 Parameter setting in general 3 steps must be taken for each parameter setting: Select parameter ►... - Page 14 If [C�Loc] is displayed when an attempt is made to modify a parameter value, an IO-Link communication is active (temporary locking)� If [S�Loc] is displayed, the sensor is permanently locked via software� This locking can only be removed with a parameter setting software� •...
- Page 15 For unlocking: ► Press [▲] + [▼] simultaneously for 10 s� > [uLoc] is displayed� 10 s On delivery: not locked� • Timeout: If no button is pressed for 30 s during parameter setting, the unit returns to the operating mode with unchanged values� •...
-
Page 16: 9�2 Define The Operating Mode (Optional))
9.2 Define the operating mode (optional)) ► Select [CMPT] and set the operating mode - [2] = operating mode 2 - [3] = operating mode 3 Description of the operating modes see (→ 4.1) When using IO-Link, an IODD suitable for the operating mode must be used�... -
Page 17: 9�4 Set Output Signals
9.4 Set output signals 9.4.1 Set output functions ► Select [ou1] and set the switching function: - [Hno] = hysteresis function/normally open, - [Hnc] = hysteresis function/normally closed, - [Fno] = window function/normally open, - [Fnc] = window function/normally closed, - [OFF] = output off�... -
Page 18: 9�5 User Settings (Optional)
If operating mode 1 is used, the delay time will not behave as described here� Refer to the operating instructions of the old device for details: → www�ifm�com For this unit the parameters [dSx] and [drx] for the set and reset points are designed strictly to the VDMA guideline�... -
Page 19: 9�5�2 Set Output Logic For The Switching Outputs
9.5.2 Set output logic for the switching outputs ► Select [P-n] and set [PnP] or [nPn]� 9.5.3 Set damping for the switching signal ► Select [dAP] and set the damping constant in seconds value: 63 %); setting range 0�000���4�000 s� Damping [dAP] affects the switch point / process data flow (IO-Link communication) and the display�... -
Page 20: 9�5�5 Set Colour Change Of The Display
9.5.5 Set colour change of the display ► Select [coLr] and set the function: - [rEd] = display colour red (independent of the measured value)� - [GrEn] = display colour green (independent of the measured value)� - [r1ou] = display colour red when OUT1 switches� - [G1ou] = display colour green when OUT1 switches�... -
Page 21: 9�5�6 Graphical Depiction Of The Colour Change Of The Display
9.5.6 Graphical depiction of the colour change of the display Display colour change for the parameters Display colour change for the parameters [r1ou] / [r2ou], mode hysteresis function [G1ou] / [G2ou], mode hysteresis function OUT1/ OUT1/ OUT2 OUT2 Measured value > switch point OUT1/OUT2; Measured value >... - Page 22 Display colour change for the parameter Display colour change for the parameter [r-12], mode hysteresis function [G-12], mode hysteresis function OUT2 OUT2 OUT1 OUT1 Measured value between OUT1 and OUT2; Measured value between OUT1 and OUT2; display = red display = green Display colour change for the parameter Display colour change for the parameter [r-12], mode window function...
- Page 23 Display colour change with parameter [r-cF] Display colour change with parameter [G-cF] independent of OUT1 / OUT2 independent of OUT1 / OUT2� Measured value between cFL and cFH; Measured value between cFL and cFH; display = red display = green Colour change display green Colour change display red Initial value of the measuring range...
-
Page 24: 9�6 Diagnostic Functions
9.6 Diagnostic functions 9.6.1 Read min/max values for the system pressure ► Select [Hi] or [Lo] and briefly press [●]. [Hi] = maximum value, [Lo] = minimum value� Delete memory: ► Select [Hi] or [Lo]� ► Press [▲] or [▼] and keep pressed until [----] is displayed. ►... -
Page 25: 10�2 Self-Diagnostics / Fault Indications
10.2 Self-diagnostics / fault indications The unit has many self-diagnostic options� • It monitors itself automatically during operation� • Warnings and faults are displayed (even if the display is deactivated), in addition they are available via IO-Link� Fault / warning Corrective measures none F Supply voltage too low�... -
Page 26: Technical Data
The setting ranges depend on the operating mode (→ 4.1)� 11.1.1 Setting ranges in operating mode 2 rP / SP cFL / cFH ΔP Setting range Min� distance Setting range Min� distance 1���250 0���250 PN7191 20���3620 0���3620 0�1���25 0�2 0���25 0�2 0�1 ΔP = step increment... -
Page 27: 11�2 Further Technical Data
11.2 Further technical data Further technical data and scale drawing at: www�ifm�com� 12 Factory setting Factory setting User setting 25% VMR* 23% VMR* 75% VMR* 73% VMR* 0.06 colr HIPS** CMPT final value of the measuring range, (MAW) initial value of the measuring range The indicated percentage of the final value of the measuring range (VMR) of the corresponding sensor is set in bar�...
Need help?
Do you have a question about the PN7191 and is the answer not in the manual?
Questions and answers