
Related Manuals for AVANT A453046


Summary of Contents for AVANT A453046
- Page 1 English Aerator 1100 2023 1 Operator's Manual for Attachment Aerator 1100 Product number A453046 www.avanttecno.com A462361 2023 1 EN 2023-...
- Page 2 Aerator 1100 2023 1...
-
Page 3: Table Of Contents
Aerator 1100 2023 1 CONTENTS 1. FOREWORD ............................4 Warning symbols used in this manual ........................... 5 2. DESIGNED PURPOSE OF USE......................6 3. SAFETY INSTRUCTIONS FOR USING THE ATTACHMENT ............7 Personal protective equipment ..........................8 Safe shutdown procedure ............................9 4. -
Page 4: Foreword
If you sell or transfer the equipment, be sure to hand over this manual to the new owner. If the manual is lost or damaged, you can request a new one from your Avant dealer or from the manufacturer. -
Page 5: Warning Symbols Used In This Manual
5 (26) Warning symbols used in this manual The following warning symbols are used throughout this manual. They indicate factors that must be taken into account to reduce the risk of personal injury or damage to property: WARNING SAFETY ALERT SYMBOL This symbol means: “Warning, be alert! Your safety is involved!”... -
Page 6: Designed Purpose Of Use
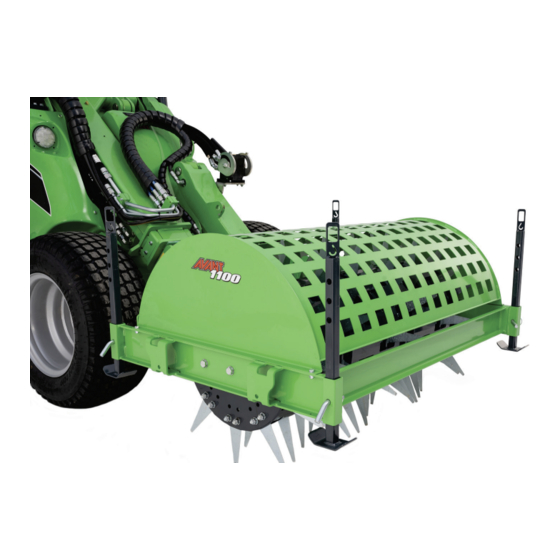
The Avant Aerator 1100 is a free rolling attachment that can be pushed across the lawn. It has an aerating axle with knife type blades installed to it. The blades penetrate the soil and aerates the growing lawn. The aerating axle is equipped with 90 replaceable blades which loosen the soil. -
Page 7: Safety Instructions For Using The Attachment
7 (26) 3. Safety instructions for using the attachment Please bear in mind that safety is the result of several factors. The loader-attachment combination is highly powerful and improper or careless use or maintenance may cause serious personal injury or property damage. -
Page 8: Personal Protective Equipment
8 (26) Crushing hazard - Never allow anyone to get under a lifted attachment or loader boom. Keep in mind that the loader boom can be lowered or tilted even if the engine has WARNING been shut down. The loader is not intended to be left to keep a load elevated for longer periods. -
Page 9: Safe Shutdown Procedure
9 (26) 3.2 Safe shutdown procedure Safe stopping of the attachment, before going near the attachment: Always stop the attachment following safe stopping procedure before leaving the driver's seat. Safe stopping procedure prevents all unintentional movements of the attachment. Note that the loader boom can move down even if the engine of the loader is turned off. -
Page 10: Technical Specifications
856 mm Weight: 260 kg Number of blades: 90 pcs (A427393) Length of the blades: 205 mm Compatible AVANT loaders: See Table 1 Options Solid tines A457278 (12 pcs) Counterweight 29 kg A35957 (2-4 pcs) 4.1 Safety labels and main components of the attachment Listed below are the labels and markings on the attachment. - Page 11 Follow safe stopping procedure before going near the attachment. 3 A453566 Attachment identification plate Table 4 - Aerator 1100 - Main components Avant quick coupling brackets Aerating axle Locking pin for aerating axle Blade (90 pcs) Support leg (4 pcs)
-
Page 12: Lifting
12 (26) 4.2 Lifting Make sure that the attachment is properly secured against unintended movements during lifting operation. Use appropriate type of lifting accessories, lifting straps, chains or hooks, for example. Do not use lifting accessories if there are signs of damage, deformation, or otherwise unsafe conditions. Lift the attachment by using the lifting points, that are shown in the adjacent figure. -
Page 13: Attaching The Attachment
Do not stay in the area between the attachment and the loader. Mount the attachment only on level surface. WARNING Never move or lift an attachment that has not been locked. Avant quick coupling system: Step 1: Lift the locking pins of the quick coupling plate of the loader up, and turn them backwards into the slot, so that they are locked in the upper position. - Page 14 If your loader is not listed in Table 1 on page 6, ask your Avant dealer before using this attachment.
-
Page 15: Operating The Attachment
15 (26) 6. Operating the attachment Check the attachment and the operating environment once more before starting to work, and that all obstacles have been removed from the operating area. Quick inspection of the equipment and the operating area before use are parts of ensuring safety and the best performance of the equipment. -
Page 16: Checks Before Use
16 (26) 6.2 Checks before use Check the aerator and the operating area once more before starting to work. Quick inspection of the equipment and the operating area before use are parts of ensuring safety and the best performance of the equipment. -
Page 17: Use
17 (26) 6.3 Use Starting to use Aerator 1100 1. Lift the storage supports of the aerator and lock them to upper position before use. See the following paragraph. 2. Release the aerator axle by releasing the locking pin of the aerating axle. See page 20. 3. -
Page 18: Adjusting The Operating Depth
18 (26) 6.3.2 Adjusting the operating depth The blades are set to the operating depth of 150 mm as standard. The operating depth can be adjusted to the depth of 110 mm by repositioning the blades. The attachment does not need to be disconnected from the loader while adjusting the height. -
Page 19: Extra Weights (Option)
Some operations may require more weigh on the attachment for the best result. Typically when operating on hard soil, and the blades do not penetrate into the ground deep enough, the working depth of the blades can be increased significantly by adding Avant counterweights on the aerator. Counterweights (A35957) are fitted on the attachment as shown in the adjacent figure. -
Page 20: Storing The Attachment
20 (26) 6.6 Storing the attachment Uncouple and store the attachment on level ground. The best way to store the attachment is a place where it is protected from direct sunlight, rain, and extreme temperatures. Avoid leaving the attachment laying directly on the ground. -
Page 21: Maintenance And Service
21 (26) 7. Maintenance and Service The attachment has been designed to be as maintenance free as possible. Continuous maintenance includes regular cleaning and lubrication, and monitoring the condition of the attachment. Because of the crushing hazard caused by lowering machine parts, all maintenance work must be done when moving parts have been lowered down completely and the attachment is lowered flat against the ground. -
Page 22: Blade Maintenance
22 (26) 7.3 Blade maintenance The condition of the blades and disc units should be checked at least every few uses. Replace any broken items. Always use good protective gloves when handling the blades. 7.3.1 Accessing the blades To access the blades: 1. -
Page 23: Lubrication
23 (26) 7.4 Lubrication There are total of 2 lubricating points at the ends of the aerating axle on the Aerator. A small amount of lubricant should be added to lubrication points regularly. Correct lubrication interval depends heavily operating conditions but lubricant must be added at least after every 10 hours of use. -
Page 24: Warranty Terms
24 (26) 8. Warranty terms Avant Tecno Oy grants a warranty of one year (12 months) from the date of purchase for the attachment it manufactures. The warranty covers repair costs as follows: Work costs are covered, if the repair is not performed at the factory.
Need help?
Do you have a question about the A453046 and is the answer not in the manual?
Questions and answers