Advertisement
Advertisement

Subscribe to Our Youtube Channel
Related Manuals for Culina CUL57PGSS


Summary of Contents for Culina CUL57PGSS
- Page 1 CUL57PGSS Oven Instruction Manual...
-
Page 2: Table Of Contents
Content 1…………………………………..…………………Important safety information 2…………………………………..…………………Installation 3…………………………………..…………………Prior to start up of the appliance 4…………………………………..…………………Selecting a cooking function and temperature 5…………………………………..…………………Troubleshooting 6…………………………………..…………………Maintenance and cleaning 7…………………………………..…………………Environmental note 8…………………………………..…………………Transportation Important safety information This User Instruction Manual contains important information, including safety & installation points, which will enable you to get the most out of your appliance. Please keep it in a safe place so that it is easily available for future reference;... - Page 3 should be taken to avoid touching Operation: heating elements. ● hildren less than 8 years of age shall be kept away unless arning! anger of fire! continuously supervised. ● o not allow paper or cloth to come ● his appliance can be used by in contact with any heating element.
- Page 4 ot surfaces! isk of burns! nstallation ● uring use the appliance becomes hot. ● he oven must be installed in Care should be taken to avoid touching accordance with the installation heating elements inside the oven. instructions and all measurements must ●...
- Page 5 ● ● f the supply cord is damaged, it must o not place objects with open flames, be replaced by the manufacturer, its e.g. candles, on top of or beside the service agent or similarly qualified appliance. persons in order to avoid a hazard. ●...
-
Page 6: Installation
● ● mportant! Always switch off the lways disconnect the power supply electricity supply at the mains or prior to cleaning the appliance. If the remove the plug from its mains socket switched fused connection unit or during installation and maintenance. If mains socket is difficult to reach, shut the appliance is hard wired we off the power supply by using the... - Page 7 incorporated in the permanent wiring. The switch is to be of approved type and positioned in accordance with local wiring and electrical rules and specifications. The switch must have 3 mm air gap contact separation in all poles, in the active (phase) conductor of the fixed wiring.
- Page 8 Positioning the appliance ⚫ Ensure that the aperture that you will be fitting the oven into is of the size given in the above diagram. ⚫ The oven must be fitted into an oven housing with the ventilation cut-outs shown in the “Ventilation requirements”...
-
Page 9: Prior To Start Up Of The Appliance
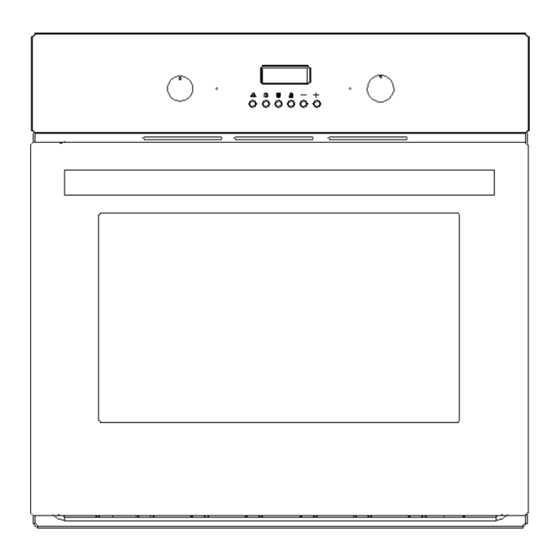
Ensure that the oven has been securely fixed into the housing unit. The fixing of the oven into the housing is made by using four screws. These should be screwed through the oven cabinet and into the housing unit. Prior to start up of the appliance ➢... - Page 10 the oven stable and the external surface temperature lower. After the oven has been used the cooling fan will run on for a period of time, until the oven is sufficiently cooled. B.Control panel Here, you will see an overview of the control panel. Depending on the appliance model, individual details may differ.
- Page 11 The timer has 3 status, they are standby, select function and working status. Stand-by status: After connected to the power supply, the display screen will show system time, the second icon flashes, it is the status before entering cooking function; If exceeds 10 seconds without any operation under standby mode, the display brightness automatically reduces, press any button to recover to the original brightness.
- Page 12 state. The clock shows the system time and starts the timing(The default system time as 0.00). The second icon “ ” is flashing,1 second 1 time, the effect is shown in Pic 5.You can press “K5” to choose 3 kinds of ring tone, The default is the second ring tone. Whenever user wants to adjust the ring tone again, press “K5”.
- Page 13 system time can be adjusted. Set the clock by pressing "K6" and "K5". After the setting is completed, wait for 5 seconds to automatically determine the set time. The second icon " " stops flashing and turns to the constant light display. The display effect of the setting is as shown in Pic 8 (set an hour).
- Page 14 Pic 11 Alarm clock working status diagram Pic 12 At the end of alarm clock time (alarm clock icon always bright) (alarm clock icon flickering) Pic 13 Cancel alarm or After alarm clock over Note: 1. After the alarm time setting is completed, if you need to query the remaining alarm time or reset the alarm time after entering the working state, you can press the alarm button “K1”...
- Page 15 At the end of the set time, The display shows the system time, the icon “ ” goes out, the second icon “ ” and the automatic function icon “AUTO” flash(Pic 17), the cooking will be interrupted and the intermittent sound signal will be heard. Cancel it as indicated above. the icon “AUTO”...
- Page 16 When the cooking end time setting is completed, wait for 5 seconds to automatically confirm this time. The automatic function icon “AUTO” and the oven in use icon “ ” stop flashing and turn to always bright. The display shows the system time( Pic 21). When the cooking end time is reached (assuming the end time is 0:30), the display shows the system time, the oven in use icon “...
- Page 17 Pic 24 Cooking time setting Pic 25 Reservation function setting completion diagram initial status Pic 26 Reservation function setting completion status Practical example: We want to cook for 45 minutes and for the cooking to end at 2 p.m. 1. We press “k2” and select 0.45 by using “K6“ and “K5” 2.
-
Page 18: Selecting A Cooking Function And Temperature
Selecting a cooking function and temperature Using your oven Selecting an oven function The oven function selector knob should be used to select the particular mode of cooking that you require. The appliance will utilise different elements within the oven cavity, depending on the oven function that you select. - Page 19 Oven operating light This light will come on to indicate that the oven’s heating elements are in operation. The light will turn off when the temperature set on the thermostat control knob has been reached. It will cycle on and off throughout the cooking time.
-
Page 20: Maintenance And Cleaning
Troubleshooting Fault Cause Solution Something at the connection is Turn off main supply and check if some wrong, or it’s not connected. wire has been disconnected. Oven Power supply connections are Turn off main supply and check if some doesn’t loose. - Page 21 Replacement of the oven light bulb In order to avoid the possibility of an electric shock ensure that the appliance is switched off before replacing the bulb. ⚫ Set all control knobs to the position”0”and disconnect the mains plug,unscrew and wash the lamp cover and then wipe it dry.
-
Page 22: Environmental Note
Regular inspections Besides keeping the cooker clean, you should: 1. Carry out periodic inspections of the control elements and cooking units of the cooker. After the guarantee has expired you should have a technical inspection of the cooker carried out at a service centre at least once every two years. 2. -
Page 23: Transportation
Use cardboard covers for the wire grill and trays in your oven. Also tape the oven’s covers to the side walls. If the original carton is unavailable, take measures to protect the external surfaces (glass and painted surfaces) of oven against possible blows, as well as the above. IM CUL57PGSS 20191123...
Need help?
Do you have a question about the CUL57PGSS and is the answer not in the manual?
Questions and answers
IS THERE A VIDEO SHOWING THE WAY TO SET AND USE