Table of Contents
Advertisement
Quick Links
Advertisement
Chapters
Table of Contents

Related Manuals for Beko SLGR 30524SS


Summary of Contents for Beko SLGR 30524SS
- Page 1 30" Slide-In Gas Range Owner’s Manual SLGR 30524SS 285.6003.28 / R.AA/ 15.06.2023...
- Page 2 Store / Dealer City State Zip Code If you have questions or comments, please contact your local authorized Beko dealer, or call our Toll Free Customer Hotline number. 1-888-352 BEKO (2356) BEKO.COM/US-EN To register your product with Beko, please go to...
-
Page 3: Table Of Contents
Control Panel Overview ......................8 Preparation ........................10 Settings ..........................11 Operation ...........................13 Care and Maintenance ......................26 Troubleshooting ........................29 Warranty and Service ......................30 FURTHER INFORMATION Browse the Beko website for helpful information on using your slide-in range, care and maintenance, troubleshooting and more just visit http://www.beko.us... -
Page 4: Premium Technology
PREMIUM TECHNOLOGY At Beko, we believe a truly revolutionary product is one that redefines what is possible in terms of performance. Secondly, it must achieve that performance while using the least amount of natural resources possible. And finally, it needs to be priced within reach of everyone who wants to lead a healthy and sustainable life. -
Page 5: Technical Information
TECHNICAL INFORMATION General Overall Height 36" (914 mm) Overall Width 29 - 13/16" (757 mm) Overall Depth 28 - 3/4" (730 mm) Total electric power 1.03 kW Electrical connection / Fuse 120/240 V~;60 Hz 2AC~N / min. 8.6 A Cable type / cross section / SJT 3x18 / AWG / max. -
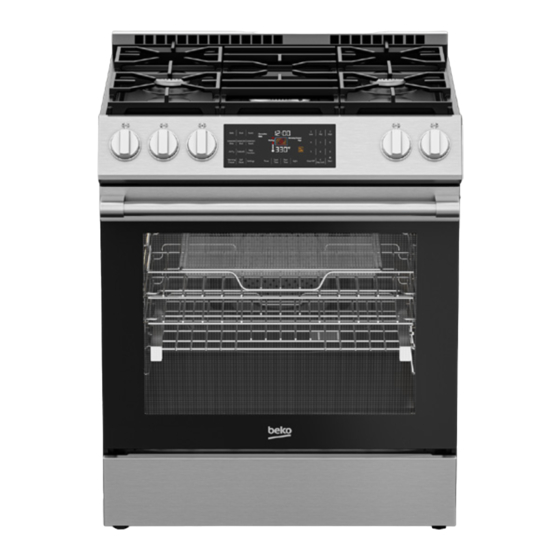
Page 6: Slide-In Range Overview
SLIDE-IN RANGE OVERVIEW Control knobs Model / Serial Tag / Rating Label (Located on bottom of control panel) Storage Drawer Foot... - Page 7 SLIDE-IN RANGE OVERVIEW Splashback Burners Control panel Handle Front door...
-
Page 8: Control Panel Overview
CONTROL PANEL OVERVIEW Display The selected functions are shown here as well as the current oven operating conditions. Burner Control Knobs These knobs are used to turn on and adjust burner temperatures. - Page 9 Numeric Keypad This section is used to enter temperature, time, start and stop cooking modes. Start / Cancel Keys These keys are used to start and cancel cooking modes.
-
Page 10: Preparation
PREPARATION The following information will help you to Caution: The cooling fan continues to use your appliance in an ecological way, operate for about 20-30 minutes after and to save energy. the oven is switched off. TIPS FOR SAVING ENERGY INITIAL HEATING •... -
Page 11: Settings
SETTINGS Warning: Before using the oven, the 24 Hour 12 Hour 24 Hour 12 Hour clock must be set. If the clock is not set, the oven some functions will not 10:00 10:00 AM 22:00 10:00 PM work properly. 11:00 11:00 AM 23:00 11:00 PM... - Page 12 SETTINGS attempt to extinguish a possible fire with water! When oil catches fire, cover it with a fire blanket. Turn off the hob if it is safe to do so and call the fire department. Warning: Never extend the flame beyond the outer edge of the cooking utensil.
-
Page 13: Operation
OPERATION BURNERS • Use flat bottomed saucepans or vessels Igniting the gas burners only. • Gas burners are controlled with gas hob • Put appropriate amount of food in sauce- knobs). pans and pans. Thus, you will not have to make any unnecessary cleaning by prevent-ing the dishes from overflowing. - Page 14 OPERATION OVEN Maximum alarm period is 5 hours and 59 minutes. If a value greater than 5:59 is set, the clock will return an error. CANCEL AN ALARM 1. To cancel an alarm after it has been set, TIMER press “Timer” on the touchpad. •...
- Page 15 OPERATION OVEN 3. For cooking time, press the 'Cook Time' key once. Enter the cooking time using numbers on the right keypad while Cook and Time are flashing. 4. Press “Cook Time” key once to set the cooking time. Enter how long you wish program to last, using the numbers •...
- Page 16 OPERATION OVEN COOKING TIPS Cooking Vegetables • Cook vegetables in a pan with a lid to Baking keep them from running out of liquid and drying out. • Use dark-colored or -enamel coated cookware to improve heat transfer. • Boil vegetables before cooking in the oven to make sure they cook fully.
- Page 17 OPERATION OVEN OVEN FUNCTION MODES throughout the oven. Convection Bake bake mode can be used to cook a variety of food items, from cakes to For best results, preheat oven when breads. using bake mode. Convection bake mode is also ideal Heat radiates from the bake for sponge cakes, pastries, and element, situated at the bottom of...
- Page 18 OPERATION OVEN to cook small cuts and flat pieces of You can use a lid or roasting bags meat, poultry, and fish. Broil mode in this mode. Follow manufacturer’s can also be used to brown breads and directions for the roasting bag. other foods.
- Page 19 OPERATION OVEN The convection fan circulates heat touchpad for 2 seconds. Touching throughout the oven. Pizza mode can “Clear/Off” on the touchpad will turn be used for fresh or frozen pizza. Follow the heating elements off, but will not manufacturer’s directions for frozen change the appearance of the display.
- Page 20 OPERATION OVEN Warming Drawer Warning: The warming drawer will keep hot, cooked foods at serving temperature. Always start with hot food. Cold or room temperature foods cannot be heated or warmed in the warming drawer (except crisping crackers, chips, dry cereal).Bacteria will grow very rapidly in food that in between 40 and 140°F.
- Page 21 OPERATION OVEN AirFry Place a proper size(larger than AirFry tray) baking sheet or tray on the rack Warning: Airfry accessories should below the AirFry tray to catch any only be used with the airfry function. drippings from food. This will help to When the Airfry accessory is used reduce splatter and smoke.If you dont with functions where the oven burners...
- Page 22 OPERATION OVEN AIRFRY COOK GUIDE Recommended Cooking Rack Time Recommended Food Preheat Oven Temp. Mode Position (min.) amount Function Frozen potato Bake AirFry 25 … 35 200-1400 g 430°F(220°C) Frozen crunchy snacks Bake AirFry 15 … 25 400-1000 g 430°F(220°C) (chicken nuggets) 200-800 g Frozen pastry...
- Page 23 OPERATION OVEN Oven Functions Table Temperature Function Recommended Maximum Minimum Bake 350°F (175°C) 550°F (290°C) 125°F (50°C) Convection Bake 350°F (175°C) 550°F (290°C) 125°F (50°C) Roast 375°F (190°C) 550°F (290°C) 125°F (50°C) Convection Roast 350°F (175°C) 550°F (290°C) 125°F (50°C) Broil 375°F (190°C) 465°F (240°C)
- Page 24 OPERATION SUGGESTED BAKE/ROAST TIMES CHART Number of Food Cooking Mode Oven Temp. Rack Position Racks Sponge cake Bake 360 °F ( 182 °C) Single Sponge cake Convection Bake 350 °F ( 175 °C) Multiple 3 and 5 Bread loaf (leavened) Bake 400 °F ( 205 °C) Single...
- Page 25 OPERATION SUGGESTED BAKE/ROAST TIMES CHART Pan Size and Time(min.) Explanation Type 8" (200mm) or 9" The cakes are positioned in the middle of the oven. Bake foods with 25 - 35 (230mm) 1" (25 mm) - 1.5" (38 mm) space between pans and oven wall. round 8"...
-
Page 26: Care And Maintenance
CARE AND MAINTENANCE SELF CLEANING FUNCTION Warning: Do not clean the door gasket. Fiberglass gasket is highly sensitive and can get damaged easily. In case Warning: If the oven is hot, self cleaning of a damage on the oven door gasket, mode cannot be operated until the replace with the new one from the oven is cold. - Page 27 CARE AND MAINTENANCE force door open or closed the hinge could Caution: During the Self-Cleaning cycle, be damaged and injury could result. the electrical flow to hob burners will be cut. After turning the function and • Do not lay removed door on sharp or thermostat knob to off position, the pointed objects as this could break the door lock will be automatically opened.
- Page 28 CARE AND MAINTENANCE 1. Turn off power at the main power REPLACING THE OVEN LAMP supply (your fuse or breaker box).. Warning: Hot surfaces cause burns! 2. Turn the glass cover counter clockwise Before replacing the oven lamp, make to remove it. sure that the product is disconnected (See Cleaning the oven.) from mains and cooled down in order...
-
Page 29: Troubleshooting
TROUBLESHOOTING OVEN LIGHTS DO NOT TURN Warning: Consult your Authorized Service Agent or the dealer where you purchased the product if the instruction above do not remedy • Defective oven light bulb. >>>Replace your issue. Never attempt to repair a bulb. -
Page 30: Warranty And Service
WARRANTY AND SERVICE The warranties provided by Beko in these statements only apply to Beko ranges sold to the original purchaser or homeowner in the US and Canada. The warranty is not transferable. To obtain warranty service, please contact our nearest distributor as listed by state and province. - Page 31 No Other Warranties. This Warranty Statement is the complete and exclusive warranty from the manufacturer. No employee of Beko or any other party is authorized to make any warranty statements in addition to those made in this Warranty Statement.
- Page 32 1-888-352 BEKO (2356) beko.com/us-en ©2022 Beko U.S., Inc. All rights reserved.
- Page 33 Safety & Installation Instructions WARNING: Read all safety instructions before using the product. If the information in this manual is not followed exactly, a fire or explosion may result causing property damage, personal injury or death. SLGR 30524SS 285.6003.29 / R.AA / 15.06.2023...
- Page 34 TO PREVENT TIPPING: If the information in this manual is not followed exactly, a fire or explosion may result causing property damage, personal injury or death. DO NOT OPERATE THE RANGE WITHOUT ANTI-TIP DEVICE IN PLACE AND ENGAGED This appliance is intended for normal household use only. It is not approved for outdoor or other non-household uses (including sea or air-going vessels).
- Page 35 PLEASE READ THESE INSTRUCTIONS CAREFULLY BEFORE INSTALLATION OR USING YOUR APPLIANCE ! SAVE THESE INSTRUCTIONS Save these instructions for the local electrical inspectors use. This product can only be used in the rooms which incorporates a properly adjusted and functioning Carbon Monoxide sensor. Make sure the Carbon Monoxide sensor works properly and its maintenance done frequently.
-
Page 36: Technical Information
TECHNICAL INFORMATION General Overall Height 36" (914 mm) Overall Width 29 - 13/16" (757 mm) Overall Depth 28 - 3/4" (730 mm) Total electric power 1.03 kW Electrical connection / Fuse 120/240 V~;60 Hz 2AC~N / min. 8.6 A Cable type / cross section / SJT 3x18 / AWG / max. -
Page 37: Important Safety Information
IMPORTANT SAFETY INFORMATION Be sure to observe all listed warnings its service agent or similarly qualified persons. and cautions. Look particularly for the icons with exclamation marks inside. Warning: Never use your appliance for The information icon will also provide warming or heating the room. - Page 38 IMPORTANT SAFETY INFORMATION Warning: Glazed cooking utensils - only Warning: Appliance must be placed certain types of glass, glass/ceramic, directly on the floor. It must not be ceramic, earthenware, or other glazed placed onto a base or a pedestal. utensils are suitable for range-top Warning: Rear surface of the oven gets service without breaking due to the hot when it is in use.
- Page 39 IMPORTANT SAFETY INFORMATION do not touch to knobs not for use. 1 hour before or after cooking. Doing so can result in food poisoning or Warning: Keep Oven Vent Ducts sickness. unobstructed. Warning: To avoid permanent damage Warning: Never cover the top of grates to the oven bottom finish do not line with any kind of cover.
- Page 40 IMPORTANT SAFETY INFORMATION may become hot enough to cause Warning: Keep appliance area clear burns - among these surfaces are oven and free from combustible materials, vent openings and surfaces near these gasoline, and other flammable vapors. openings, interior surfaces of the oven cavity, oven doors, and window.
- Page 41 IMPORTANT SAFETY INFORMATION breakage. Do not cook on a product Warning: Keep all ventilation slots clear with broken glass. Shock, fire or cuts of obstructions. may occur. • Only authorized replacement parts Warning: The manufacturer declines all may be used in performing service liability for injury to persons or damage on the range.
- Page 42 IMPORTANT SAFETY INFORMATION • Accessible parts may be hot when the • Do not operate the appliance barefooted. broil is in use. Young children should be • Never touch the appliance with wet kept away. hands or feet. • Surface units may be hot even though SAFETY FOR GAS they are dark in color.
- Page 43 IMPORTANT SAFETY INFORMATION ventilation device (mechanical extractor area where it started. hood). Prolonged intensive use of • The fire department is being called. the appliance may call for additional ventilation, for example increasing • The fire does not obstruct your escape the level of the mechanical ventilation route where present.
-
Page 44: Installation
INSTALLATION not harmful to the environment. Please • If an appliance hood is to befitted, refer dispose of all parts of the packaging to the manufacturer's instructions according to environmental standards. regarding fixing heights. • This is beneficial to the environment. •... - Page 45 INSTALLATION CLEARANCES & DIMENSIONS potential scratches during the lifting process. It is also recommended to take off watches and jewelry and to Caution: Dimensions that are shown in wear work shoes during installation for figure must be used. Given dimensions foot protection.
- Page 46 INSTALLATION ROOM VENTILATION • The air for combustion is taken from the room air and the exhaust gases are emitted directly into the room. • Good room ventilation is essential for safe operation of your appliance. If there is no window or door available for room ventilation, extra ventilation must be installed.
- Page 47 INSTALLATION 2. Fix the part2 of the bracket to the floor • Ensure the anti-tip device is re-engaged with 4 screws (5) in accordance with the when the range is moved. dimensions and direction indicated in Figure 1. • Do not operate the range without the anti-tip device in place and engaged.
- Page 48 INSTALLATION ANTI-TIP STABILITY DEVICE Bracket Installation Option 2 INSTALLATION INSTRUCTIONS 1. Adjust your oven feets according to your counter. 2. Measure the dimension ‘A’ in Figure 3 . Warning: Verify the anti-tip device has been properly installed and engaged. 3. Mount the bracket to the wall as •...
- Page 49 INSTALLATION...
- Page 50 INSTALLATION HOW TO MOVE THE APPLIANCE Warning: Electrical shock hazard! Use extreme caution when drilling holes into the wall or floor. There may Movement of your appliance is most be concealed electrical wires located easily achieved by lifting the front as behind the wall or under the floor.
- Page 51 INSTALLATION Caution: This range must be electrically Warning: Avoid fire hazard or electrical grounded in accordance with local shock. Do not use an adapter plug, an codes, or in their absence, with the extension cord, or remove grounding National Electrical Code ANSI/NFPA prong from electrical power cord , have No.
- Page 52 INSTALLATION • When installed where it is not permitted to ground through the neutral, a 4-conductor cord must be used or cable assembly. See manufacturer's instructions. • The main supply data must correspond to the data specified on the rating label of the appliance.
- Page 53 INSTALLATION longer than 36 inches. Caution: The gas cooker requires a 110/120VAC electrical supply to • Installer show the owner where the gas operate the elec-tronic ignition system. shut-off valve is located. The 6' (1.8 m) power supply cord provided with the range is equipped High Altitude Installation note with a 3-prong, grounded plug for •...
- Page 54 INSTALLATION off valve in an easily accessible location. Warning: Be careful not to crimp flexible Make sure all users know where and how connector! to shut off the gas supply to the range. 6. Carefully tip range forward to insure •...
- Page 55 INSTALLATION TEST FOR GAS LEAKS to L.O. Verify that the flame completely surrounds the burner. There should be a flame at each burner port and there Warning: Never check for leaks with a should be no air gap between the flame flame.
- Page 56 INSTALLATION Flame Characteristics Caution: If the temperature of the oven increases unintended, turn off the oven and call the authorized service agent or technician with license to have oven repaired. • The California Safe Drinking Water and Toxic Enforcement Act requires the Governor of Cali-fornia to publish a list of substances known to the State of California to cause cancer, birth defects,...
-
Page 57: Package Contents And Accessories
PACKAGE CONTENTS AND ACCESSORIES HEIGHT-ADJUSTABLE Accessories supplied can vary depending on the product model. Not TELESCOPIC ROLLER-RACK every accessory described in the user WITH WIRE SHELF manual may exist on your product. • Used for roasting and for easily placing the food to be baked, roasted or cooked OWNER'S MANUAL in casserole dishes to the desired rack. - Page 58 PACKAGE CONTENTS AND ACCESSORIES How to reattach the wire shelf with How to remove the wire shelf with telescopic roller-rack telescopic roller-rack • To reattach the wire self with telescopic • You can remove the wire self with rails, the procedures applied when telescopic rails by first lifting it up and removing it must be repeated from the then pulling it towards you.
- Page 59 NOTES AIRFRY ACCESORIES How to clean the airfry accessories You can wash the basket part of How to set your range for AirFry the frying grill in the dishwasher. Intensive wash in the lower basket of 1. Place your AirFry tray recommended the dishwasher is recommended for rack positon 3 as shown picture1 and the basket.
- Page 60 1-888-352 BEKO (2356) beko.com/us-en ©2022 Beko U.S., Inc. All rights reserved.
Need help?
Do you have a question about the SLGR 30524SS and is the answer not in the manual?
Questions and answers