Advertisement
Quick Links
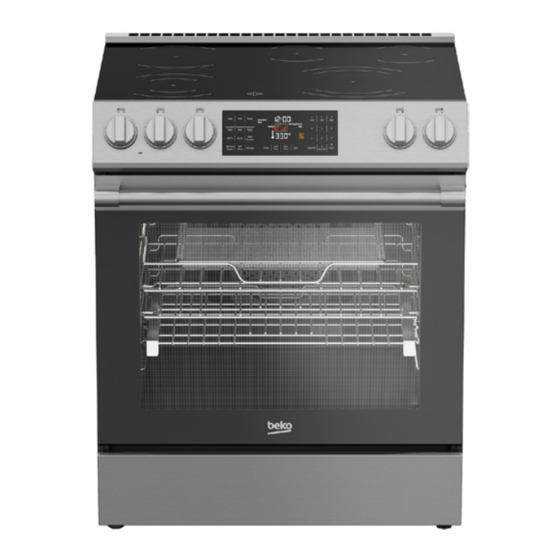
30" Slide-In Electric Range
Safety & Installation Instructions
SLER 30524SS
WARNING: Read all safety
instructions before using the
product. If the information in
this manual is not followed
exactly, a fire or explosion
may result causing property
damage, personal injury or
death.
285.6003.22 / R.AA / 16.06.2023
Advertisement

Related Manuals for Beko SLER 30524SS


Summary of Contents for Beko SLER 30524SS
- Page 1 Safety & Installation Instructions WARNING: Read all safety instructions before using the product. If the information in this manual is not followed exactly, a fire or explosion may result causing property damage, personal injury or death. SLER 30524SS 285.6003.22 / R.AA / 16.06.2023...
- Page 2 TO PREVENT TIPPING: If the information in this manual is not followed exactly, a fire or explosion may result causing property damage, personal injury or death. DO NOT OPERATE THE RANGE WITHOUT ANTI-TIP DEVICE IN PLACE AND ENGAGED This appliance is intended for normal household use only. It is not approved for outdoor or other non-household uses (including sea or air-going vessels).
- Page 3 PLEASE READ THESE INSTRUCTIONS CAREFULLY BEFORE INSTALLATION OR USING YOUR APPLIANCE ! SAVE THESE INSTRUCTIONS Save these instructions for the local electrical inspectors use. This product can only be used in the rooms which incorporates a properly adjusted and functioning Carbon Monoxide sensor. Make sure the Carbon Monoxide sensor works properly and its maintenance done frequently.
-
Page 4: Technical Information
TECHNICAL INFORMATION General Overall Height 36" (914 mm) Overall Width 29 - 13/16" (757 mm) Overall Depth 26 - 3/4" (679 mm) Total electric power 13kW Electrical connection 120/240 V~;60 Hz 2AC~N Cable type / Cross section / Fuse SRDT 8/3 + 10/1 AWG / min. 50 A Cable length max. -
Page 5: Important Safety Information
IMPORTANT SAFETY INFORMATION Be sure to observe all listed warnings Warning: Never use your appliance for and cautions. Look particularly for the warming or heating the room. icons with exclamation marks inside. The information icon will also provide • User Servicing - DO NOT repair or important references. - Page 6 IMPORTANT SAFETY INFORMATION can scratch the surface, which may Caution: Use proper pan size - this result in shattering of the glass. appliance is equipped with one or more surface units of different size. Warning: This appliance can be used by Select utensils having flat bottoms children aged from 8 years and above large enough to cover the surface unit...
- Page 7 IMPORTANT SAFETY INFORMATION 1 hour before or after cooking. Doing Caution: Use care when opening so can result in food poisoning or door, let hot air or steam escape before sickness. removing or replacing food Warning: To avoid permanent damage Nickel is a component in all stainless to the oven bottom finish do not line steel and some other metal...
- Page 8 IMPORTANT SAFETY INFORMATION clothes or storage. Use the drawer for Warning: DO NOT TOUCH HEATING cooking purposes only. ELEMENTS OR INTERIOR SURFACES OF OVEN Heating elements may be Warning: Do not leave paper products, hot even though they are dark in color. plastics, canned food or combustible Interior surfaces of an oven become materials in the drawer.
- Page 9 IMPORTANT SAFETY INFORMATION aluminum foil directly onto the bottom of linings may also trap heat, causing a the oven. The heat accumulation might fire hazard. damage the bottom of the oven. • Do not use the oven with front door glass Warning: After broiling, always take any removed or broken.
- Page 10 IMPORTANT SAFETY INFORMATION SAFETY FOR CHILDREN SAFETY FOR ELECTRICITY Warning: Do Not leave children alone Warning: Before installing, turn power Children should not be left alone or OFF at the service panel. Lock service unattended in area where appliance is panel to prevent power from being in use.
- Page 11 IMPORTANT SAFETY INFORMATION FUTURE TRANSPORTATION • This appliance is not intended to use at mobile homes, recreational vehicles. • Do not carry out cleaning or maintenance Warning: Do not obstruct the flow of ventilation air. operations on the appliance without having previously disconnected it from •...
-
Page 12: Installation
INSTALLATION SAFETY FOR CHILDREN Caution: Material damage! Do not place other items on the top of the appliance. The appliance must be transported Caution: The kitchen floor must be able upright. The door and/or handle must to carry the weight of the appliance plus not be used for lifting or moving the the additional weight of cookware and appliance. - Page 13 INSTALLATION...
- Page 14 INSTALLATION ANTI-TIP STABILITY DEVICE Caution: To eliminate the risk of burns or fire by reaching over heated surface INSTALLATION INSTRUCTIONS units, cabinet storage space located above the surface units should be avoided. If cabinet storage is to be Warning: Verify the anti-tip device has provided, the risk can be reduced by been properly installed and engaged.
- Page 15 INSTALLATION...
- Page 16 INSTALLATION ANTI-TIP STABILITY DEVICE Bracket Installation Option 2 INSTALLATION INSTRUCTIONS 1. Adjust your oven feets according to your counter. 2. Measure the dimension ‘A’ in Figure 3 . Warning: Verify the anti-tip device has been properly installed and engaged. 3. Mount the bracket to the wall as •...
- Page 17 INSTALLATION...
- Page 18 INSTALLATION HOW TO MOVE THE APPLIANCE Warning: Electrical shock hazard! Use extreme caution when drilling holes into the wall or floor. There may Movement of your appliance is most be concealed electrical wires located easily achieved by lifting the front as behind the wall or under the floor.
- Page 19 INSTALLATION CONNECTION TO THE MAIN Observe all governing codes and local SUPPLY ordinances • A 3 wire or 4 wire single phase 120/240 or 120/208 Volt, 60 Hz AC only electrical Warning: Electrical shock hazard! supply is required on a separate circuit Electrical installation must comply with fused on both sides of the line (red and national and local codes.
- Page 20 INSTALLATION • Amper cord is used it must be marked 3 & 4 -wire electrical wall receptacle for use with a 1 3/8 inches (35 mm) types & recommended mounting diameter opening. Cord must have either orientation on wall 3 or 4 conductors to match electric receptacle (Use copper or Aluminum •...
- Page 21 INSTALLATION Power cord strain relief installation • Purchase a strain relief before installation. 1. Using the 1-1/8 in. or 7/8 in. diameter opening insert the strain relief and power cord through the opening and secure the strain relief as directed in this instructions.
- Page 22 INSTALLATION Conduit Installation 3 & 4-wire permanent wire connections • Purchase a squeeze connector Warning: For 3-wire permanent matching the diameter of the conduit connection read carefully and follow and assemble it in the hole. Insert the steps 2 and 5 below. conduit through the squeeze connector Warning: For 4-wire permanent and tighten.
- Page 23 INSTALLATION 3 wire connection figure 4 wire connection figure 1. Terminal block 1. Terminal block 2. Squeeze connector 2. Squeeze connector 3. Washer 3. Washer 4. Nut 4. Nut 5. Grounding screw 5. Grounding screw BK. Black BK. Black WH. White WH.
-
Page 24: Package Contents And Accessories
PACKAGE CONTENTS AND ACCESSORIES HEIGHT-ADJUSTABLE Accessories supplied can vary depending on the product model. Not TELESCOPIC ROLLER-RACK every accessory described in the user WITH WIRE SHELF manual may exist on your product. • Used for roasting and for easily placing the food to be baked, roasted or cooked OWNER'S MANUAL in casserole dishes to the desired rack. - Page 25 PACKAGE CONTENTS AND ACCESSORIES How to remove the wire shelf with How to reattach the wire shelf with telescopic roller-rack telescopic roller-rack • You can remove the wire self with • To reattach the wire self with telescopic telescopic rails by first lifting it up and rails, the procedures applied when then pulling it towards you.
- Page 26 PACKAGE CONTENTS AND ACCESSORIES AIRFRY ACCESORIES How to clean the airfry accessories You can wash the basket part of How to set your range for AirFry the frying grill in the dishwasher. Intensive wash in the lower basket of 1. Place your AirFry tray recommended the dishwasher is recommended for rack positon 3 as shown picture1 and the basket.
- Page 27 NOTES...
- Page 28 1-888-352 BEKO (2356) beko.com/us-en ©2022 Beko U.S., Inc. All rights reserved.
Need help?
Do you have a question about the SLER 30524SS and is the answer not in the manual?
Questions and answers