
Related Manuals for TSC TH240 Series


Summary of Contents for TSC TH240 Series
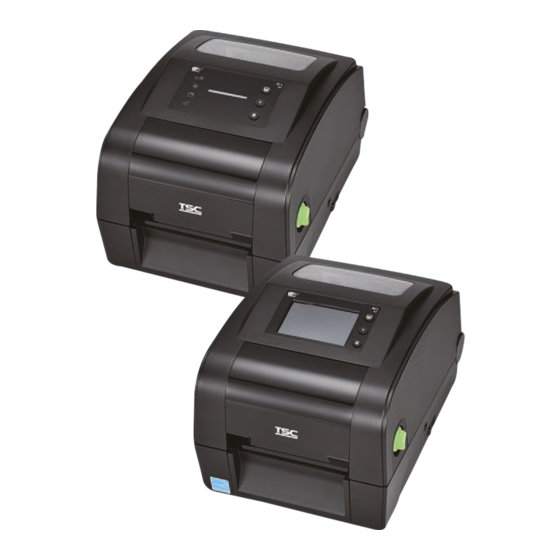
- Page 1 Desktop Barcode Printer TH240/DH240 Series Thermal Transfer Direct Thermal Series Models TH240 / TH340 TH240T / TH340T TH240THC / TH340THC DH240T / DH340T DH240THC / DH340THC User Manual www.tscprinters.com...
- Page 2 All other trademarks are the property of their respective owners. Information in this document is subject to change without notice and does not represent a commitment on the part of TSC Auto ID Technology Co. No part of this manual may be reproduced or transmitted in any form or by any means, for any purpose other than the purchaser’s personal use, without the expressed written...
-
Page 3: Table Of Contents
Connecting the Power Cable and Adapter ........................20 Loading the Media ................................21 Loading the Ribbon (for TH240 Series only) ........................26 Loading the Media in Peel-off Mode (Optional) ......................29 Loading the Media in Cutter Mode (Optional) ......................... 31 Operator Interface ............................ - Page 4 Main Screen ..............................60 Setting .................................... 61 Sensor .................................... 68 Interface ..................................70 Advanced ..................................73 File Manager .................................. 75 Diagnostic ..................................76 Favorites ..................................78 Troubleshooting ............................80 Common Problems ................................. 80 Maintenance ..............................85 Cleaning Supplies ................................86 Cleaning Procedures ..............................
-
Page 5: Introduction
This document provides an easy reference for operating this printer. TSC printers include the Windows labeling software for creating your label template. For system integration, the TSPL/TSPL2 printer programming manual or SDKs can be found on TSC website at: https://www.tscprinters.com. -
Page 6: Specifications
1.1 Specifications DH240 Series Model DH340T (HC) DH240T (HC) (HC: Healthcare) Resolution 8 dots/mm (203 dpi) 12 dots/mm (300 dpi) Print Method Direct Thermal 203 mm (8”)/ second 152 mm (6”)/ second Max. Print Speed Peel mode: 76 mm (3”)/ second Peel mode: 76 mm (3”)/ second Max. - Page 7 Model DH340T (HC) DH240T (HC) (HC: Healthcare) ▪ USB 2.0 ▪ RS-232 ▪ USB Host I/O & Connectivity ▪ Ethernet LAN port (10/100 Mbps) 802.11 a/b/g/n/ac Wi-Fi with Bluetooth 5.0 combo module (dealer option) ▪ ▪ Bluetooth 5.0 (dealer option) ▪...
- Page 8 Model DH340T (HC) DH240T (HC) (HC: Healthcare) 1D Barcodes Code 39, Code 93, Code128UCC, Code128 subsets A.B.C, Codabar, Interleaved 2 of 5, EAN 8, EAN 13, EAN 128, UPC-A, UPC-E, EAN and UPC 2(5) digits add-on, MSI, PLESSEY, POSTNET, China post, ITF14, EAN14, Code 11, TELEPEN, TELEPENN, PLANET, Code 49, Deutsche Post Identcode, Deutsche Post Supported Barcode Formats Leitcode, LOGMARS...
- Page 9 Model DH340T (HC) DH240T (HC) (HC: Healthcare) ▪ Quick start guide x1 ▪ USB cable x1 Accessories ▪ Power cord x1 ▪ External universal switching power supply x1 Factory Options MFi Bluetooth 5.0 ▪ Peel-off module ▪ Guillotine cutter (full cut and partial cut) ▪...
- Page 10 TH240 Series Model TH240 TH340 TH240T (HC) TH340T (HC) (HC: Healthcare) Resolution 8 dots/mm (203 dpi) 12 dots/mm (300 dpi) 8 dots/mm (203 dpi) 12 dots/mm (300 dpi) Print Method Thermal Transfer & Direct Thermal 203 mm (8”)/ second 152 mm (6”)/ second 203 mm (8”)/ second...
- Page 11 Model TH240 TH340 TH240T (HC) TH340T (HC) (HC: Healthcare) ▪ USB 2.0 ▪ RS-232 ▪ USB Host I/O & Connectivity ▪ Ethernet LAN port (10/100 Mbps) 802.11 a/b/g/n/ac Wi-Fi with Bluetooth 5.0 combo module (dealer option) ▪ ▪ Bluetooth 5.0 (dealer option) ▪...
- Page 12 Model TH240 TH340 TH240T (HC) TH340T (HC) (HC: Healthcare) 1D Barcodes Code 39, Code 93, Code128UCC, Code128 subsets A.B.C, Codabar, Interleaved 2 of 5, EAN 8, EAN 13, EAN 128, UPC-A, UPC-E, EAN and UPC 2(5) digits add-on, MSI, PLESSEY, POSTNET, China post, ITF14, EAN14, Code 11, TELEPEN, TELEPENN, PLANET, Code 49, Deutsche Post Identcode, Deutsche Post Supported Barcode Leitcode, LOGMARS...
- Page 13 Model TH240 TH340 TH240T (HC) TH340T (HC) (HC: Healthcare) ▪ Quick start guide x1 ▪ USB cable x1 ▪ Power cord x1 Accessories ▪ External universal switching power supply x1 1” Ribbon paper core x1 ▪ ▪ 1” Ribbon spindle x2 (for 300 m ribbon roll) ▪...
-
Page 14: Unpacking And Inspecting
Ribbon spindle x2 (TH240 series only) ▪ Paper core x1 (TH240 series only) ▪ Adapter for 120 mm wide media x2 (TH240 series only) NOTE: If anything is missing or damaged, please contact the customer service department of your reseller or distributor. -
Page 15: Getting To Know Your Printer
3 Getting to Know Your Printer 3.1 Front View TH240 Series with LCD Panel Ribbon access cover Media viewer window Reprint button Pause button Feed button Cover release lever microSD card slot Power switch... - Page 16 TH240 Series with LED Panel Icon LEDs LED indicator Ribbon access cover Media viewer window Reprint button Pause button Feed button Cover release lever microSD card slot Power switch...
- Page 17 DH240 Series Media viewer window Reprint button Pause button Feed button Cover release lever microSD card slot Power switch...
-
Page 18: Inner View
3.2 Inner View TH240 Series Ribbon rewind hub Printhead Ribbon supply hub Media holder Media guide Black mark sensor Front panel cover Media holder lock Media damper Platen roller... - Page 19 DH240 Series Printhead Upper black mark sensor Media holder Platen roller Front panel cover Media holder lock Black mark sensor...
-
Page 20: Rear View
3.3 Rear View TH240 Series External label entrance chute Power jack Reset button USB interface USB host RS-232C interface Ethernet interface... - Page 21 DH240 Series External label entrance chute Power jack Reset button USB interface USB host RS-232C interface Ethernet interface...
-
Page 22: Setting Up The Printer
4 Setting up the Printer 4.1 Connecting the Power Cable and Adapter 1. Place the printer on a flat surface. 2. Make sure the power switch on the right side of the printer is set to OFF. 3. Connect the printer to your computer using the supplied USB cable. 4. -
Page 23: Loading The Media
4.2 Loading the Media TH240 Series Pull the cover release levers to open the printer’s top cover. Slightly pull to separate the media holders. Load the media roll into the printer ensuring that the printable side Release the media holders ensuring that the media is properly of the media faces up. - Page 24 Open the media damper. Pull the media and thread it through under the media damper until the media extends out of the front panel of the printer. Press the media guide adjustment button to move the media Close the media damper. guides until the guides fit the width of the media.
- Page 25 Gently close the top cover until it clicks into place. Perform a media calibration for the media in use. For how to perform a media calibration, please refer to 7.2 Sensor.
- Page 26 DH240 Series Pull the cover release levers to open the printer’s top cover. Slightly pull to separate the media holders. Load the media roll into the printer ensuring that the printable side Rotate the media to make sure that the media is properly secured of the media faces up.
- Page 27 Pull the media until it extends out of the front panel of the printer. Gently close the top cover until it clicks into place. Perform a media calibration for the media in use. For how to perform a media calibration, please refer to 7.2 Sensor. NOTE: The illustration below describes the media path for the DH240 series printers.
-
Page 28: Loading The Ribbon (For Th240 Series Only)
4.3 Loading the Ribbon (for TH240 Series only) Pull the release latches to open the printer’s top cover. Open the ribbon access cover. Orient the core adapter as indicated and then insert the core Push the right side of the paper core onto the right spring-loaded adapter into the supplied rewind paper core. - Page 29 Orient the core adapter as indicated and then insert the core Repeat the procedures described in step 4 to load the ribbon into adapter into the ribbon core. its compartment. NOTE: This step is only applicable to the 1-inch ribbon core. Skip this step if the ribbon features a 0.5-inch core.
- Page 30 Keep rotating the mentioned gear until the ribbon completely completely covers the printhead. covers the printhead and remove any wrinkle from the ribbon. Close the ribbon access cover and top cover. NOTE: The illustration below describes the ribbon path and media path for the TH240 series printers.
-
Page 31: Loading The Media In Peel-Off Mode (Optional)
4.4 Loading the Media in Peel-off Mode (Optional) Open the printer’s top cover. Install the media and perform a media calibration for the media in use. For information about how to install the media and perform the calibration, please refer to 4.2 Loading the Media and 7.2 Sensor. - Page 32 Remove some pieces of label from the release liner. Thread the media through the opening on the peel module. Close the printer’s top cover. Set the print mode to Peeler Mode Close the peel roller. and then print a label to check if the peel module works well. For how to set the print mode to Peeler Mode, please refer to 6.7 Configuring Optional Kits and 7.1.1 TSPL.
-
Page 33: Loading The Media In Cutter Mode (Optional)
4.5 Loading the Media in Cutter Mode (Optional) Open the printer’s top cover and then load the media. For how to Push the release latch as indicated to open the cutter gate. open the printer’s top cover and load the media, please refer to 4.2 Loading the Media. - Page 34 Close the printer’s top cover. Perform the media calibration for the media in use. For information about how to perform the media calibration, please refer to 7.2 Sensor. Set the printer to the Cutter Mode. For information about how to Print a label to check if the cutter module works well.
-
Page 35: Operator Interface
5 Operator Interface Two operator interface options are available on the printers: LED User Interface and LCD User Interface. In addition to the two physical user interfaces, you can also use Web User Interface to control and manage the printers. 5.1 LED User Interface 5.1.1 Control Panel Name... - Page 36 Name Description Indicates the Wi-Fi connection status. Wi-Fi Connection Indicator ON: The wireless connection is active. Please refer to 5.1.2 LED Indicator for detailed information about the LED indicator and its behavior. LED Indicator Reprint Button Reprints the last label. Pause Button Stops the print activities.
- Page 37 5.1.3 Power-on Utilities LED User Interface features a set of utilities which provides quick access to the printer’s mostly used functions. Follow the procedures below to launch the power-on utilities and select the function you need. 1. Turn off the printer. 2.
- Page 38 LED User Interface also provides two shortcuts to the Factory Default and Sensor Calibration function respectively. To run Factory Default: 1. Turn off the printer. 2. Press and hold Feed + Pause and then turn on the printer. When the printer beeps twice, release the two buttons. All printer’s configurations will be reset to factory default.
-
Page 39: Lcd User Interface
5.2 LCD User Interface 5.2.1 LCD Panel Name Description Displays icons to indicate the printer’s status. Refer to 5.2.3 Icon Indicators for more information. Icon Indicators Area Displays the printer’s model name and firmware version. Model Name & Firmware Displays the Ethernet or Wi-Fi IP address when connecting to the Ethernet or Wi-Fi network. Ethernet &... - Page 40 5.2.2 Power-on Utilities LCD User Interface features a set of utilities which provides quick access to the printer’s mostly used functions. Follow the procedures below to launch the power-on utilities and select the function you want to use. 1. Turn off the printer. 2.
- Page 41 Sequence & Function Image Factory Default Black Mark Calibration Gap Calibration Main screen will appear on the display if users do not select any of Ready (Skips AUTO.BAS) the abovementioned functions.
- Page 42 5.2.3 Icon Indicators NOTE: Icon indicators only apply for models shipped with LCD User Interface. Icon Description Indicates that the printer is connected to the wireless network. Indicates that the printer is connected to the Ethernet network. Indicates that the printer is paired with an external device via Bluetooth or the printer is receiving data via Bluetooth.
-
Page 43: Web User Interface
2. Enter the printer’s IP address inside the browser’s address bar and then press “Enter”. NOTE: For how to know the printer’s IP address, you may refer to 6 TSC Console for detailed information or contact your IT department for further assistance. - Page 44 5.3.2 Introduction to Web User Interface Description Description Refer to 5.3.2.1 Configuration for more information. Refer to 5.3.2.3 Function for further information. Opens the visualized control panel. Refer to 5.3.2.4 Refer to 5.3.2.2 Emulation for more information. Visualized Control Interface for further information. Refer to 5.3.2.4 Visualized Control Interface for more Refer to 5.3.2.6 Tool for further information.
- Page 45 5.3.2.1 Configuration Item Description Common Configures the printer using the TSPL command set. Refer to 7.1.1 TSPL for more information. Adjust Adjusts the print and stop location. Refer to 7.1.1 TSPL for more information. Configures the parameters that relate to the media type and sets the media sensor. Print NOTE: For DH240 series, when using the upper black mark sensor, you must shift the bottom black Media...
- Page 46 5.3.2.3 Function Item Description SOTI settings Sets the MQTT server and manages the CA certificate files. Monitors the printhead’s health status. TPH Care Email Sets the SMTP server. SNTP Sets the SNTP server. Configures the SNMP (Simple Network Management Protocol) for the printer. SNMP Web Password Sets the user/administrator name and its corresponding password.
- Page 47 5.3.2.6 Tool Item Description File Manager Manages the files saved in the built-in memory. Communication Tool Sends command sets or instructions to the printer. Updates the printer’s firmware. Update Firmware Clear Browsing Record Clears the browsing record. Switches to the classic user interface. Classic Webpage...
-
Page 48: Tsc Console
6.1 Launching TSC Console Follow the steps below to launch TSC Console: 1. Double click the TSC Console icon on the desktop of your computer to launch TSC Console. After launching TSC Console, the following screen will appear. 2. Select Printers > Add Printers to add the new printer to the TSC Console main page. - Page 49 3. Select the connection based on how the printer is connected to your computer and then select OK to add the printer. NOTE: The image below shows that the printer is connected to a computer via the USB cable. 4. Select and start configuring the printer. NOTE: You may refer to TSC Console Programming Manual for further information.
-
Page 50: Adding Ethernet Interface
Follow the steps below to add Ethernet interface to the TSC Console main page: 1. Add the printer to the TSC Console main page via the USB port or COM port. For how to add the printer to the TSC Console... - Page 51 2. Double click the printer you want to configure. When the Printer Configuration page appear, select the Ethernet tab. Write down the printer’s IP address which is required to add the Ethernet interface. 3. Go to the TSC Console main page. Select Printers > Add Printers.
- Page 52 4. Select Network and then select OK. Enter the printer’s IP address you have just written down in the IP Address field and then select Discover. 5. When the message prompts to inform that the corresponding printer is found, select OK to finish the configuration. You can find the Ethernet interface is displayed on the TSC Console main page.
-
Page 53: Adding Wi-Fi Interface
6.3 Adding Wi-Fi Interface It allows users to add Wi-Fi interface to the TSC Console main page and enables users to control the printer through a wireless network. Follow the steps below to add Wi-Fi interface to the TSC Console main page: Add the printer to the TSC Console main page via the USB port or COM port. - Page 54 When using the WPA-Personal encryption: (1) Enter the network name in the SSID field. (2) Select WPA-Personal in the WLAN Encryption field. (3) Enter the Wi-Fi network password in the Key field. (4) Set DHCP to ON. If DHCP is set to OFF, you need to specify information for the IP Address, Subnet Mask, and Gateway fields.
- Page 55 Initializing Printer’s Wi-Fi Settings to restore the Wi-Fi settings to factory default values and then re-configure the Wi-Fi connection. Remove the interface cable. Go to the TSC Console main page, select Printers > Add Printers and then select Network to add the printer.
- Page 56 Go to the TSC Console main page. Select Functions > Print Test Page to check if you can control the printer via the Wi-Fi connection.
-
Page 57: Initializing Printer's Wi-Fi Settings
6.4 Initializing Printer’s Wi-Fi Settings Go to the TSC Console main page. Select the Functions tab. Select Wi-Fi Default to restore the Wi-Fi settings to factory default values. -
Page 58: Tph Care
Allows users to check if there are defective dots on the printhead. Enables/Disables TPH Care Auto Protection. Follow the steps below to open the TPH Care page: Double click the printer you want to configure on the TSC Console main page to open the Printer Configuration menu. - Page 59 Select the TPH Care tab to enter the TPH Care page. Enable the TPH Care Auto Protection function (Default: OFF). Select Get TPH Care Profile to check the health status of the printhead. If the pattern extends flat roughly, it means the status of the printhead is good. Alternatively, you can check the Unhealthy TPH dot number field.
-
Page 60: Printer's Main Functions
6.6 Printer’s Main Functions The function buttons are located on the left side of the Printer Configuration page. You can use the function buttons to manage and configure the printer. Item Description Calibration Detects the media type and label size. RTC Setup Synchronizes the printer with the real time clock on the computer. -
Page 61: Configuring Optional Kits
To configure the kit: Add the printer to the TSC Console main page via the USB port or COM port. For how to add the printer to the TSC Console main page, please refer to 6.1 Launching TSC Console. -
Page 62: Main Screen
7 Main Screen All setting options for the printer can be divided into 6 sub-menus based on function. It allows users to configure the printer without connecting the printer to a computer. To open the 6 sub-menus, tap the Menu icon on the LCD panel. Icon Name Description... -
Page 63: Setting
7.1 Setting It allows users to configure the printer using the TSPL or ZPL2 command set. NOTE: TSPL indicates TSC printer language and ZPL2 indicates an emulation of Zebra printer language. To configure the printer: 1. Tap Command Set to select the command set you want to use. - Page 64 7.1.1 TSPL The following illustration and table describe the TSPL command set. TSPL Speed Density Direction Print Mode Reprint Mode Offset Shift X Shift Y Reference X Reference Y Code Page Country...
- Page 65 Item Description Default 5 (203 dpi) Speed Sets the print speed. Setting range: 1.5 to 8 ips (203 dpi), 1.5 to 6 ips (300 dpi). 4 (300 dpi) Density Sets the print darkness. Setting range: 0 to 15. Sets the printout direction. Setting options: 0 or 1. Direction When set to 0 When set to 1...
- Page 66 Item Description Default Code Page Specifies the code page which is associated with the supported characters. Country Sets the country code. ATTENTION: If you print using a label design software or other label printing tools, the commands from the software or tool will overwrite the printer’s settings you set through the LCD display panel.
- Page 67 7.1.2 ZPL2 The following illustration and table describe the ZPL2 command set. ZPL2 Darkness Print Speed Tear Off Print Mode Print Width List Fonts List Images List Formats List Setup Control Prefix Format Prefix Delimiter Char Media Power UP Head Close Label Top Left Position Reprint Mode...
- Page 68 Item Description Default Darkness Sets the print darkness. Setting range: 0 to 30. 5 (203 dpi) Print Speed Sets the print speed. Setting range: 1.5 to 8 ips (203 dpi), 1.5 to 6 ips (300 dpi). 4 (300 dpi) Tear Off Specifies the stop position of the media after a label is printed.
- Page 69 Item Description Default Configures the printer to take specific action after closing the printhead. No Motion: The printer will take no action. The sensor values and media position will not be changed. Length: The printer will detect the length of a label and then advance the label to the correct Head Close No Motion position.
-
Page 70: Sensor
7.2 Sensor The setting options in the Sensor menu allows users to calibrate the printer based on what kind of the media they want to use. It is recommended to run the sensor calibration anytime you use a different media. Sensor Auto Calibration Preprint Calibration... - Page 71 Item Description Default If Auto Calibration cannot determine the media type and complete the calibration, it is recommended to use Manual Calibration. After installing the media you want to use, follow the on-screen instructions to complete the calibration. Manual Calibration ...
-
Page 72: Interface
7.3 Interface Interface menu allows users to configure the printer’s I/O interfaces. Interface Serial Ethernet Wi-Fi Bluetooth 7.3.1 Serial The table below describes the configurable items for the printer’s RS-232 interface. Item Description Default Sets Baud Rate for the RS-232 interface. Setting options: 1200 / 2400 / 4800 / 9600 / 19200 / 38400 / Baud Rate 9600 57600 / 115200 bps. - Page 73 7.3.2 Ethernet The table below describes the configurable items for the printer’s Ethernet interface. Item Description Default Network Interface Sets the network interface. Setting options: Ethernet / Wi-Fi. Status Displays information about the Ethernet connection if the printer is connected to a wired network. Select to use a DHCP server or non-DHCP server.
- Page 74 7.3.4 Bluetooth The table below describes the configurable items for the Bluetooth interface. Item Description Default Status Displays information about the Bluetooth status. PS-XXXXXX NOTE: XXXXXX indicates the last Local Name Sets the local name for Bluetooth. six digits of the MAC address. You can find the MAC address in the Status item.
-
Page 75: Advanced
7.4 Advanced The illustration and table below describe the configurable items in the Advanced menu. Advanced Language Printer Information Initialization Vertical Length Adjustment Vertical Percentage Display Brightness Display Orientation Touchscreen Calibration Date & Time Security Ribbon Low Warning Print Head Maintain Key Sound Contact Us... - Page 76 Item Description Default Language Changes the LCD menu language. English Displays printer’s information, such as serial number, printhead mileage, the number Printer Information of printed labels, etc. Initialization Resets the printer to factory default. Vertical Length Adjustment Turns on/off the Vertical Length Adjustment function. Vertical Percentage Adjusts the label length.
-
Page 77: File Manager
7.5 File Manager File Manager allows users to check the remaining space of the printer’s built-in memory and manage or execute the files saved in the printer’s DRAM/Flash memory or micro SD card. File Manager DRAM FLASH CARD Item Description Allows users to manage or execute files saved in the printer’s DRAM. -
Page 78: Diagnostic
7.6 Diagnostic The illustration and table below describe the functions in the Diagnostic menu. Diagnostic Print Config. Dump Mode Print Head Display Sensor Item Description Prints the printer’s configurations. You can use this function to check if there is a defective dot on the Print Config. - Page 79 Item Description original data same data in hexadecimal format Displays the printhead’s temperature and the amount of the defective dots. Print Head Checks the LCD’s health status. Display Sensor Configures the intensity and reading power for the gap and black mark sensor.
-
Page 80: Favorites
7.7 Favorites Favorites provides quick access to the mostly used functions. Follow the steps below to add your mostly used functions into the favorites list: 1. Select and hold the item you want to add into the favorites list. 2. When the Join Favorites screen is displayed, select Yes to add the selected item into the favorites list. To remove items from your favorites list: 1. - Page 81 2. When the Delete Favorites screen is displayed, select Yes to remove the selected item from the favorites list.
-
Page 82: Troubleshooting
8 Troubleshooting 8.1 Common Problems Problem Possible Cause Recommended Solution Plug the power cord in printer and outlet. The power cord is not properly Switch the printer on. Power indicator does not illuminate connected. Turn on the printer. LED turn on (Carriage Open) The printer head is open. - Page 83 Problem Possible Cause Recommended Solution then check the IP address setting again. Please reset the wireless device setting. Select the correct printer port in the driver. Print head’s harness connector is not well connected with printhead. Turn off the printer and plug the connector again.
- Page 84 Problem Possible Cause Recommended Solution Gap/black mark sensor is not set Calibrate the media sensor. properly. Set media size correctly. Make sure label size is set properly. Paper jam Remove the stuck label inside the printer ...
- Page 85 Problem Possible Cause Recommended Solution The platen roller is dirty. Clean the platen roller. Turn off and on the printer to skip the The printer is in Hex Dump mode. dump mode. Irregular printing The RS-232 setting is incorrect. ...
- Page 86 Recommended Solution Calibrate the sensor sensitivity again. Set the correct label size and gap size. Enter LCD menu (or via TSC Console) to fine tune the parameter of Shift Y. If using the software BarTender, please set the vertical offset in the driver.
-
Page 87: Maintenance
9 Maintenance This section provides cleaning and maintenance procedures. Cleaning: Depending on the media used, the printer may accumulate residues (media dust, adhesives, etc.) as a by-product of normal printing. To maintain the best printing quality, you should remove these residues by cleaning the printer periodically. Regularly clean the print head and supply sensors once change a new media to keep the printer at the optimized performance and extend printer life. -
Page 88: Cleaning Supplies
9.1 Cleaning Supplies The following supplies are recommended for cleaning the printer: Cotton swab Lint-free cloth Brush with soft and non-metallic bristles Vacuum cleaner 75% Ethanol used for disinfection 99% Isopropyl alcohol used for cleaning the printhead and platen roller ... -
Page 89: Cleaning Procedures
9.2 Cleaning Procedures Component Method Recommended Cleaning Schedule Power off the printer before cleaning the printhead. Leave the printhead to cool down for at least one minute. Clean the printhead when you load new Printhead Wet a cotton swab with the 99% Isopropyl alcohol and then wipe across the media. -
Page 90: Agency Compliance And Approvals
10 Agency Compliance and Approvals EN 55032: Class B EN 55035 EN IEC 61000-3-2 Class A EN 61000-3-3 EN 300328 (Optional) EN 301893 (Optional) EN 62311 (Optional) EN 301489-1-17 (Optional) EN 62368-1 FCC part 15B, Class B FCC part 15C (Optional) ICES-003, Class B This equipment has been tested and found to comply with the limits for a Class B digital device, pursuant to part 15 of the FCC Rules. - Page 91 This Class B digital apparatus complies with Canadian ICES-003. Cet appareil numérique de la classe B est conform à la norme NMB-003 du Canada. AS/NZS CISPR 32, Class B AS/NZS 4268:2017 (Optional) UL 62368-1 CAN/CSA-C22.2 NO. 62368-1 KS C 9832 KS C 9835 KS X 3124:2020 (Optional) KS X 3126:2020 (Optional)
- Page 92 BS EN 55032: Class B BS EN 55035 BS EN IEC 61000-3-2 BS EN 61000-3-3 NOM-019 LP0002 (Optional) TELEC-T401 (Optional) Japanese radio regulation 2008 45 (E) Dated 28-01-2005 (Optional) 1048 (E) Dated 18-10-2018 IMDA TS SRD (Optional)
- Page 93 เครื ่ อ งโทรคมนาคมและอุ ป กรณ์ น ี ้มี ค วามสอดคล้ อ งตามมาตรฐานหรื อ ข้ อ ก าหนดทางเทคนิ ค ของ กสทช.” “ (Optional) 備註:不同型號可能會有不同認證,一切以產品上的認證標籤為準。 Important safety instructions: Read all of these instructions and keep them for later use. Follow all warnings and instructions on the product. ...
- Page 94 The mains socket shall be installed near the equipment and easily accessible. The unit must be protected against moisture. Ensure the stability when installing the device, Tipping or dropping could cause damage. Make sure to follow the correct power rating and power type indicated on marking label provided by manufacture. ...
- Page 95 Informations de sécurité importantes: Lire attentivement et conserver ces instructions pour un usage ultérieur. Bien respecter les avertissements et instructions sur le produit. Débrancher l'alimentation de l’entrée CA avant de procéder au nettoyage ou en cas de dysfonctionnement. Ne pas utiliser de nettoyant liquide ou d'aérosol.
- Page 96 CAUTION: For equipment with RTC (CR2032) battery or rechargeable battery pack Risk of explosion if battery is replaced by an incorrect type. Dispose of used batteries according to the Instructions as below. DO NOT throw the battery in fire. ...
- Page 97 ATTENTION: (Pour les appareils équipés d’une batterie RTC (CR2032) ou de batteries rechargeables) Risque d’explosion en cas de remplacement de la batterie par une référence non conforme. La batterie usagée : NE DOIT PAS être mise au feu. NE DOIT PAS être mise en court-circuit.
- Page 98 CAUTION: Any changes or modifications not expressly approved by the grantee of this device could void the user's authority to operate the equipment. CE Statement: This equipment complies with EU radiation exposure limits set forth for an uncontrolled environment. This equipment should be installed and operated with minimum distance 20 cm between the radiator and your body.
- Page 99 30mW 5470-5725MHz Hereby, TSC Auto ID Technology Co., Ltd. declares that the radio equipment type [Wi-Fi] IEEE 802.11 a/b/g/n/ac is in compliance with Directive 2014/53/EU. The full text of the EU declaration of conformity is available at the following internet address: http:// www.tscprinters.com...
- Page 100 Canada, Industry Canada (IC) Notices This Class B digital apparatus complies with Canadian ICES-003 and RSS-210. Operation is subject to the following two conditions: (1) this device may not cause interference, and (2) this device must accept any interference, including interference that may cause undesired operation of the device. Radio Frequency (RF) Exposure Information The radiated output power of the Wireless Device is below the Industry Canada (IC) radio frequency exposure limits.
- Page 101 Informations concernant l'exposition aux fréquences radio (RF) La puissance de sortie émise par l’appareil sans fil est inférieure à la limite d'exposition aux fréquences radio de l'Industry Canada (IC). Utilisez l’appareil sans fil de façon à minimiser les contacts humains lors du fonctionnement normal. Ce périphérique a été...
- Page 102 限用物質含有情況標示聲明書 / Declaration of the Presence Condition of the Restricted Substances Marking 設備名稱(Equipment Name):熱轉式/熱感式條碼印表機 型號(Type Designation):TH240 限用物質及其化學符號 (Restricted substances and its chemical symbols) 鉛 Lead 汞 Mercury 鎘 Cadmium 六價鉻 Hexavalent 多溴聯苯 多溴二苯醚 (Pb) (Hg) (Cd) chromium Polybrominated Polybrominated 單元Unit (Cr+6 ) biphenyls diphenyl ethers...
-
Page 103: Revision History
Revision History Date Description Technical Writer Peter Yao 2023/11/15 Official release. - Page 104 www.tscprinters.com...
Need help?
Do you have a question about the TH240 Series and is the answer not in the manual?
Questions and answers