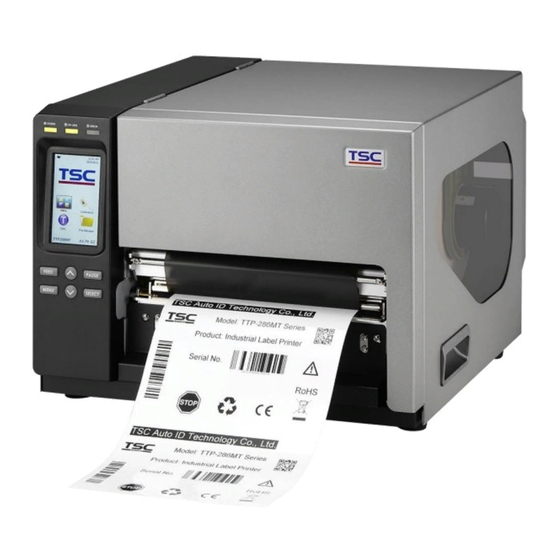
Thermal transfer / direct thermal bar code printer (54 pages)
Summary of Contents for TSC Printronix TTP-286MT Series
Page 1
TTP-286MT Series Thermal Transfer Direct Thermal Industrial Barcode Printers Series Lists: User Manual TTP-286MT / TTP-384MT...
Page 2
All other trademarks are the property of their respective owners. Information in this document is subject to change without notice and does not represent a commitment on the part of TSC Auto ID Technology Co. No part of this manual may be reproduced or transmitted in any form or by any means, for any purpose other than the purchaser’s personal use, without the...
OCR-A and OCR-B fonts. By integrating rich features. This document provides an easy reference for operating the printer. TSC printers include the Windows labeling software for creating your label template. For system integration, the TSPL/TSPL2 printer programming manual or SDKs can be found on TSC website...
1.1 Product Specification 203 dpi 300 dpi Product standard feature models models Thermal transfer/ or direct thermal High quality die-cast aluminum design Metal cover with large clear media view window Transmissive gap sensor (position adjustable from 4”~8”) Reflective black mark sensor position full web adjustable Transmissive ribbon end sensor Ribbon encoder sensor (Support color ribbon) Head open sensor...
Page 8
Fonts and bar codes can be printed in any one of the four directions (0, 90,180, 270 degree) ® Internal Monotype Imaging true type font engine with one CG Triumvirate Bold Condensed scalable font Downloadable fonts from PC to printer memory Bar code, graphics/image printing 1D bar code: Code128 subsets A.B.C, Code128UCC, EAN128, Interleave 2 of 5, Code 39, Code 93, EAN-13, EAN-...
1.2 General Specification General Specifications 440 mm (W) x 336 mm (H) x 514 mm (D) Physical dimensions 17.32” (W) x 13.23” (H) x 19.84” (D) Weight 23.7 kg Internal switching power supply Power Input: AC 100-240V, 3.0A, 50-60Hz Output: DC 24V, 8.33A, 200W Operation: 5 ~ 40˚C (41 ~ 104˚F), 20~85% non-condensing Environmental condition Storage: -40 ~ 60 ˚C (-40 ~ 140˚F), 10~90% non-condensing...
2. Operation Overview 2.1 Unpacking and Inspection This printer has been specially packaged to withstand damage during shipping. Please carefully inspect the packaging and printer upon receiving the bar code printer. Please retain the packaging materials in case you need to reship the printer. Unpacking the printer, the following items are included in the carton.
2.2.2 Interior View Ribbon rewind spindle Ribbon supply spindle Print head pressure adjustment knobs Print head release lever Label roll guards Label supply spindle Media guide bar Black mark sensor Print head Ribbon sensor Gap sensor Platen roller Label guide Fixed screw...
2.2.3 Rear View External label entrance chute Slot-in Wi-Fi module (Option) RS-232C interface Ethernet interface USB interface microSD card slot Centronics interface (Option) Power switch Power cord socket GPIO interface (Option) Note: The interface picture here is for reference only. Please refer to the product specification for the interfaces availability.
2.3.1 LED Indication and Keypads Status Indication Printer power off POWER Printer power on Printer is ready ON-LINE Printer is paused Blinking Printer is downloading data Printer is ready Carriage open or cutter error ERROR Blinking No paper, paper jam or no ribbon Keys Function PAUSE...
3. Setup 3.1 Setting up the printer Place the printer on flat surface. Make sure the printer is power off. Connect the printer to the computer with the provided USB cable. Plug in the power cord. Note: Please switch OFF the printer before plugging in the power cord to printer power jack.
3.2 Loading the Ribbon Install the ribbon and Lift the handle to paper core onto the ribbon open the printer supply spindle and ribbon right side cover. rewind spindle. Make sure Push the print head the ribbon & paper core release lever to are set at the center of the open the print head...
Page 21
Close the print Ribbon Loading Path head mechanism making sure the latches are engaged securely.
3.3 Loading the Media Lift the handle to open the printer right side cover. Push the print head release lever to open the print head mechanism. Remove one label roll guard from the label spindle. Make sure the width of the label. (You can refer to the ruler on the spindles.)
Page 23
Place media roll on label supply spindle. Replace label roll guard. Make sure the label roll guard position of each sides are the same as the length of the label. Please check the outside edge scales are both close to the label width. Pull label roll leading edge forward through the media guide bar, media sensor (green) and place the label leading edge onto the platen roller.
Page 24
Loose the fixed screw to adjust the label guide to fit label width. Screw the fixed screw to lock the label guide. Close the print head mechanism. Make sure the latches are engaged securely. Using the front display panel, set media sensor type and calibrate the selected sensor.
3.4 Loading the Media in Cutter Mode (Option) Lift the handle to open the printer right side cover. Push the print head release lever to open the print head mechanism.Please refer to section 3.3 to load media. Lead the media through the cutter paper opening. Adjust the label guide to fit the width of the label.
4. Knob Adjustment There are conditions that will need to adjust the print head pressure. Print with thick media If media thickness is larger than 0.19 mm, the larger pressure is required to get good quality printout. Ribbon wrinkle presented on the media There are 5 levels of pressure for adjustment.
4.1 Mechanism Fine Adjustment to Avoid Ribbon Wrinkles Ribbon wrinkle is related to the media width, thickness, print head pressure balance, ribbon film characteristics, print darkness setting…etc. In case the ribbon wrinkle happens, please follow the instructions below to adjust the printer parts. Left print head pressure adjustment knobs Right print head...
Page 28
Wrinkle happens from label lower right to upper left direction Right knobs Feed Direction Decrease the left side print head pressure adjustment knobs setting 1 level per each adjustment then print the label again to check if wrinkle is gone. ...
Page 29
Wrinkles happen from label lower left to upper right direction Left knobs Feed Direction Decrease the right side print head pressure adjustment knobs setting 1 level per each adjustment then print the label again to check if wrinkle is gone. ...
5. TSC Console TSC Console is a management tool combining the Printer Management, Diagnostic Tool, CommTool and Printer Webpage settings, which enables you to adjust printer’s settings/status; change printers’ settings; download graphics, deploy fonts, graphics, label templates or upgrade the firmware to the group of printers, and send additional commands to printers at the same time ※...
Page 31
Select the current interface of the printer. The printer will be added to TSC Console’s interface. Select the printer and set the settings. For more information, please refer to TSC Console User Manual.
5.2 Setup Ethernet Interface Use USB or COM to establish the interface on TSC Console. Double click to enter the Printer Configuration Page > Click Ethernet tab > Check the IP Address.
Page 33
Choose Network > Key in the IP Address > Click Discover to establish the Ehternet interface. The notification will pop up > Click OK to close the window > The Ethernert interface will be shown on TSC Console.
5.3 Printer Function Printer Function could be found in Printer Configuration. “Printer Function” will be shown on the left side of the window. Functions Description Calibrate Sensor Detect media types and the size of the label RTC Setup Synchronize printer with Real Time Clock on PC Factory Default Initialize the printer to default settings Reset Printer...
6. LCD Menu Function 6.1 Enter the Menu By touch display: Tap the “Menu” icon on LCD to enter the main menu. By Keys: Press the “MENU” button and press the “SELECT” button to enter the main menu.
6.2 Menu Overview There are 8 categories on the menu. Users can easily set the settings of the printer without connecting the computer. Please refer to following sections for more details. File Manager : To check and manage printer’s TSPL : To set up the printer settings for TSPL memory storage.
6.3 TSPL TSPL category can set up the printer settings for TSPL. Speed Density None Direction Batch Mode Print mode Peeler Mode Offset Cutter Mode TSPL Shift X Cutter Batch Shift Y Reference X Reference Y Code Page Country...
Page 38
Item Description Default Speed Set the print speed. Setting range: 2~14 for 203dpi; 2~12 for 300dpi; 1~6 for 600dpi Density Set the printing darkness. Set the printout direction. Setting Value: 0 and 1. Direction Direction 0: Direction 1: Set the print mode. There are 5 modes in total: None: Next label top of form is aligned to the print head burn line location.
6.4 ZPL2 Darkness Print Speed This “ZPL2” category can set up the printer settings for ZPL2. Tear Off Tear Off Print Mode Peeler Off Print Width Cutter List Fonts List Images List Formats List Setup Control Prefix Format Prefix Feed Delimiter Char Menu ZPL2...
Page 40
Item Description Default Density Set the printing darkness. Available setting range: 0 to 30. Set the print speed. Available setting range is 2~18 for 203dpi and 2~14 for 300dpi; 1.5~6 Print Speed for 300dpi.. Tear Off Adjust media stop location. Available setting value range: -120~120 dots. 0 dot Set the print mode.
Page 41
Set the action of the media when turning on the printer. Feed: Printer will advance one label. Media Power Up Calibration: Printer will make calibration. No Motion Length: Printer determine length and feed label. No Motion: Printer will not move media. Set the action of the media when closing the print head.
6.5 Sensor This option is used to calibrate the selected sensor. We recommend calibrate the sensor before printing when changing the media. Black Mark Auto Calibration Continuous Preprint Manual Calibration Standard Black Mark Menu Sensor Auto Continuous Threshold Detect Fixed Maximum Length Advanced Item...
6.6.1 Serial Comm Serial comm can set the printer RS-232 settings. 1200 bps 2400 bps 4800 bps 9600 bps Baud Rate 19200 bps 38400 bps 57600 bps 115200 bps None Menu Interface Serial Parity Even Data Bits Stop Bit(s) Item Description Default Baud Rate...
6.6.2 Ehernet Ethernet configures internal Ethernet configuration and checks the printer’s Ethernet module status, and reset the Ethernet module. Status Menu Interface Ethernet Config Item Description Default Status Check the Ethernet IP address and MAC setting status. DHCP: On or OFF the DHCP (Dynamic Host Configuration Protocol) network protocol. Config.
6.7 File Manager File Manager is used to check the printer available memory, show the files list, delete the files or run the files that saved in the printer DRAM/Flash/Card memory. DRAM Menu File Manager FLASH...
6.8 Diagnostic Print Config. Dump Mode Menu Diagnostic Print Head Diag Gap Display Diag Black Mark Sensor Diag Ribbon End Diag Media Item Description Print current printer configuration to the label. The configuration printout contains print head test pattern, which is useful Print Config.
6.9 Advanced Display Brightness Touchscreen Calibration Menu Advanced Date & Time Cutter Type Language Item Description Display Brightness This item is used to setup the brightness for display. Touchscreen Calibration This item is used to calibrate the center of the cross for best result for touchscreen. Date &...
6.10 Service This feature is used to restore printer settings to defaults and checking information for printer. Initialization Menu Service Printer Information Contact us Item Description Initialization This feature is used to restore printer settings to defaults. Printer Information This feature is used to check printer serial number, printed mileage(m), labels(pcs.) and cutting counter. Contact us This feature is used to check the contact information for tech support service...
7. TroubleShooting Problem Possible Cause Recovery Procedure Plug the power cord in printer and outlet. The power cord is not properly connected. Power indicator does not illuminate The power switch is closed. Switch the printer on. ...
Page 51
mechanism. If peeler module is installed, please remove the label. If there is no peeler module in front of the printer, please Peel function is enabled. Take Label switch off the printer and install it. Check if the connector is plugging correctly. Can’t downloading the file to ...
Page 52
Sensor sensitivity is not set properly. Calibrate the sensor by Auto Gap or Manual Gap options. The media sensor is covered with dust. Clear the GAP/Black mark sensor by blower. Printhead pressure is incorrect. Please refer to the chapter 4.
8. Maintenance This session presents the clean tools and methods to maintain the printer. For Cleaning Depending on the media used, the printer may accumulate residues (media dust, adhesives, etc.) as a by-product of normal printing. To maintain the best printing quality, you should remove these residues by cleaning the printer periodically. Regularly clean the print head and supply sensors once change a new media to keep the printer at the optimized performance and extend printer life.
9. Angency Complicance and Approvals EN 55022 (Class A) EN 55024 EN 61000-3-2 / EN 61000-3-3 EN 60950-1 This is a class A product. In a domestic environment this product may cause radio interference in which case the user may be required to take adequate measures. FCC CFR Title 47 Part 15B, Class A ICES-003, Class A This equipment has been tested and found to comply with the limits for a Class A digital device, pursuant to...
Page 56
EN 60950-1 Wichtige Sicherheits-Hinweise 1. Bitte lesen Sie diese Hinweis sorgfältig durch. 2. Heben Sie diese Anleitung fűr den späteren Gebrauch auf. 3. Vor jedem Reinigen ist das Gerät vom Stromentz zu trennen. Verwenden Sie keine Flüssig-oder Aerosolreiniger. Am besten eignet sich ein angefeuchtetes Tuch zur Reinigung.
Page 57
CAUTION 1. HAZARDOUS MOVING PARTS IN CUTTER MODULE. KEEP FINGER AND OTHER BODY PARTS AWAY. 2. THE MAIN BOARD INCLUDES REAL TIME CLOCK FEATURE HAS LITHIUM BATTERY CR2032 INSTALLED. RISK OF EXPLOSION IF BATTERY IS REPLACED BY AN INCORRECT TYPE. 3.
Need help?
Do you have a question about the Printronix TTP-286MT Series and is the answer not in the manual?
Questions and answers