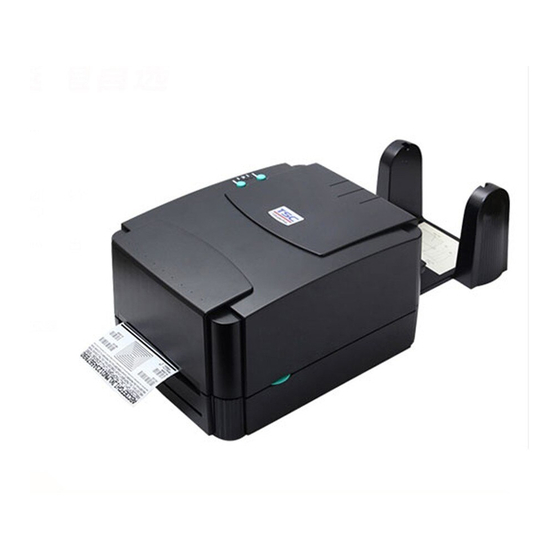
TSC TTP-243 Pro Series User Manual
Thermal transfer / direct thermal bar code printer
Hide thumbs
Also See for TTP-243 Pro Series:
- User manual (42 pages) ,
- Service manual (41 pages) ,
- Programming manual (434 pages)

Related Manuals for TSC TTP-243 Pro Series


Summary of Contents for TSC TTP-243 Pro Series
- Page 1 TTP-243 Pro/ 243E Pro/ 342 Pro Series TTP-243 Plus/ 243E Plus/ 342 Plus Series THERMAL TRANSFER / DIRECT THERMAL BAR CODE PRINTER USER’S MANUAL...
-
Page 3: Table Of Contents
CONTENTS PRODUCT INTRODUCTION ............2 1.1 Compliances ..................... 2 1.2 Effective Print Area ................... 3 1.3 Available Bar Codes ..................3 1.4 Various Sensors ....................4 1.5 Supply Specifications ..................6 1.5.1 Types of Paper ..................6 1.5.2 Specifications .................... 6 1.5.3 Ribbon Sizes and Shapes ................. -
Page 4: Product Introduction
This programming capability provides the greatest efficiency in label printing. TSC reserves the right to make changes in the product, the programs, and their availability at any time and without notice. 1.1 Compliances CE Class A, FCC Class A, C-Tick Class A, TÜ... -
Page 5: Effective Print Area
1.2 Effective Print Area 203 DPI 300 DPI Label/Ticket Print Length 12 mm~2286 mm 12 mm~1016 mm Effective Print Length 10 mm~2284 mm 10 mm~1014 mm Label/Ticket Print Width 25 mm~104 mm Effective Print Width 23 mm~102 mm No Print Area 1 mm 1.3 Available Bar Codes 1D bar code... -
Page 6: Various Sensors
1.4 Various Sensors Feed Gap Sensor The feed gap sensor detects a label gap to locate the starting print position of the next label. The sensor is mounted 4 mm off the center line of the main mechanism. In case of Label Black Mark Sensor The black mark sensor locates the position of label by emitting infrared rays onto the black mark at the back of the ticket. - Page 7 Ribbon End Sensor The sensor detects the end portion of the ribbon. The ribbon end must be transparent. Label End Sensor The sensor detects the end portion of the label. Peel off Sensor The sensor detects the backing paper of a label. Ribbon encoder The encoder is used to detect if the ribbon is broken.
-
Page 8: Supply Specifications
1.5 Supply Specifications 1.5.1 Types of Paper Two types of media are available: label and ticket. There are two types of sensors for paper: gap sensor and black mark sensor. Label and ticket can be further classified into direct thermal type or thermal transfer type. -
Page 10: Ribbon Sizes And Shapes
1.5.3 Ribbon Sizes and Shapes Item Specifications Ribbon shape Spool type Max. 110mm Ribbon width Min. 40mm Max. 110mm Ribbon winding width Min. 40mm Leading tape Polyester film, 3355mm long End tape Polyester film (transparent), 2505mm long 67mm Max. ribbon OD. Winding method Ink surface to be wound outside Note: The maximum length of ribbon depends on its thickness and core outside diameter. -
Page 11: Getting Started
2. GETTING STARTED 2.1 Unpacking and Inspection The printer has been specially packaged to withstand damage in the shipping process. However, for fear that unexpected damage might occur, upon receiving the bar code printer, carefully inspect the package and the device. In case of evident damage, contact the carrier directly to specify the nature and extent of the damage. -
Page 12: Printer Parts
2.3 Printer Parts * Top front view 1. Cover Release Button 2. PWR., ON-LINE and ERR. Indicators 3. PAUSE Button 4. FEED Button 5. Label Dispense Opening 6. Liner Opening (For use with peel-off function/ Not available for 243E series printer) - Page 13 * Interior view 1. Printer Cover (In open position) 2. Label Supply Roll Spindle 3. Fixing Tabs 4. Ribbon Mechanism 5. Ribbon Supply Spindle 6. Ribbon Rewind Spindle 7. Printer Carriage Release Lever 8. Liner Opening 9. Detachable Front Panel 10.
-
Page 14: Rear View
* Rear view TTP-243 Plus/ 243E Plus/ 342 Plus series 1. Power On/Off Switch 2. Power Supply Connector 3. RS-232C DB-9 Interface Connector 4. Centronics Interface Connector 5. Label Insert Opening (For use with external labels) TTP-243 Pro/243E Pro/ 342 Pro series 1. -
Page 15: External Label Roll Mount (Option For 243E Series Printer)
2.4 External Label Roll Mount (Option for 243E series printer) External label roll mount... -
Page 16: Buttons And Indicators
2.5 Buttons and Indicators PWR. (POWER) Indicator The green PWR. indicator illuminates when the POWER switch is turned on. ON-LINE Indicator The green ON-LINE indicator illuminates when the printer is ready to print. When PAUSE button is pressed, the ON-LINE indicator flashes. ERR. -
Page 17: Set Up
3. SET UP 3.1 Setting up the Printer 1. Place the printer on a flat, secure surface. 2. Make sure the POWER switch is off. 3. Connect the printer to the computer mainframe with the provided RS-232C or Centronics cable. 4. -
Page 18: Loading Label And Tag Stock
3.2 Loading Label and Tag Stock 1. Open the printer cover. 2. Disengage the printer carriage by pulling the printer carriage release lever on the left side of the platen. 3. Slide the label supply roll spindle through the core of a label roll and attach the fixing tabs onto the spindle. - Page 19 7. Wind the label roll until it becomes adequately taut. 8. Close the printer cover and press the FEED button three or four times until the green ON-LINE indicator illuminates. 9. When the printer is out of ribbon or media, the ON-LINE LED will not illuminate and the ERR.
- Page 20 Feed labels through adjustable label guide 1. Printer Carriage Release Lever 2. Platen 3. Label Media 4. Adjustable Label Guide...
-
Page 21: Peel-Off Function (Not Available For 243E Series Printer)
3.3 Peel-off Function (Not available for 243E series printer) To employ the peel-off function, load the label stock according to the following steps. 1. Remove the front panel. 2. Remove the foremost one or two labels from the liner. Label Liner 3 .Pull the printer carriage release lever to feed the liner between the platen and the white peel-off roller. - Page 22 Note: It is recommended that the print speed be set at 2 inches (1.5 inches for TTP-342 series) per second when using the peel-off function of the printer. Peel-off function is not available for TTP-243E series printer.
- Page 23 Setting up printer for peel-off function 1. Printer Carriage Release Lever 2. Platen 3. Peel-off Roller 4. Liner Printer ready for peel-off function 1. Printer Carriage Release Lever 2. Printer Front Panel 3. Liner Opening 4. Liner 5. Label...
-
Page 24: Ribbon Loading Instructions
3.4 Ribbon Loading Instructions 1. Place an empty paper core on the ribbon rewind spindle. 2. Insert the left side first. Mount the ribbon rewind paper core on the front hubs. 3. Please be noted that the bigger hub side with 4 ribs must be installed toward the right side of ribbon mechanism. - Page 25 6. Disengage the printer carriage by pulling the carriage release lever upwards. 7. Following the direction of the RIBBON label, pull the transparent ribbon leader to the front from under the ribbon mechanism. 8. Attach the ribbon leader to the empty paper core on the ribbon rewind spindle (with a tape).
- Page 26 10. Engage the printer carriage. 11. Close the printer cover and press the FEED button until the green ON-LINE LED illuminates. Note: Please install ribbon and media and close print head mechanism prior to turn on power. Printer will determine direct thermal or thermal transfer mode automatically while turning on printer power.
- Page 27 Placement of ribbon supply roll 1. Printer Carriage Release Lever 2. Ribbon Supply Spindle 3. Ribbon Rewind Spindle 4. Thermal Transfer Ribbon Installation of label stock and thermal transfer ribbon...
-
Page 28: Install External Label Roll Mount (Not Available For 243E Series Printer)
3.5 Install External Label Roll Mount (Not available for 243E series printer) Installation of external label roll mount 1. External Label Roll Mount 2. Label Supply Roll Spindle 3. External Label Feed Opening 4. Fixing Tabs... -
Page 29: Install Memory Module (Option)
3.6 Install Memory Module (Option) 1. Power off the printer. 2. Open the memory card cover. 3. Insert the memory module(Plus series) or Plus the SD memory card module(Pro series) on the main board. TTP-243 Plus/243E Plus/ 342 Plus series TTP-243 Pro/243E Pro/ 342 Pro Series 4. - Page 30 V2.0 SDHC CLASS 6 4 GB SanDisk, Transcend, Panasonic V1.0, V1.1 microSD 128 MB Transcend, Panasonic V1.0, V1.1 microSD 256 MB Transcend, Panasonic V1.0, V1.1 microSD 512 MB Panasonic V1.0, V1.1 microSD 1 GB Transcend, Panasonic V2.0 SDHC CLASS 4 microSD 4 GB Panasonic V2.0 SDHC CLASS 6 microSD 4 GB Transcend...
-
Page 31: Self Test
3.7 Self Test To initiate the self-test mode, depress the FEED button while turning on the printer power. The printer will calibrate the label length. If the label gap is not detected within 10", the printer stops feeding labels and the media is treated as continuous paper. -
Page 32: Dump Mode
3.8 Dump Mode After the self-test, the printer enters the dump mode. In this mode, any characters sent from the host computer will be printed in two columns, as shown. The characters received will be shown in the first column, and their corresponding hexadecimal values, in the second. -
Page 33: Using Ttp-243 Series/243E Series/342 Series
4. USING TTP-243 series/243E series/342 series 4.1 Power-on Utilities There are three power-on utilities to set up and test printer hardware. These utilities are activated by pressing the FEED or PAUSE button and turning on the printer power simultaneously. The utilities are listed as below: 1. -
Page 34: Printer Initialization
4.1.3 Printer Initialization Printer initialization clears all downloaded files resident in flash memory, and sets printer parameters to default values. Parameter Default Value Speed 200 dpi: 50.8 mm/sec (2 ips) 300 dpi: 38.1 mm/sec (1.5 ips) Density Label Width 4"(101.6 mm) Label Height 4"(101.6 mm) Sensor Type... -
Page 35: Troubleshooting Guide
4.2 Troubleshooting Guide The following guide lists some of the most common problems that may be encountered when operating the bar code printer. If the printer still does not function after all suggested solutions have been invoked, please contact the Customer Service Department of your purchased reseller or distributor for assistance. - Page 36 then it's ribbon sensor problem. Please check the following items. (1) Is outside wound ribbon is used with this printer? (2) Is ribbon threaded correctly in the mechanism? (3) Is paper core installed on the ribbon take up spindle? 2. Calibrate the sensitivity of gap sensor. Continuous feeding when printing 1.
-
Page 37: Update History
Update History Date Content Editor 2010/10/12 Add section 1.2~1.5 Camille 2010/10/13 Modify section 1.2 & 1.3 Camille 2010/11/22 Modify section 1.1 Camille 2011/1/25 Modify TSC address Camille... - Page 39 9F., No.95, Minquan Rd., Xindian Dist., No.35, Sec. 2, Ligong 1st Rd., Wujie Township, New Taipei City 23141, Taiwan (R.O.C.) Yilan County 26841, Taiwan (R.O.C.) TEL: +886-2-2218-6789 TEL: +886-3-990-6677 FAX: +886-2-2218-5678 FAX: +886-3-990-5577 Web site: www.tscprinters.com E-mail: printer_sales@tscprinters.com TSC Auto ID Technology Co., Ltd. tech_support@tscprinters.com...
Need help?
Do you have a question about the TTP-243 Pro Series and is the answer not in the manual?
Questions and answers