
Related Manuals for TSC TTP-244 Pro Series


Summary of Contents for TSC TTP-244 Pro Series
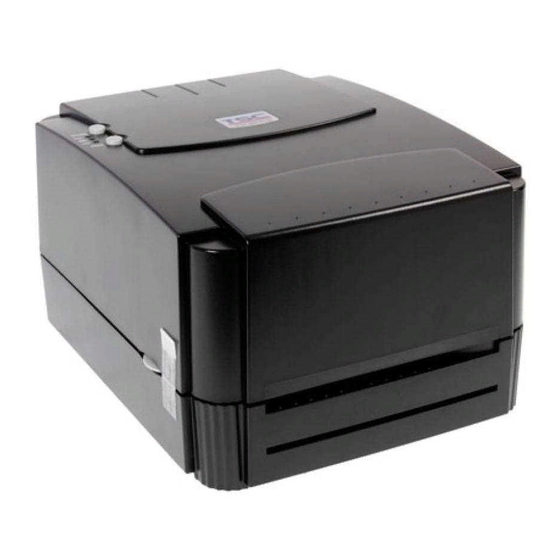
- Page 1 TTP-244 Pro Series Thermal Transfer Direct Thermal Desktop Barcode Printers Series Lists: User Manual TTP-244 Pro...
- Page 2 All other trademarks are the property of their respective owners. Information in this document is subject to change without notice and does not represent a commitment on the part of TSC Auto ID Technology Co. No part of this manual may be reproduced or transmitted in any form or by any means, for any purpose other than the purchaser’s personal use, without the...
-
Page 3: Table Of Contents
Table of Contents 1. Introduction ........................................1 1.1 Product Specification ....................................2 1.1.1 Printer Optional Features ..................................3 1.2 General Specification ....................................3 1.3 Print Specification ......................................4 1.4 Ribbon Specification ....................................4 1.5 Media Specification ......................................6 1.6 Various Sensor ......................................7 2. Operation Overview ......................................9 2.1 Unpacking and Inspection ....................................9 2.2 Printer Overview ...................................... - Page 4 4.1 LED Indication ......................................19 4.2 Regular Button Function .................................... 20 4.3 Power-on Utilities ....................................... 21 5. TSC Console ........................................25 5.1 Start TSC Console ..................................... 25 5.2 Printer Function ......................................27 5.3 Setting Post-Print Action .................................... 28 6. TroubleShooting ......................................29 7.
-
Page 5: Introduction
This document provides an easy reference for operating this printer. TSC printers include the Windows labeling software for creating your label template. For system integration, the TSPL/TSPL2 printer programming manual or SDKs can be found on TSC website at: https://www.tscprinters.com. -
Page 6: Product Specification
1.1 Product Specification Product standard feature Thermal transfer or direct thermal printing Black mark reflective sensor Gap transmissive sensor Ribbon end sensor 2 buttons 3 LED for printer status (Power, Error, On-line) 32-bit RISC CPU USB 2.0 (full speed) & RS-232 interface 8 MB SDRAM memory 4 MB FLASH memory ®... -
Page 7: Printer Optional Features
1.1.1 Printer Optional Features The printer offers the following optional features. Product option feature User option Factory option Centronics parallel & RS-232 serial interfaces or Centronics parallel & USB serial interfaces Bluetooth module (serial interface) 802.11 b/g/n wireless module (serial interface) External roll mount, media OD. -
Page 8: Print Specification
1.3 Print Specification Print Specifications Print head resolution 203 dots/inch (8 dots/mm) (dots per inch/mm) Printing method Thermal transfer or direct thermal Dot size 0.125 x 0.125 mm (width x length) (1 mm = 8 dots) Max.print speed 5 ips (127 mm/sec) Max. - Page 9 The formula below defines the correlation between ribbon roll length and ribbon core diameter. , where L = Ribbon length D = Max. roll diameter d = Ribbon core outside diameter t = Ribbon thickness...
-
Page 10: Media Specification
1.5 Media Specification Media Specifications Label roll capacity 110 mm (4.33”) OD 25.4 ~ 76.2 mm (1” ~ 3”) Media core diameter Media type Continuous, die-cut, black mark, External fan-fold, notched Media wound type Outside wound 25.4 ~ 112 mm (1.0” ~ 4.4”) Media width Media thickness 0.06 ~ 0.19 mm (2.36 ~ 7.48 mil) -
Page 11: Various Sensor
1.6 Various Sensor Gap Sensor The gap sensor detects a label gap to locate the top of form of the next label. The sensor is mounted 4 mm off the center line of the main mechanism. Black Mark Sensor The black mark sensor locates the position of label by emitting infrared rays onto the black mark at the back of the ticket. The sensor is mounted 5.75 mm off the center line of the mechanism. - Page 12 In case of Ticket The default sensor position is (1) as shown on the figure below. To change to the (2) position, the customer should notify the manufacturer in advance. There can be only one position for the sensor. Ribbon End Sensor The sensor detects the end portion of the ribbon.
-
Page 13: Operation Overview
2. Operation Overview 2.1 Unpacking and Inspection This printer has been specially packaged to withstand damage during shipping. Please carefully inspect the packaging and printer upon receiving the bar code printer. Please retain the packaging materials in case you need to reship the printer. ... -
Page 14: Printer Overview
2.2 Printer Overview 2.2.1 Front View PAUSE button PWR., ON-LINE and ERR. indicators FEED button Cover release button Label dispense opening... -
Page 15: Interior View
2.2.2 Interior View Label supply roll spindle Fixing tabs Ribbon mechanism Ribbon rewind spindle Printer cover (in open position) PAUSE button PWR., ON-LINE, ERR. indicators FEED button Ribbon supply spindle Printer carriage release lever Media sensor Adjustable label guide Platen roller... -
Page 16: Rear View
2.2.3 Rear View Power on/off switch Power supply DC jacket RS-232C interface Label insert opening (For use with external media) USB interface Centronics interface (Factory option) -
Page 17: Setup
3. Setup 3.1 Setting up the Printer Open the printer top cover. Place the printer on a flat surface. Make sure the POWER switch is OFF. Connect the printer to the computer with RS-232C or USB cable. Plug the power cord into the power jacket at the rear of the printer, and then plug the power cord into a properly grounded receptacle. -
Page 18: Loading The Ribbon
3.2 Loading the Ribbon Place paper core on the ribbon rewind spindle. Insert the left side first. Mount the ribbon rewind paper core on the front hubs. Please be noted that the bigger hub side with 4 ribs must be installed toward the right side of ribbon mechanism. - Page 19 Disengage the printer carriage by pulling the carriage release lever forwards. Following the direction of the RIBBON label, pull the transparent ribbon leader to the front from under the ribbon mechanism. Attach the ribbon leader to the empty paper core on the ribbon rewind spindle (with a tape).
-
Page 20: Loading The Media
3.3 Loading the Media Open the printer cover then disengage the printer carriage. Place the label roll into the label roll mount/ or external label roll mount. Feed the label under the carriage and over the platen. External Label Roll Mount (Option) - Page 21 Adjust the label guide to fit the width of the media. Engage the printer carriage. Wind the label roll until it becomes adequately taut. Close the printer cover and press the FEED button three or four times until the green ON-LINE indicator illuminates.
-
Page 22: Install Sd Memory Card (Option)
3.4 Install SD Memory Card (Option) Open the memory card Make sure the direction of cover. the memory card is correct Close the print head Plug in the SD memory mechanism as indicated. card module on the main board. -
Page 23: Led And Button Functions
4. LED and Button Functions 4.1 LED Indication Indication PWR. (POWER) Indicator The green PWR. indicator illuminates when the POWER switch is turned on. The green ON-LINE indicator illuminates when the printer is ready to print. When PAUSE button ON-LINE Indicator is pressed, the ON-LINE indicator flashes. -
Page 24: Regular Button Function
4.2 Regular Button Function Function Buttons The PAUSE button allows the user to stop or continue a print job. By pressing the PAUSE button: (1) the printer stops printing after printing label (2) the PAUSE LED flashes PAUSE Button (3) the printer will hold all data in memory. This allows for trouble-free replacement of label stock and thermal transfer ribbon. -
Page 25: Power-On Utilities
4.3 Power-on Utilities There are three power-on utilities to set up and test hardware. These utilities are activated by pressing the FEED or PAUSE button and turning on the printer power simultaneously. The utilities are listed as below: Self-test Gap sensor calibration Printer initialization... - Page 26 Self Test and Dump Mode This utility is used to use slef test function to see the setting of the printer. Please follow below steps to activate the function: Install the label first > Press the FEED button>Turn on the printer power >The printer will performs the following items: Calibrate label pitch Print out thermal print head check pattern Print the internal settings...
- Page 27 Gap Sensor Calibration Utility This utility is used to calibrate the sensitivity of gap sensor. Please follow the steps below to calibrate gap sensor: Turn off the printer power > install blank labels > Hold the PAUSE button > Turn on printer power. Release PAUSE button when printer feeds labels >...
- Page 28 Printer Initialization Printer initialization sets printer parameters to default values. And it will not clear downloaded files resident in flash memory. Please follow the steps below to initialize the printer: Turn off the printer power > Hold down the PAUSE FEED buttons >...
-
Page 29: Tsc Console
5. TSC Console TSC Console is a management tool combining the Printer Management, Diagnostic Tool, CommTool and Printer Webpage settings, which enables you to adjust printer’s settings/status; change printers’ settings; download graphics, deploy fonts, graphics, label templates or upgrade the firmware to the group of printers, and send additional commands to printers at the same time ※... - Page 30 Select the current interface of the printer. The printer will be added to TSC Console’s interface. Select the printer and set the settings. For more information, please refer to TSC Console User Manual.
-
Page 31: Printer Function
5.2 Printer Function Printer Function could be found in Printer Configuration. “Printer Function” will be shown on the left side of the window. Functions Description Calibrate Sensor Detect media types and the size of the label RTC Setup Synchronize printer with Real Time Clock on PC Factory Default Initialize the printer to default settings Reset Printer... -
Page 32: Setting Post-Print Action
When the printer is equipped with other opton kits, ex: cutter, peeler, rewinder, please select the mode after finishing the calibration. Follow below procedure to set the post action for the printing: Refer Chp 5.1 to connect the printer with TSC Console > Double click the printer >... -
Page 33: Troubleshooting
6. TroubleShooting The following guide lists the most common problems that may be encountered when operating this bar code printer. If the printer still does not function after all suggested solutions have been invoked, please contact the Customer Service Department of your purchased reseller or distributor for assistance. - Page 34 Please check the following items. Is outside wound ribbon is used with this printer? Is ribbon threaded correctly in the mechanism? Is paper core installed on the ribbon take up spindle? 2. Calibrate the sensitivity of gap sensor. 1.
-
Page 35: Maintenance
7. Maintenance This session presents the clean tools and methods to maintain the printer. For Cleaning Depending on the media used, the printer may accumulate residues (media dust, adhesives, etc.) as a by-product of normal printing. To maintain the best printing quality, you should remove these residues by cleaning the printer periodically. Regularly clean the print head and supply sensors once change a new media to keep the printer at the optimized performance and extend printer life. - Page 36 Cleaning Tools Cotton swab Lint-free cloth Brush with soft non-metallic bristles Vacuum cleaner 75% Ethanol (for disinfecting) 99% Isopropyl alcohol (for printhead and platen roller cleaning) Genuine printhead cleaning pen Mild detergent (without chlorine) Cleaning Process: Printer Part Method...
-
Page 37: Angency Compliance And Approvals
8. Angency Compliance and Approvals EN 55032, Class A EN 55024 EN 60950-1; EN 61000-3-2; EN 61000-3-3 This is a class A product. In a domestic environment this product may cause radio interference in which case the user may be required to take adequate measures. FCC part 15B, Class A ICES-003, Class A This equipment has been tested and found to comply with the limits for a Class A digital device, pursuant to... - Page 38 GB 4943.1 GB 9254, Class A GB 17625.1 此为 A 级产品,在生活环境中,该产品可能会造成无线电干扰, 在这种情况下,可能需要用户对干扰采取切实可行的措施。 EN 60950-1 IS 13252(Part 1)/ IEC 60950-1 TP TC 004/2011 TP TC 020/2011 Note: There may have certification differences in the series models, please refer to product label for accuracy. Important safety instructions: 1.
- Page 39 Hazardous moving parts, keep fingers and other body parts away. CAUTION: For equipment with RTC (CR2032) battery or rechargeable battery pack Risk of explosion if battery is replaced by an incorrect type. Dispose of used batteries according to the Instructions as below. 1.
-
Page 40: Revise History
9. Revise History Date Content Editor...
Need help?
Do you have a question about the TTP-244 Pro Series and is the answer not in the manual?
Questions and answers