Axon Fleet 3 Installation Manual
Hide thumbs
Also See for Fleet 3:
- User manual ,
- Installation & user manual (28 pages) ,
- User manual (103 pages)
Table of Contents
Advertisement
Advertisement
Table of Contents

Related Manuals for Axon Fleet 3


Summary of Contents for Axon Fleet 3
- Page 1 Axon Fleet 3 Installation Guide Document Revision: B January 2023...
- Page 2 AXON, Axon Body 2, Axon Body 3, Axon Device Manager, Axon Evidence, Axon Fleet, Axon Flex 2, and Axon Signal are trademarks of Axon Enterprise, Inc., some of which are registered in the US and other countries. For more information, visit www.axon.com/legal.
-
Page 3: Table Of Contents
Cradlepoint Package ............................ 8 Airgain Antenna & Router Compatibility ....................9 Axon Professional Services Package ......................10 Wiring Information ............................11 Power and Signal Harness and Axon Signal Vehicle Fleet 3 Harness ............12 Electrical Requirements ..........................12 Battery Power ............................12 Electrical Ground ............................14 Ignition Sensing Source ..........................15... - Page 4 Installing Cameras................................ 30 Dual-View Camera ............................30 Installing the Pigtail Support Brackets ......................34 Interior Camera .............................. 37 Installing Axon Signal Vehicle Device........................... 38 Installing the Fleet Hub ..............................39 Registration and Firmware Updates ..........................44 Testing the System............................... 44 Hardware Testing ............................45 Fleet Dashboard Installation, Registration and Updates...............
-
Page 5: Introduction
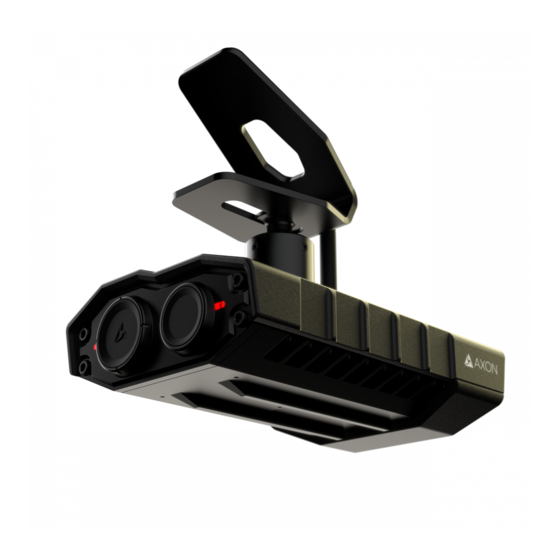
Axon Fleet 3 Installation Guide Introduction The Axon Fleet 3 solution is a purpose-built in-vehicle recording system capable of capturing audio and video, supplemented by artificial intelligence designed for use in high-risk environments encountered by law enforcement, corrections, military, emergency medical services (EMS), and security activities. -
Page 6: Pre-Installation Information
Information about the standard Axon Fleet 3 hardware kit is provided in this section. Fleet 3 Hardware Pack age The Fleet 3 components necessary to install one vehicle can be shipped in a single box. The following table lists the components for a standard two-camera vehicle installation. - Page 7 Axon Fleet 3 Installation Guide Interior Camera 72037 Interior 3-in-1 Antenna 72033 Hub mount bracket 72011 DVC windshield mount 72001 (includes Connector Support Clip) IC interior mount 72002 (includes Connector Support Clip) Power and Signal 72013 Harness Axon Enterprise, Inc.
-
Page 8: Fleet 3 Body-Worn Camera Signal Package
2x 20ft Fleet 3 Bo dy-Wo rn Camera Signal Package Customers who use Body-Worn cameras and are not reusing their Axon Signal Vehicle (ASV) units will require a new unit and cable assembly. Customers reusing their ASV units may need a new cable assembly. The ASV units and cable assemblies are boxed separately from other components. -
Page 9: Airgain Antenna & Router Compatibility
Axon supplies an externally mounted Airgain antenna in conjunction with the purchase of a Cradlepoint router as part of the Axon Fleet 3 solution. Each router requires a certain antenna configuration Please refer to the below chart for Router and Antenna compatibility. -
Page 10: Axon Professional Services Package
Installation Guide IBR1700 Router and Antennas Axo n Pro fessio nal Services Pack age Axon Fleet Professional Services is Included as part of the Axon Fleet 3 Standard 2 Camera Kit (SKU 72036) package and includes the following: • Assistance configuring network policy and laptop software •... -
Page 11: Wiring Information
Installation Guide Wiring Information This section provides an overview of the vehicle wiring layout for Axon Fleet 3. The information should be used with the image on the following page. The Vehicle MDC connects to the Cradlepoint router with an Ethernet cable (yellow •... -
Page 12: Power And Signal Harness And Axon Signal Vehicle Fleet 3 Harness
Axon Fleet 3 Installation Guide Po wer and Signal Harnes s and Axo n Sign al Vehicle Fleet 3 Harness The following image shows the combined Axon Fleet 3 Power and Signal harness plus the ASV Fleet 3 Harness SKU 72013 – FLEET 3 HUB, CABLE ASSEMBLY, POWER NOTE: There is no current product firmware support for the relay connections. - Page 13 Router - 2A • Hub – 7.5A • When wiring a single power line to provide power to all Fleet devices (Hub, router, and Axon Signal Vehicle), use a 15A fuse. Power Source: • The Fleet 3 Power and Signal Harness includes #12 AWG wires for power and ground, and #16 AWG for the ignition signal.
-
Page 14: Electrical Ground
Devices with high current loads (those with 30W or more, can create interference and disrupt the operation of Fleet 3 systems. Fleet 3 devices and wiring should be distanced from any devices, AMPs, antennas, and power lines carry high current load. Axon developed the... -
Page 15: Ignition Sensing Source
Installation Guide Optimal Crossing Angle: 90 degrees Minimum Crossing Angle: 45 degrees Fleet 3 Ethernet cables should be distanced from any devices, AMPS, antennas, and • power lines carrying a high current load. Use the following recommendations: Minimum Parallel Distance: 6 inches Ignitio n Sensing So urce The Fleet Hub and some routers can sense ignition to determine when to power on and off. -
Page 16: Determining A Mount And Wiring Plan
The Interior Camera is commonly mounted on the prisoner partition, facing the • prisoner compartment. The Hub and Axon Signal Vehicle (ASV) unit are best mounted near each other. The • ideal location is near the siren/light controller unit since this is typically where most activation sources originate. -
Page 17: Tools And Supplies
(Optional) Determine where the power shutoff timer or PSU will be installed and • connect into Fleet 3. If using a power shutoff timer or PSU, Fleet 3 ignition sensing should still be connected to vehicle ignition. Tools and Supplies The following tables list the devices, tools, and supplies needed to install Axon fleet 3. -
Page 18: Additional Reading
22 AWG for signal connection) Additional Reading This manual explains how to install the Axon Fleet 3 hardware. Other manuals cover additional aspects of the Axon Fleet 3 system. These documents are available from the Product Guide section of my.axon.com. -
Page 19: Upgrading From Fleet 1 And 2
• Upgrading from Fleet 1 and 2 If your agency had Axon Fleet 1 or 2, this section provides an overview of the items that are kept, changed, and discarded when upgrading. For additional information see the Axon Fleet 1 and 2 Removal Guide. -
Page 20: When Upgrading From Fleet 1 Or Fleet 2 To Fleet 3
The Axon Signal Vehicle device only activates Axon Body-Worn Cameras that are in Bluetooth range. When Upgradi ng fro m Fleet 1 o r Fleet 2 to Fleet 3 The following items do not normally change and can be reused: •... - Page 21 Axon Fleet 3 Installation Guide Axon Fleet 1 and 2 cameras • Axon Fleet camera mounts • Axon Fleet 2 wiring harness • USB dongle • Axon Enterprise, Inc. Page 21 of 47...
-
Page 22: Installation Information
Before starting the installing, unbox and prepare the Axon Fleet 3 hardware. The Fleet 3 components necessary to install one vehicle can be shipped in a single box. The following image shows the shipping box for the standard two-camera installation for a single vehicle. - Page 23 Axon Fleet 3 Installation Guide If using a driver, the nut can be reached through the center hole in the mount. 3. Slide the camera to the forward-most position of the mount and ensure the centerline of the camera is in line with the centerline of the bracket before tightening.
- Page 24 Axon Fleet 3 Installation Guide 5. To use the Trunk Mount, attach hub to mounting plate using at least 4 of the socket head screws supplied in the Hub screw kit. Leave enough space for the cable strain relief as well as the locking plate for the Ethernet cables.
-
Page 25: Installing The Router And Exterior Antenna
Axon Fleet 3 Installation Guide 7. Prepare source end of the Power and Signal Harness for connection to vehicle power/activation sources. Any inputs not being used should be taped back with Tesa tape or similar. Installing the Router and Exterior Antenna For installation of the router and the antenna, refer to the appropriate manufacturer’s... -
Page 26: Installing The Interior Antenna
Axon Fleet 3 Installation Guide Installing the Interior Antenna The Interior Antenna requires an unobstructed view of the sky for GPS reception and the cabling must reach the Hub. The antenna side that must face towards the sky is indicated by raised text on the antenna, as shown in the following image. -
Page 27: Installing The Power And Signal Harness And Ethernet Cables
The Power and Signal Harness simplifies connection of constant power, ignition sensing, and Signal 12V Input sources into Fleet 3, Axon Signal Vehicle (ASV) device, and the router. The harness also includes integrated fuses: 5 Amp fuse for the router and ASV, and a 7.5 Amp fuse for the Hub. -
Page 28: Connecting To Power
Electrical Ground section of the guide for additional information. 2. Axon Fleet 3 includes ignition sensing capability. Connect the Power and Signal Harness orange wire to an ignition run/start source. 3. Connect the Power and Signal Harness red wire to either constant battery positive or delayed-off source. -
Page 29: Axon Signal Vehicle Device Connections
Note: In previous Axon Fleet versions, the Fleet Power Units and the Axon Signal Vehicle device may have been mounted in separate areas. Since all 12V inputs will run to both Hub and Axon Signal Vehicle device, it may be necessary to extend the wires to Hub mounting location. -
Page 30: Mdc Ethernet Cable
Axon Fleet 3 Installation Guide Note: If replacing an Axon Fleet 1 or 2 system old camera wiring may be taped to the new wiring and pulled through certain spots, such as behind panels, under floormats, etc. to to aide in the installation of the new cables. - Page 31 • with the eye. This curve can reduce the adhesive surface area that bonds with the windshield. Axon recommends that the mount be placed at least 1-2” below the top edge of the windshield to ensure adhesion. If using the adhesive mount for the Dual View Camera, follow the instructions printed on the supplied wipe to prepare the chosen windshield mounting location.
- Page 32 Axon Fleet 3 Installation Guide correctly before fastening to the windshield. Choose a location so that the buttons and LEDs will be reachable and visible from the driver seat position. 5. Press and hold firmly, with 30-50lbs of force, for 30 seconds to allow adhesive to set. Do not press on the camera.
- Page 33 Axon Fleet 3 Installation Guide Note: If for some reason the mount is not correctly installed to the windshield, the standard process is to replace the entire mount instead of trying to replace the VHB tape. 7. (Optional) Loosen the three small set screws in the dual view camera mount to adjust the camera angle (roll, tilt, pan).
-
Page 34: Installing The Pigtail Support Brackets
Axon Fleet 3 Installation Guide Installing the Pigtail Suppo rt Brackets Use the following instructions to secure the camera connectors. Get the top and bottom pigtail support brackets, as shown in the following image, and wiring harness cloth tape. 1. Plug in the male cable connector to the pigtail connector, making sure it is pushed in as much as possible. - Page 35 Axon Fleet 3 Installation Guide 3. Press down on the main body and both strain reliefs to make sure they are seated. The alignment ribs of the bottom housing should line up with the open areas of the strain reliefs.
- Page 36 Axon Fleet 3 Installation Guide 5. Use the wiring harness cloth tape to secure the bracket. Start at the bottom side and wrap the tape around both the top and bottom brackets, making sure the snaps stay engaged. Make sure you wrap the tape around the bracket 1-1/2 to 2 times for support.
-
Page 37: Interior Camera
Axon Fleet 3 Installation Guide 6. The assembly can now be tucked up between the headliner and the roof. Interior Camera 1. Using the supplied mounting bracket and self-tapping screws, install the rear camera mount in the desired location. This is commonly the top center of the prisoner partition. -
Page 38: Installing Axon Signal Vehicle Device
Installing Axon Signal Vehicle Device For a new Axon Signal Vehicle (ASV) device, 1. Affix ASV to the mounting location. 2. Connect the ASV to the Fleet 3 Power and Signal Harness using the procedure described Axon Signal Vehicle Device Connections. -
Page 39: Installing The Fleet Hub
If the ASV device needs to be updated, see the Updating Axon Signal Vehicle Firmware help article on My Axon for more information on updating firmware. 3. Connect the ASV to the Fleet 3 Power and Signal Harness using the procedure described Axon Signal Vehicle Device Connections. - Page 40 2. Connect the Ethernet cables to the Hub. a. Cameras: Axon recommends using the LAN1 port for the Dual-View camera and the LAN2 port for the Interior camera. i. If desired, the camera Ethernet cables can be plugged into any LAN port.
- Page 41 Axon Fleet 3 Installation Guide 3. Locate the two-piece cable strain relief supplied in the hub screw kit and attach to hub. Axon Enterprise, Inc. Page 41 of 47...
- Page 42 Axon Fleet 3 Installation Guide a. Slide the U-shaped retainer over the cables. b. Install H-shaped retainer 4. Connect the 10-pin Signal harness and the 6-pin Power harness to the rear of the Hub 5. Connect the Interior antenna leads to the Hub and tighten using an 8mm wrench Connect both Wi-Fi connectors to the 5GHz ports on the right side of the Hub.
- Page 43 Axon Fleet 3 Installation Guide 6. Use cable ties to secure the cabling to Hub mount strain relief. 7. Return the Hub to its mounting location. The Hub can be mounted flat, vertical or on a slope. There are small vents on the top and bottom of the front of the Hub.
-
Page 44: Registration And Firmware Updates
Installation Guide 9. Connect the 12V and ignition power back to their sources testing for continuity of power at the Hub. If necessary, start the vehicle and ensure the Fleet 3 system powers up. Registration and Firmware Updates Axon Fleet 3 devices are automatically registered to your Axon Evidence account on the first sign into Axon Evidence through the Fleet Dashboard. -
Page 45: Hardware Testing
Stop the recording and wait 30 seconds before testing the next input. Confirm cameras activate. Stop recording before testing the next input. • 6. Axon Signal Vehicle testing. If not completed earlier, See test steps in The Axon Signal Vehicle manual Fleet Dashboard Installation, Registration and Update s Axon Fleet 3 must be registered to download settings and complete software testing. -
Page 46: Software Testing
Software Testing Perform final check to ensure that the system is fully operational. 1. Open Fleet Dashboard on the MDC and sign in to your Axon Evidence account. 2. Use the Dashboard to confirm the cameras are connected and online. - Page 47 Axon Fleet 3 Installation Guide You will need an Axon BWC registered to the same agency as the Fleet 3 system. On the Settings page, tap Add Body Camera and follow the prompts to pair the • BWC. • Navigate to the Devices page by tapping the camera icon.
Need help?
Do you have a question about the Fleet 3 and is the answer not in the manual?
Questions and answers