Table of Contents
Advertisement
Quick Links
Advertisement
Table of Contents

Related Manuals for SHOWTEC Compact Par 7 Tri


Summary of Contents for SHOWTEC Compact Par 7 Tri
- Page 1 Compact Par 7 Tri ORDERCODE 42580...
- Page 2 For more information: iwant@showtec.info You can get some of the best quality, best priced products on the market from Showtec. So next time, turn to Showtec for more great lighting equipment. Always get the best -- with Showtec ! Thank you!
-
Page 3: Table Of Contents
Showtec Showtec Compact Par 7 Tri Product Guide ™ Warning ....................................2 Safety Instructions ................................. 2 Operating Determinations ............................4 Rigging .................................... 4 Return Procedure ................................5 Claims ....................................5 Description of the device ..............................6 Backside ..................................7 Installation ................................... 7 Set Up and Operation ............................... -
Page 4: Warning
Save the carton and all packing materials. In the event that a fixture must be returned to the factory, it is important that the fixture be returned in the original factory box and packing. Your shipment includes: • Compact Par 7 Tri with IEC powercable 1,5m • User manual LED Expected Lifespan LEDs gradually decline in brightness over time. - Page 5 For replacement use fuses of same type and rating only. The user is responsible for correct positioning and operating of the Compact Par 7 Tri. The manufacturer will not accept liability for damages caused by the misuse or incorrect installation of this device.
-
Page 6: Operating Determinations
Always let the installation be carried out by an authorized dealer ! Procedure: If the Compact Par 7 Tri is lowered from the ceiling or high joists, professional trussing systems have to be used. Use a clamp to mount the Compact Par 7 Tri, with the mounting-bracket, to the trussing system. -
Page 7: Return Procedure
Connection with the mains Connect the device to the mains with the power-plug. Always pay attention, that the right color cable is connected to the right place. International EU Cable UK Cable US Cable BROWN YELLOW/COPPER FASE BLUE BLACK SILVER YELLOW/GREEN GREEN GREEN... -
Page 8: Description Of The Device
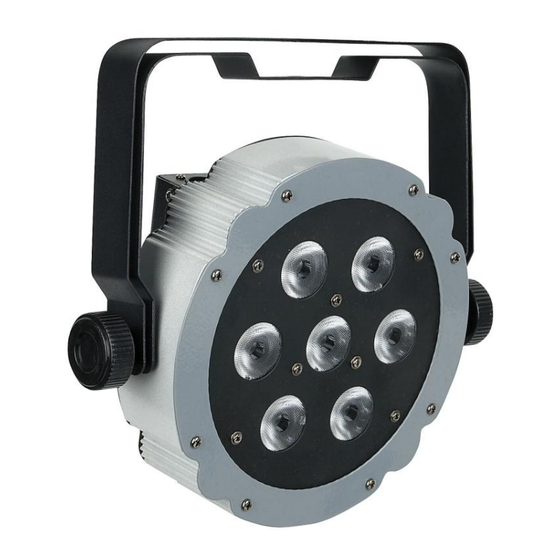
Description of the device Features The Showtec Compact Par 7 Tri is a light effect with high output and great effects. • Flat Par Housing • Stylish design • Power Supply: 100-240V AC • Peak Power 152 Watt • Continuous Power 50 Watt •... -
Page 9: Backside
5) Earth connection 8) 3-pin DMX Out Installation Remove all packing materials from the Compact Par 7 Tri. Check that all foam and plastic padding is removed. Connect all cables. Always disconnect from electric mains power supply before cleaning or servicing. -
Page 10: Control Modes
Multiple Compact Pars (Master/Slave control) 1. Fasten the effect light onto firm trussing. Leave at least 0,5 meter on all sides for air circulation. Use a 3-p XLR cable to connect the Compact Par 7 Tri. The pins: Earth... -
Page 11: Multiple Compact Pars (Dmx Control)
Multiple Compact Pars (DMX Control) 1. Fasten the effect light onto firm trussing. Leave at least 0,5 meter on all sides for air circulation. Plug the end of the electric mains power cord into a proper electric power supply socket. Use a 3-p XLR cable to connect the Compact Pars. -
Page 12: Control Panel
Control Panel Fig. 5 A. LED Display D. Up Button B. MODE Button E. Down Button C. SETUP Button DMX Control Mode The fixtures are individually addressed on a data-link and connected to the controller. The fixtures respond to the DMX signal from the controller. DMX Addressing The control panel on the front side of the base allows you to assign the DMX fixture address, which is the first channel from which the Compact Par will respond to the controller. -
Page 13: Menu Overview
Menu Overview... -
Page 14: Main Menu Options
3. DMX address 4. Slave 5. Sound controlled The Compact Par 7 Tri will only show its version number at start-up ! 1. Built-in Programs 1) Press the MODE button on the device, until the display shows 2) With this menu you can set the Built-in Program Mode of the Compact Par. -
Page 15: Auto Run Program
4) When you select , you can press Setup to switch between the built-in programs Menu. 5) You can choose 2 different sub menus. Program Running Speed from 01-99 and FL Flash Frequency from 00-99 Use the Setup button to scroll through the menu. 2. -
Page 16: Dmx Channels
DMX Channels 3 Channels Channel 1 – Red 0-255 Red gradual color brightness from 0 to 100% Channel 1 – Green 0-255 Green gradual color brightness from 0 to 100% Channel 1 – Blue 0-255 Blue gradual color brightness from 0 to 100% 4 Channels Channel 1 –... -
Page 17: Channels
8 Channels Channel 1 – Master Dimmer 0-255 Brightness from 0 to 100% Channel 2 – Red (when CH6 is OFF 0-255 Red gradual color brightness from 0 to 100% Channel 2 – RGB Macro (when CH6 is set between 1-24 Red (255) 9-17 Red (255), Green (50) - Page 18 Channel 5 – Strobe No Function 10-255 Strobe effect, from slow to fast (0-20 flashes/sec.) Channel 6 – Color Programs No Function 1-24 29 static color program Mode via Channel 2 25-49 Program 2 (7-color, gradual change) R, RG, G, GB, B, RB, RGB 50-74 Program 3 (3-color, gradual change) R, G, B 75-99...
-
Page 19: Maintenance
Maintenance The Showtec Compact Par requires almost no maintenance. However, you should keep the unit clean. Otherwise, the fixture’s light-output will be significantly reduced. Disconnect the mains power supply, and then wipe the cover with a damp cloth. Do not immerse in liquid. Wipe lens clean with glass cleaner and a soft cloth. - Page 20 Problem Probable cause(s) Remedy No power to the fixture • Check that power is switched on One or more and cables are plugged in. fixtures are Primary fuse blown. • Replace fuse. completely dead. Fixtures reset The controller is not connected. •...
-
Page 21: Product Specification
Product Specification Model: Showtec Compact Par Power: 240V-50Hz (CE) Peak Power 132 Watt; Continuous Power 246 Watt Power Supply: 100-240V AC Peak Power 152 Watt Continuous Power 50 Watt Drive Current: 350mA Refresh rate: 3.9KHz LED System: 7 x 3-in-1 LED Technology...
Need help?
Do you have a question about the Compact Par 7 Tri and is the answer not in the manual?
Questions and answers