Advertisement
Foreword
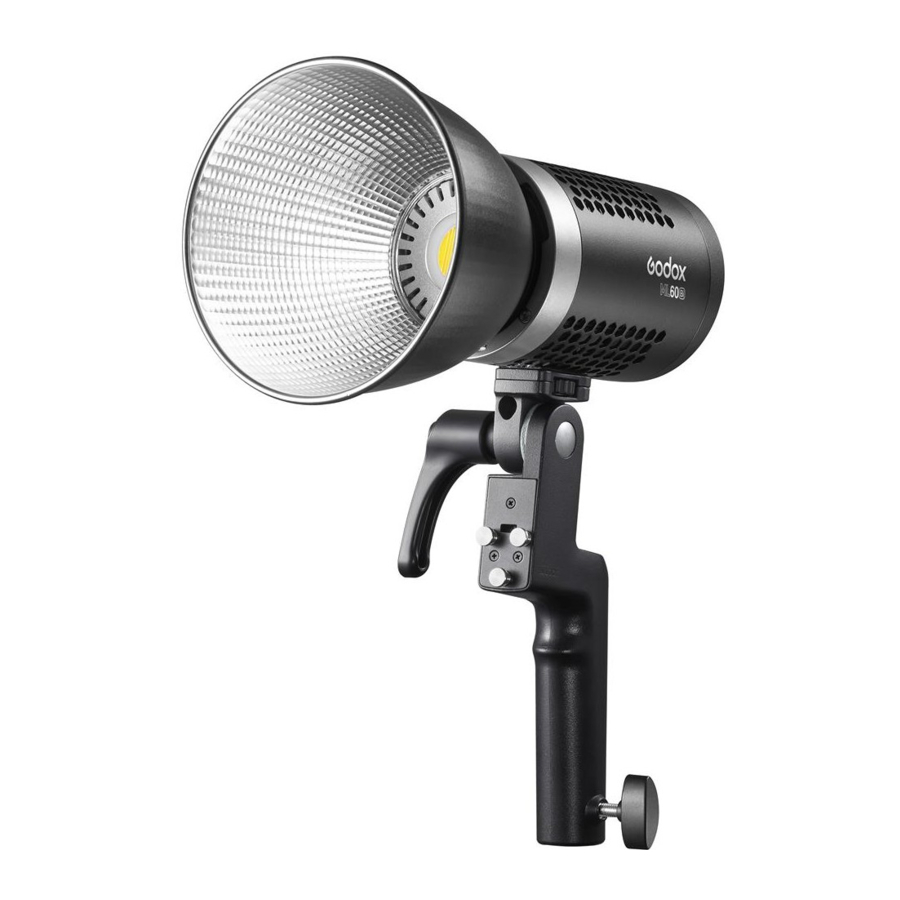
This Bi-color LED Video Light ML60Bi is a light that is easy to fill. It has high brightness, wireless adjustable, and color temperature adjustable functions. Suitable for almost all shooting occasions e.g. live, camping, make up, portrait shooting, make up, video, wedding, children photography, etc. It's portable and easy to be operated.
Features:
- Freely switch LED bi-color mode and 21 Light effects modes
- 0% to 100% Precisely adjust light brightness
- 16 Groups and 32 channels wireless remote control
- Switch silent mode to light without interference
- Compact and lightweight, easy to be held in hand
- Freely adjust color temperature
- Combined control by smartphone APP/2.4G wireless
Warning
 Always keep this product dry.
Do not use in rain or in damp conditions. Do not disassemble. Should repairs become necessary, this product must be sent to an authorized maintenance center.
Keep out of reach of children.
As this product do not have waterproof function, please take measures of waterproof in rainy or damp environment.
Do not use the flash unit in the presence of flammable gases, chemicals and other similar materials. In certain circumstance, these materials may be sensitive to the strong light emitting from this flash unit and fire or electromagnetic interference may result.
Parts

- Body
- Power Switch
- DC Power Socket
- Control Panel
- CCT/SET Select Dial
- DIM Select Dial
- Display
- Thermovent
- Fixing Socket for Handle
- Accessory Locking Ring
- LED Light Beads
- Radiator
- Handle


- Handle Bracket
- Direction Adjusting Ring
- Fixing Screw for Light Head
- Fixing Screw for Light Stand
- Fixing Buckle for Battery Case
- Battery Case


- Clip
- Fixing Hole for Battery Case
- Locking Ring for Battery Case
- Battery Compartment 1 and 2
- Battery Level Display Button/Battery Locking Ring
- Battery Level Indicator
- Battery Case Leg
- Battery Power Output Port
What's in the Box

Optional Accessory

Power management
- Power Supply
Adapter power supply: input: 100-240V~50/60Hz 2A, output: 16.8V 4.2A. External battery power supply: install two NP-F970 batteries into the battery compartment. Then, use DC power line to connect the battery case with the light body to achieve power supply.
The battery case can only offer battery discharging instead of charging. When powered by battery box, two batteries shall be used simultaneously. Please do not use one battery individually.
Operation
- Power On
Press the power switch to control the on/off of the light, and the OLED display will show the current information. - mode Selection: Bi-color mode/FX Special Effects mode
- Color temperature mode: the main interface is the color temperature mode
- Color temperature adjustment: Rotate the CCT/SET knob on the main interface to adjust the color temperature (2800~6500K). Normally rotate 100 unit values, and quickly rotate 500 unit values.
- Brightness Adjustment: Select the DIM dial to adjust brightness from 0% to 100%.

- Light effect mode: There are seven types and 21 kinds of light effect modes.
Special Effects Display Situation Display Display II Display III Fx1 ![]()
Flash Flash Press conference Paparazzi FX2 ![]()
lightning Discontinuous Frequent Continuous FX3 ![]()
Broken bulb Discontinuous Frequent Continuous FX4 ![]()
TV Slow speed medium speed Quick speed FX5 ![]()
Candle Intermittently Frequent Continuous FX6 ![]()
Fire Wood fire Bonfire Fire FX7 ![]()
Fireworks Short Continuous Performance ![warning]() Tip: Rotate DIM dial to select light efficiency type, and then press DIM dial to realize speed switching.
Tip: Rotate DIM dial to select light efficiency type, and then press DIM dial to realize speed switching.
- Color temperature mode: the main interface is the color temperature mode
- 2.4G Wireless setting
ML60Bi has 2.4G wireless receiving function, and the remote control RC-A6 can be purchased separately for wireless remote control. Using 2.4G wireless technology function, it can control 16 Groups, 32 channels, and 99 wireless IDs at the same time, with strong anti-interference.
Note: Before use, please set the channel (CH), group (GR) and ID of the remote control and the LED light to be the same. The LED light can only receive wireless signals when it is turned on.
Turn on/off 2.4G wireless: press CCT/SET button to enter the menu. Turn the CCT/SET select dial until the wireless icon is displayed. Then, turn the DIM select dial to turn on or off 2.4G wireless.

Channel CH Setting: press CCT/SET button to enter the menu. Turn the CCT/SET select dial until the CH is displayed. Then, turn the DIM select dial to choose channel from 1 to 32.

Group GR Setting: press CCT/SET button to enter the menu. Turn the CCT/SET select dial until the GR is displayed. Then, turn the DIM select dial to choose group from A to E and 0 to 9.

ID setting: press CCT/SET button to enter the menu. Turn the CCT/SET select dial until the ID is displayed. Then, turn the DIM select dial to choose 99 IDs from 1 to 99.

- Brightness adjustment: Rotate DIM to adjust brightness, normally rotate 1 unit value, and quickly rotate 10 unit value.
Note: Press the DIM select dial to turn off brightness, and then press dim to restore the brightness of the last time it was turned off.

- Silent mode:
When![]() is displayed, the silent mode is turned on.
is displayed, the silent mode is turned on.
Turn on the silent mode: press CCT/SET button to enter the menu. Then, screw the DIM select dial to turn on or off the fan. Set it to on to enter non-silent mode while set it to off to enter silent mode. In silent mode, the brightness adjustment range is from 0% to 50%.

- Install and detach battery case
- Install battery case: Aim the handle's fixing buckles into the battery case's fixing holes, pull the batter case downwards until being tightened.

- Detach battery case: push the battery case' locking ring and push the battery case upwards to take it out.
![]()
- Connect the battery case with light head: Insert one end of the power cord into the battery box and the other end into the DC socket of the lamp cap.
![]()
- Insert two FP970 batteries, and the LED light can be put into usage.
![]()
- Install battery case: Aim the handle's fixing buckles into the battery case's fixing holes, pull the batter case downwards until being tightened.
- Low Battery Indication
When the battery is below one grid, the low battery indicator will pop out.
![]()
- Locking Function
In power on state, long press the CCT/SET button for 2 seconds and the locking icon will appear on the display. Long press the button for 2 seconds again to unlock.
Note: The locking function only locks the control panel function, the 2.4G wireless remote control and Bluetooth control are not affected.

- High Temperature Alarm Function
- When the LED Light bead temperature is too high, the display screen will display the high temperature alarm symbol
![]() .
. - When the LED Light temperature returns to normal, the lamp will automatically release the alarm. At this time, the DIM dial can be rotated to change the brightness.
- When the temperature sensor failure symbol
![]() appears on the display, it Errl means that the high temperature alarm function of the machine has failed.
appears on the display, it Errl means that the high temperature alarm function of the machine has failed.
- When the LED Light bead temperature is too high, the display screen will display the high temperature alarm symbol
- Bluetooth Control
- Press the CCT/SET button to enter the menu, turn the CCT/SET knob to the Bluetooth symbol
![]() , turn the DIM knob (OFF/Bluetooth MAC code/Reset cycle selection), select OFF when the Bluetooth is turned off; When the Bluetooth MAC code (For example: CE8C) is selected, Bluetooth is turned on and the Bluetooth symbol appears on the main interface; select Reset and then press the DIM button to perform the Bluetooth reset function.
, turn the DIM knob (OFF/Bluetooth MAC code/Reset cycle selection), select OFF when the Bluetooth is turned off; When the Bluetooth MAC code (For example: CE8C) is selected, Bluetooth is turned on and the Bluetooth symbol appears on the main interface; select Reset and then press the DIM button to perform the Bluetooth reset function.
Note: The first mobile device (mobile phone or tablet) can directly use the APP to control the light body. When replacing other mobile devices (mobile phones or tablets), the lamp body can be connected normally after Bluetooth reset.
![]()
- Scan the QR code to download the "Godox Light" mobile app. (It can be used on both Android and Apple systems) (QR code diagram). For specific operations, please refer to the "Help" manual of the mobile APP, which contains detailed tutorials.
![]()
- Press the CCT/SET button to enter the menu, turn the CCT/SET knob to the Bluetooth symbol


 appears on the display, it Errl means that the high temperature alarm function of the machine has failed.

Technical Data
| LED Light | ML60Bi |
| Adapter | Output: 16.8V 4.2A |
| Power | Max. 60W |
| Channel | 32 |
| Group | 16(A B C D E F,0-9) |
| Brightness Adjusting Range | 0%~100% |
| 100% Illuminance(LUX)(≈) | 10100 (testing distance is 1 meter) |
| CRI(≈) | 96 |
| TLCI(≈) | 97 |
| Color Temperature | 2800~6500K (without reflector) |
| Mode | Bi-color mode/scene mode |
| Lighting effects mode | A total of 7 categories and 21 types |
| Control method | mobile APP/2.4G wireless control |
| 2.4G wireless transmission distance | 30 meters |
| Bluetooth transmission distance | 30 meters |
| Working Temperature | -10~40℃ |
| Weight | 0.77Kg (not include handle and reflector) |
| Dimension | 145*88*88mm (not include handle and reflector) |
| BT Frequency Range | 2402.0-2480.0mHz |
| Max. Transmitting Power | 5dbm |
* Product design and specifications are subject to change without notice.
Maintenance
This product, except consumables e.g. charger and charger cable, is supported with a one-year warranty.
Avoid sudden impacts and the product should be dedusted regularly. Maintenance of the flash must be performed by our authorized maintenance department which can provide original accessories.
Unauthorized service will void the warranty.
If the product had failures or was wetted, do not use it until it is repaired by professionals.
Changes made to the specifications or designs may not be reflected in this manual.
GODOX Photo Equipment Co., Ltd.
Add: Building 2, Yaochuan Industrial Zone, Tangwei Community, Fuhai Street, Bao'an District, Shenzhen, China
Tel: +86-755-29609320(8062)
Fax: +86-755-25723423
E-mail: godox@godox.com
godox.com


Documents / Resources
References
Download manual
Here you can download full pdf version of manual, it may contain additional safety instructions, warranty information, FCC rules, etc.
Advertisement


Need help?
Do you have a question about the ML60Bi and is the answer not in the manual?
Questions and answers