Advertisement
Foreword
Thank you for purchasing this Godox Product!
This LED Light ML60 is a continuous light with wireless adjustment and 8 FX situational special effects. Suitable for almost all shooting occasions e.g. live, camping, make up, portrait shooting, make up, video, wedding, children photography, etc. It's portable and easy to be operated.
Features:
- Freely switch LED continuous light mode and 8 FX situational special effects modes
- 0% to 100% Precisely adjust light brightness
- 16 Groups and 32 channels wireless remote control
- Switch silent mode to light without interference
- Compact and lightweight, easy to be held in hand
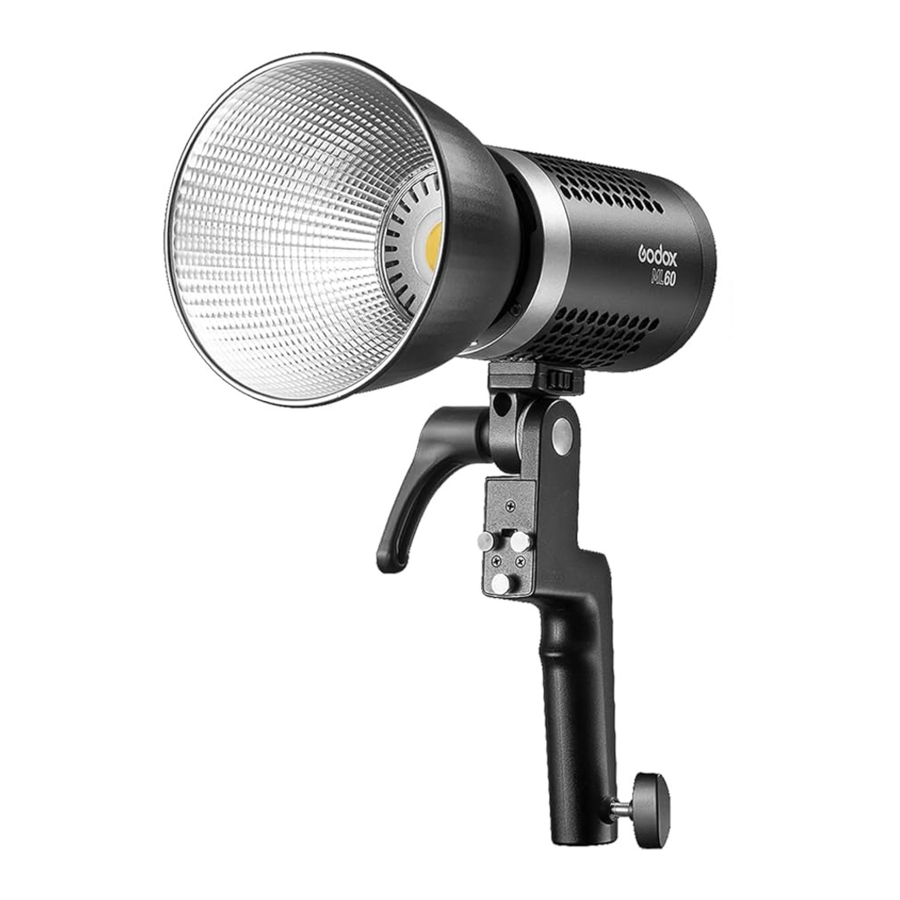
Parts

- Body
- Power Switch
- DC Power Socket
- Control Panel
- SET Select Dial
- DIM Select Dial
- Display
- Thermovent
- Fixing Socket for Handle
- Accessory Locking Ring
- LED Light
- Radiator
Handle

- Handle Bracket
- Direction Adjusting Ring
- Fixing Screw for Light Head
- Fixing Screw for Light Stand
- Fixing Buckle for Battery Case
Battery Case

- Clip
- Fixing Hole for Battery Case
- Locking Ring for Battery Case
- NP-F970 Battery Compartment 1 and 2
- Battery Level Display Button/ Battery Locking Ring
- Battery Level Indicator
- Battery Case Leg
- Battery Power Output Port
What's in the Box

Power Management
Power Supply
Adapter power supply: input: 100-240V~50/60Hz 2A, output: 16.8V 4.2A. External battery power supply: install two NP-F970 batteries into the battery compartment. Then, use the power cable to connect the battery case with the light body to achieve power supply.
The battery case can only offer battery discharging instead of charging. When powered by battery box, two batteries shall be used simultaneously. Please do not use one battery individually.
Operation
Power On
Press the power switch to control the on/off of the light, and the OLED display will show the current information.

Mode Selection: Continuous Lighting Mode/FX Special Effects Mode
Press SET button to enter the menu. The, turn the SET select dial to FX and screw the DIM select dial to switch the two modes:
Continuous lighting mode: set FX mode to OFF to enter continuous lighting mode.
Special effects mode: there are 8 situational special effects from FX1 to FX8.

| Special Effects | FX1 | FX2 | FX3 | FX4 | FX5 | FX6 | FX7 | FX8 |
| Icon |  |  |  |  |  |  |  |  |
| Situation | Lightning intervals | Lightning frequent | Lightning sustainable | Flash | Conference | Paparazzi | TV | Broken bulb |
2.4G Wireless Setting
Turn on/off 2.4G wireless: press SET button to enter the menu. Turn the SET select dial until the wireless icon is displayed. Then, turn the DIM select dial to turn on or off 2.4G wireless.

Channel CH setting: press SET button to enter the menu. Turn the SET select dial until the CH is displayed. Then, turn the DIM select dial to choose channel

Group GR setting: press SET button to enter the menu. Turn the SET select dial until the GR is displayed. Then, turn the DIM select dial to choose group from A to E and 0 to 9.

ID setting: press SET button to enter the menu. Turn the SET select dial until the ID is displayed. Then, turn the DIM select dial to choose 99 IDs from 1 to 99.

Brightness adjustment
Turn the DIM select dial to adjust brightness.

Silent mode
When ![]() is displayed, the silent mode is turned on.
is displayed, the silent mode is turned on.
Turn on the silent mode: press SET button to enter the menu. Then, screw the DIM select dial to turn on or off the silent mode. Set it to on to enter non-silent mode while set it to off to enter silent mode.

Install and detach battery case
- Install battery case: Aim the handle's fixing buckles into the battery case's fixing holes, pull the batter case downwards until being tightened.

- Detach battery case: push the battery case' locking ring and push the battery case upwards to take it out.
![]()
- Connect the battery case with light head: insert the one end with clamping buckle of the power cable into the battery case while another end into the DC power socket of the light head.
![]()
- Insert two FP970 batteries, and the LED light can be put into usage.
![]()


Technical Data
| LED Light | ML60 |
| Adapter | Output: 16.8V 4.2A |
| Power | Max. 60W |
| Channel | 32 |
| Group | 16(A B C D E F,0-9) |
| Brightness Adjusting Range | 0%~100% |
| 100% Illuminance(LUX)(≈) | 73000 (testing distance is 0.5m) |
| CRI(≈) | 96 |
| TLCI(≈) | 97 |
| Color Temperature | 5600 ± 200K |
| Working Temperature | -10~40℃ |
| Weight | 0.77Kg (not include handle and reflector) |
| Dimension | 145*88*88mm (not include handle and reflector) |
* Product design and specifications are subject to change without notice.
Maintenance
This product, except consumables e.g. charger and charger cable, is supported with a one-year warranty.
Avoid sudden impacts and the product should be dedusted regularly. Maintenance of the flash must be performed by our authorized maintenance department which can provide original accessories.
Unauthorized service will void the warranty.
If the product had failures or was wetted, do not use it until it is repaired by professionals.
Changes made to the specifications or designs may not be reflected in this manual.

- Always keep this product dry. Do not use in rain or in damp conditions.
- Do not disassemble. Should repairs become necessary, this product must be sent to an authorized maintenance center.
- Keep out of reach of children.
- As this product do not have waterproof function, please take measures of waterproof in rainy or damp environment.
- Do not use the flash unit in the presence of flammable gases, chemicals and other similar materials. In certain circumstance, these materials may be sensitive to the strong light emitting from this flash unit and fire or electromagnetic interference may result.

Documents / Resources
References
Download manual
Here you can download full pdf version of manual, it may contain additional safety instructions, warranty information, FCC rules, etc.
Advertisement


Need help?
Do you have a question about the ML60 LED Light and is the answer not in the manual?
Questions and answers