Advertisement
- 1 Important Information
- 2 Specifications
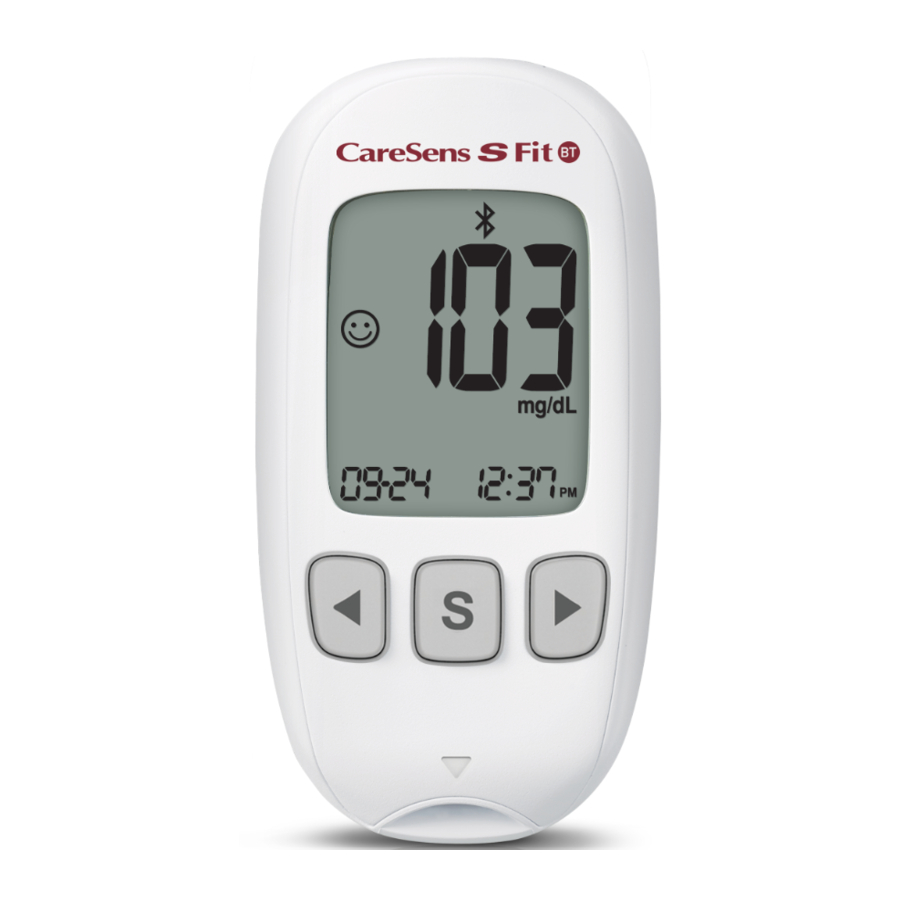
- 3 CareSens S Fit BT Blood Glucose Monitoring System
- 4 Inserting or Replacing the Battery
- 5 Caring for Your System
- 6 Test Strip
- 7 Overview
- 8 Display
- 9 Setting Up Your System
- 10 Setting the Sound On/OFF
- 11 Turning on the Strip Expiration Date Indicator
- 12 Setting the Hypoglycemia (Lo) Indicator
- 13 Setting the Hyperglycemia (Hi) Indicator
- 14 Setting the Strip Expiration Date Indicator
- 15 Checking the System
- 16 Using the Lancing Device
- 17 HI and Lo Messages
- 18 Target Blood Glucose Ranges
- 19 Transferring Test Results
- 20 Meter Memory
- 21 Setting the Alarm Function
- 22 Understanding Error Messages
- 23 General Troubleshooting
- 24 Performance Characteristics
- 25 Documents / Resources
Important Information
Read This First!
For optimum safety and benefits, please read the entire manual contents before using the system.
Intended use:
CareSens S Fit BT Blood Glucose Monitoring System is intended for the quantitative measurement of glucose in fresh capillary whole blood from the fingertip.
The CareSens S Fit BT Blood Glucose Monitoring System is intended for use outside the body (in vitro diagnostic use) and is intended for use as an aid to monitor the effectiveness of diabetes management. The system is for self-testing or healthcare professional use and should not be used for the diagnosis of or screening for diabetes or for testing newborns.
Meaning of Symbols Used
 | CE Mark |  | Consult instructions for use |
 | Authorised representative in the European Communmity/European Union |  | WEEE (waste electrical and electronic equipment |
 | Temperature limit | ||
 | In vitro diagnostic medical device |  | Manufacturer |
 |  |  | Batch code |
 | Biological risks |  | Serial number |
 | Do not re-use |  | Use-by date |
- Glucose in blood samples reacts with the chemical in the test strip to produce a small electrical current. The CareSens S Fit BT meter detects this electrical current and measures the amount of glucose in the blood sample.
- The CareSens S Fit BT blood glucose meter is designed to minimise code related errors in monitoring by using the no-coding function.
- The CareSens S Fit BT blood glucose meter should be used only with the CareSens S Test Strips.
- An abnormally high or low red blood cell count (hematocrit level over 65% or below 15%) may produce inaccurate results.
- If your test result is below 3.3 mmol/L or above 13.3 mmol/L, consult a healthcare professional immediately.
- Inaccurate results may occur in severely hypotensive individuals or patients in shock. Inaccurate low results may occur for individuals experiencing a hyperglycemic hyperosmolar state, with or without ketosis. Critically ill patients should not be tested with blood glucose meters.
- Inaccurate results may occur in patients undergoing oxygen therapy.
If you need assistance, please contact the Spirit Healthcare 24/7 Freephone Support Line at 0800 881 5423 or go to www.spirit-healthcare.co.uk.
Specifications
Product specifications
| Measurement range | 1.1–33.3 mmol/L |
| Sample size | Minimum 0.5 μL |
| Test time | 6 seconds |
| Sample type | Fresh capillary whole blood |
| Calibration | Plasma-equivalent |
| Assay method | Electrochemical |
| Battery life | 1,000 tests |
| Power | One 3.0 V lithium battery (disposable, type CR2032) |
| Memory | 1,000 test results |
| Size | 95 x 49 x 17.5 mm |
| Weight | 51.5 g (with battery) |
| Bluetooth ® technology |
|
Operating ranges
| Temperature | 5–45°C |
| Relative humidity | 10–90 % |
| Hematocrit | 15–65 % |
Storage/Transport Conditions
| Temperature | Meter (with battery) | 0–50°C |
| Test strip | 1–30°C | |
| Control solution | 8–30°C | |
| Relative Humidity | Test strip | 10–90 % |
CareSens S Fit BT Blood Glucose Monitoring System
CareSens S Fit BT Blood Glucose Monitoring System includes the following items
- CareSens S Fit BT Blood Glucose Meter
- Instructions for Use
CareSens S Fit BT Blood Glucose Monitoring System may include the following items
- CareSens S Blood Glucose Test Strips
- Battery
- Lancets
- Lancing Device
- Logbook
- Carrying Case
- Check all the components after opening the CareSens S Fit BT Blood Glucose Monitoring System package. The exact contents are listed on the main box.
- Please contact the Spirit Healthcare 24/7 Freephone Support Line for a free data transmission cable at 0800 881 5423 or go to www.spirit-healthcare.co.uk.
Inserting or Replacing the Battery
The CareSens S Fit BT meter uses one 3.0 V lithium battery. Before using the meter, check the battery compartment and insert a battery if empty. When the  symbol appears on the display while the meter is in use, the battery should be replaced as soon as possible. The test results may not be saved if the battery runs out.
Step 1

Make sure the meter is turned off. Push the cover in the direction of the arrow to open the battery compartment.
Step 2

Remove the used battery. Slip your thumb finger and pulling it out with your index and thumb finger as shown in the diagram. Insert a new battery with the + side facing up and make sure the battery is inserted firmly.
Step 3

Place the cover on the battery compartment. Push it down until you hear the tab click into place.
![]()
Note
Removing the meter battery will not affect your stored results. However, you may need to reset your meter settings.
Caring for Your System
Use a soft cloth or tissue to wipe the meter exterior. If necessary, dip the soft cloth or tissue in a small amount of alcohol.
Do not use organic solvents such as benzene or acetone, or household and industrial cleaners that may cause irreparable damage to the meter.
- Do not expose the meter to direct sunlight, heat, or excessive humidity for an extended period of time. It is recommended to store and use the test system indoors.
- Do not let dirt, dust, blood, or water enter into the meter's test strip port.
- Do not drop the meter or submit it to strong shock.
- Do not try to fix or alter the meter in any way.
- Keep the meter away from strong electromagnetic field sources, such as cell phones and microwave ovens.
- Store all the meter components in the carrying case to prevent loss and help keep the meter clean.
- Avoid getting any liquid or moisture in the test strip vial. This can affect the test strips and cause inaccurate test results.
- Do not apply samples other than capillary whole blood or control solution to the test strip.
- Store the meter in a cool and dry place between 0–50°C.
Disposal of the meter
If you need to throw your meter away, you should follow existing policies and procedures of your own country or region. For information about correct disposal, please contact your local council or authority. If you need assistance, contact the Spirit Healthcare 24/7 Freephone Support Line at 0800 881 5423 or go to www.spirit-healthcare.co.uk.
Test Strip
The CareSens S Fit BT Blood Glucose Monitoring System measures blood glucose quickly and accurately. It automatically absorbs the small blood sample applied to the tip of the strip.

Contact bars
Gently push the test strip, with its contact bars facing up, into the test strip port of meter
Confirmation window
Check here to see whether sufficient blood sample has been applied
Tip to apply blood sample
Apply blood sample here for testing

- The CareSens S Test Strips should be used only with fresh capillary whole blood samples.
- Do not reuse test strips.
- Do not use test strips past the expiration date.
- Test strips in new, unopened vials and test strips in vials that have been opened can be used up until the expiration date printed on the test strip box and vial label if the test strips are used and stored according to its storage and handling methods.
- Store test strips in a cool and dry place at a temperature between 1–30 ˚C and 10–90% relative humidity.
- Keep test strips away from direct sunlight or heat and do not freeze.
- Store test strips only in their original vial.
- Avoid getting any liquid or moisture in the test strip vial. This can affect the test strips and cause inaccurate test results.
- Do not apply samples other than capillary whole blood or control solution to the test strip.
- Close the vial tightly after taking out a test strip for testing and use the strip immediately.
- Handle test strips only with clean and dry hands.
- Do not bend, cut, or alter test strips in any way.
- For detailed storage and usage information, refer to the CareSens S test strip package insert.
- Keep the meter and testing supplies away from young children.
- Drying agents in the vial cap may be harmful if inhaled or swallowed and may cause skin or eye irritation.
Overview

Data Port
Used to transfer data from the meter to a computer with a cable
 ,
, Button
Turns the meter on, selects or changes information
Test Strip
Port Insert test strip here
Display
Shows results and messages
S Button
Turns the meter on/off, confirms menu selections, and changes information
![]()
Note
- The cable for data management software can be ordered separately. Please contact your authorised i-SENS sales representative.
- The unit of measurement is fixed and it cannot be changed by the user.
Display

- Test results: test results displaying panel
- Memory symbol: appears when test results stored in the memory are displayed
- Setting symbol: appears when in SET mode
- PP2 alarm: appears when the post-meal alarm has been set
- Bluetooth Symbol
- Mute symbol: appears only when the sound is set to OFF
- Control Solution flag: appears when the control solution test results are saved or displayed
- KET symbol: appears when the test result is greater than 13.3 mmol/L
- Hi: appears when the test result is greater than the selected hyperglycemia level
- Smile symbol: appears when the test result is within the selected normal blood glucose range
- Lo: appears when the test result is lower than the selected hypoglycemia 11 level
- alarm: appears when the time alarm has been set
- mmol/L, mg/dL: unit for measuring blood glucose
- Pre-meal test flag: used for tests done before eating
- Post-meal test flag: used for tests done after eating
- Fasting test flag: used for tests done after fasting for at least 8 hours
- Battery symbol: indicates meter battery is running low and needs to be replaced
- Blood insertion symbol: indicates meter is ready for the application of a drop of blood or control solution
- Month/Day/Hour/Minute: appears date and time
![]()
Note
It is recommended to check if the display screen on the meter matches the illustration above every time the meter turns on. Do not use the meter if the display screen does not exactly match the illustration as the meter may show incorrect results.
Setting Up Your System
Press and hold the S button for 3 seconds to enter SET mode. After all settings are finished, press and hold the S button for 3 seconds to turn off the meter. Press the  or
or  button to change values. Press and hold the button to scroll faster.
Step 1 - Entering the SET Mode

Press and hold the S button for 3 seconds to enter SET mode. After all the segments flash across the screen, 'SET' will show up.
Press the or button to select 'YES' and press the S button to go to the next step.
If you do not want to connect your meter to your smartphone, press the S button when the screen display 'bT' while 'OFF' is blinking on the botton of the screen. Then, the meter will go to Step 4 Adjusting the Date and Time mode.
![]()
Note
Follow steps 2–3 to pair your meter and smartphone. Pairing allows the meter to communicate wirelessly with your smartphone. Ensure that devices are within the maximum Bluetooth range (10 metres). Before pairing your meter and smartphone, download and install the SmartLog mobile app on your smartphone.
Step 2 - Bluetooth Pairing
- Smartphone: If you want to pair (connect) your meter to your smartphone, launch the SmartLog mobile app and find the Accessories menu on your smartphone.
- Smartphone: Select the CareSens S Fit model from the meters list, and then tap Bluetooth Register > Next.
- Meter: With your meter turned off, press and hold the
![]() button for three seconds to enter pairing mode. The Bluetooth symbol and 'bT' will appear and 'YES' will blink at the bottom of the screen. Press the S button to select 'YES'.
button for three seconds to enter pairing mode. The Bluetooth symbol and 'bT' will appear and 'YES' will blink at the bottom of the screen. Press the S button to select 'YES'.
![]()
- Smartphone/Meter: Tap 1 on your smartphone to set the Bluetooth pairing type setting while Bluetooth symbol and 'tYPE 1' are displayed on the meter's screen.
![]()
- Smartphone/Meter: Follow the on-screen instructions on SmartLog mobile app to begin searching your meter. Look for 'CareSens' and the last 4 characters of the meter serial number on the SmartLog mobile app screen to correctly identify your meter. Touch your meter's ID (CareSens XXXX) on the SmartLog mobile app screen.
![]()


![]()
Note
Some content or menus may differ depending on your smartphone's operating system or SmartLog version.
Step 3 - Entering the PIN number
- Meter/Smartphone: The symbol and 6-digit PIN number will appear on the meter's screen.
![]()
- Smartphone: Enter the PIN number into the SmartLog mobile app and touch 'OK'. Make sure the PIN you enter on your smartphone matches the PIN on your meter screen.
- Meter: When your meter and smartphone are paired and connected, the meter will display 'SYNC' and the saved test results will be transferred to your smartphone.
![]()
- Meter: When the data transfer is finished, the meter will be display 'End' on the screen and it will be automatically turned off after 3 seconds.
If the data transfer is failed, the meter will display 'FAIL' and it will be automatically turned off after 3 seconds. Then, repeat Step 2 to 5 to connect your meter with smartphone.
![]()


![]()
Note
Some smartphones, especially those that are not tested or approved by i-SENS, may be incompatible with your meter. Visit www.i-sens.com/smartlog for more information about supported smartphones. You can also scan the QR code on the back cover of this user manual.
Step 4 - Adjusting the Date and Time

Press the or button to adjust the date and time. Following images will appear in order of year, month, date, time format, hour, and minutes. Press the S button to confirm your selection and to go to the next step.
Setting the Sound On/OFF
Step 5
On pressing the or button, the screen will display 'On' or 'OFF'. Press the S button to confirm the selection.
The meter will beep in the following instances if set to On.
- When you push a button to turn on the meter,
- When the test strip is inserted in the meter,
- When the blood sample is absorbed into the test strip and the test starts,
- When the test result is displayed,
- When you press and hold the
![]() button to set the postmeal (PP2) alert,
button to set the postmeal (PP2) alert, - When it is time for a pre-set blood glucose test.
![]()

If the sound is set to OFF, none of the sound functions will work.
After setting the sound, press the S button to go to the next step.
![]()
Note
The  symbol is displayed only when the sound is set to OFF
Turning on the Strip Expiration Date Indicator
Step 6

This setting allows you to turn the strip expiration date indicator on or off. This setting turns the function on or off only. See instruction to set the strip expiration date. When 'EP' appears on the screen, press the or button. The screen will display 'On' or 'OFF'. Press the S button to confirm the setting. If you do not want to set the indicator, press the S button while the screen displays 'OFF'.
![]()
Note

If the pre-set expiration date expires, the meter will display 'EP' when the test strip is inserted. 'EP' shows alternately also when the test result is displayed right after the test. If the expiration date is set to October of 2025, the meter will display 'EP' at the beginning of November, 2025.
Setting the Hypoglycemia (Lo) Indicator
Step 7

This setting allows you to select the desired level for the hypoglycemia indicator (possible low blood sugar). You will be alerted any time your test result is lower than the selected level. Press the or button until the desired hypoglycemia level between 1.1 and 5.0 mmol/L appears. Then, press the S button to confirm the level and to go to the next step.
![]()
Note

If the test result is lower than the pre-set hypoglycemia level, the meter will display 'Lo'
Ask your healthcare professional to help you decide what your hypoglycemia level is before setting your level.
Setting the Hyperglycemia (Hi) Indicator
Step 8

This setting allows you to select the desired level for the hyperglycemia indicator (possible high blood sugar). You will be alerted any time your test result is higher than the selected level. Press the or button until the desired hyperglycemia level between 6.7–19.4 mmol/L appears. Press and hold the S button to confirm the hyperglycemia level and turn the meter off.
Note
 Indicator")
If the test result is greater than the preset hyperglycemia level, the meter will display 'Hi'.
If the test result is greater than between 13.4 and 33.3 mmol/L, 'KET' will blink three times on the screen.
![]()
Note
- If your blood glucose is measured to be more than 13.3 mmol/L, you may also have ketones.
- The CareSens S Fit BT meter is not intended to detect ketones.
- If you see 'KET' displayed on your meter, ask your healthcare professional when and how you should test for ketones.
Ask your healthcare professional to help you decide what your hyperglycemia level is before setting your level.
Note

If the test result is within the selected normal blood glucose range, the smile symbol will be displayed as shown.
Setting the Strip Expiration Date Indicator
Step 1 - Entering the Expiration Date Setting
Press and hold the and buttons at the same time for 3 seconds to enter the expiration date settings. After all segments flash across the screen, 'EP' will show up.
![]()
Note
The strip expiration date is printed on the test strip vial.
Step 2 - Setting the Year

A number indicating the year will blink in the left corner of the screen. Press the or button until the correct year appears.
Press the S button to confirm the year and set the month.
Step 3 - Setting the Month

A number indicating the month will blink at the bottom of the screen. Press the or Press button until the correct month appears. Press and hold the S button for 3 seconds to confirm the month and turn off the meter.
Checking the System

You may check your meter and test strips using the CareSens S Glucose Control Solution (control A and/or B). The CareSens S Control Solution contains a known amount of glucose and is used to check that the meter and the test strips are working properly. The test strip vials have CareSens S Control Solution ranges printed on their labels. Compare the result displayed on the meter to the CareSens S Control Solution range printed on the test strip vial. Before using a new meter or a new vial of test strips, you may conduct a control solution test following the procedure.
![]()
Note
- Use only the CareSens S Control Solution (available for purchase separately).
- Check the expiration date printed on the bottle. When you first open a control solution bottle, record the discard date (date opened plus three (3) months) in the space provided on the label.
- Make sure your meter, test strips, and control solution are at room temperature before testing. Control solution tests must be done at room temperature 20–25°C.
- Before using the control solution, shake the bottle, discard the first few drops and wipe the tip clean.
- Close the control solution bottle tightly and store at a temperature between 8–30°C.
You may do a control solution test:
- When you want to practice the test procedure using the control solution instead of blood,
- When using the meter for the first time,
- Whenever you open a new vial of test strips,
- If the meter or test strips do not function properly,
- If your symptoms are inconsistent with the blood glucose test results and you feel that the meter or test strips are not working properly,
- If you drop or damage the meter.
Control Solution Testing
Step 1- Inserting Test Strip

Insert a test strip into the meter's test strip port, with the contact bars facing upwards.
Gently push the test strip into the port until the meter beeps. Be careful not to bend the strip while pushing it in.
The  symbol will be displayed on the screen.
Step 2 - Activating Control Solution Test Mode

You can flag the control solution test result by pressing and holding the button for 3 seconds. To undo the control solution flag, press and hold the button for 3 seconds again.
Step 3 - Applying Control Solution to Test Strip

Shake the bottle before each test. Remove the cap and squeeze the bottle to discard the first drop. Then wipe the tip with a clean tissue or cloth. Dispense a drop of control solution onto a clean non-absorbent surface. It helps to squeeze a drop onto the top of the cap as shown. After the  symbol appears on the display, apply the solution to the tip of the test strip until the meter beeps. Make sure the confirmation window fills completely.
![]()
Note
The meter may switch off if the control solution sample is not applied within 2 minutes of the symbol appearing on the screen. If the meter turns off, remove the strip, reinsert, and start from step 1.
Step 4 - Waiting for the Result

The display segments will rotate clockwise and a test result will appear after the meter counts down from 6 to 1.
When flagged, the result is stored in the meter's memory but it is not included in the averages.
Step 5 - Comparing the Result
Compare the result displayed on the meter to the range printed on the test strip vial.
The result should fall within the range.
The range printed on the test strip vial is for the CareSens S Control Solution only. It has nothing to do with your blood glucose level.
![]()
Note
The CareSens S Control Solution can be purchased separately. Please contact Spirit Healthcare on 0800 881 5423.
Comparing the Control Solution Test Results
The test result of each control solution should be within the range printed on the label of the test strip vial. Repeat the control solution test if the test result falls outside of the range. Out of range results may occur in following situations:
| Situations | Do This |
| Repeat the control solution test by referring to the instruction. |
| Discard the used control solution and repeat the test using a new bottle of control solution. |
If results continue to fall outside the range printed on the test strip vial, the CareSens S Test Strip and CareSens S Fit BT meter may not be working properly. Do not use your system and contact Spirit Healthcare 24/7 Freephone Support Line at 0800 881 5423.
Using the Lancing Device
You will need a lancing device in order to collect a blood sample.
You may use the lancing device that is included in the CareSens S Fit BT Blood Glucose Monitoring System or any other medically approved lancing device.

- The lancing device is for use by a single user only and should not be shared with anyone.
- Use a soft cloth or tissue to wipe the lancing device. If necessary, a small amount of alcohol on a soft cloth or tissue may be used.
To avoid infection when drawing a sample, do not use a lancet more than once, and:
- Do not use a lancet that has been used by others.
- Always use a new sterile lancet.
- Keep the lancing device clean.
![]()
Note
Repeated puncturing at the same sample site may cause pain or skin calluses (thick hard skin). Choose a different site each time you test.
Preparing the Lancing Device
Step 1

Wash hands and sample site with soap and warm water. Rinse and dry thoroughly.
Step 2

Unscrew and remove the lancing device tip.
Step 3

Firmly insert a new lancet into the lancet holder. Hold the lancet firmly. Gently twist to pull off protective disk. Save disk to recap lancet after use. Replace lancing device tip.
Step 4

Turn the adjustable tip until it is aligned with the load confirmation window and release button as shown.
Step 5

The lancing device has seven puncture depth settings, numbered 1 through 7 (1 for a shallow puncture, 7 for a deeper puncture). Choose a depth by rotating the top portion of the adjustable tip until the desired number aligns with the arrow.
![]()
Note
1 = least penetration of lancet into the skin
7 = most penetration of lancet into the skin
Step 6

To cock the lancing device, hold the body of lancing device in one hand and pull the sliding barrel with the other hand. The device is loaded when you feel a click and the load confirmation window turns red.
![]()
Note
The skin depth to get blood samples will vary for various people at different sample sites. The lancing device's adjustable tip allows the best depth of skin penetration to get an adequate sample size.
Preparing the Meter and Test Strip
Step 7

Insert a test strip with the contact bars facing upwards into the meter's test strip port. Push the strip in gently until the meter beeps. Be careful not to bend the test strip. The  symbol will appear on the screen.
Applying Blood Sample
Step 8

Obtain a blood sample using the lancing device.
Place the device against the pad of the finger. Press the release button. Remove the device from the finger. Wait a few seconds for a blood drop to form. A minimum volume of 0.5 microliter is needed to fill the confirmation window (actual size of 0.5 μL: ![]() ).
).
Step 9

After the symbol appears on the screen, apply the blood sample to the tip of the test strip till the meter beeps. At this time, the display segments will rotate clockwise while the blood is going in. If the confirmation window is not filled in time because of abnormal viscosity (thickness and stickiness) or insufficient volume, the Er4 message may appear.
It is recommended to place the test strip vertically into the blood sample site as shown.
Do not apply blood on top surface of the test strip.
Do not allow any foreign substances, such as dirt, blood, or water enter into the meter. The meter may be damaged or may malfunction. Follow the warning information provided below to prevent possible damage to the meter.
- Do not apply the blood sample directly to the test strip port.
- Do not apply the blood sample to the test strip while holding the meter in a way that the tip of the test strip faces upwards. The blood sample may run down the surface of the test strip and flow into the test strip port.
- Do not store your meter in unsanitary or contaminated sites.
![]()
Note
The meter may switch off if the blood sample is not applied within 2 minutes of the symbol appearing on the screen. If the meter turns off, remove the strip and reinsert it, and start from Step 2.
Step 10

The test result will appear after the meter counts down from 6 to 1. The result will be automatically stored in the meter's memory. If the test strip is removed after the test result is displayed, the meter will automatically switch off after 3 seconds. Discard used test strips safely in disposable containers.
Step 11

You can attach a flag to a result to indicate particular situations while the strip is still in the meter. When the result is displayed right after a test, press the or button to select a pre-meal flag ( ![]() ), a post-meal flag (
), a post-meal flag (  ), or a fasting flag (
 ![]() ). When you remove the test strip while the desired flag is blinking, the test result is stored with the flag.
). When you remove the test strip while the desired flag is blinking, the test result is stored with the flag.
If you do not want to add any flags on the test result, remove the strip after the test result is displayed.
Discarding Used Lancets
Step 1

Unscrew the lancing device tip.
Step 2

Stick the lancet into the saved protective disk. Push the lancet ejector forward with the thumb to dispose of the used lancet in a proper biohazard container.

The lancet is for single use only. Never share or reuse a lancet. Always dispose of lancets properly.
HI and Lo Messages
HI Message

The meter displays results between 1.1–33.3 mmol/L. 'HI' appears when the blood glucose level is greater than 33.3 mmol/L and indicate severe hyperglycemia (much higher than normal glucose levels).
If 'HI' is displayed again upon retesting, please contact your healthcare professional immediately.
Lo Message

'Lo' appears when a test result is less than 1.1 mmol/L and indicates severe hypoglycemia (very low glucose levels). If 'Lo' is displayed again upon retesting, please contact your healthcare professional immediately.
![]()
Note
Please contact the Spirit Healthcare 24/7 Freephone Support Line at 0800 881 5423 or go to www.spirit-healthcare.co.uk, if such messages are displayed even if you do not have hyperglycaemia or hypoglycaemia.
Target Blood Glucose Ranges
Expected Values
Normal blood glucose levels for an adult without diabetes are below 5.5 mmol/L before meals and fasting* and are less than 7.8 mmol/L two hours after meals.
*Fasting is defined as no caloric intake for at least eight hours.
Reference
American Diabetes Association (Standards of Medical Care in Diabetes – 2021. Diabetes Care), January 2021, vol. 44 (Supplement 1): S15-S33.
Transferring Test Results

Test results stored in the CareSens S Fit BT meter can be transferred from the meter to a computer using SmartLog software and cable. The meter screen displays 'PC' when it is connected to the computer using the data cable. For more information, contact the Spirit Healthcare 24/7 Freephone Support Line at 0800 881 5423 or go to www.spirit-healthcare.co.uk.
Meter Memory
The CareSens S Fit BT meter can save up to 1,000 glucose test results with time and date. If the memory is full, the oldest test result will be deleted and the latest test result will be stored.
The meter calculates and displays the averages of total test results, Pre-meal ( ![]() ) test results, Post-meal test (
) test results, Post-meal test ( ![]() ), and Fasting test results (
), and Fasting test results ( ![]() ) from the last 1, 7, 14, 30, and 90 days.
) from the last 1, 7, 14, 30, and 90 days.
Viewing Averages Stored in Memory
Step 1

Press the , or S button to turn the meter on. The current date and time will be displayed at the bottom of the screen followed by the 1 day average value and the number of the test results saved within the current day.
Step 2 - Viewing Averages

Press the button to view the average values of 7, 14, 30 and 90 days and the number of tests performed. (For the average values of Pre-meal, Post-meal or fasting, each representative symbol will be appeared on the screen with the average values and the number of tests peformed.)
Step 3
Use the button to scroll back through the averages seen previously. Press the S button to turn off the meter.
The control solution test results saved with the symbol  are not included in the averages.
Viewing Test Results Stored in Memory
Step 1

Press the , or S button to turn the meter on. The current date and time will be displayed on the bottom of the screen followed by the 1 day average value and the number of the test results saved within the current day.
Step 2

Use the button to scroll through the test results, starting from the most recent and ending with the oldest. Press the button to return to the result seen previously. After checking the stored test results hold the S button to turn off the meter.
![]()
Note
The control solution test results saved with  symbol will be displayed with symbol when you review the stored test results.
Setting the Alarm Function
Four types of alarms can be set in the CareSens S Fit BT meter: one post-meal alert (PP2 alert) and three time set alarms (alarm 1–3). The PP2 alert goes off 2 hours after setting the alert. The alarms ring for 15 seconds and can be silenced by pressing the , or S button or by inserting a test strip.
Setting the Post-meal Alert (PP2 alert)
Step 1 - Turning the PP2 alert On

Without inserting a test strip, press and hold the button for 3 seconds to set the post-meal alert. 'PP2', bell ( ![]() ) symbol and 'On' will be displayed. The screen will then automatically change to the memory recall mode. At this time, bell (
) symbol and 'On' will be displayed. The screen will then automatically change to the memory recall mode. At this time, bell ( ![]() ) symbol, indicating that the PP2 alert has been set, will be displayed on the screen.
) symbol, indicating that the PP2 alert has been set, will be displayed on the screen.
![]()
Note
The PP2 alert will automatically turn off if the meter's time setting is adjusted to more than two hours before or just past the currently activated PP2 alert time.
Step 2 - Turning the PP2 alert OFF

To turn off the PP2 alert, press and hold the button for 3 seconds. 'PP2', bell ( ) symbol and 'OFF' will appear on the screen. Then the screen will change automatically to the memory recall mode without bell () symbol displayed.
Setting the Time Alarms (alarm 1–3)
Step 1

Without inserting a test strip, press and the S button simultaneously for 3 seconds to enter the time alarm mode. The 'alarm 1' will be displayed while the 'OFF' is blinking on the screen.
On pressing the button, the 'alarm 1' is set and 'On' is displayed on the screen. Press the button again to cancel the 'alarm 1'. The 'OFF' will blink on the screen.
Step 2

Press the button to set the time of 'alarm 1'.
A number representing the hour will blink on the screen.
Press the button to set the hour.
On pressing the button, the number indicating the minute will start blinking. Press the button to set the minute.
Step 3

Press the S button to finish and to go to 'alarm 2' setting. Repeat steps 2 to 4 to set the remaining alarms time (alarm 2–3).
Step 4
Press and hold and hold the S button for 3 seconds to finish and turn the meter off.
Understanding Error Messages

A used test strip was inserted.
→ Repeat the test with a new test strip.

The blood or control solution sample was applied before the  appeared.
→ Repeat the test with a new test strip and wait until the appears before applying the blood or control solution sample.

The temperature during the test was above or below the operating range.
→ Move to an area where the temperature is within the operating range (5–45 ˚C) and repeat the test after the meter and test strips have reached a temperature within the operating range.

The blood sample has abnormally high viscosity or insufficient volume.
→ Repeat the test with a new test strip.

This error message may appear when the wrong blood glucose test strip is used instead of CareSens S Blood Glucose Test Strip.
→ Repeat the test with a CareSens S test strip.

There is a problem with the meter.
→ Contact the Spirit Healthcare 24/7 Freephone Support Line at 0800 881 5423 or go to www.spirit-healthcare.co.uk.

There is a problem with Bluetooth communication.
→ Contact the Spirit Healthcare 24/7 Freephone Support Line at 0800 881 5423 or go to www.spirit-healthcare.co.uk.

An electronic error occurred during the test.
→ Repeat the test with a new test strip. If the error message persists, contact the Spirit Healthcare 24/7 Freephone Support Line at 0800 881 5423 or go to www.spirit-healthcare.co.uk.
![]()
Note
If the error messages persist, contact the Spirit Healthcare 24/7 Freephone Support Line at 0800 881 5423 or go to www.spirit-healthcare.co.uk.
General Troubleshooting
| Problem | Troubleshooting |
| The display is blank even after inserting a test strip. |
|
| The test does not start even after applying the blood sample on the strip. |
|
| The test result does not match the way you feel. |
|
![]()
Note
If the problem is not resolved, please contact the Spirit Healthcare 24/7 Freephone Support Line at 0800 881 5423 or go to www.spirit-healthcare.co.uk.
Performance Characteristics
The performance of CareSens S Fit BT Blood Glucose Monitoring System has been evaluated in laboratory and in clinical tests.
Accuracy: The accuracy of the CareSens S Fit BT Blood Glucose Monitoring System (Model: GM01NBE) was assessed by comparing blood glucose results obtained by patients with those obtained using a YSI Model 2300 Glucose Analyzer, a laboratory instrument.
The following results were obtained by diabetic patients at clinic centers.
| Slope | 0.998 |
| Y-intercept | 0.130 mmol/L |
| Correlation coefficient (r) | 0.9962 |
| Number of samples | 600 |
| Range tested | 1.5–24.8 mmol/L |
System accuracy results for glucose concentration < 5.55 mmol/L
| ±0.28 mmol/L | ±0.56 mmol/L | ±0.83 mmol/L |
| 118/180 (65.6%) | 172/180 (95.6%) | 180/180 (100%) |
System accuracy results for glucose concentration ≥ 5.55 mmol/L
| Within ±5 % | Within ±10 % | Within ±15 % |
| 298/420 (71.0%) | 403/420 (96.0%) | 417/420 (99.3%) |
System accuracy results for glucose concentrations between 1.5 mmol/L and 24.8 mmol/L
| Within ±0.83 mmol/L and Within ±15 % |
| 597/600 (99.5%) |
Precision: The precision studies were performed in a laboratory using CareSens S Fit BT Blood Glucose Monitoring Systems.
| Within Run Precision | ||
| Blood average | 2.0 mmol/L | SD = 0.1 mmol/L |
| 3.8 mmol/L | SD = 0.1 mmol/L | |
| 7.5 mmol/L | CV = 3.0 % | |
| 11.8 mmol/L | CV = 2.6 % | |
| 16.5 mmol/L | CV = 3.0 % | |
| Between Run Precision | ||
| Control solution average | 2.3 mmol/L | SD = 0.1 mmol/L |
| 7.2 mmol/L | CV = 2.3 % | |
| 19.7 mmol/L | CV = 3.7 % | |
This study shows that there could be variation of up to 3.7%.
Influence Quantities
Packed cell volume (Hematocrit)
Packed cell volume evaluation was conducted in various hematocrit levels. The range of hematocrit levels within the acceptance criteria is 15–65%.
Interferences
The effect of various interfering substances was evaluated in whole blood samples. The presence of the following substances within the given concentrations does not affect blood glucose measurements. Higher concentrations of the substances shown below may cause inaccurate blood glucose results.
| No. | Interferent | Concentration |
| 1 | Acetaminophen (paracetamol) | 1.32 mmol/L |
| 2 | Ascorbic acid | 0.17 mmol/L |
| 3 | Bilirubin (Unconjugated) | 0.34 mmol/L |
| 4 | Cholesterol | 12.93 mmol/L |
| 5 | Creatinine | 2.65 mmol/L |
| 6 | Dopamine | 0.85 mmol/L |
| 7 | EDTA | 6.16 mmol/L |
| 8 | Galactose | 3.33 mmol/L |
| 9 | Gentisic acid | 3.24 mmol/L |
| 10 | Glutathione (Red) | 2.99 mmol/L |
| 11 | Hemoglobin | 0.31 mmol/L |
| 12 | Heparin | 8000 U/dL |
| 13 | Ibuprofen | 2.42 mmol/L |
| 14 | Icodextrin | 1094 mg/dL |
| 15 | L-Dopa (L-3,4-dihydroxyphenylalanine) | 0.25 mmol/L |
| 16 | Maltose | 29.21 mmol/L |
| 17 | Methyl-DOPA | 0.07 mmol/L |
| 18 | Pralidoxime Iodide (PAM) | 0.95 mmol/L |
| 19 | Sodium Salicylate | 5.07 mmol/L |
| 20 | Tolbutamide | 3.70 mmol/L |
| 21 | Tolazamide | 3.21 mmol/L |
| 22 | Triglycerides | 37.26 mmol/L |
| 23 | Uric acid | 1.49 mmol/L |
| 24 | Xylose | 19.98 mmol/L |
User Performance Evaluation
A study evaluating glucose values from fingertip capillary blood samples obtained by 100 lay persons showed the following results: 100% within ±0.83 mmol/L of the medical laboratory values at glucose concentrations below 5.55 mmol/L, and 97.2% within ±15% of the medical laboratory values at glucose concentrations at or above 5.55 mmol/L.
Spirit Healthcare Ltd.
Spirit House, Saffron Way,
Off Saffron Lane, Leicester, LE2 6UP
Customer Support Tel: 0800 881 5423 www.spirit-healthcare.co.uk

Documents / Resources
References
Download manual
Here you can download full pdf version of manual, it may contain additional safety instructions, warranty information, FCC rules, etc.
Download i-SENS CareSens S Fit - Blood Glucose Monitoring System Manual
Advertisement


Need help?
Do you have a question about the CareSens S Fit and is the answer not in the manual?
Questions and answers