Advertisement
Quick Links
2015+ Chevrolet City Express/Nissan NV200 L2H1 Base Mounting Kit
Page 2
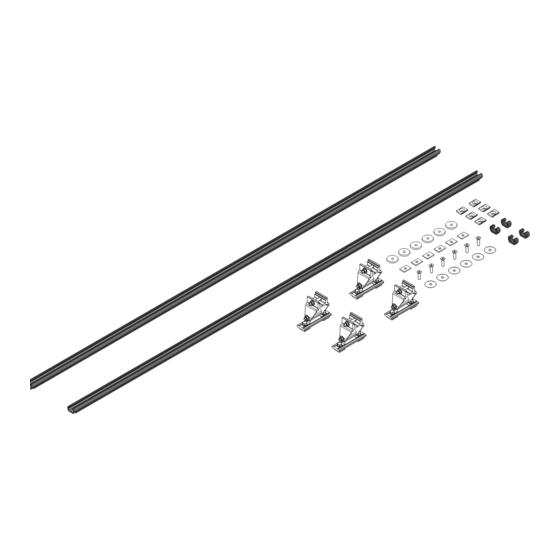
Packaging Contents
Pages 3-6
Low Roof Medium Wheelbase (115.20")
PRIME DESIGN, A SAFE FLEET BRAND ▪ Address: 1689 Oakdale Avenue #102, West St Paul, Minnesota 55118
Toll Free: 1.8.PRIME.RACK ▪ Fax: 651-552-1799 ▪ Email: info@primedesign.net ▪ Website: www.primedesign.net
Advertisement

Related Manuals for Safe Fleet PRIME DESIGN FBM-1014-BLK

Summary of Contents for Safe Fleet PRIME DESIGN FBM-1014-BLK
- Page 1 Page 2 Packaging Contents Pages 3-6 Low Roof Medium Wheelbase (115.20”) PRIME DESIGN, A SAFE FLEET BRAND ▪ Address: 1689 Oakdale Avenue #102, West St Paul, Minnesota 55118 Toll Free: 1.8.PRIME.RACK ▪ Fax: 651-552-1799 ▪ Email: info@primedesign.net ▪ Website: www.primedesign.net...
-
Page 2: Contents Overview
CONTENTS OVERVIEW TWO CROSSBAR CONFIGURATION 1—FBM-1014-BLK ..........(Qty 1) Channels, 80.00” w/Hardware Kit Channels 80” (2X) M8 x 30MM (6X) End Caps (4X) Brackets (4X) Foam Pad (6X) Nylon Washer (6X) Foam Gasket (6X) Anti-Seize (1X) Flex Channel Connector (6X) 2—Crossbars (shown for illustrative purposes only) Ordered separately ErgoRack, Gen4... - Page 3 L2H1 FBM ASSEMBLY SEQUENCE NOTE: Base, Rotation, Crossbar, and Side Rail features are shown for illustrative purposes only. These features are not included with this Base Mounting Kit, and must be purchased separately. FLEX CHANNELS Apply Anti-Seize to six M8 x 30MM Screws, and fasten the Channels into the roof Channel grooves.
-
Page 4: Mounting Brackets
MOUNTING BRACKETS MOUNTING BRACKETS Set to distances shown below. Do not torque the Crossbar Mounting Brackets until Steps 3.3–3.4. Finger-tighten them Loosen the bolts indicated below, then slide Crossbar into designated dimension to hold them in place, then proceed Mounting Brackets into each of the Channels, and attach to your Feature (FEA) Assembly Manual. - Page 5 CROSSBARS (ERGORACK) CROSSBAR ADJUSTMENT Shown with LH Base, and RH Rotation for illustrative purposes only h i c F r o 8.75” Front h i c 8.00” Rear Torque all of these Crossbar Clamp nuts to 90 in-lbs Verify the specified distance from the ends of both Mounting Bracket to the ends of...
- Page 6 CROSSBARS (ALURACK) CROSSBAR ADJUSTMENT Shown with L2H1 AluRack for illustrative purposes only h i c F r o Center Torque all of these h i c 2A.2 2A.1 Crossbar Clamp nuts to 90 in-lbs. 2A.3 Verify the specified distance from the ends of both Mounting Bracket to the ends of both Channels.
- Page 7 Page Intentionally Left Blank...
- Page 8 USAM-FBM1014BLK-US01 Rev-B 0619...
Need help?
Do you have a question about the PRIME DESIGN FBM-1014-BLK and is the answer not in the manual?
Questions and answers