Table of Contents
Advertisement
Quick Links
Advertisement
Table of Contents

Related Manuals for Bristan DSC 3HBF C


Summary of Contents for Bristan DSC 3HBF C
- Page 1 Installation Instructions Descent Tap Range Models covered: DSC 3HBAS C, DSC 3HBF C, DSC WMBAS C, DSC WMBF C, DSC BS C Please keep this booklet for future reference. Installer, when you have read these instructions please ensure you leave them...
-
Page 2: Table Of Contents
Contents Thank you for choosing Bristan, the UK’s leading taps and showers expert. We have designed this product with your enjoyment in mind. To ensure that it works to its full potential, it needs to be fitted correctly. These fitting instructions have been created to give you all of the information you need and, if you need any further help, please do not hesitate to contact us. -
Page 3: Important Safety Information
Important Safety Information • Please read these instructions thoroughly and retain for future use. • All products manufactured and supplied by Bristan are safe provided they are installed, used correctly and receive regular maintenance in accordance with these instructions. •... -
Page 4: General Information
Inlet distance from cold water tank to outlet (metres) DSC 3HBAS C 15mm Compression Threaded Tail DSC 3HBF C 3/4" BSP Threaded Tail DSC WMBAS C 15mm Compression Threaded Tail DSC WMBF C 22mm Compression Threaded Tail DSC BS C 1/2"... -
Page 5: Dimensions
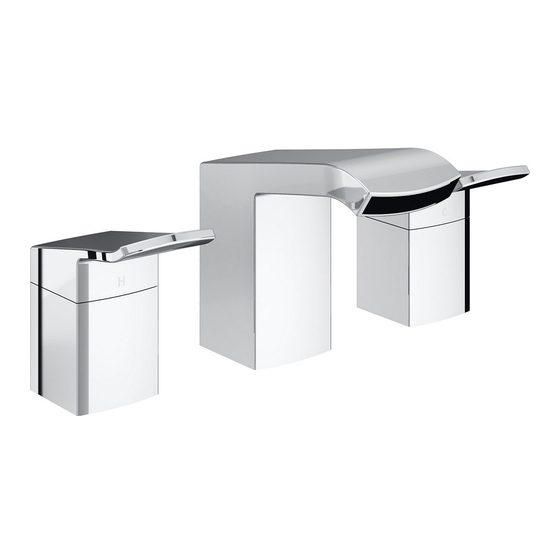
Dimensions 3 Hole Basin Mixer 3 Hole Bath Filler Dimensions are approximate and in millimetres. Need help? Give us a call on 0844 701 6273 and speak to one of our trained advisers. - Page 6 Dimensions Cont. Bath Spout Wall Mounted Basin Mixer 48-62 Dimensions are approximate and in millimetres. Need help? Give us a call on 0844 701 6273 and speak to one of our trained advisers.
- Page 7 Dimensions Cont. Wall Mounted Bath Filler 58-70 Dimensions are approximate and in millimetres. Need help? Give us a call on 0844 701 6273 and speak to one of our trained advisers.
-
Page 8: Installation Requirements
Installation Requirements Flexible Connecting Pipes Care must be taken when connecting the flexible connection pipes to the household pipework to ensure they do not bend sharply and kink or twist. See below for recommended ways to fit the flexible connecting pipes. Slight 90°... -
Page 9: Installation
Installation 3 Hole Basin Mixer/ Bath Filler 1. With the backnut, metal and rubber washer fitted to the side body threaded tail, put the side body through the hole in the basin / bath from underneath. 2. Screw the shroud, ensuring the washer is fitted betweed the shroud and basin / bath, onto the treaded tail and tighten backnut underneath onto the bottom of the basin/... -
Page 10: Wall Mounted Basin Mixer / Bath Filler
Installation Cont. Wall Mounted Basin Mixer and Bath Filler 1. Decide on the final position of the basin mixer/ bath filler. Install suitable battons into the wall cavity if required to support the tap body. 2. Plumb the hot and cold water supply pipes to the required position. -
Page 11: Bath Spout
Installation Cont. Bath Spout 1. Terminate sufficient pipework inside the wall cavity to a 1/2" BSP female fitting ensuring pipework is fixed in position and rigid so that it is unable to move. 2. Screw the spout connecting tube into the female fitting (using a suitable thread sealant) ensuring the spout connecting tube is fully tightened. -
Page 12: Maintenance
Wash the valve with clean running water and make sure that any debris has been removed. If necessary replace the valve using parts supplied by Bristan only. Lightly grease the seal (only use silicone grease), replace the valve shroud, spline adaptor, screw and the handle. -
Page 13: Troubleshooting
Troubleshooting Symptom Cause Remedy No flow or low partially closed isolation valve. Open isolation valve. flow rate Instantaneous water heater Increase water flow rate or cycles on and off as flow rate or pressure through system to pressure is too low. meet required minimum working pressure of tap. -
Page 14: Guarantee
Guarantee At Bristan, we want to make things as • Repair under this guarantee does not easy as possible for our customers. That’s extend the original expiry date. The why we design products that are easy to guarantee on any replacement parts or fit and use, and that are quality tested to product ends at the original expiry date. - Page 15 ‘phone or with a spare part, then we’ll guarantee period, contact Bristan Care send out one of our Bristan Care Customer Service on 0844 701 6273 with engineers to take a look. Bristan Care...
- Page 16 DSC BOOK 2 Part Numbersa: Issue: D1 Useful contact details: Customer Service: 0844 7016273 Bristan Group Ltd. Customer Service Email: Birch Coppice Business Park Customercare@bristan.com Dordon Tamworth Customer Service Fax: Staffordshire 0844 7016275 B78 1SG Reception: Web: www.bristan.com 0844 7016274 Email: enquire@bristan.com...
Need help?
Do you have a question about the DSC 3HBF C and is the answer not in the manual?
Questions and answers