Advertisement
Table of Contents
Installation Instructions & User Guide
Installation Instructions & User Guide
Installation Instructions & User Guide
Installation Instructions & User Guide
Fitting Instructions & Contents List
Fitting Instructions & Contents List
Fitting Instructions & Contents List
Fitting Instructions & Contents List
Please keep these instructions for future reference and request of replacement parts
Please keep these instructions for future reference and request of replacement parts
Please keep these instructions for future reference and request of replacement parts
Please keep these instructions for future reference and request of replacement parts
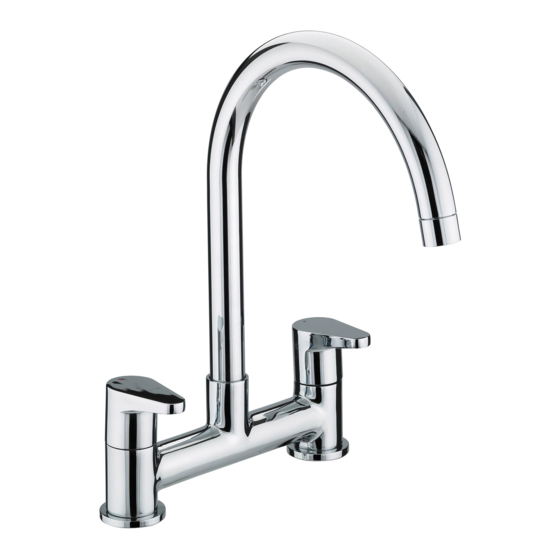
Quest Deck Sink Mixer
Quest Deck Sink Mixer
Quest Deck Sink Mixer
Quest Deck Sink Mixer
Advertisement
Table of Contents

Related Manuals for Bristan Quest Deck Sink Mixer


Summary of Contents for Bristan Quest Deck Sink Mixer
- Page 1 Quest Deck Sink Mixer Quest Deck Sink Mixer Quest Deck Sink Mixer Quest Deck Sink Mixer Installation Instructions & User Guide Installation Instructions & User Guide Installation Instructions & User Guide Installation Instructions & User Guide Fitting Instructions & Contents List Fitting Instructions &...
- Page 2 Thank you for choosing Bristan, the UK’s leading taps and showers expert. We have designed this product with your enjoyment in mind. To ensure that it works to its full potential, it needs to be fitted correctly. These fitting instructions have been created to give you all of the information you need and, if you need any further help, please do not hesitate to give us a call on 0844 701 6273.
- Page 3 Installation Installation Installation Installation Identify all components and check for completeness, particularly before arranging fitting. Fit the mixer (3) to the sink using the backnut washers (2) and backnuts (1) below surface. Connect the hot and cold water supplies to the mixer. Fully open both valves, letting the water run for a few minutes to check all joints and connections for leaks.
- Page 4 All subject to proof of purchase. *Labour provided by an approved Bristan engineer. Guarantee only applies to products with a manufacturing fault. A deferred payment will be necessary in order to secure any visits by our engineers which will be charged if the problem is found not not to be a manufacturing fault.
Need help?
Do you have a question about the Quest Deck Sink Mixer and is the answer not in the manual?
Questions and answers